A workspace in Postman is a shared environment where team members can collaborate on API development. It serves as a centralized hub for storing API requests, collections, environments, and other resources related to API development.
Steps to access Posstman Workspaces
Accessing a workspace in Postman is a straightforward process once you have created or been invited to one. Here are the steps to access a workspace in Postman.
Step 1: Sign In to Postman:
Open your web browser and navigate to the Postman website (https://www.postman.com/). Sign in to your Postman account using your credentials (email address and password).
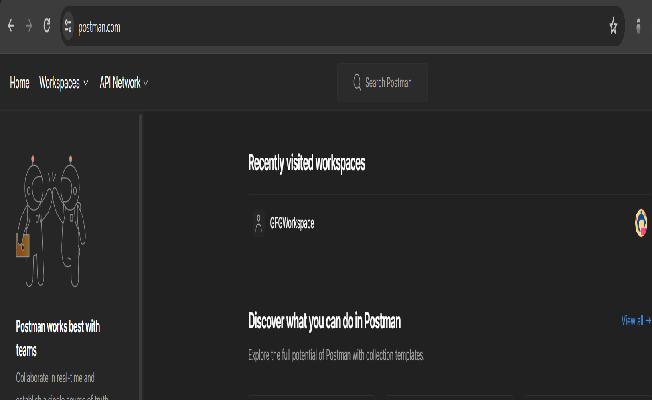
https://www.postman.com/
Step2: Navigate to Workspaces:
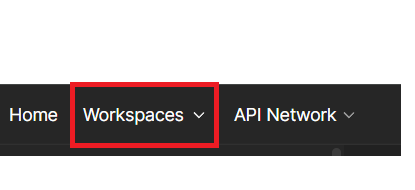
Once you’re logged in, you’ll land on the Postman dashboard. On the left sidebar, click on the “Workspaces” tab. This will display a list of all the workspaces you have access to.

select this option
Step3: Select the Desired Workspace:
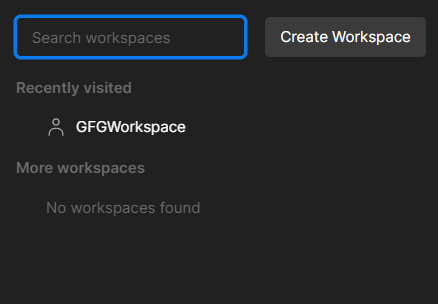
In the list of workspaces, find the workspace you want to access. Click on the name of the workspace to enter it.

Choose your workspace
Step4: Work within the Workspace:
Once you’re inside the workspace, you can start working on API requests, collections, environments, and other resources associated with that workspace. You can create new items, edit existing ones, collaborate with team members, and perform various actions within the workspace.
Step5: Switching Between Workspaces:
If you need to access a different workspace, you can do so by clicking on the workspace name in the top-left corner of the Postman interface. This will open a dropdown menu listing all available workspaces. Simply select the workspace you want to switch to from the dropdown menu.
By following these steps, you can easily access and work within your desired workspace in Postman, whether you’re collaborating with team members or managing your own API development projects.
Getting the workspace ID
To get the Workspace ID in Postman, you can follow these steps:
Step1: Navigate to Workspaces:
Open Postman and navigate to the “Workspaces” section by clicking on the “Workspaces” tab in the left sidebar.
Choose workspaces
Step2: Select Workspace:
Choose the workspace for which you want to find the ID. Click on the name of the workspace to enter it.
Select Workspace
Step3.View Workspace Settings:
Once inside the workspace, look for the workspace settings. In some versions of Postman, you might find it by clicking on the workspace name again or by clicking on the three dots (…) next to the workspace name.

Select this option
Step4: Find Workspace ID:
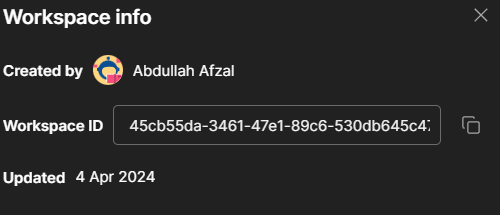
In the workspace settings or details, you should be able to find the Workspace ID. It is usually displayed somewhere on this page.

Choose this option next to workspace setting
Step 5: Copy Workspace ID:
Once you’ve located the Workspace ID, you can simply copy it. It may be displayed as a string of characters or numbers.
Copy Workspace ID
Alternative Method:
If you’re using the Postman API, you can programmatically retrieve the Workspace ID by making a request to the Postman API endpoint for workspaces. This would typically involve making a GET request to the /workspaces endpoint, which will return information about all the workspaces you have access to, including their IDs.
By following these steps, you can easily find the Workspace ID in Postman, whether through the user interface or programmatically via the API.
Accessing private workspaces
Accessing private workspaces in Postman requires appropriate permissions granted by the workspace owner or an administrator. Here’s how you can access private workspaces:
If you are the Workspace Owner:
- Step1: Sign In to Postman: Log in to your Postman account using your credentials.
- Step2: Navigate to Workspaces: Click on the “Workspaces” tab in the left sidebar to view a list of all workspaces.
- Step3: Select the Private Workspace: Find the private workspace you want to access and click on its name to enter it.
If you are a Member with Access:
- Step1: Sign In to Postman: Log in to your Postman account using your credentials.
- Step2: Accept Workspace Invitation: If you’ve been invited to a private workspace, you should receive an email notification or an in-app notification. Accept the invitation by following the provided link or navigating to the invitation section within Postman.
- Step3: Navigate to Workspaces: Once you’ve accepted the invitation, click on the “Workspaces” tab in the left sidebar to view a list of all workspaces.
- Step4: Select the Private Workspace: Find the private workspace you’ve been invited to and click on its name to enter it.
- Step5: Work within the Workspace: Once inside the workspace, you can collaborate with other members, work on API development tasks, and access resources shared within the workspace.
If you are an Administrator:
- Step1: Sign In to Postman: Log in to your Postman account using your credentials.
- Step2: Manage Workspace Access: As an administrator, you have the ability to manage workspace access and permissions. You can grant access to specific users or teams by inviting them to the workspace.
- Step3: Navigate to Workspaces: Click on the “Workspaces” tab in the left sidebar to view a list of all workspaces.
- Step4: Select the Private Workspace: Find the private workspace you want to manage and click on its name to enter it.
- Step5: Manage Members: Within the workspace settings, you can manage members, roles, and permissions. Invite new members, modify access levels, or remove members as needed.
Editing workspace details
Editing workspace details in Postman can be done by the workspace owner or users with appropriate permissions. Here’s how you can edit workspace details:
- Step 1: Sign In to Postman: Log in to your Postman account using your credentials.
- Step 2: Navigate to Workspaces: Click on the “Workspaces” tab in the left sidebar to view a list of all workspaces.
- Step 3: Select the Workspace: Find the workspace whose details you want to edit and click on its name to enter it.
- Step 4: Access Workspace Settings: Once inside the workspace, look for the workspace settings or details section. Depending on the version of Postman you are using, you might find it by clicking on the workspace name again or by clicking on the three dots (…) next to the workspace name.
- Step 5: Edit Workspace Details: Within the workspace settings, you should be able to edit various details such as the workspace name, description, and visibility settings (public, private, or read-only). Make the necessary changes to the desired fields.

edit workspace name
- Step 6: Save Changes: After making the required edits, ensure to save the changes. Look for a “Save” or “Update” button within the workspace settings interface and click on it to apply your modifications.
- Step 7: Confirm Changes: Postman may prompt you to confirm your changes before applying them. Review the modifications to ensure they are accurate, then proceed to confirm the changes.
- Step 8: Verification: Once the changes are saved, verify that the workspace details have been updated accordingly. You can do this by navigating back to the workspace list or refreshing the workspace page to see the changes reflected.
Changing workspace visibility
To change the visibility of a workspace in Postman, follow these steps:
- Step 1: Sign In to Postman: Log in to your Postman account using your credentials.
- Step 2: Navigate to Workspaces: Click on the “Workspaces” tab in the left sidebar to view a list of all workspaces.
- Step 3: Select the Workspace: Find the workspace for which you want to change the visibility and click on its name to enter it.
- Step 4: Access Workspace Settings: Once inside the workspace, locate the workspace settings or details section. Depending on the version of Postman you are using, you might find it by clicking on the workspace name again or by clicking on the three dots (…) next to the workspace name.
- Step 5: Change Visibility Settings: Within the workspace settings, you should see an option to change the visibility of the workspace. Typically, you can choose between “Public”, “Private”, or “Read-only” visibility settings. Select the desired visibility option.
- Step 6: Save Changes: After selecting the new visibility setting, save the changes. Look for a “Save” or “Update” button within the workspace settings interface and click on it to apply your modifications.
- Step 7: Confirm Changes: Postman may prompt you to confirm your changes before applying them. Review the modifications to ensure they are accurate, then proceed to confirm the changes.
- Step 8: Verification: Once the changes are saved, verify that the workspace visibility has been updated accordingly. You can do this by navigating back to the workspace list or refreshing the workspace page to see the changes reflected.
Sharing workspaces
Sharing workspaces in Postman allows you to collaborate with team members by granting them access to the workspace’s resources. Here’s how you can share a workspace:
- Step 1: Sign In to Postman: Log in to your Postman account using your credentials.
- Step 2: Navigate to Workspaces: Click on the “Workspaces” tab in the left sidebar to view a list of all workspaces.
- Step 3: Select the Workspace: Find the workspace you want to share and click on its name to enter it.
- Step 4: Access Workspace Settings: Once inside the workspace, locate the workspace settings or details section. This might involve clicking on the workspace name again or clicking on the three dots (…) next to the workspace name.
- Step 5: Invite Members: Within the workspace settings, look for an option to invite members or manage access. Click on it to open the membership settings.
- Step 6: Invite Team Members: Enter the email addresses of the team members you want to invite to the workspace. You can invite multiple members at once by separating their email addresses with commas.
- Step 7: Set Permissions (Optional): Depending on your workspace settings, you may have the option to set permissions for invited members. You can typically choose between different access levels such as viewer, contributor, or admin, each with different privileges.
- Step 8: Send Invitations: After entering the email addresses and setting permissions (if applicable), send the invitations. Postman will send invitation emails to the specified email addresses.
- Step 9: Accept Invitations: Invited team members will receive an email invitation to join the workspace. They need to accept the invitation by following the provided link in the email or navigating to the invitations section within Postman.
- Step 10: Collaborate: Once team members accept the invitations and join the workspace, they can collaborate with you by accessing and working on the shared resources within the workspace.
Approving requests for access to private workspaces
To approve requests for access to private workspaces in Postman, you need to follow these steps:
- Step 1: Sign In to Postman: Log in to your Postman account using your credentials.
- Step 2: Navigate to Workspaces: Click on the “Workspaces” tab in the left sidebar to view a list of all workspaces.
- Step 3: Select the Workspace: Find the private workspace for which you’ve received access requests and click on its name to enter it.
- Step 4: Access Workspace Settings: Once inside the workspace, locate the workspace settings or details section. This might involve clicking on the workspace name again or clicking on the three dots (…) next to the workspace name.
- Step 5: View Access Requests: Look for an option to manage access or view access requests within the workspace settings. Click on it to access the list of pending access requests.
- Step 6: Approve or Reject Requests: Review the list of access requests and decide whether to approve or reject each request. Typically, you’ll see the name or email address of the requester along with their request details.
- Step 7: Manage Permissions (Optional): Depending on your workspace settings, you may have the option to set permissions for approved members. You can typically choose between different access levels such as viewer, contributor, or admin, each with different privileges.
- Step 8: Save Changes: After approving or rejecting the access requests and setting permissions (if applicable), save the changes. Look for a “Save” or “Update” button within the workspace settings interface and click on it to apply your modifications.
- Step 9: Notify Requesters: Once you’ve made your decisions on the access requests, Postman may automatically notify the requesters about the status of their requests. If not, you can inform them manually.
Managing workspace roles
In Postman, workspace roles determine the level of access and permissions that users have within a workspace. Workspace owners and administrators can manage these roles to control how team members interact with workspace resources. Here’s how you can manage workspace roles:
- Step 1: Sign In to Postman: Log in to your Postman account using your credentials.
- Step 2: Navigate to Workspaces: Click on the “Workspaces” tab in the left sidebar to view a list of all workspaces.
- Step 3: Select the Workspace: Find the workspace for which you want to manage roles and click on its name to enter it.
- Step 4: Access Workspace Settings: Once inside the workspace, locate the workspace settings or details section. This might involve clicking on the workspace name again or clicking on the three dots (…) next to the workspace name.
- Step 5: Manage Members: Look for an option to manage members or roles within the workspace settings. Click on it to access the list of workspace members and their roles.
- Step 6: Modify Roles: In the list of workspace members, you should see their roles displayed. Typically, you can choose between different roles such as owner, admin, contributor, or viewer. Click on the role of a member to modify it.
- Step 7: Assign New Roles: To assign a new role to a member, select the desired role from the available options. Each role comes with specific permissions regarding accessing and managing workspace resources.
- Step 8: Save Changes: After modifying the roles of workspace members, save the changes. Look for a “Save” or “Update” button within the workspace settings interface and click on it to apply your modifications.
- Step 9: Notify Members (Optional): Once you’ve made changes to the roles of workspace members, consider notifying them about their updated roles. This ensures transparency and helps team members understand their level of access and responsibilities within the workspace.
Watching and moving elements to the workspace
In Postman, you can watch elements such as collections, requests, or folders, and move them between different workspaces. Here’s how you can watch and move elements to a workspace:
Watching Elements:
- Step 1: Navigate to the Element: Go to the section of Postman where the element you want to watch is located. This could be the Collections, Requests, or Environments section.
- Step 2: Locate the Element: Find the specific collection, request, or folder you want to watch.
- Step 3: Watch the Element: Hover over the element, and you should see a small eye icon (👁️) appear. Click on this icon to watch the element.
- Step 4: Confirmation: Once you’ve clicked on the eye icon, it should change to indicate that you are now watching the element. This means you’ll receive notifications about any changes made to that element.
Moving Elements to a Workspace
- Step 1: Navigate to the Element: Go to the section of Postman where the element you want to move is located.
- Step 2: Locate the Element: Find the specific collection, request, or folder you want to move.
- Step 3: Select the Element: Click on the checkbox or select the element you want to move. You can select multiple elements if you want to move them together.
- Step 4: Access Move Option: Look for an option to move the selected elements. This could be located in the toolbar at the top of the page or in the context menu when you right-click on the selected elements.
- Step 5: Choose Destination Workspace: After selecting the move option, you’ll be prompted to choose the destination workspace. Select the workspace where you want to move the elements.
- Step 6: Confirm Move: Once you’ve chosen the destination workspace, confirm the move action. Postman may ask for confirmation before proceeding.
- Step 7: Verification: Verify that the elements have been successfully moved to the desired workspace by checking the workspace where you moved them.
Deleting a workspace
To delete a workspace in Postman, you need to follow these steps:
- Step 1: Sign In to Postman: Log in to your Postman account using your credentials.
- Step 2: Navigate to Workspaces: Click on the “Workspaces” tab in the left sidebar to view a list of all workspaces.
- Step 3: Select the Workspace: Find the workspace you want to delete and click on its name to enter it.
- Step 4: Access Workspace Settings: Once inside the workspace, locate the workspace settings or details section. This might involve clicking on the workspace name again or clicking on the three dots (…) next to the workspace name.
- Step 5: Delete Workspace: Look for an option to delete the workspace. This option is typically located in the workspace settings or details section. It may be labeled as “Delete Workspace” or “Remove Workspace”.
- Step 6: Confirm Deletion: After selecting the delete option, Postman may ask for confirmation before proceeding. Confirm that you want to delete the workspace.
- Step 7: Verification: Once the workspace is deleted, verify that it has been removed from your workspace list. You should no longer see the deleted workspace in your list of workspaces.
FAQs
What kind of encoding does Postman support for authorization credentials?
Postman supports various types of authorization methods, each with its own encoding mechanism. The supported authorization methods include:
- Basic Auth: Postman supports Basic Authentication, where the username and password are encoded in Base64 format and sent in the HTTP header. Postman handles the encoding and decoding of Basic Authentication credentials automatically.
- Bearer Token: For Bearer Token authentication, the token is typically provided in the “Authorization” header of the HTTP request. Postman does not encode Bearer Tokens as they are provided as-is.
- OAuth 1.0 and OAuth 2.0: Postman supports OAuth 1.0 and OAuth 2.0 authorization flows, which involve specific mechanisms for obtaining access tokens. For OAuth 1.0, Postman handles the signature generation automatically. For OAuth 2.0, you typically provide the access token directly, and Postman does not encode it.
- Digest Auth: Postman supports Digest Authentication, where the username and password are hashed using MD5 or another supported hashing algorithm before sending them in the HTTP header.
- API Key: If your API requires an API key for authorization, you can typically provide it as a query parameter, a header value, or in the request body. Postman does not encode API keys unless required by the API provider.
Can postman’s global variables share the same names?
Yes, Postman allows global variables to share the same names. However, it’s important to note that global variables are scoped globally within Postman, meaning they are accessible across all requests, collections, and environments within your Postman workspace. Therefore, if you have global variables with the same name, they will overwrite each other, and the last one defined will take precedence.
In POST methods, what does a binary form mean?
In the context of HTTP POST requests, a binary form refers to data that is encoded in a binary format rather than as plain text. Binary data can include files, images, audio, video, or any other type of non-textual information.
When submitting data in a binary form in a POST request, it typically means that the request body contains binary-encoded data, and the Content-Type header of the request specifies a suitable content type for binary data, such as “application/octet-stream” or a more specific media type like “image/jpeg” or “audio/mp4”.
Conclusion
In this article, we discussed some of the operations we can do on workspaces in postman. We looked at accessing workspaces, accessing private workspaces, and sharing workspaces. We also discussed managing workspace roles, watching and moving elements to workspaces, and lastly deleting a workspace.
Share your thoughts in the comments
Please Login to comment...