Developers build an API(Application Programming Interface) that allows other systems to interact with their Application’s functionalities and data. In simple words, API is a set of protocols, rules, and tools that allow different software applications to access allowed functionalities, and data and interact with each other.API is a service created for user applications that request data or some functionality from servers.
In this article, we will build a RESTful Social Media API where we will create a backend structure of a general Social media Application where a User can register, and if a user is authentic then the user can create a Post. Also, they can delete their specific Post. But before directly jumping onto that we will learn why to create an API and choose the Technology stack for your API.
Why Create an API?
If some Applications need a little chunk of data from our system, we cannot give them complete access to our servers for various security concerns. Instead, we create well-structured and secure API for that particular data or functionality so that if someone needs that we can give them endpoints with proper API keys and only Authentic users can access the data which can be checked by proper Authentications like OAuth 2.0 and JSON Web Tokens.
We can also monitor and analyze the API usage by different users so that we can handle that safely if some issue will occur and can improve our API over time for better utilization.
For example: Many large companies like Swiggy, Zomato, and OLA use map API which integrate the map into the Applications to give the live location of their riders and to provide a better experience to the customer.
Before start building the API, let’s discuss the technology stack on top of which the whole API will be created.
Choosing the Technology Stack
It is very important to choose the right technology stack when it comes to building an API. The technology stack includes programming language, framework, library, and database which will be used to develop API. Although there are several factors based on which you should choose the technology stack for building an API, some of them are scalability, performance, security, and developer productivity. So always look for technology that provides scalability options such as distributed systems, load balancing, and caching mechanisms. Also, choose such programming languages and frameworks that align with your project requirements and the expertise of your developer team.
So in this article, we will see how to build a RESTful Social Media web API whose tech stack would be:
- Node.js – to create routes and servers.
- MongoDB – Database on which we can perform CRUD(Create Read Update Delete ) operations
- REST – Representational State Transfer which is scalable and works on HTTP protocol.
- Postman – Additionally, we will use Postman for API testing. Now let’s make it for more clear understanding.
How to Build a Social Media REST API Using Node.js?
We will build a REST API called social_media. We will create Users, add authentication functionalities and if the user is authentic allow them to create posts. All the data will be stored in the MongoDB database. We will further call the API for deleting specific posts by ID and get the user details and all the requests will be sent to Postman.
Since this article is all about building an API. So we are not creating any front end here but for testing and requests of data, we will use Postman.
Here are the steps for building a social media API:
Step 1: Initialize Node.js Project
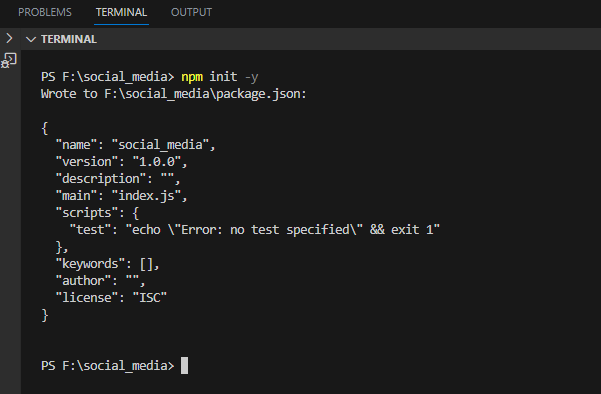
First, Create a new directory named social_media and inside that directory initialize NPM by running this command on the terminal.
npm init -y
It will initialize your project and create a package.json file containing your project details.
Output:
Step 2: Installing the Necessary Modules
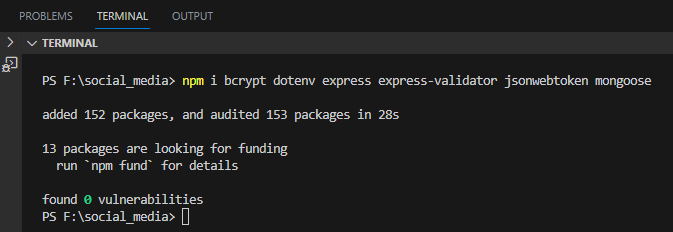
Install the modules you will need in this project using the following command
npm i <module_name, module_name...>
Here replace the module_name with the name of the modules which are given below.
- bcrypt: it is used to make passwords secure by hashing
- dotenv: it is used to store our secret key and URL of MongoDB
- express: it is a node.js framework.
- express-validator: it is used to validate the user’s input data like email and phone number.
- jsonwebtoken: used to authenticate and authorize users
- mongoose: it connects MongoDB to our Application.
Further, if any module is required we can install that in the same manner.
Output:
Step 3: Creating Server
It’s time to create our server. Create a server.js file in the current directory. Import the express library, create an app using it, and listen to the server on port no. 3000. Add the below code to the server.js file
server.js
const express = require('express');

const app = express();
const PORT = process.env.PORT || 3000;

app.use(express.json());


app.listen(PORT, () => {
    console.log(`Server started on port ${PORT}`);
  });

  module.exports = app;
Now we will run the file by entering the below command on the terminal.
Output:
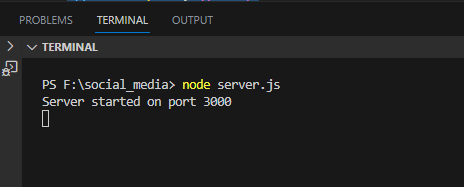
Congratulations!! Your server has started.
Step 4: Create a Database
So we will use MongoDB Atlas to create our social_media database. We are using its website.
After login into MongoDB click on Create which is shown in the image below
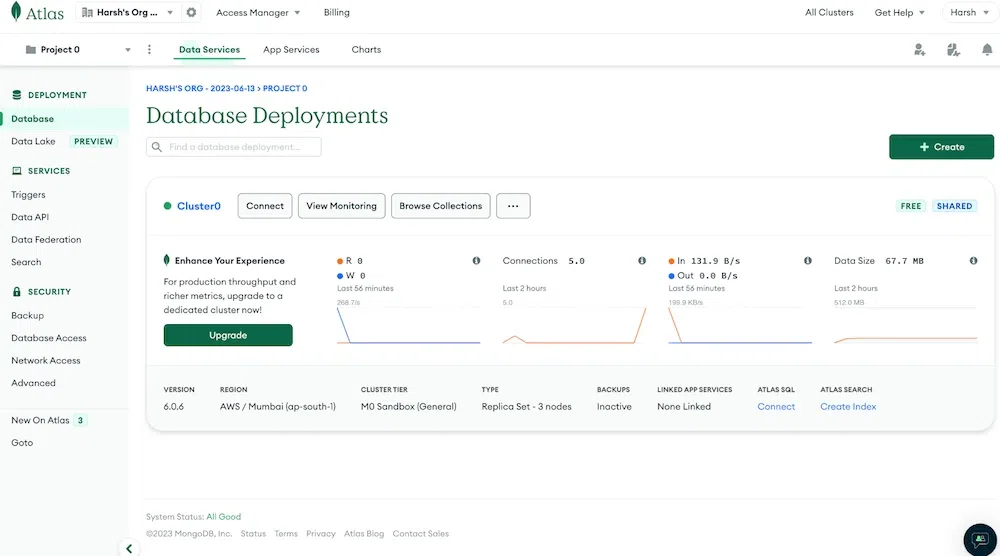
4.1. Click on Create Cluster
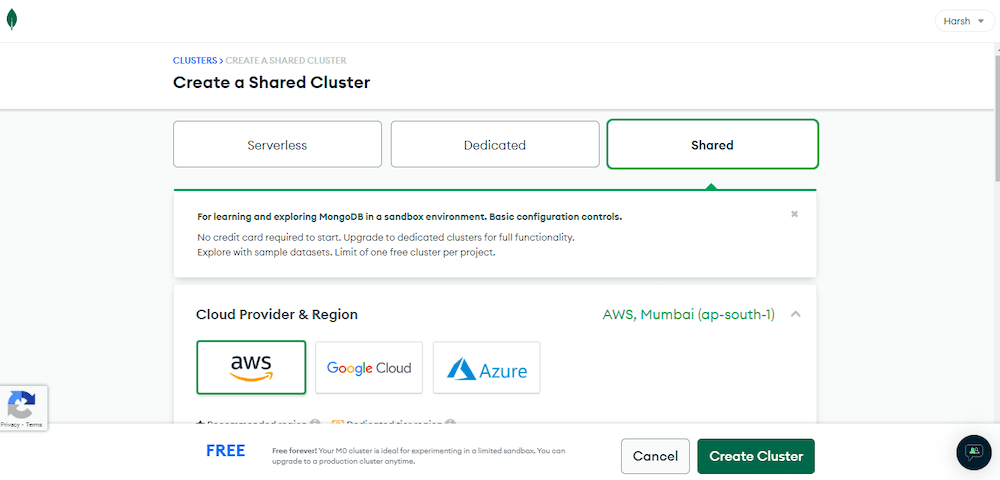
4.2. Create a new project named ‘social_media’.

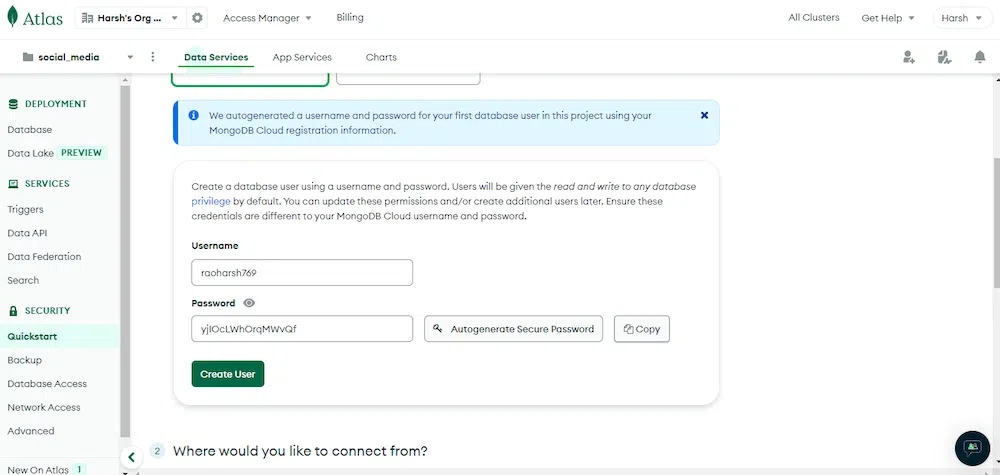
4.3. Save the username and password shown below which will be used to connect with DB.
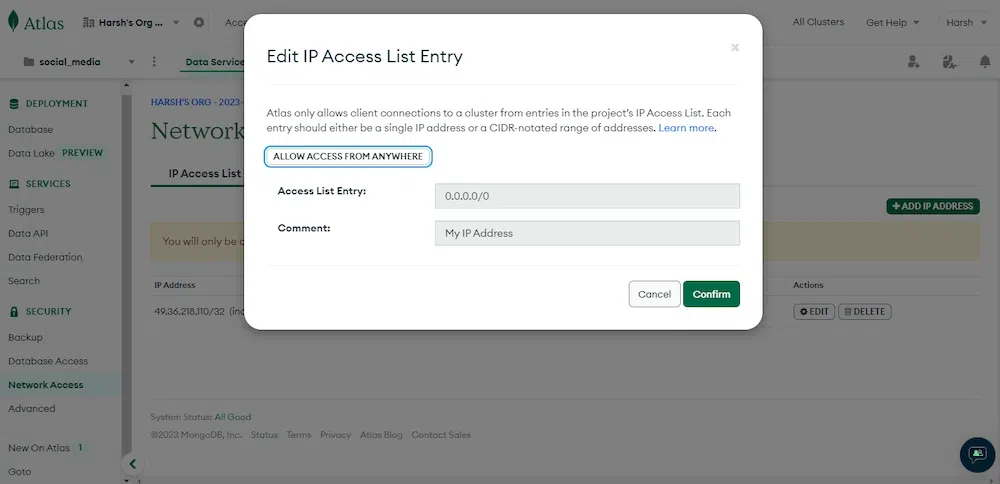
4.4. Go to Network Access then select edit and allow Access From Anywhere and then confirm.
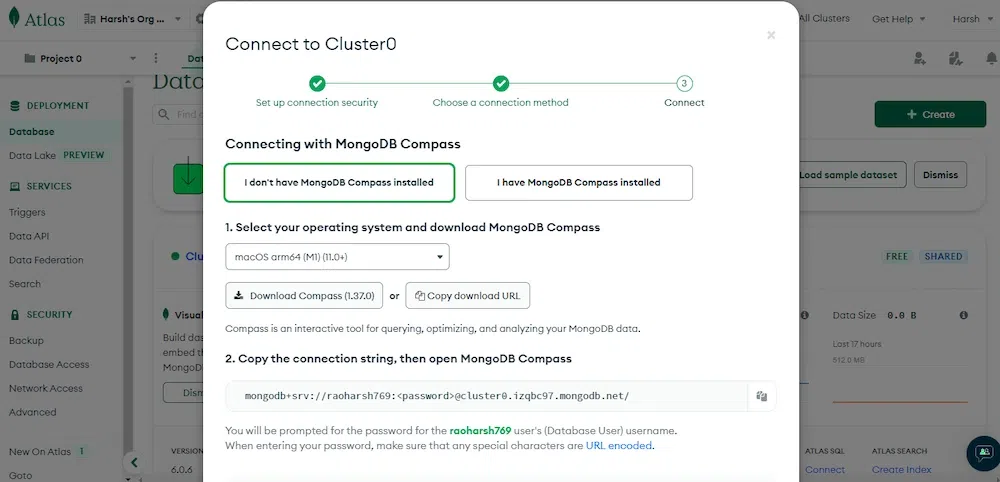
4.5. Now you have to add this database to your application by adding a link which you will find by going to Database -> connect -> Compass and you will see the below image:
Step 5: Connecting MongoDB to the Application
For this, we will create a new file ‘db.js’ in the same directory and write the connection code there and after that, we will connect this file to our server.js file.
Now make a db.js file in the same directory.
db.js
const mongoose = require('mongoose');

const connectDB = async () => {
  try {

    await mongoose.connect(process.env.MONGODB_URI, {
      useNewUrlParser: true,
      useUnifiedTopology: true,

    });
    console.log('MongoDB connected');

  } catch (error) {
    console.error(error.message);
    process.exit(1);
  }
};

module.exports = connectDB;
Here we need the mongoose library to connect with the database. ‘process.env.MONGODB_URI’ will give the link stored in the .env file which connects our server with the database. And in case of any error, it will catch and show us on the console.
Create a .env file in the same directory to store the secret key and the URL to connect MongoDB to make the connection secure.
.env
MONGODB_URI=”mongodb+srv://<replaceyourusername>:<pasteyourpassword>@cluster0.g73tlip.mongodb.net/?retryWrites=true&w=majority”
JWT_SECRET=mysecret
Here replace your username with <replaceyourusername> and replace your password with <pasteyourpassword>.
Now connect the db.js file to the server.js file by adding the below code to the server.js file.
server.js
const connectDB = require('./db');
require('dotenv').config();
connectDB();
See the final updated server.js file at the end of this section.
Now we will run our server.js file.
Output:
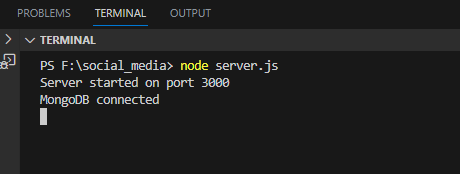
Here you can see our database has successfully connected.
Step 6: Create schema for users, and posts
As of now, our database is connected so it’s time to create the schema for our Users and the posts they will create.
Users will contain 4 fields – name, email, password, and posts. The schema for users will look like this:
{
  name: {
    type: String,
    required: true
  },
  email: {
    type: String,
    required: true,
    unique: true
  },
  password: {
    type: String,
    required: true
  },
  posts: [{ type: mongoose.Schema.Types.ObjectId, ref: 'Post' }]
}
Here name, email, and password are mandatory for a new user to register.
Posts Schema will contain 4 fields:- author, title, description, and createdAt and it will look like this:
{
  author: {
    type: mongoose.Schema.Types.ObjectId,
    ref: 'User',
    required: true
  },
  title: {
    type: String,
    required: true
  },
  description:{
    type: String,
    required: true
  },
  createdAt: {
    type: Date,
    default: Date.now
  }
We will create the User and Post Schema in different files and to create these files we will create a directory named ‘models’ inside our main directory which contains the users.js and posts.js files which will have the respective schemas and models.
userSchema.pre() and postSchema.pre() are used to perform operations to the data before adding to db.
In the user.js file bcrypt is used to hash the password to make it more secure. We will convert the password using hashing and then store it in the database.
Create a user.js file for User schema.
models/user.js
const mongoose = require('mongoose');
const bcrypt = require('bcrypt');
const userSchema = new mongoose.Schema({
  name: {
    type: String,
    required: true
  },
  email: {
    type: String,
    required: true,
    unique: true
  },
  password: {
    type: String,
    required: true
  },
  posts: [{ type: mongoose.Schema.Types.ObjectId, ref: 'Post' }]
});
userSchema.pre('save', async function (next) {
    const user = this;
    if (user.isModified('password') || user.isNew) {
      try {
        const hash = await bcrypt.hash(user.password, 10);
        user.password = hash;
      } catch (error) {
        return next(error);
      }
    }
    next();
  });


const User = mongoose.model('User', userSchema);

module.exports = User;
Just before adding the post, it will update the new post in userSchema using postSchema.pre().
Create a post.js file for Post schema.
models/posts.js
const mongoose = require('mongoose');
const postSchema = new mongoose.Schema({
  author: {
    type: mongoose.Schema.Types.ObjectId,
    ref: 'User',
    required: true
  },
  title: {
    type: String,
    required: true
  },
  description:{
    type: String,
    required: true
  },
  createdAt: {
    type: Date,
    default: Date.now
  }
});
postSchema.pre('save', async function() {
  try {
    // Find the user document and update its posts array with the new post
    const user = await mongoose.model('User').findByIdAndUpdate(
      this.author,
      { $push: { posts: this._id } },
      { new: true }
    );

  } catch (err) {
    console.error(err);
  }
});
const Post = mongoose.model('Post', postSchema);

module.exports = Post;
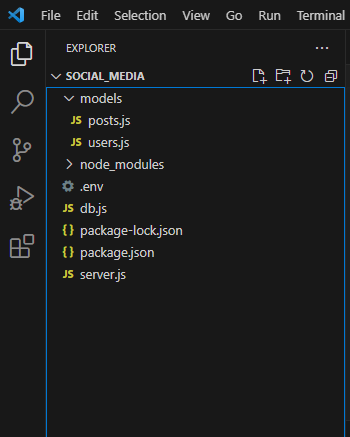
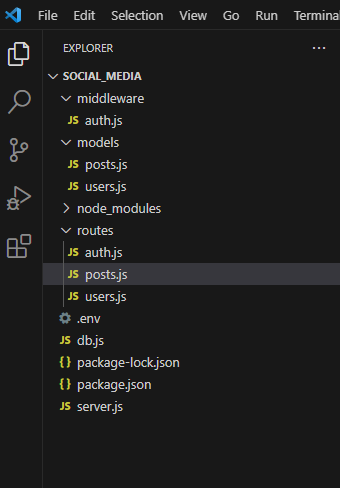
Now our directory will look like this:
Step 7: Create/ register new users
We will create 2 new users using the POST method and add them to our database.
Syntax of POST method:
router.post(route, (req, res)=>{
 ...
})
For adding users we will create another directory ‘routes’ which will have all the routes and our users.js file.
routes/users.js
// Import necessary modules
const express = require('express');
const router = express.Router();
const User = require('../models/users');

// Create a new user
router.post('/register', async (req, res) => {
  const { name, email, password } = req.body;

  // Create a new user with the provided name, email, and password

  const user = new User({ name, email, password });
  await user.save();

  // Return the new user as JSON
  res.json(user);
});
module.exports = router;
When the user calls the /register API since it is the POST request so it will carry some data along with it. Fetch the data using req.body and Assign the data to {name, email, password} and then add this data to the schema.
To connect the routes/users.js file to the server we add the following code to our server.js file:
server.js
const userRouter = require('./routes/users');
app.use('/api',userRouter);
See the updated code of server.js at the end of this section.
Now when we hit this route and send data as a request to the server using the POST method it will store our data in the database.
Now using Postman create 2 users:
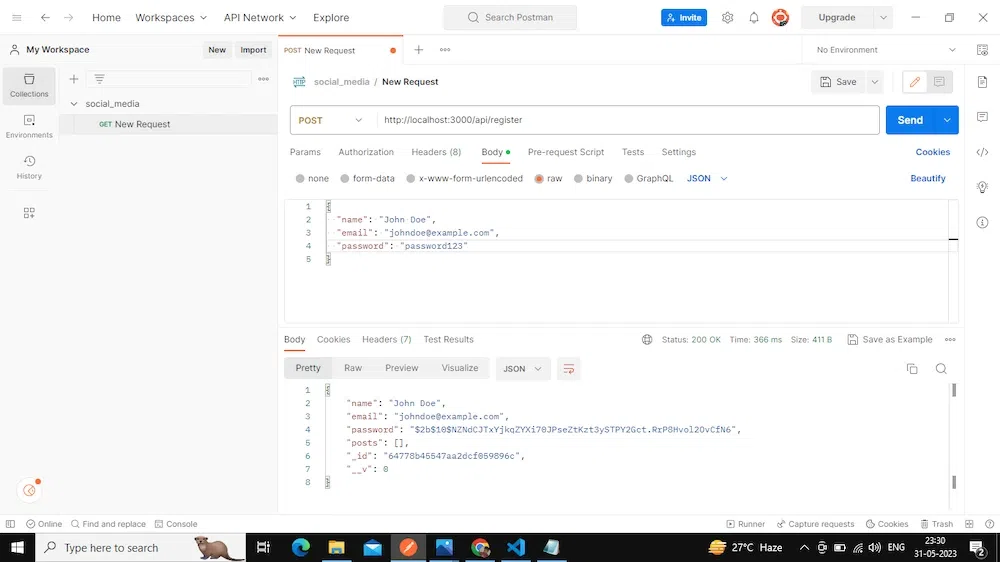
After logging into Postman create a new collection named social_media, there create a new request, after that select the POST method, and in the body select raw where change the TEXT to JSON format, and in the input field add the data of a new user.
Now add the URL of api/register and hit the send button.

In the output body, we will see the data stored in our DB in JSON format.
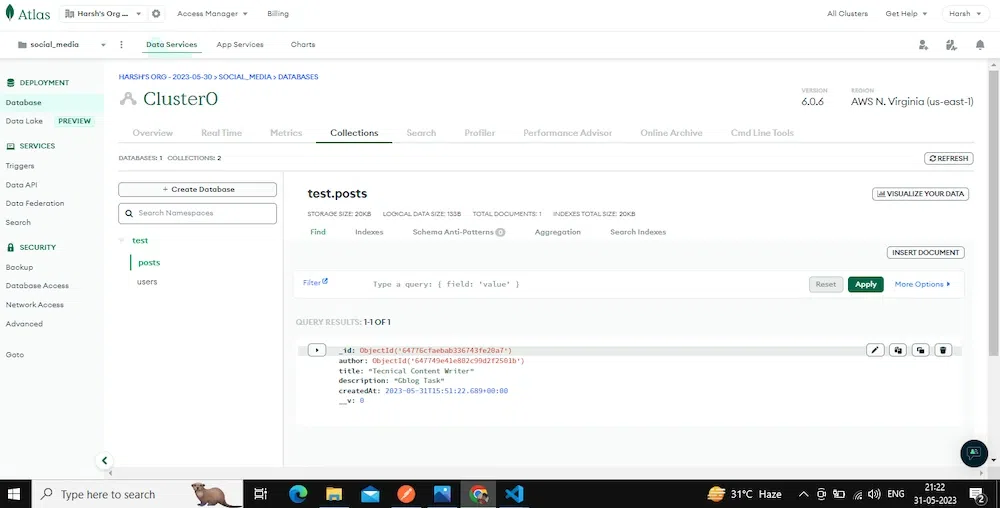
Similarly, Create another User.
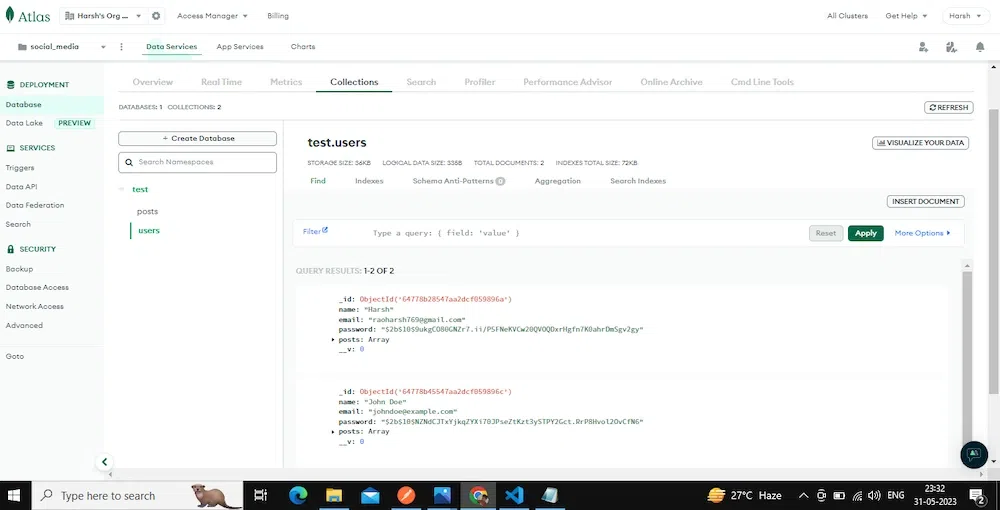
Go to social_media database and If we refresh our Browse collection on the database we find data of 2 users in JSON format.
Step 8: Getting the Detail of a User
Now we will fetch all the details of a user using the GET method. But before that, we will check if the user is authentic or not, for this, we are using a middleware ‘auth’ which will check if a user is authentic or not by using JSON Web Token.
So first create another directory ‘middleware’ which contains the ‘auth.js’ file.
It will take a token and check if it exists then create a userID using this token and check whether a user exists with this userID and if it exists then pass the user or else throw an error.
middleware/auth.js
const jwt = require('jsonwebtoken');
const User = require('../models/users');

module.exports = async function(req, res, next) {

  if(!req.headers.authorization){
    return res.status(401).json({ message: 'Unauthorized' });
  }
  const token = req.headers.authorization.split(' ')[1];;
//   console.log(req);

  // Check if the token exists
  if (!token) {
    return res.status(401).json({ message: 'Unauthorized' });
  }

  try {
    // Verify the token
    const decoded = jwt.verify(token, process.env.JWT_SECRET);
    // console.log(decoded);
    // Add the decoded user information to the request object
    const user = await User.findById(decoded.userId);
    if(!user){
    return res.status(400).json({ message: 'User does not exist' });

    }
    req.user = user;


    // Call the next middleware function
    next();
  } catch (err) {
    res.status(401).json({ message: 'Invalid token' });
  }
};
We take a token from the registered user and check if the user is the same or not if the user matches then it will allow the request to proceed further else throw an error.
Here we are generating tokens manually, To generate tokens, create a ‘auth.js’ file in the ‘routes’ directory which will check the details of a user and generate the token if the user exists.
When we hit the /authenticate and provide email and password it will then check whether the email exists or not with the required password and if the user exists then return a JSON Web Token as a response.
routes/auth.js
const express = require('express');
const jwt = require('jsonwebtoken');
const User = require('../models/users');
const bcrypt = require("bcrypt");
const router = express.Router();

router.post('/authenticate', async (req, res) => {
  const { email, password } = req.body;
  if(!email){
    return res.status(400).json({ message: '"email" is required' });
  }
  if(!password){
    return res.status(400).json({ message: '"password" is required' });
  }
  // Find the user by email
  const user = await User.findOne({ email });
  // If the user doesn't exist or the password is incorrect, return an error
  if(!user){
    return res.status(401).json({ message: 'Email or password is incorrect' });
  }
  const validPassword = await bcrypt.compare(password, user.password)
  if (!validPassword) {
    return res.status(401).json({ message: 'Email or password is incorrect' });
  }

  // Generate a JWT token with the user ID as payload
  const token = jwt.sign({ userId: user._id }, process.env.JWT_SECRET);

  // Return the token as JSON
  res.json({ token });
});


module.exports = router;
Link the above file to server.js by adding the below code to the ‘server.js’ file:
server.js
const authRouter = require('./routes/auth');
app.use('/api', authRouter);
See the final updated code of the server.js file at the end of this section.
Now to get the details of users we have to create a route /user which will check if the user is authentic using middleware and then return the details of users.
Add the below code in ‘routes/users.js’ to get the detail of a user
routes/users.js
Cout auth= require(‘../middleware/auth’);
router.get('/user', auth, async (req, res) => {
    try {
      const userId = req.user.id;

      const user = await User.findById(userId);

      const userName = user.name;


      res.json({ name: userName });
    } catch (err) {
      console.error(err.message);
      res.status(500).send('Server Error');
    }
  });
Now let’s look at the postman:
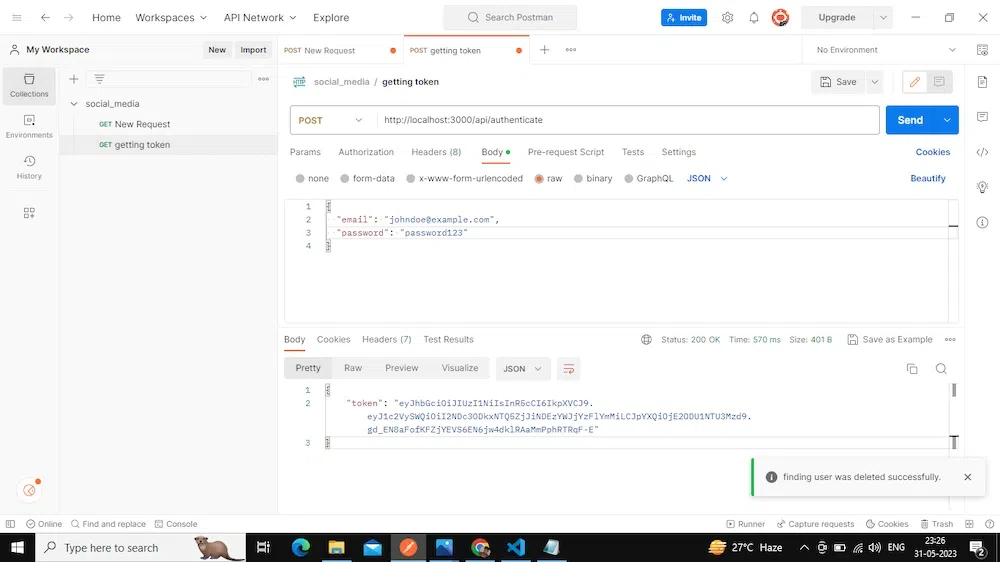
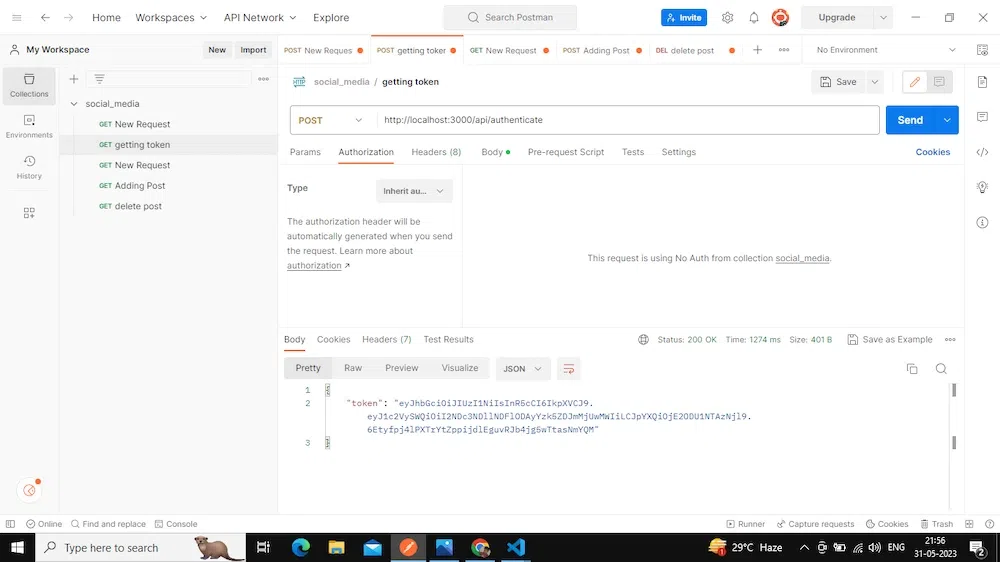
First, create a token for the user for which you want the details using the /authenticate route in the auth.js file:
Create a new request, select POST method, and in the body got to raw and select JSON format and add {email, password} in the input field as JSON. Add the URL of api/authenticate and enter the Send button, it will generate the Token as an Output.
Now take this token and send it as a request while authenticating in middleware when we hit this user route on Postman to get the user’s detail, so we will pass the token as a bearer token in authentication in Postman as shown in the image below:
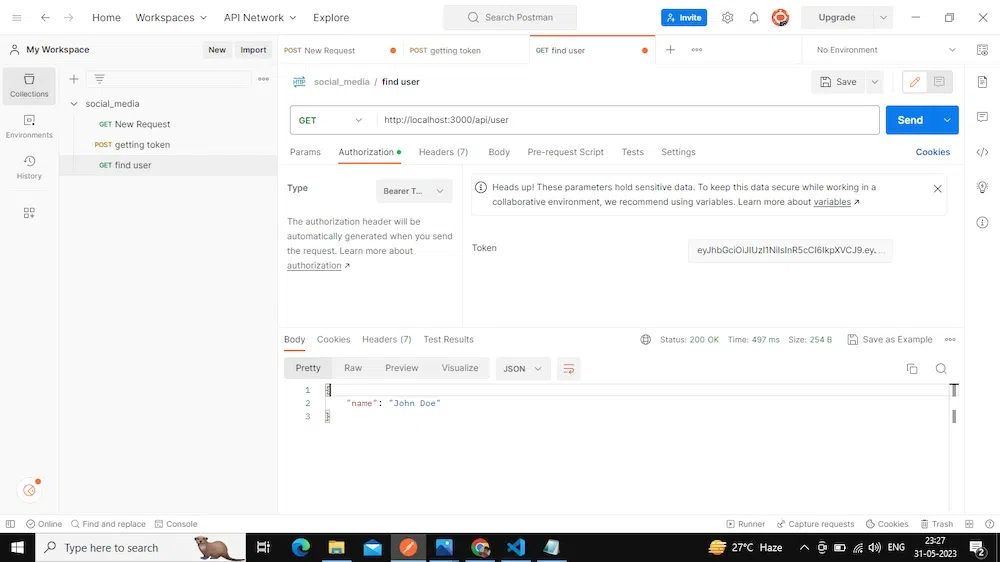
Hence as a response, it will show us the details of users as an output.
Step 9: Create a post for a user
Similarly, we can create posts for a specific user using the POST method. Now we will create another file ‘posts.js’ inside routes which contains the routes of creating posts.
Creating a ‘posts.js’ file inside routes that contain the route. Here we are using one of the important library ‘express-validator’ which add a middleware ‘check’ to the route and validateResult will check whether the request is giving any error or not and after that create a new post by taking the data from the request.
routes/posts.js
const express = require('express');
const router = express.Router();
const auth = require('../middleware/auth');
const { check, validationResult } = require('express-validator');
const Post = require('../models/posts');

router.post('/posts',
  [auth, [check('title', 'Title is required').not().isEmpty(), check('description', 'Description is required').not().isEmpty()]],
  async (req, res) => {
    // Check for validation errors
    const errors = validationResult(req);
    if (!errors.isEmpty()) {
      return res.status(422).json({ message: 'Invalid inputs'});
    }

    try {
      // Create a new post
      const post = new Post({
        title: req.body.title,
        description: req.body.description,
        author: req.user.id
      });

      // Save the post to the database
      await post.save();

      // Return the new post object
      res.json({
        id: post.id,
        title: post.title,
        description: post.description,
        createdAt: post.createdAt
      });
    } catch (err) {
      console.error(err.message);
      res.status(500).send('Server Error');
    }
  }
);


module.exports = router;
Connect this file with the server.js file by adding the below code to the server.js file:
server.js
const postRouter = require('./routes/posts');
app.use('/api',postRouter);
See the final updated server.js file at the end of this section
Now first create a token on Postman for the user you want to create a post
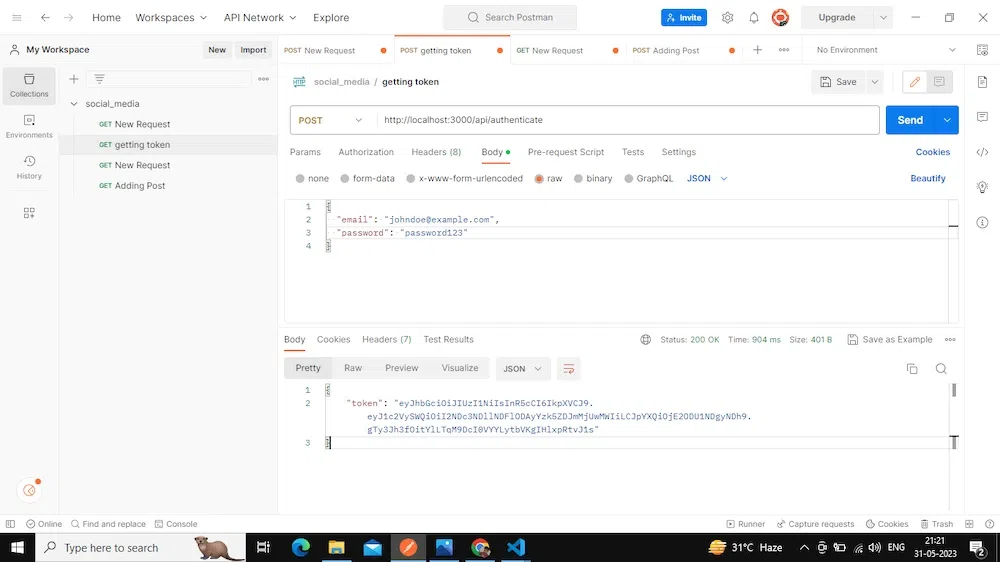
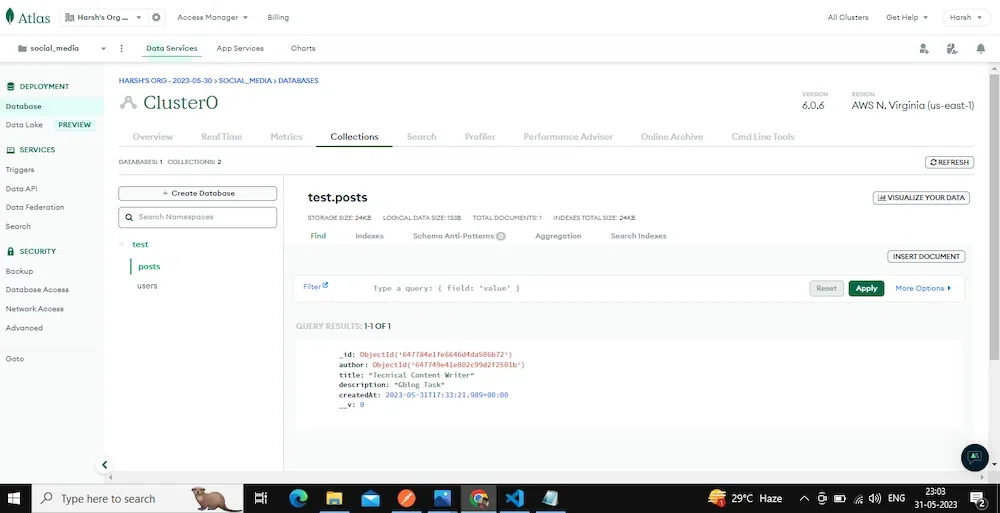
Take this token, create a new request and add it to the bearer token of the authentication section, and hit a post request with the data of the post in JSON format

Then refresh the Browse collection in the database and you will find that the post is created and stored in the database successfully, as shown in the image below:
Step 10: Delete a Post
Now let’s delete a user’s post by post ID using the DELETE method. Create the route inside the ‘routes/posts.js’ file.
Firstly we will check if the postID exists or not using findOne. If it exists then delete it using the deleteOne function
Add the below code to the ‘routes/posts.js’ file after the ‘/posts’ route:
routes/posts.js
// DELETE a post by ID
router.delete('/posts/:id', auth, async (req, res) => {
    try {
      // Find the post by ID and verify it was created by the authenticated user
      const post = await Post.findOne({ _id: req.params.id, author: req.user.id });
      if (!post) {
        return res.status(404).json({ message: 'Post not found' });
      }

      // Delete the post and its associated comments
      await Post.deleteOne({ _id: req.params.id });

      resstatus(204).json({ message: 'Post deleted' });
    } catch (err) {
      console.error(err.message);
      res.status(500).send('Server Error');
    }
  });
First create a token for the user, for which you want to delete the post
Now take the id of the post which has to be deleted:
Now create a new DELETE request and add the token to the bearer token at authentication and add the id to the route and send it.

Now if you refresh and see the Browse collection in the database then Post does not exist:
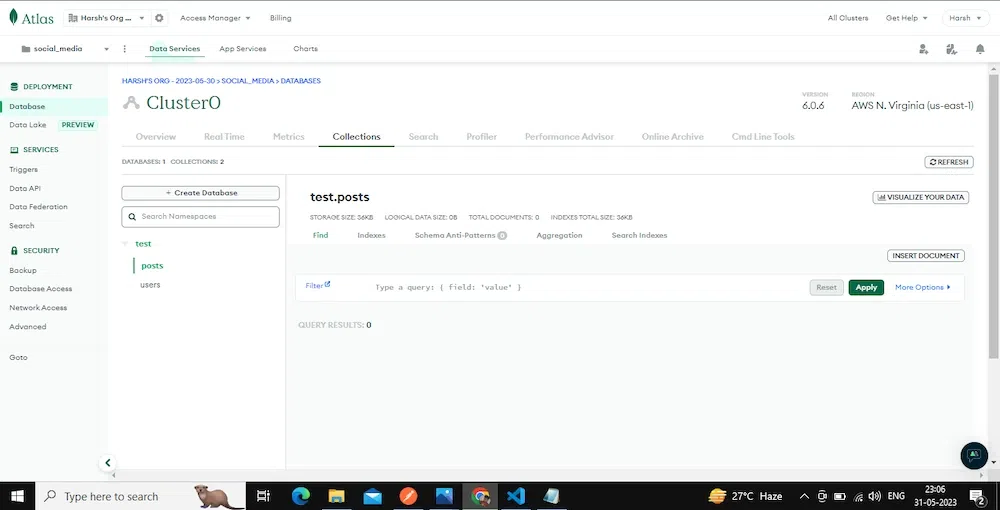
The post has been deleted. Now if you look at the final structure of the directory, it will look like this:
We have completed the social_media API project. Final Updated files which are used multiple times:
server.js
const express = require('express');
const connectDB = require('./db');
const authRouter = require('./routes/auth');
const userRouter = require('./routes/users');
const postRouter = require('./routes/posts');

const app = express();
const PORT = process.env.PORT || 3000;


require('dotenv').config();
connectDB();

app.use(express.json());

app.use('/api',userRouter);
app.use('/api',authRouter);
app.use('/api',postRouter);

app.listen(PORT, () => {
    console.log(`Server started on port ${PORT}`);
  });

  module.exports = app;
Best Practices and Tips For Building API
Building an API requires detailed planning and commitment to best practices by developers to make it more secure, user-friendly, and structured. Here are some of the best practices tips followed by the developers working in the software industry during API development:
- Follow RESTful Principles: Today REST(Representational State Transfer) principles are followed by the software industry. So, design your API that follows REST principles. Also, use clear and meaningful resource naming and responses should have suitable status codes.
- Use Versioning: if you implement versioning from the start, then it will allow you to make necessary changes and add new features without breaking existing API integration.
- Add Authentication and Authorization: it is easy to understand that giving access to your data and functionalities to anonymous users can be harmful. So, implementing strong authentication for secure access to your API is recommended, and based on the user role, access should be authorized.
- Error Handling and Status Code: To make a smooth user experience with your API use proper HTTP status code for the success and failure of requests. Implement proper Error handling to give meaningful and understandable error messages and error codes to help developers.
- Testing and Improving your API: Test your API regularly to fix any issue and implement the necessary changes to improve it. You can conduct load testing and performance testing to test your API.
- Analyze API Usage: Monitor your API by implementing the necessary mechanism to track performance, errors, and API usage. Collect this data and analyze that to gain insights to improve your API.
- Scalability of API: Design your API in such a way that if demand increases in the future then you can scale your API such that it can handle increasing traffic along with good performance.
- Create Documentation: Provide complete and clear documentation for your API. Explain the endpoints request and response format, authentication required, and any other important information guideline which is required to use your API effectively and efficiently.
Hence, these are some of the tips which you can follow to build a scalable, secure, and developer-friendly API.
Conclusion
In this article, we have learned how APIs are very useful for developers to build large scalable systems. We have built a social_media API from scratch and did some CRUD operations on the MongoDB database lastly, we saw some best practices to build good APIs.
Share your thoughts in the comments
Please Login to comment...