Background local notifications in Flutter
Last Updated :
11 Nov, 2022
Sometimes user wants some very important features like the latest news updates, latest articles updates, weather condition alert, complete his/her profile update, future events update and much more in his/ her Android or iOS device without opening App and if you would like to develop this kind of Android and iOS application then this article will help you to do so. In this process, we set up background jobs that periodically check update about the latest events or alert.
Flutter:
It is an open-source UI software development toolkit created by Google. It comes in handy while developing applications for Android, Mac, Windows, Google Fuchsia, iOS, Linux, and the web through a single codebase.
Dart:
It is a client-optimized programming language for apps on multiple platforms. It is used to developed mobile, desktop, server, and web applications. Dart is an object-oriented language that also has garbage-collection property and has a syntax similar to the C programming language. It can compile in both native code or JavaScript.
Flutter WorkManager:
It is used as a wrapper around the Android’s WorkManager and also the iOS performFetchWithCompletionHandler, which effectively enables the headless execution of Dart code in the background. WorkManager provides an easy-to-use API where we can define a background job that should run once, or periodically, apply multiple constraints like for example if a task needs an internet connection, or if the battery should be fully charged, and much more.
Flutter Local Notifications:
It is a cross-platform plugin for displaying local notifications in a flutter application. It offers a bunch of features like for example scheduling when notifications should appear, periodically show a notification (interval-based), handle when a user has tapped on a notification when the app is in the foreground, background, or terminated, specify a custom notification sound and much more.
Android Studio:
It is the official integrated development environment(IDE) for Google’s Android operating system, built on JetBrains’ IntelliJ IDEA software and designed specifically for Android development, and this hole representation of Android Studio will be used as IDE.
Here, We are creating background jobs with headless execution. To get started we need to install certain flutter plugins and Android Studio must be installed in the local system.
Before getting started Flutter development toolkit in the local system and Flutter plugin in Android Studio IDE must be installed.
- Open Android Studio and create a new flutter application project with a name called ‘geeksforgeeks’.
- Once the project is created and sync successfully, connect your Android device to Android Studio and make sure Developer options and USB debugging are On.
- Run the project by clicking on the first green icon at the center top to cross-check the project is built and running successfully(first time Android Studio takes a little more time as usual).
- Now, It’s time to install the necessary plugins, open the ‘pubspec.yaml’ file from geeksforgeeks -> pubspec.yaml project structure and copy-paste two dependencies that are Workmanager and flutter_local_notifications as follows.
dependencies:
  flutter:
    sdk: flutter

  # The following adds the Cupertino Icons font to your application.
  # Use with the CupertinoIcons class for iOS style icons.
  cupertino_icons: ^0.1.2
  # Use with the Workmanager class for background jobs headless execution.
  workmanager: ^0.2.3
  # Use with FlutterLocalNotificationsPlugin class for local push notifications.
  flutter_local_notifications: ^1.4.4+2
- Once, you have done the above steps then click on ‘Packages get’ flutter command appearing at the center top to get install all necessary packages and plugins.
- Now, It’s time to add some required permissions, open the ‘AndroidManifest.xml’ file from geeksforgeeks -> android -> app -> src -> main -> AndroidManifest.xml project directory structure and copy-paste following permissions.
<!-- Add below permission inside 'manifest' tag -->
<uses-permission android:name="android.permission.RECEIVE_BOOT_COMPLETED"/>
<!-- Add below permission inside 'application' tag -->
<receiver android:name="com.dexterous.flutterlocalnotifications.ScheduledNotificationBootReceiver">
    <intent-filter>
        <action android:name="android.intent.action.BOOT_COMPLETED"/>
        <action android:name="android.intent.action.MY_PACKAGE_REPLACED"/>
    </intent-filter>
</receiver>
Now, It is time to code, open ‘main.dart’ file from geeksforgeeks -> lib -> main.dart project directory structure and copy-paste following the entire code.
Dart
import 'package:flutter/material.dart';
import 'package:flutter_local_notifications/flutter_local_notifications.dart';
import 'package:workmanager/workmanager.dart';
void main() {
WidgetsFlutterBinding.ensureInitialized();
Workmanager().initialize(
callbackDispatcher,
isInDebugMode: true
);
Workmanager().registerPeriodicTask(
"2",
"simplePeriodicTask",
frequency: Duration(minutes: 15),
);
runApp(MyApp());
}
void callbackDispatcher() {
Workmanager().executeTask((task, inputData) {
FlutterLocalNotificationsPlugin flip = new FlutterLocalNotificationsPlugin();
var android = new AndroidInitializationSettings('@mipmap/ic_launcher');
var IOS = new IOSInitializationSettings();
var settings = new InitializationSettings(android, IOS);
flip.initialize(settings);
_showNotificationWithDefaultSound(flip);
return Future.value(true);
});
}
Future _showNotificationWithDefaultSound(flip) async {
var androidPlatformChannelSpecifics = new AndroidNotificationDetails(
'your channel id',
'your channel name',
'your channel description',
importance: Importance.Max,
priority: Priority.High
);
var iOSPlatformChannelSpecifics = new IOSNotificationDetails();
var platformChannelSpecifics = new NotificationDetails(
androidPlatformChannelSpecifics,
iOSPlatformChannelSpecifics
);
await flip.show(0, 'GeeksforGeeks',
'Your are one step away to connect with GeeksforGeeks',
platformChannelSpecifics, payload: 'Default_Sound'
);
}
class MyApp extends StatelessWidget {
@override
Widget build(BuildContext context) {
return MaterialApp(
title: 'Geeks Demo',
theme: ThemeData(
primarySwatch: Colors.green,
),
home: HomePage(title: "GeeksforGeeks"),
);
}
}
class HomePage extends StatefulWidget {
HomePage({Key key, this.title}) : super(key: key);
final String title;
@override
_HomePageState createState() => _HomePageState();
}
class _HomePageState extends State<HomePage> {
@override
Widget build(BuildContext context) {
return Scaffold(
appBar: AppBar(
title: Text(widget.title),
),
body: new Container(),
);
}
}
|
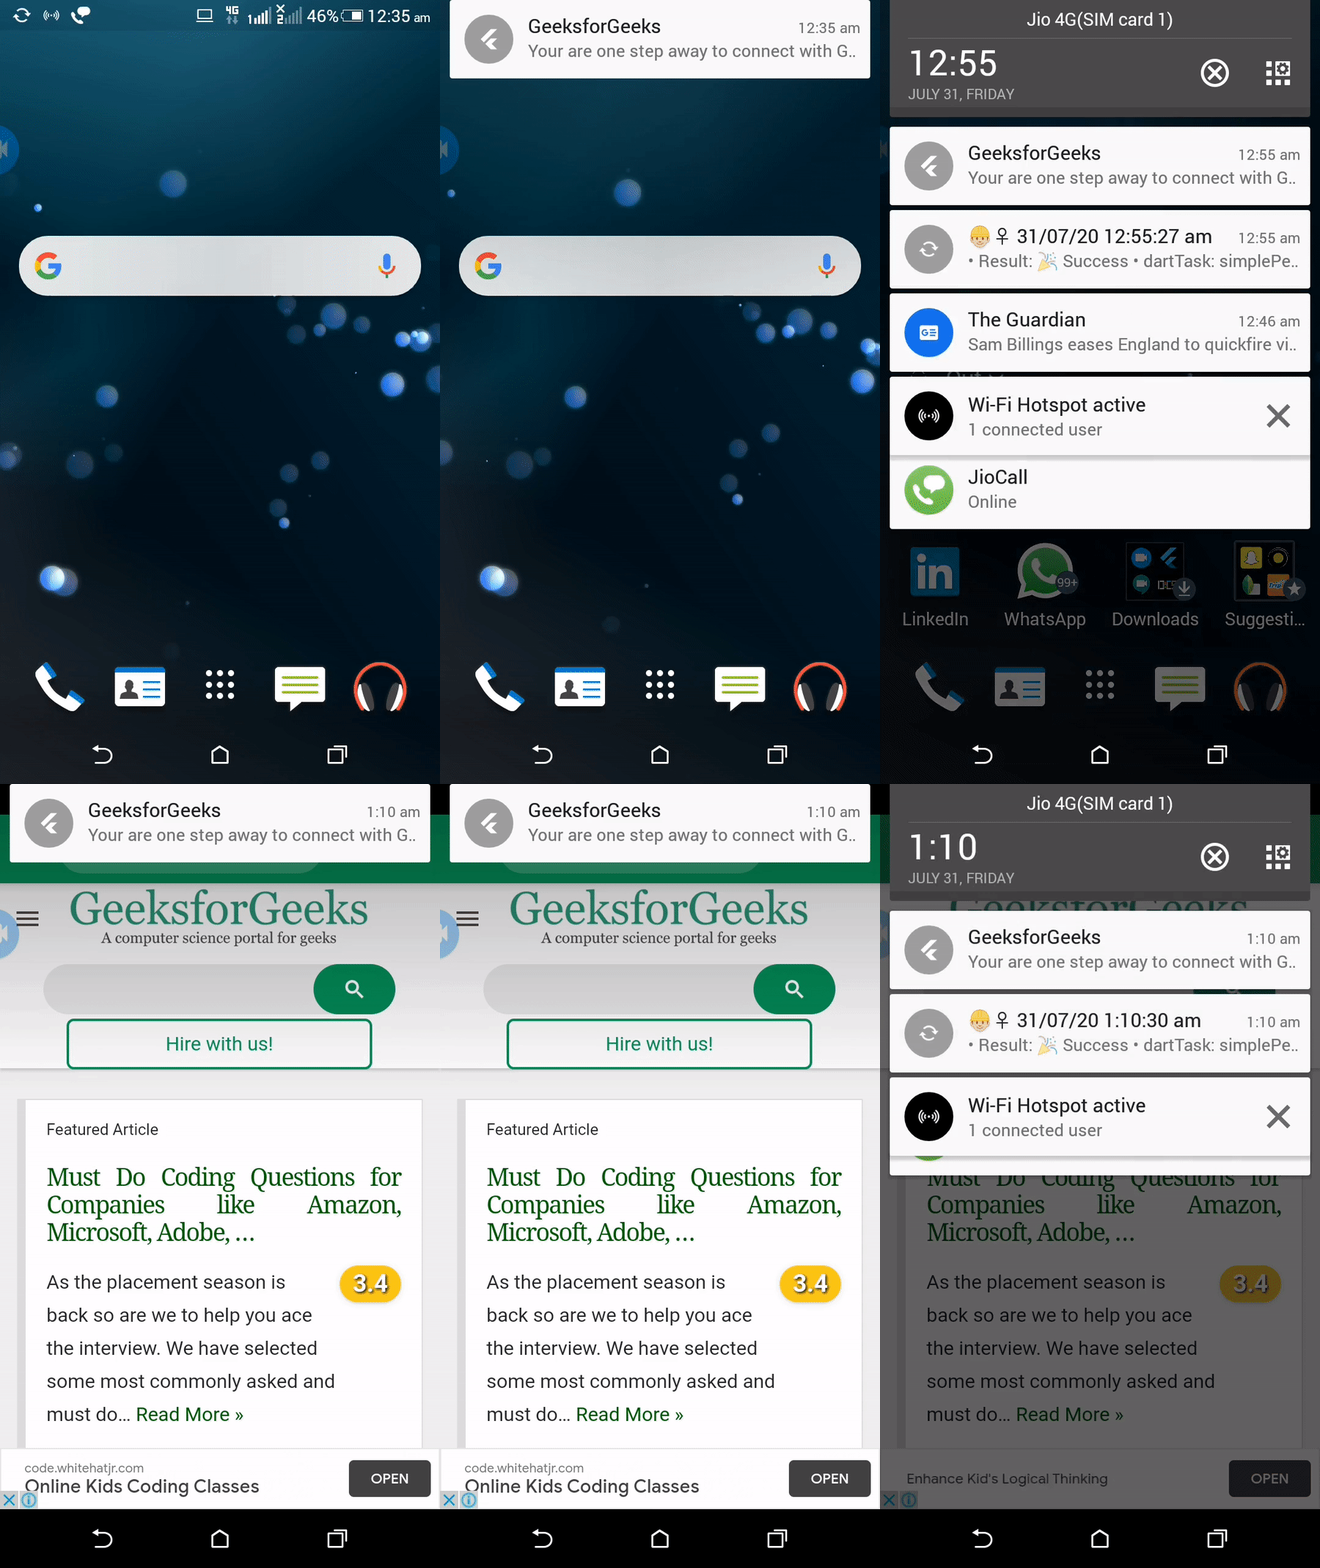
Finally, Run the project by clicking on the first green icon at the center top to see the output, and your job gets done.
Output:

References:
Share your thoughts in the comments
Please Login to comment...