AI-Powered Chatbot Platform with Node and Express.js
Last Updated :
28 Mar, 2024
An AI Powered Chatbot using NodeJS and ExpressJS can be created using the free OpenAI’s API Key that is provided for every user login. This article covers a basic syntax of how we can use ES6 (EcmaScript Version 6) to implement the functionalities of Node.js and Express.js including the use of REST APIs to send prompts and receive responses.
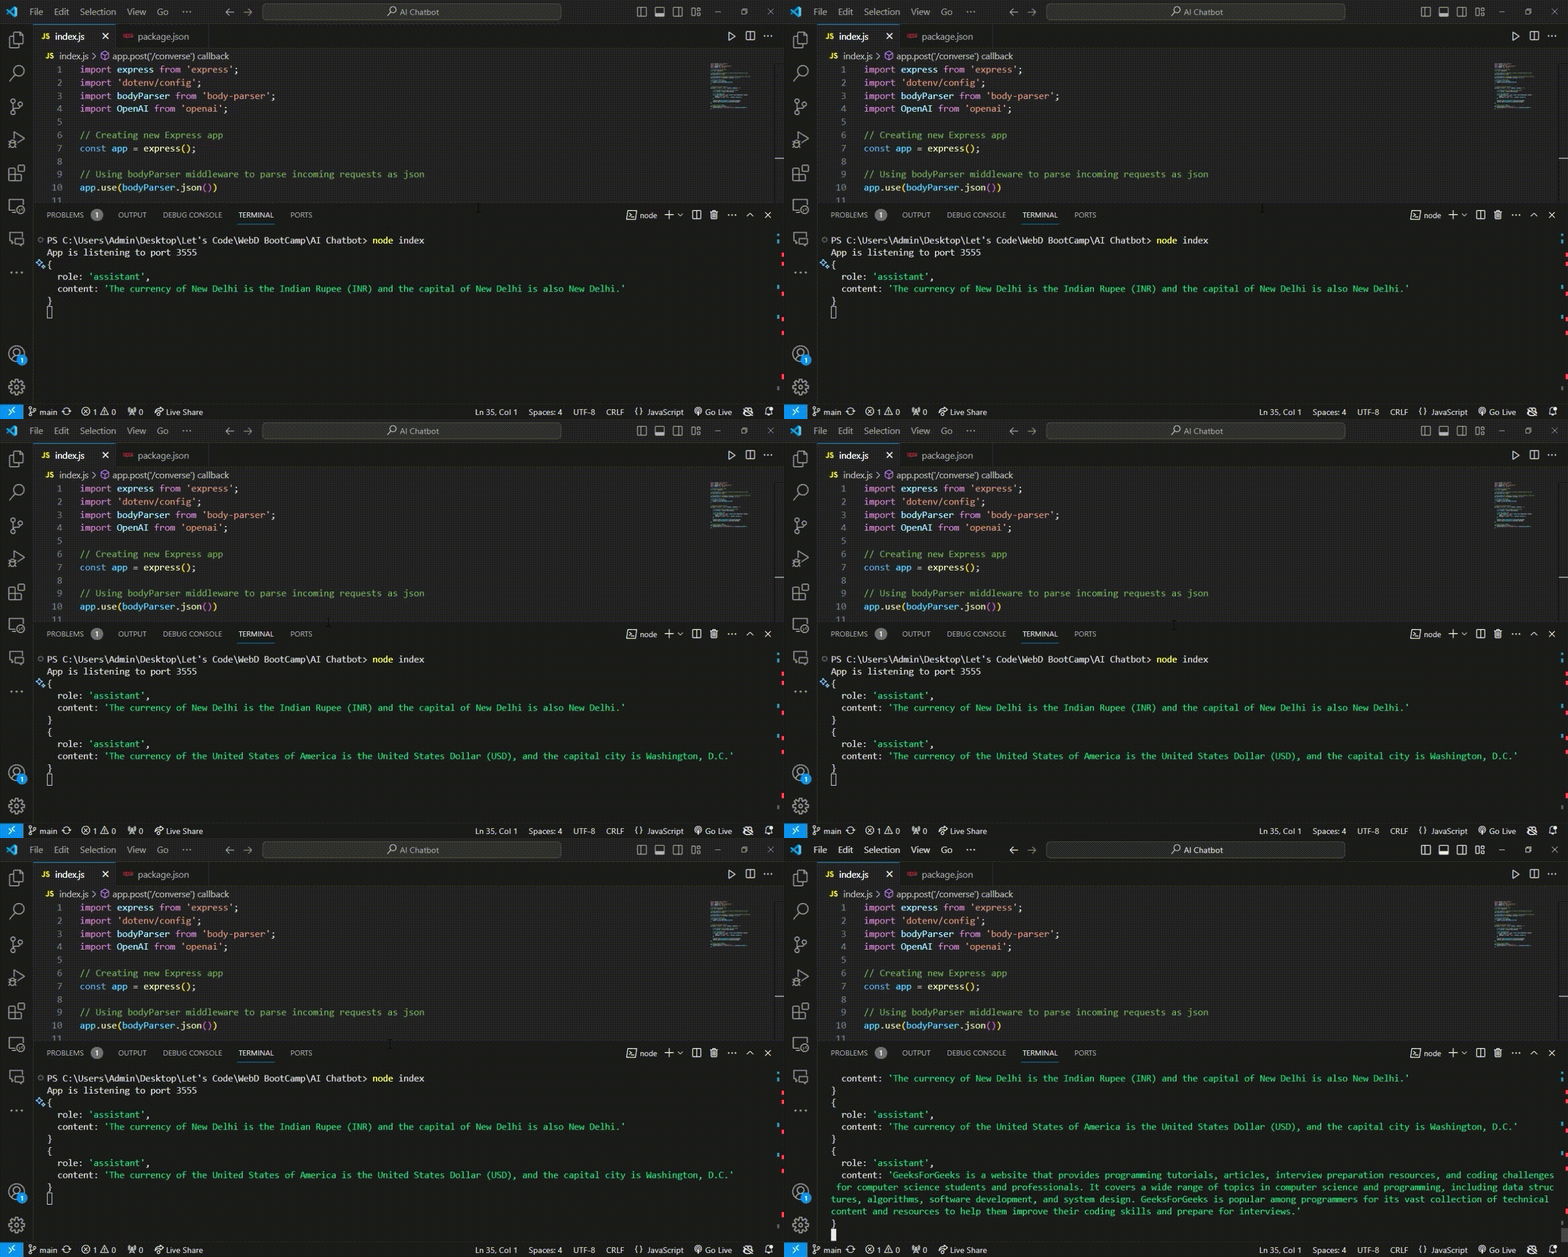
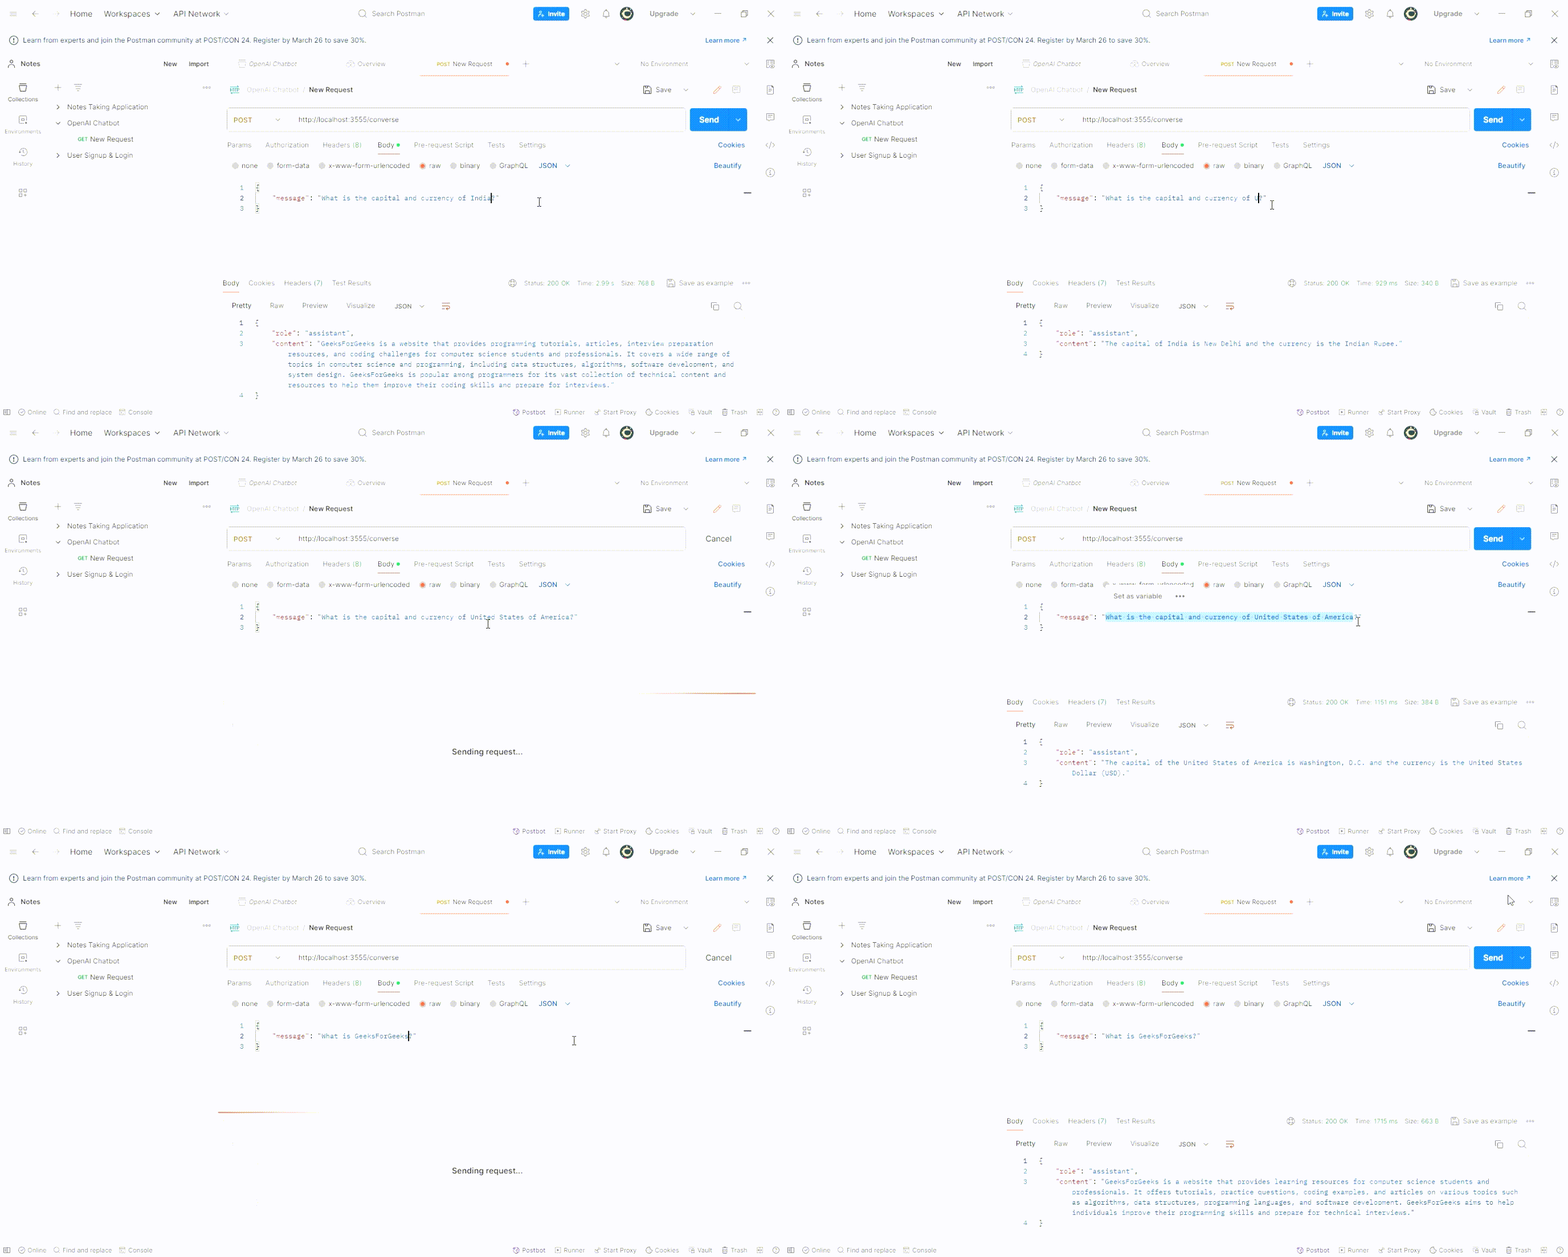
Output Preview: Let us have a look at how the final output will look like.

Output Preview
Prerequisites:
Approach to create AI-Powered Chatbot Platform:
- Creating a chatbot with openai is a fun task. Here are some steps that you need to follow to achieve the goal of creating a human like chatbot.
- Initialise the NodeJS Project by installing node modules and other dependencies.
- Add a .env file to save the OPENAI’s secret API Key.
- You can get your API Key after logging onto the official website of OPENAI and go into the API Documentation. Click on the option of Free API Key and create yours and save it for future reference.
- Add the PORT number on which the localhost will be running in the env file. You can also add it directly into the index file.
- Import several functions from the required dependencies and code according to the Version 4 of OpenAI to get the desired output.
- Return the responses to the server with route component : /converse.
- Open Postman and add the link to it and send a message in the JSON format. Send the request and you can simultaneously observe the responses both in VS Code terminal and Postman Terminal of responses.
Steps to create the project:
Step 1. Create a folder with the name AI-Chatbot using the following command.
mkdir AI-Chatbot
Step 2. Go to the folder which you have just now created.
cd "AI-Chatbot"
Step 3. Initialise the NodeJS Project
npm init
Step 4. Install dependencies required for the project – Express.js, OpenAI and env(Optional).
npm install express openai body-parser dotenv
Step 5. Create a file named index.js and add the boiler plate code for ExpressJS & NodeJS.
Step 6. Set up the OpenAI and it’s key and handle incoming requests and responses.
Step 7. Create a file named .env and access the PORT number and OPEN_API_KEY through the .env file.
Step 8. Complete the functionalities to listen to the application on required PORT.
Project Structure
.png)
Project Structure
Example Code:
JavaScript
import express from 'express';
import 'dotenv/config';
import bodyParser from 'body-parser';
import OpenAI from 'openai';

// Creating new Express app
const app = express();

// Using bodyParser middleware to parse incoming requests as json
app.use(bodyParser.json())

// Using bodyParser middleware to parse incoming requests as URL Data
app.use(bodyParser.urlencoded({ extended: true }));

// Setting up OpenAI API
const openai = new OpenAI({
    apiKey: process.env.OPENAI_API_KEY,
})


// Handling Incoming requests
app.post('/converse', async (request, response) => {

    // Extracting user's message from the prompt
    const message = request.body.message;

    // Calling openAI API
    const chatCompletion = await openai.chat.completions.create({
        model: 'gpt-3.5-turbo',
        messages: [{ role: 'user', content: message }],
    })

    response.send(chatCompletion.choices[0].message);
    console.log(chatCompletion.choices[0].message);
})

// Listen to app on PORT
app.listen(process.env.PORT, () => {
    console.log(`App is listening to port ${process.env.PORT}`);
})
Steps to run the application
1. Proceed to the terminal window of VS Code and run the following command :
node index
2. Your application is running successfully if you get the message mentioned below :
App is listening to port PORT_NUMBER
3. To add a message to the chatbot login on Postman. Create a new collection and add a request POST.
4. Add a message in the form of JSON ( Javascript Object Notation) in the body and choose JSON format. You can add a message as follows :
{
    "message": "What is GeeksForGeeks?"
}
5. Click on Send to send your request and you will receive the response in the terminal windows of both VS Code & Postman.
Output :
{
    "role": "assistant",
    "content": "GeeksForGeeks is a website that provides learning resources for computer science students and professionals. It offers tutorials, practice questions, coding examples, and articles on various topics such as algorithms, data structures, programming languages, and software development. GeeksForGeeks aims to help individuals improve their programming skills and prepare for technical interviews."
}
Final Output

Postman Output
Share your thoughts in the comments
Please Login to comment...