JIRA is a software development tool used for project management and issue tracking. It is a popular tool among software development teams to plan, track, and release software projects. JIRA provides a centralized platform for managing tasks, bugs, and other types of issues and it helps teams to organize and prioritize their work. The tool integrates with other software development tools and has a variety of customizable features and workflows that allow teams to adapt it to their specific needs. Additionally, JIRA also provides various reporting and dashboard features that help teams stay on top of their work and make data-driven decisions.
JIRA supports multiple languages including English, French, etc. It is a platform-independent tool. A 30-day free trial version is available on JIRA.
The following topics will be discussed here:
Let’s start discussing each of these topics in detail.
What is JIRA used for?
JIRA provides a centralized platform for managing tasks, bugs, and other types of issues, and it helps teams organize and prioritize their work. JIRA is designed for agile software development teams and it supports multiple methodologies such as Scrum, Kanban, and custom workflows.
JIRA is used for:
- Project Management: JIRA provides a centralized platform for managing software development projects, with support for multiple projects and workflows.
- Task Management: Teams can create, assign, and track tasks, bugs, and other types of issues.
- Agile Planning: JIRA supports agile methodologies such as Scrum and Kanban and provides tools for planning and tracking sprints, backlogs, and releases.
- Reporting and Dashboards: JIRA provides various reports and dashboards that help teams get a real-time view of their work and make data-driven decisions.
- Collaboration: JIRA allows teams to collaborate and communicate effectively, with features such as comments, notifications, and alerts.
JIRA is widely used by software development teams of all sizes and is known for its ease of use and customization capabilities. The tool offers a free trial and several pricing plans, including a cloud-based version and an on-premise version.
How to use JIRA?
Let’s see how to use JIRA, from the very beginning(creating an Atlassian account).
Step 1: Creating an Atlassian Account
1. Go to the signup page of Atlassian enter the required user credentials asked on the site and then click on the SignUp button.
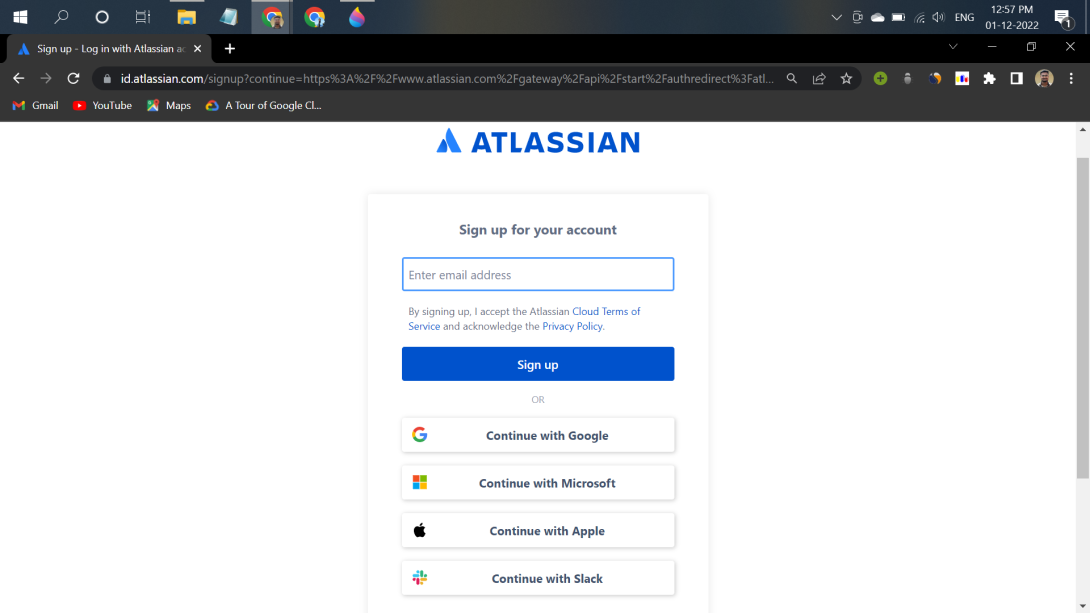
Signup Page
2. To complete the setup and login, click the verification link in the email box.
3. Set up your Atlassian account.
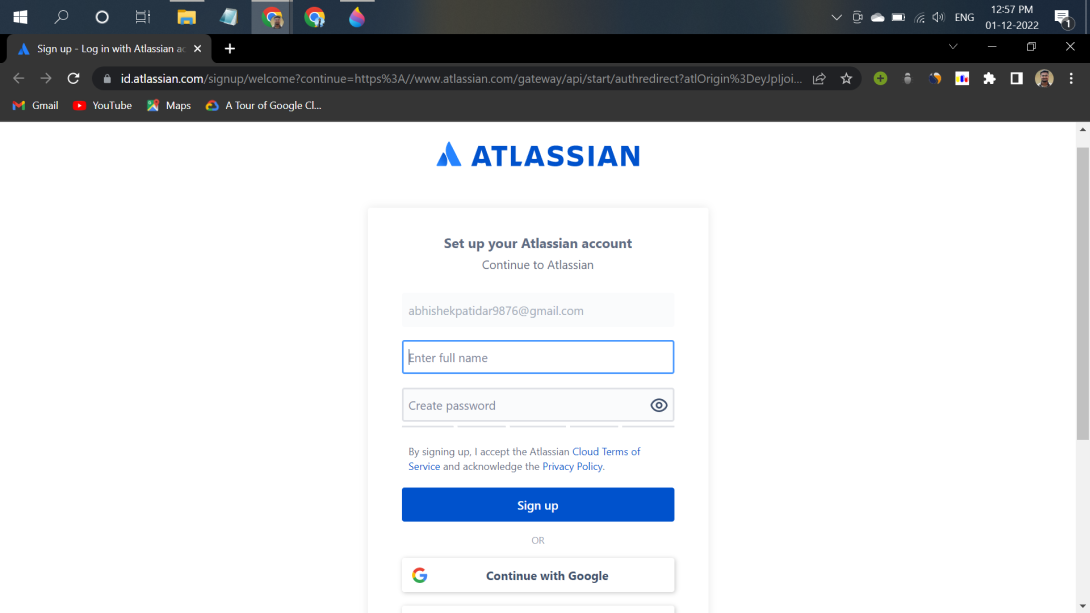
Page after clicking verify in the mail
4. Click on signup after filling details. The account has been created. The user is automatically redirected to the home page.
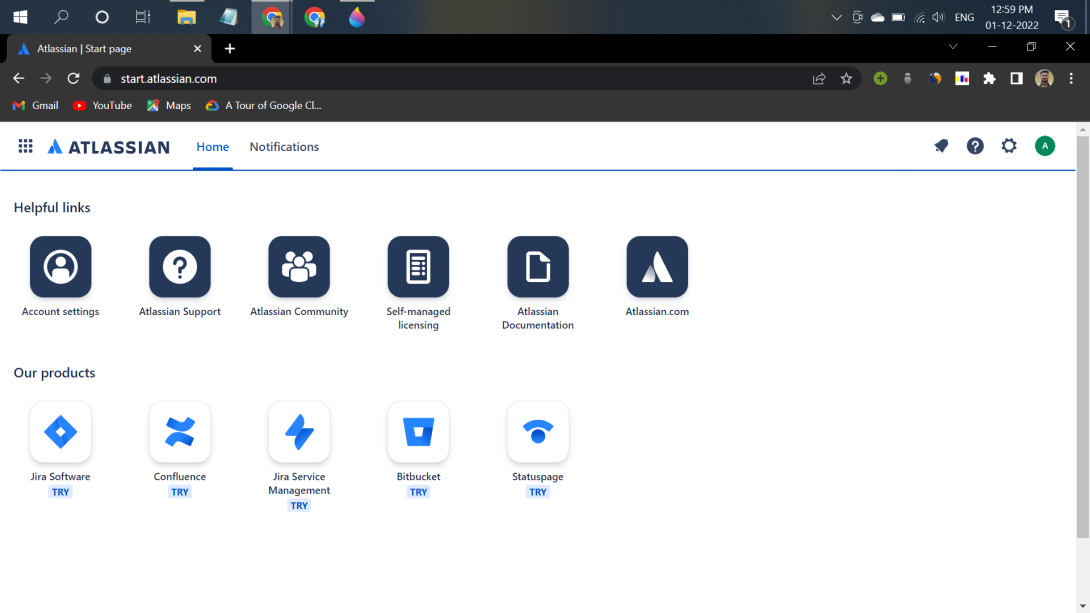
Home page
Step 2: Creating a new Project
1. Log in to your Atlassian account.
2. On the home page click on the Jira software and fill required details.
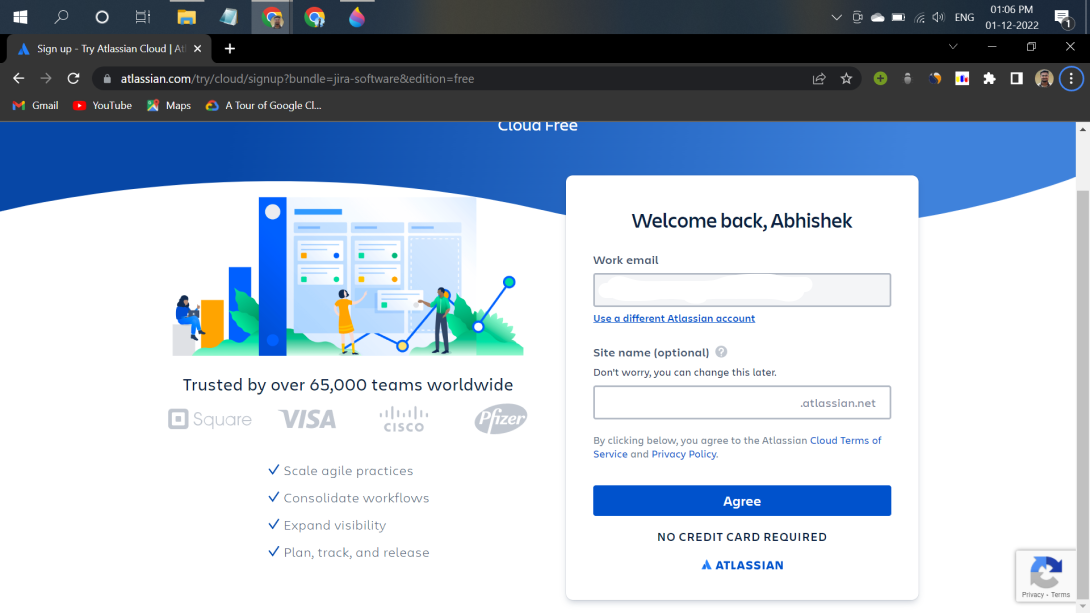
Jira Software
3. Answer some basic questions asked there to set up JIRA personally for your team.
4. Select your project name and template framework like Scrum or Kanban, etc. for your project.
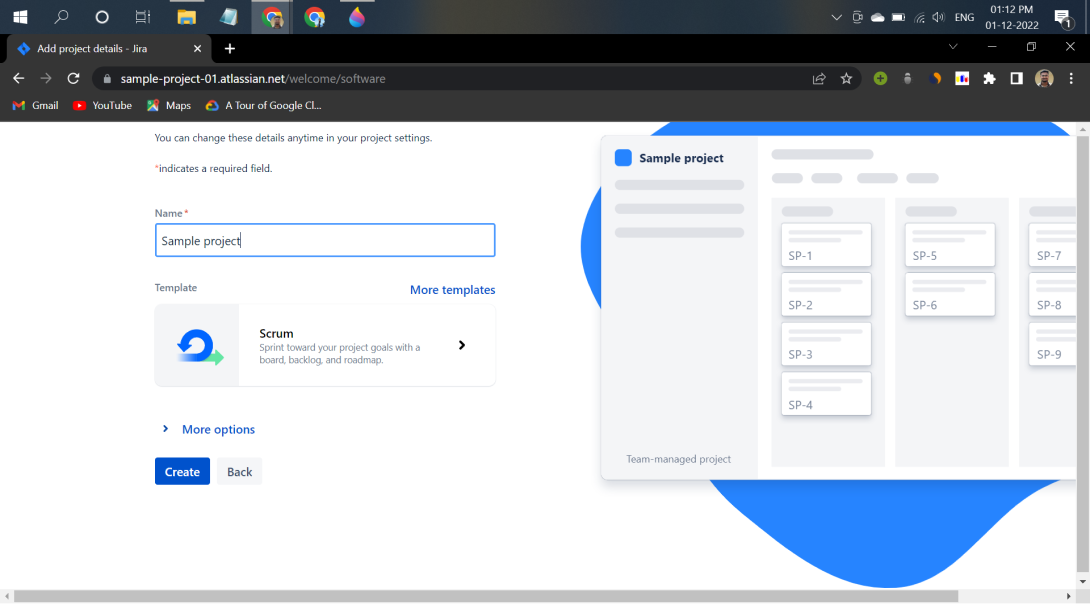
Project Details
5. After completing the above steps, the following screen will be displayed:
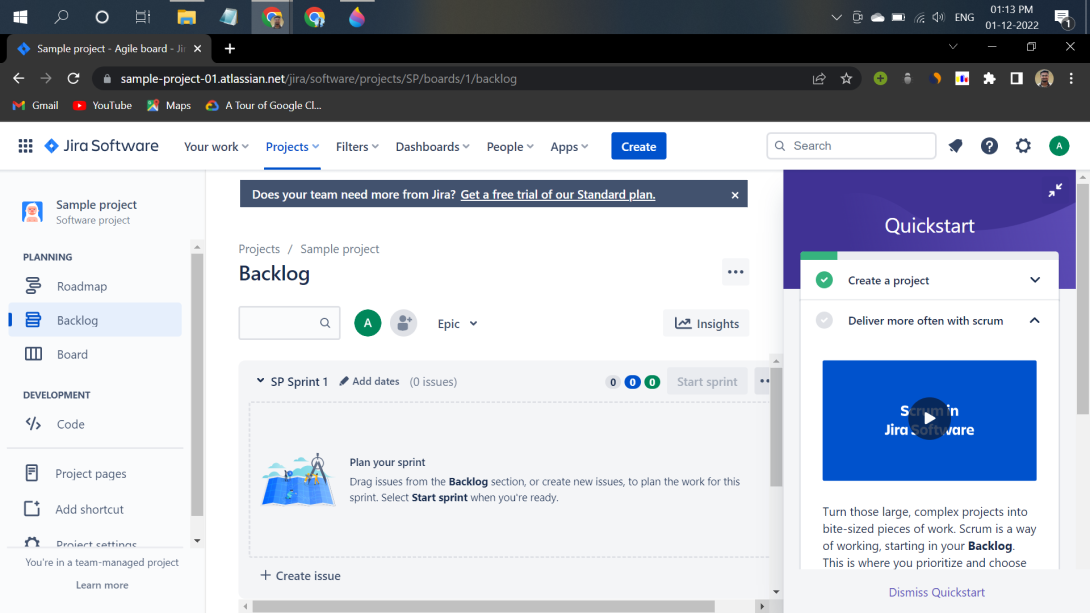
Jira Software Home page
Four main sections are there:
- Roadmap: It is an action plan for how our project will evolve.
- Backlog: It is usually a list of issues describing what your team will be doing on the project.
- Board: It shows work to be done, work in progress, and work done.
- Code: In this, we can create an automated DevOps workflow and minimize context switching between Jira Software and Bitbucket, GitHub, GitLab, and other source code management tools.
Generally, a project is divided into epics and one epic can contain multiple sprints. Each sprint has multiple issues like user stories. A sprint is a fixed period (it can vary from project to project but in a single project, the duration of each sprint should be the same) in a development cycle where the project team completes work from the product backlog. JIRA’s user stories are concise representations of the system’s evolving capabilities, written by people who need that new functionality.
Now we have to create an epic first. So click on create select the issue type as epic fill in other requirements and create your first epic. Now create another issue “user story” to implement the first functionality for example register functionality of your project. Now move this issue to the already made sprint and start the sprint. Now your first sprint has started. We can also assign epic to the different issues.
JIRA Scrum vs JIRA Kanban
Kanban vs Scrum discusses two different strategies for implementing an agile development or project management system. Kanban is continuous and more fluid, while Scrum is based on structured short work sprints.
| Parameters |
Kanban |
Scrum |
| Origin |
Lean manufacturing. |
Software development. |
| Ideology |
Use visuals to improve work-in-progress. |
Learn through experience, self-organize and prioritize, reflect on wins and losses, and continuously improve. |
| Sequence of events |
Continuous flow. |
Regular, fixed-length sprints (i.e. two weeks). |
| Practices |
Visualize workflows, limit work in progress, control workflows, and incorporate feedback loops. |
Sprint planning, sprint, daily scrum, sprint review, sprint retrospective. |
| Roles |
No required roles. |
Product owner, scrum master, and the development team. |
JIRA Scheme
A JIRA scheme is a collection of values that can be used in one or more JIRA projects. And that is the strength of the scheme. A configuration you’ve been working on for a long time can be done once. As soon as the next project with the best configuration is created, you can apply the created scheme to the new project with just a few clicks.
Some schemes that apply to the entire JIRA project or all issue types within the project are:
- Issue Type Scheme: What issue types (Bug, Feature) can be used in a JIRA project?
- Notification Scheme: Who receives what email when the content of the issue changes?
- Permission Scheme: Who can do what to an issue?
- Issue Security Scheme: Who can see specific issues?
Let us see some of these in more detail.
Issue Type Scheme
Jira administrators can group issue types into issue-type schemas to make it easier for teams to select the right type when creating issues in a project. Even when managing multiple projects, the transactional scheme minimizes maintenance effort.
The issue type schema allows you to:
- Specifying Issue Types Available in a Project.
- Setting Default Issue Types and Issue Type Orders When Creating Issues.
- Sharing the Same Set of Issue Types Across Multiple Projects.
As an example, you can use the problem type schema set up for a development team working on a software project. You can then add defect and feature issue types to this schema and apply it to all other projects containing similar work.
Issue Security Scheme
You can create issue security levels within an issue security scheme to control who can see specific issues. Associating an issue security scheme with a project allows you to apply that security level to issues in that project. Subtasks inherit the security level of their parent task. You must be a JIRA Cloud administrator to configure issue-level security.
Steps to Create an Issue Security Scheme:
- Select settings -> Issues.
- Under Issue Attributes, select Issue Security Scheme.
- Click Add Issue Security Scheme.
- Enter the requested details and click Add.
Add Security Levels to Issue Security Scheme:
- Select settings -> Issues.
- Under Issue Attributes, select Issue Security Scheme.
- Click the scheme name or the Security Level link in the Actions column.
- Enter the requested details and click Add Security Level.
System Administration
JIRA offers several useful features for administrators and users:
- Custom Workflows: JIRA allows administrators to create custom workflows for managing issues and tasks, which can be tailored to specific needs and processes.
- Dashboards and Reports: JIRA provides a range of dashboards and reports that help administrators get a real-time view of their work and make data-driven decisions.
- Integrations: JIRA integrates with a wide range of other tools and services, including development tools, collaboration platforms, and databases, which helps to streamline workflows and improve productivity.
- User Management: JIRA provides administrators with a range of tools for managing users, including user permissions, user groups, and user roles.
- Custom Fields: JIRA administrators can create custom fields to capture additional information about issues and tasks, which helps to provide a more complete view of work.
- Time Tracking: JIRA provides time-tracking features that help administrators track time spent on tasks and projects, which can be useful for reporting and billing.
- Mobile App: JIRA provides a mobile app that allows users to access their work from anywhere, including the ability to update tasks, add comments, and more.
These are just some of the useful features that JIRA administrators offer users. JIRA is known for its versatility and customization capabilities, which allow administrators to tailor the tool to their specific needs and workflows.
JIRA Issues and Issue Types
In JIRA, an “Issue” is a unit of work that needs to be tracked, such as a bug, feature request, task, or any other type of work item.
Several different issue types in JIRA can be used to categorize and organize work items. Some common issue types include:
- Bug: A problem with the software that needs to be fixed.
- New Feature: A request for a new feature or enhancement to be added to the software.
- Task: A specific piece of work that needs to be completed, such as a software development task or a project management task.
- Epic: A large body of work that can be broken down into smaller tasks and stories.
- Story: A small piece of work that represents a user’s need or requirement.
- Incident: A problem or disruption to a service that needs to be resolved.
JIRA administrators can customize the issue types in their instance of JIRA to match their specific needs and processes. For example, they can add new issue types, rename existing issue types, or change the fields and workflows associated with each issue type.
JIRA Issue Attributes
Attributes represent specific information attached to an object. A description of that object, its model number, another associated object, or the user assigned as the owner of the object.
Attributes can contain different types of information, such as text values, numbers, or references to other objects. It can also be customized to include very specific information. A postal code, a specific string pattern, a specific type of object, or a required value.
Each object contains four default attributes. The attribute is set as the object’s label, the object’s key, when the object was created in Assets, and when the object was last modified.
Issue Status
JIRA Issues have several attributes that help to describe and track them. Some of the most common attributes include:
- Summary: A short, descriptive title for the issue.
- Description: A more detailed explanation of the issue and its requirements or specifications.
- Status: The current state of the issue, such as “Open”, “In Progress”, “Resolved”, or “Closed”.
- Assignee: The person responsible for working on the issue.
- Reporter: The person who reported the issue.
- Priority: The priority level assigned to the issue, such as “High”, “Medium”, or “Low”.
- Labels: A way to categorize and label issues, making it easier to filter and search for related issues.
- Components: A way to break down a larger issue into smaller components.
- Fix Version: The version of the software that the issue will be fixed in.
- Due Date: The date by which the issue needs to be completed.
JIRA administrators can customize the attributes and fields associated with each issue type in their instance of JIRA to match their specific needs and processes.
Jira Software Statuses
JIRA software uses statuses to track the progress of issues and tasks. Some common statuses include:
- Open: The issue is new and has not yet been assigned to anyone.
- In Progress: Work has begun on the issue, and it is being actively worked on.
- Resolved: The issue has been fixed, but it may still need to be tested or verified.
- Closed: The issue has been resolved and is no longer a concern.
- Reopened: The issue has been reopened after being previously resolved.
- Pending: The issue is waiting for something else to happen, such as input from another team member.
- On Hold: The issue has been temporarily paused and will be resumed later.
- Deferred: The issue has been postponed and will be addressed at a later date.
- Done: The issue has been completed and is ready for closure.
JIRA administrators can customize the statuses and workflows for their specific needs and processes and can add or remove statuses as needed.
Jira Service Management Statuses
If you’re using Jira Service Management, you also get the following statuses by default, depending on the projects you’ve created on your site.
- Declined.
- Waiting for support.
- Waiting for the customer.
- Pending.
- Canceled.
- Escalated.
- Waiting for approval.
- Awaiting CAB approval.
- Planning.
- Awaiting implementation.
- Implementing.
- Peer review/change manager approval.
- Work in progress.
- Completed.
- Under investigation.
Issue Priorities
A topic’s priority indicates its relative importance. Administrators can customize priorities and their importance to their organization. The default priorities are:
- Highest: This problem is blocking progress.
- High: Serious problem impeding progress.
- Medium: May affect progression.
- Low: Minor issue or easy workaround.
- Lowest: Minor issue with little or no impact on progress.
Issue Resolutions
Problems can be closed or resolved in several ways. Normally when the status changes, the resolution is set. Your administrator may have customized these for your organization. The following Issue Resolutions are shipped with Jira products by default.
- Done: Work on this issue has been completed.
- Won’t do: This issue will not be resolved.
- Duplicate: A problem is a duplicate of an existing problem.
Jira Software Resolutions
Using Jira Software, you also get the following solutions by default.
- Cannot Reproduce: All attempts at reproducing this issue failed. Reading the code gives no clue as to why this behavior occurs. If you see more information later, please reopen the issue
Jira Service Management Resolutions
If you have Jira Service Management you by default get these resolutions:
- Known error.
- Hardware failure.
- Software failure.
How to Create an Issue in JIRA?
1. Select the blue colored Create button located on the top of each page.
.png)
Create Issue
2. Enter a brief description of the problem in the Summary.
.png)
Fill Summary
3. Complete all required fields and all other required fields and When finished, select Create.
.png)
Issue Created
JIRA Components
A component is a subsection of a project. These are used to group issues into smaller sets within a project. For example, a team can use components to group issues that describe work on a particular data object, service, plugin, or API within a project.
- One can tell JIRA Software to override the project’s default assignee when using a specific component.
- The component is a core feature of JIRA Software and is enabled by default. The Components page displays a list of components and details about each component.
- The Components page displays a list of components and details for each component. It includes Name, Description, Lead, Default assignee, Associated issues, etc.
- One can add, edit, or delete components on the project’s Components page.
JIRA Screen
This is the placement and appearance of the fields displayed in the user interface when creating new issues, modifying existing issues, and transitioning issues from one state to another. When a user logs in as an administrator and navigates to Settings > Problems > Screens, all available screens are displayed. The screenshots below show the screens available for different projects. By clicking three dots, the user can see all the fields available on this screen. On the other hand, organized orders are displayed in the user interface.
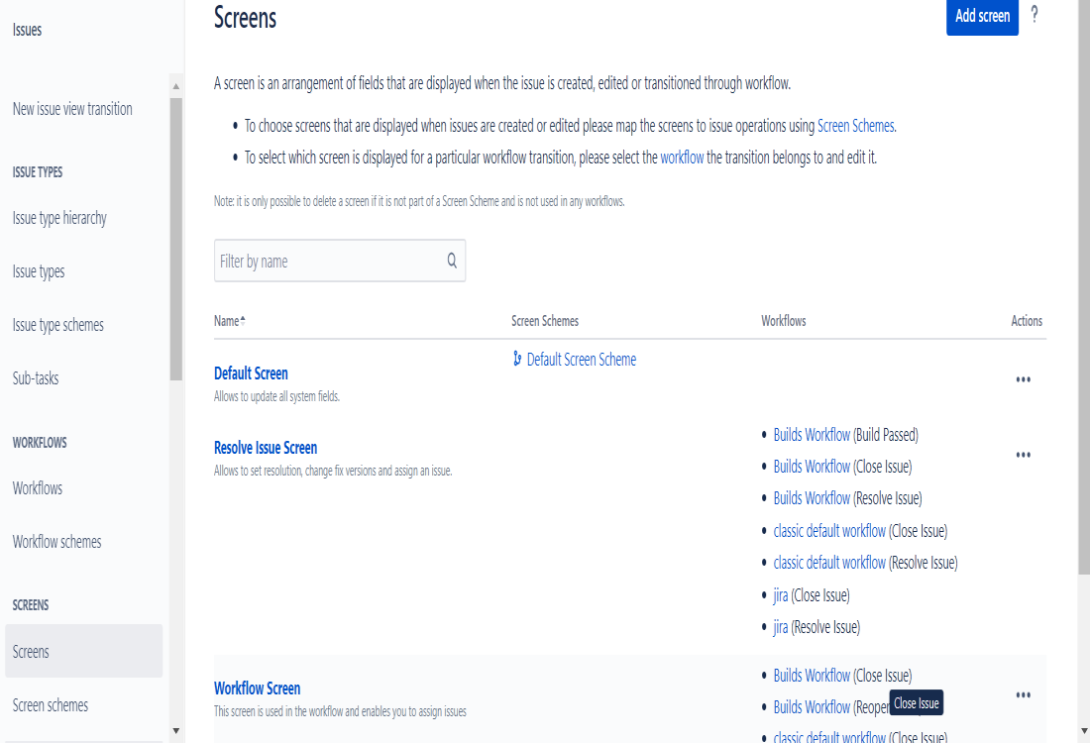
Jira Screens
Screen Schemes
Screen schemes provide options for choosing which fields to display when a particular question type is selected. Screen schemes are associated with question types using the question type screen scheme. Can be assigned to one or more projects. A screen scheme can only be deleted if it is not used by an Issue-type screen scheme. A user can add a new screen scheme by clicking the Add Screen Scheme button.
Sub-Task
JIRA administrators can create subtask issue types to divide larger units of work into tasks that teams can assign and track individually. Subtasks are enabled by default. However, if your team only needs to work with standard issue types, you can turn them off.
Sub-task issue types are different from regular issue types. By default, team-managed projects have the sub-task issue type enabled. If your project doesn’t have a subtask issue type, you’ll need to add it:
1. Go to your team management software project.
.png)
Project settings
2. Go to Project Settings -> Issue Types.
.png)
Issue types
3. Select Add Issue Type.
.png)
Subtask
4. Select subtask.
WorkFlows
JIRA uses workflows to track the lifecycle of issues. A workflow is a record of states and transitions throughout an issue’s lifecycle. A status represents the status of an issue at a particular point in time. An operation can only have one status at a given time. For example: Open, To Do, Completed, Closed, Assigned, etc. A transition must exist for an operation to switch between two states. Simply put, migration is a type of work on a problem, and status is the impact of working on that problem.
A Jira workflow is a series of states and transitions that an issue fails through its lifecycle and provides a process within your organization. can be associated with. Jira has built-in workflows, you can use them out of the box, or start from scratch and create your own. You can’t edit the built-in workflows, but you can copy them and base your workflows on them.
The default workflow is shown below:
.jpg)
Workflow
Plug-ins in JIRA
JIRA plugins are software that users can install to improve the functionality of JIRA. These are commonly referred to as “apps” or “add-ons” at Atlassian. There are over 3000 unique plugins and nearly 1000 vendors in the Atlassian Marketplace.
There are popular JIRA plugins for almost every need, and sifting through them to find the best one for your organization can be a tedious process. To save you time, here’s a list of 10 high-quality plugins covering a variety of use cases.
- Zephyr for JIRA: Zephyr is a robust test case management tool that allows users to create test plans and associate them with specific Jira issues and types. The app has a folder structure that logically groups tests within cycles. These test cycles can be planned ad-hoc or structured.
- Automation: Automation automates routine Jira processes and workflows. As projects grow in scope and more users participate, Jira admins spend hours on activities like creating issues, prioritizing them, and adding comments. Automation removes this overhead by allowing administrators to configure rule-based actions using simple visual building blocks. The learning curve is minimized because you don’t have to write custom scripts.
- Email This Issue: Email This Issue provides Jira users with a variety of useful email features. The Titles feature allows users to email issues from within Jira without having to switch to a different email client. Emails can be sent to certain types of recipients within Jira Officers or Reporters, and External Email Addresses. Users can also track emails on specific issues and automatically receive notifications when specific events or workflow transitions occur. It also makes it easy to create custom email forms using its powerful templating capabilities.
- eazyBI Reports and Charts for JIRA: Jira contains a comprehensive repository of project information that can be mined with eazyBI for business intelligence. eazyBI can also generate reports and charts to visualize Jira’s rich data and embed this data into dashboards for regular monitoring. A drag-and-drop report builder simplifies the creation of these visualizations. Available visualization types include tables, scatter plots, bar charts, line charts, and pie charts.
- JSU Automation Suite for JIRA Workflows: JSU Automation Suite is a script-free workflow automation app. It helps automate repetitive tasks and keep data in sync and consistent across related issues. Administrators can set prerequisites that must be met before performing post functions using JSU. This is a way to define additional processes that need to run during migration.
- ScriptRunner: ScriptRunner offers advanced automation capabilities at the expense of complexity. ScriptRunner lets you customize standard Jira workflows, behaviors, and form fields in Groovy, an open-source scripting engine. ScriptRunner is also great for creating custom reports using advanced Jira Query Language functions, keywords, and subqueries.
- BigPicture: BigPicture is a project portfolio management tool that helps you manage resources, risks, roadmaps, and tasks across multiple projects. BigPicture lets you create and manage collections of Jira projects called programs. The plugin’s dashboard provides valuable insight into dependencies between applications based on information from Jira projects.
- Git Integration: Git integration unifies Jira and Git code repositories so developers and reviewers don’t have to switch between the two applications. This plugin supports all Git servers including GitLab, GitHub, and Beanstalk.
- BigGantt: BigGantt integrates with Jira to provide Gantt charts that automatically reflect updates to issues. A drag-and-drop interface allows users to easily visualize schedules and resource dependencies. BigGantt helps users track due dates and status and can automatically generate a work breakdown structure. Additionally, BigGantt content can be exported to MS Excel and MS Project using another Jira plugin called BigTemplate.
- Tempo Timesheets: Tempo Timesheets help you track time spent on projects in Jira. You can use it to record your work in several ways to automatically sync activities and accounts for vacations and other activities. Managers can easily access team members’ timesheets and approve or reject them in bulk. Tempo is also a great data source for creating reports, understanding where your time is spent, and increasing your productivity.
Reports in JIRA
In JIRA, we can see different reports of our project by enabling report features inside project settings. It shows different reports like burnup reports, burndown reports, velocity reports, etc. Here is a short description of some of them.
1. Burnup Report
Visualize the sprint’s completed work and compare it to the overall scope. Use these insights to track progress toward sprint completion.
-overlay.png)
Burn-up Report
2. Burndown Chart
Track and manage the total remaining work within a sprint. Summarize both team and individual performance after the sprint.
-overlay.png)
Burn Down Chart
3. Velocity Report
Predict how much work your team can deliver in future sprints by reviewing and confirming the value delivered in previous sprints. An example is given below.
-overlay.png)
Velocity Report
4. Cumulative Flow Diagram
A cumulative flowchart shows how stable the flow is. It shows weaknesses and offers actionable suggestions for improvement. An example is given below.
-overlay.png)
Cumulative Flow Diagram
Share your thoughts in the comments
Please Login to comment...