JIRA Login
Last Updated :
01 May, 2024
JIRA is a versatile and dynamic project management software that provides a wide range of tools and features to help teams of all sizes manage their projects from start to finish. From issue tracking to agile project management to customizable workflows and integrations, JIRA empowers teams to work more collaboratively and efficiently, allowing them to focus on what really matters – delivering high-quality projects on time and within budget. It was developed by Atlassian and it is used by thousands of organizations around the world,
Jira is a powerful project management tool that helps teams of all sizes manage their projects efficiently and in an easy way. Jira provides a vast range of features for developers so that they can stay organized and on track. With its customizable features and integrations, Jira can be tailored to meet the team’s specific needs.
Prerequisites for JIRA Login
- To log in to a Jira account you need to have a valid Jira account. The account can be a user account or an administrator account.
- In order to authenticate your identity you need to have your username and password registered with the Atlassian website in order to access Jira.
- You need to have an active Internet connection with you to log in to your Jira account as Jira is a web-based software.
- If two-factor authentication is enabled, you will also need to have access to the verification code from your authenticator app.
- You need to have the URL of the Jira instance you want to access and the permission from the organization administrator to log you in.
- At last, you need an effective web browser that supports Jira.
How to Login in Jira Account
If you want to Log-in into your Jira account and want to start working on Jira follow the given steps:
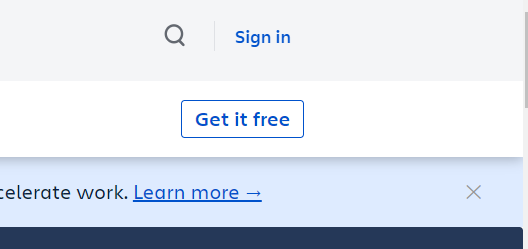
Step 1: To start with Jira kindly visit the link given https://www.atlassian.com/software/jira it will redirect you to the official website of Jira i.e. Atlassian. Now as you click on the link Atlassian website’s homepage appears on the screen. Click on sign-in option on the right-hand side of the screen.
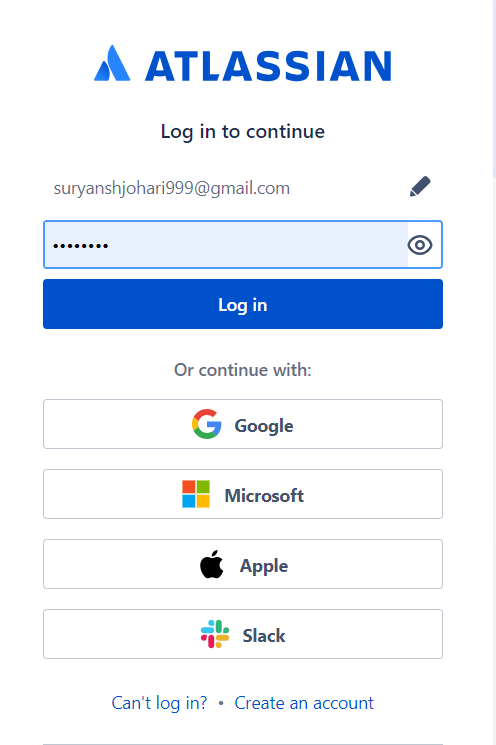
Step 2: After you click on sign in button, you are required to enter your credentials registered with the Atlassian now click on Log in button. If you are visiting for the first time then you can click on create an account option. After that, you are successfully logged in and you can start working but if you don’t have any project created then continue with the steps.
Step 3: After you have logged in now go to products sections and there look for Jira Software. Click on Jira software to start working with Jira Software. Only if you are visiting for first time else you can choose your product and start working.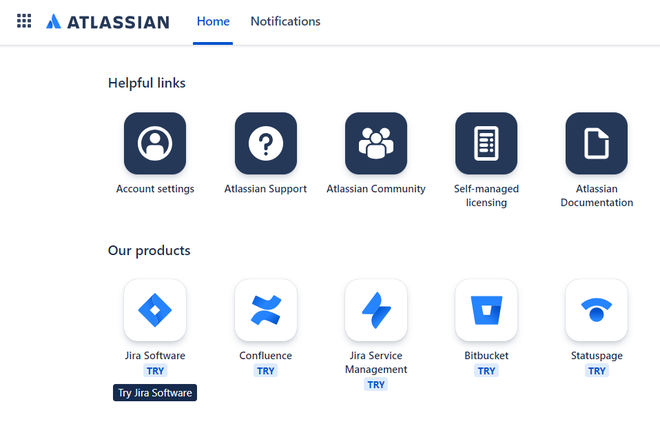
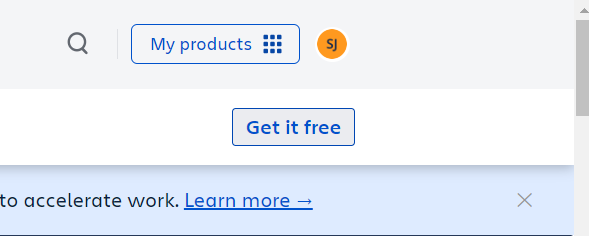
Step 4: After you click on Jira Software you are required to click on Get it free button in order to start using a free version of Jira software to ease your work as a developer.
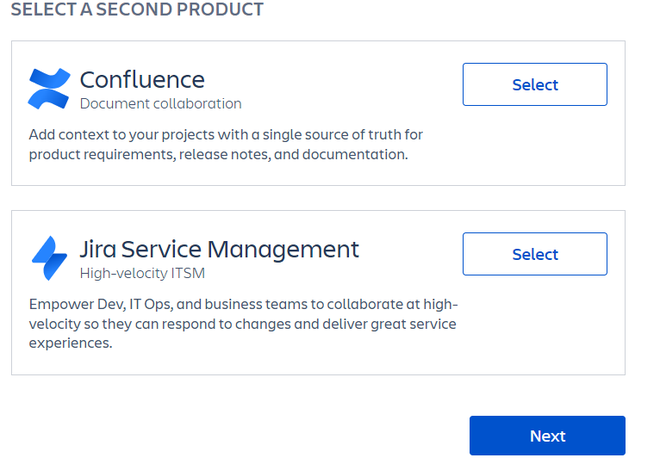
Step 5: Now you will be asked to select a secondary product with the Jira software to help you with your work so you can select the product according to your need. In this case, there’s no requirement of a second product so, simply clicking on Next button.
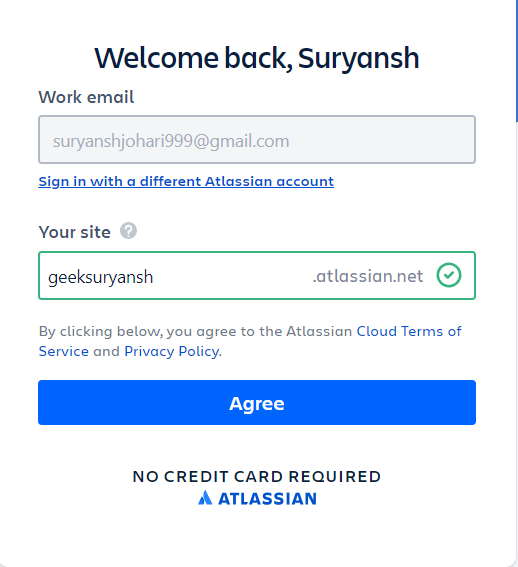
Step 6: After you have clicked on next button, now you are required to enter your work email id, with the name of the site with the domain of .atlassian.net being automatically added with your site and click on Agree button.
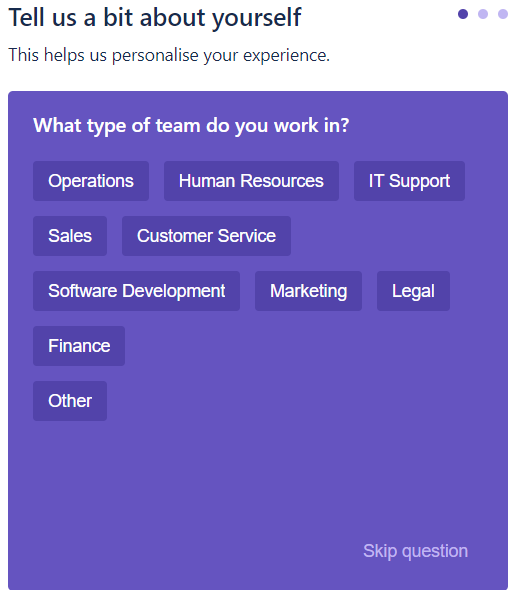
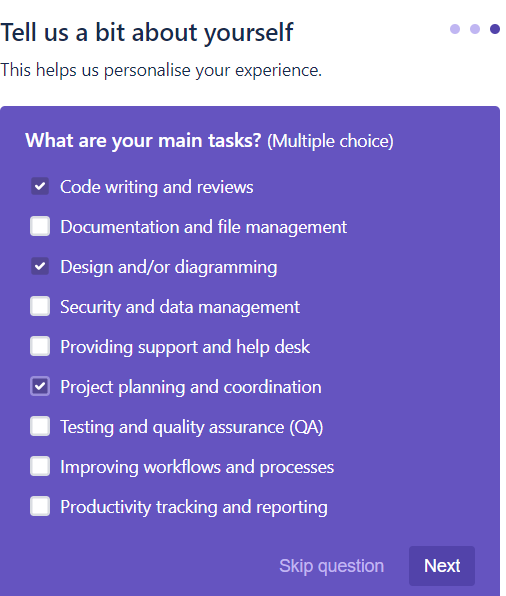
Step 7: After that Atlassian will ask you to describe yourself which will help them to personalize your experience by asking you three questions i.e. about your team, your role and your main tasks. You can provide the relevant answers according to your knowledge and then click on Next button.

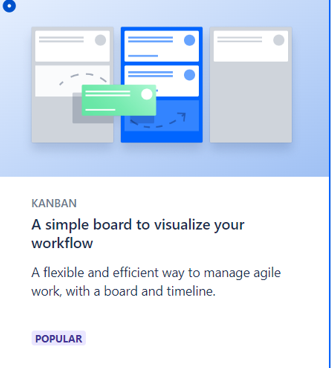
Step 8: Now you are required to choose a template for your first project. There will be 3 templates but as example, I have chosen the following template for my project.
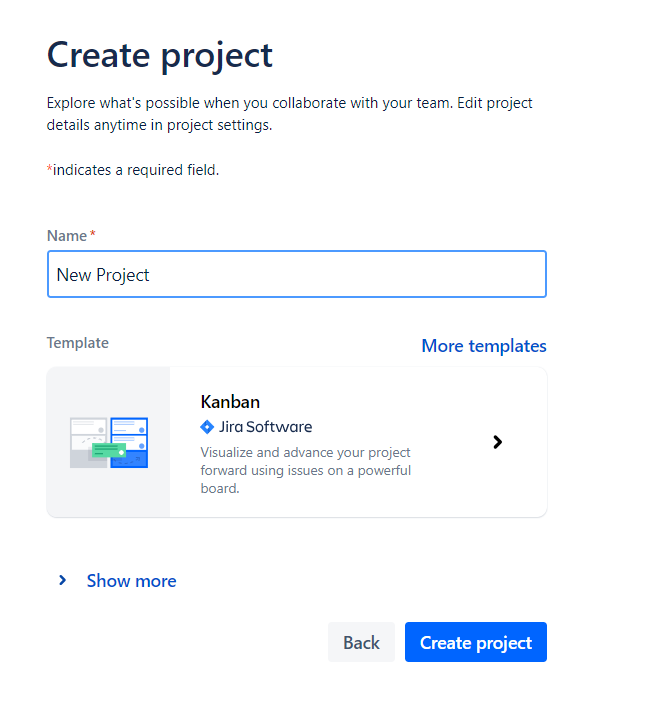
Step 9: Now you can create your project by simply giving a name to your project which will best describe your project and then simply click on the Create Project button. You can also explore more themes by clicking on More templates button.
Step 10: Now it will ask you to choose some tools for easing your work in the project. So you can choose the tools according to your requirements in this case I am simply skipping them but if you are choosing any tool then click on Next button.

Step 11: After choosing the required tools now finally you can start working with project and perform the operation according to your team’s need. Now all the information about the account has been saved so next time when you Log in you don’t have to perform the above steps again.
-660.png)
Conclusion
JIRA login is a simple and straightforward process that requires a valid email address or username and password associated with the JIRA account. By following the steps outlined in this article, users can log in to JIRA and access the powerful project management tools that JIRA offers. With its customizable workflows, integrations, and agile project management features, JIRA is a valuable tool for teams of all sizes, helping them manage their projects more efficiently and effectively.
Share your thoughts in the comments
Please Login to comment...