Understand Soap WebServices to Automate through Postman Tool
Last Updated :
05 Feb, 2024
In the ever-evolving software development, embarking on SOAP Web Services and automating the help of the Postman tool is like unlocking the doorways to effective application development. SOAP, or Simple Object Access Protocol, is a language application used to communicate, and delving into its intricacies is key for developers. Now, consider having Postman as your trusty guide—a device that makes the testing manner extremely clean, ensuring your APIs work easily. In this exploration, we can discover ways to automate SOAP Web Services through the capabilities of Postman, empowering you to streamline your improvement method and create dependable, robust solutions. Now let’s dive into the simplicity of automating SOAP Web Services with Postman.
Prerequisites
Steps to Automate Soap WebServices through the Postman Tool
Step 1: Create Collection
Open the Postman application on your computer and click on the ” Collections ” tab to create the collection in the Postman. This step will allow you to organize and keep related API requests effectively, providing a framework for organizing your project.
Step 2: Create a New Request
Now after creating your collection click on the ” New ” button to create a new request. This technique lets you specify information and parameters for developing and testing API functionalities efficiently.

Select the “POST” request by clicking on the dropdown menu, indicating the specific HTTP method for use for the API request. ” POST ” is normally used for SOAP requests as it fits the data submission and complicated operation nature of SOAP transactions.

Step 3: Provide WSDL URL
Enter the WSDL (Web Services Description Language) URL of the SOAP service you need to automate. The WSDL defines the agreement between the consumer and the carrier.
https://www.dataaccess.com/webservicesserver/NumberConversion.wso

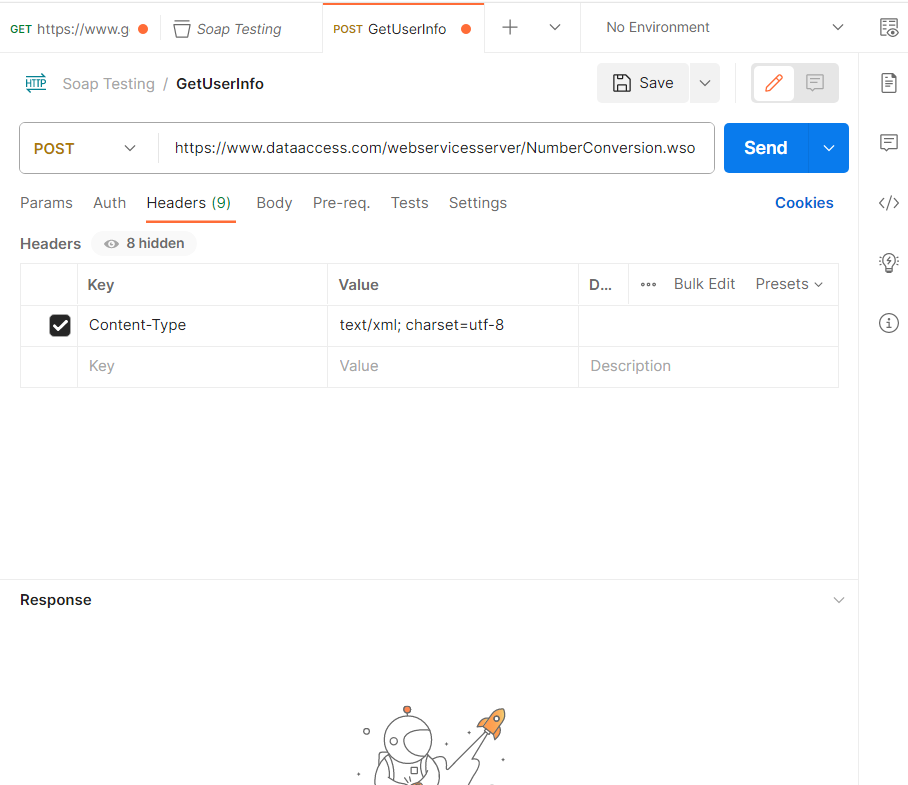
Step 4: Set Headers
Make sure that SOAP requests include the headers. Including headers is an important step to ensure that everything goes well during the communication process. Adding headers is very essential before sending the request.
|
Key
|
`Content-Type`
|
|
Value
|
`text/xml; charset=utf-8`
|
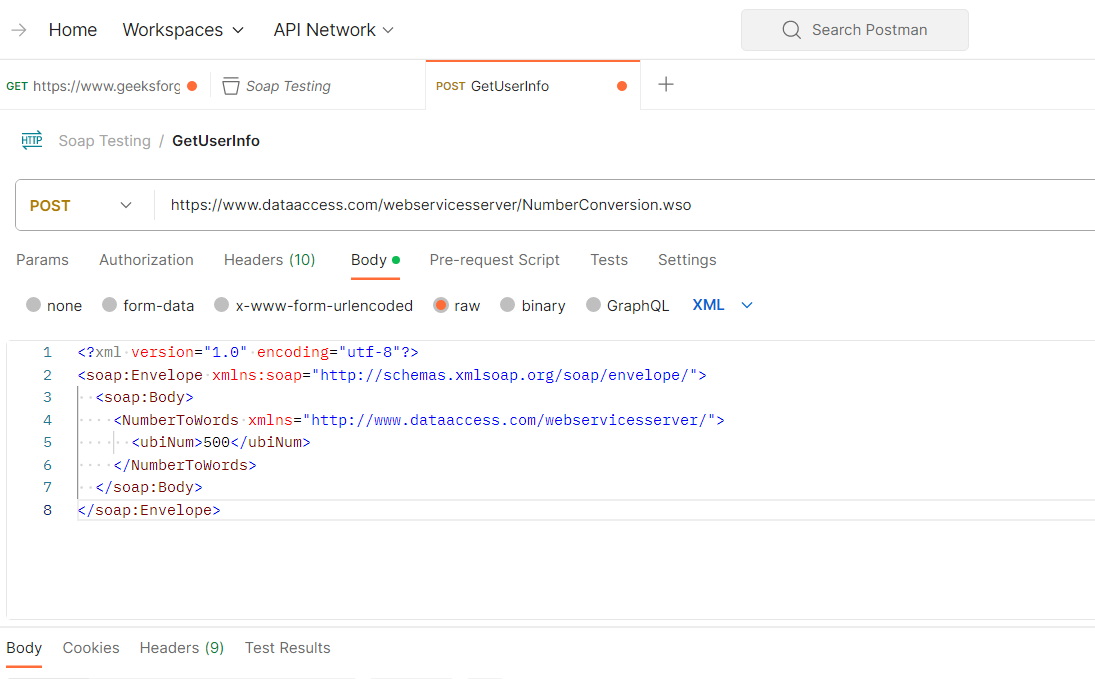
Step 5: Build the SOAP Request Body
Now switch to the ” Body ” tab. Select the raw option and enter your SOAP request XML in the request frame.
Step 6: Authentication (if required)
If including the authentication is required for the SOAP service, then add the authentication by clicking on the “Authentication” tab. Adding authentication makes sure secure and proper access is done to the SOAP service.
Step 7: Send the Request
For sending the SOAP request click on the ” Send ” button, this will allow you to send the SOAP request. This step indicates the request has been sent to the SOAP provider endpoint. This step also checks if the proper communication done with the SOAP provider is a success or not.

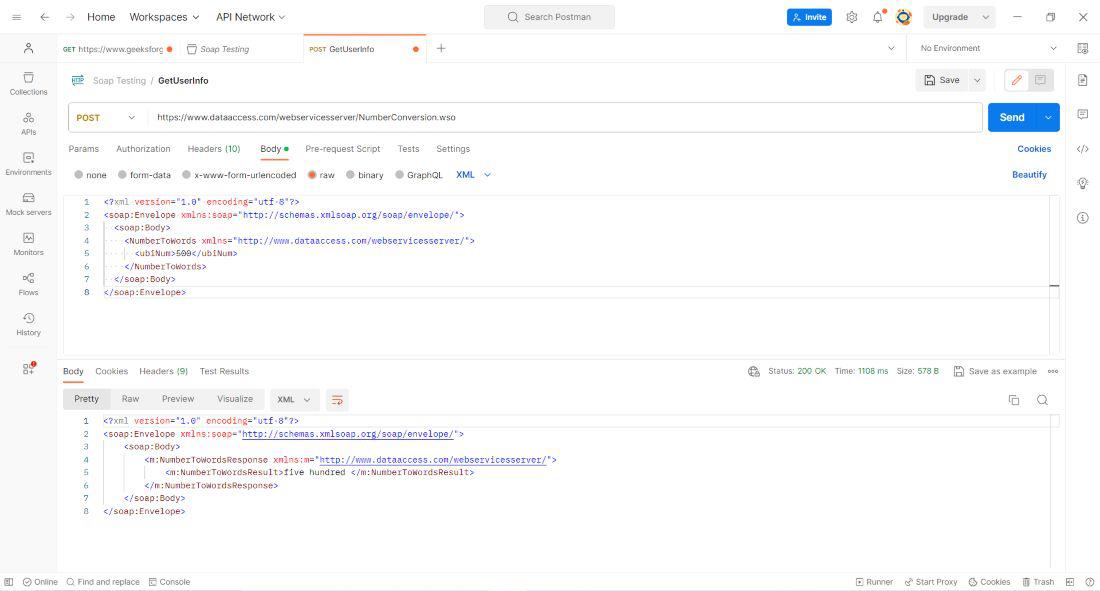
Step 8: View Response
Once you have done sending the SOAP request in the Postman, the response from the SOAP request will be shown. This will let you examine the response in the body, review headers and other information, and make sure that the request is processed correctly. It will help you to analyze the requested result for further evaluation.
Step 9: Save and Organize
Now by clicking on the save icon as shown below save your collection for future use. This will allow you to organize your requests in the folders within the collection, it will make sure that testing for APIs is easy, and navigable and the workflow is smooth.
.png)
Step 10: Set Up Pre-request Scripts
Open every request in the collection. Now in this step click on the “Pre-request Script” tab to add the scripts. It should be added before the request is sent (e.g., authentication, dynamic data generation).

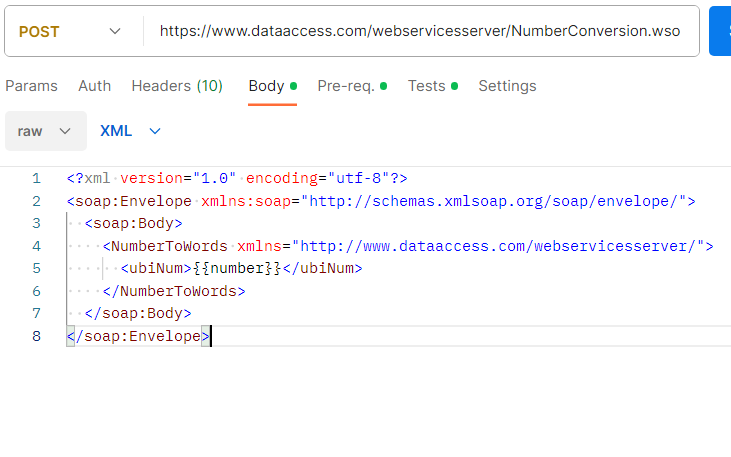
Step 11: Use Variables
To make your requests dynamic you can use variables. The variables are defined by using double curly (e.g., {{ variable_name }}) braces in the collection or request level.
Use Environment Variables:
XML
<?xml version="1.0" encoding="utf-8"?>
<soap:Body>
<ubiNum>{{number}}</ubiNum>
</NumberToWords>
</soap:Body>
</soap:Envelope>
|
Step 12: Set Environment for Collection
Now for the testing environment select whatever testing environment you desire from the dropdown menu. When running the collection this environment will be used.

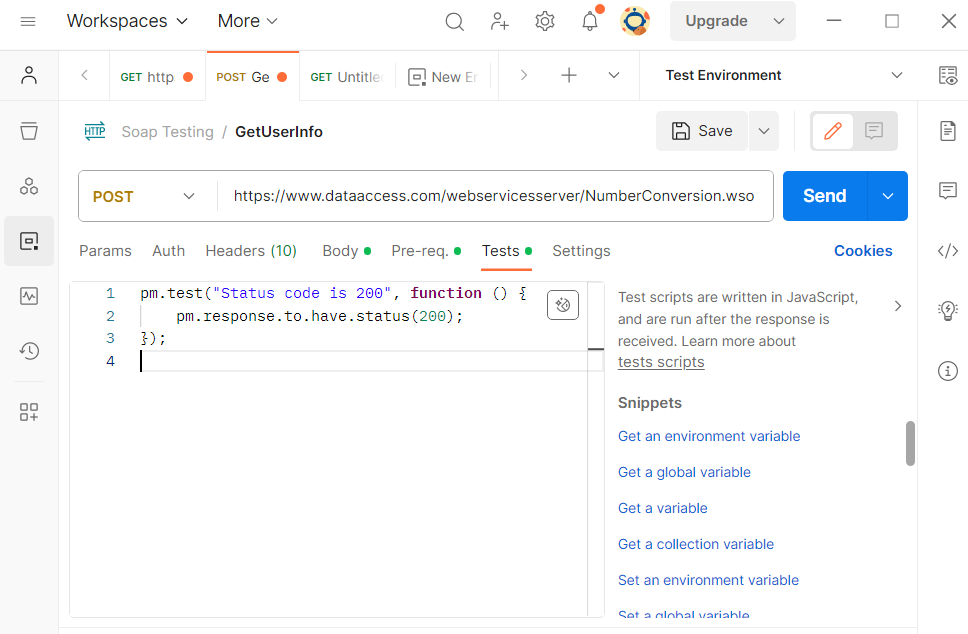
Step 13: Run Tests
For this step you have to open the “Tests” tab for every request and write JavaScript code to get the response, after that check the status code and perform other necessary checks.
Step 14: Automate Tests in Collections
Tests written in requests will automatically run when you execute the collection. Use pm.test functions to define assertions.
Example:
pm.test("Status code is 200", function () {
    pm.response.to.have.status(200);
});
Step 15: Save and Send request
Send the request and after sending the request review the response from the request that you have just sent in the body. This will ensure that the request is properly sent with all the required information and data for communication with the soap service.

Step 16: Monitor and Schedule
Postman provides monitoring capabilities for API testing. Click on the ” Monitor ” tab and set up monitors to run collections at specified intervals.

Step 17: Configure Monitoring Settings
Define the frequency, environment, and other settings for your monitor. Set the monitor to run in the specified intervals eg., hourly, daily.

Once you have configured the settings for your Postman Monitor, finalize the process by clicking the ” Create Monitor ” button, initiating the scheduled and automated execution of your specified API tests at predefined intervals. This feature streamlines the continuous testing of your SOAP requests, promoting efficiency and proactive issue identification.

Step 18: View Monitoring Results
You can view the results in the Postman dashboard, after a monitor runs, this helps in tracking the performance of your APIs over time.

Conclusion
In conclusion, getting the hang of SOAP Web Services and automating them with Postman is very crucial for developers. It ensures our applications are sturdy, and using Postman makes testing extremely easy, saving time and boosting overall efficiency. So, embracing these skills empowers us to create reliable and seamless software solutions and sets us up for success in the ever-evolving world of development.
Share your thoughts in the comments
Please Login to comment...