Single Layer Perceptron in TensorFlow
Last Updated :
09 Jan, 2023
In this article, we will be understanding the single-layer perceptron and its implementation in Python using the TensorFlow library. Neural Networks work in the same way that our biological neuron works.
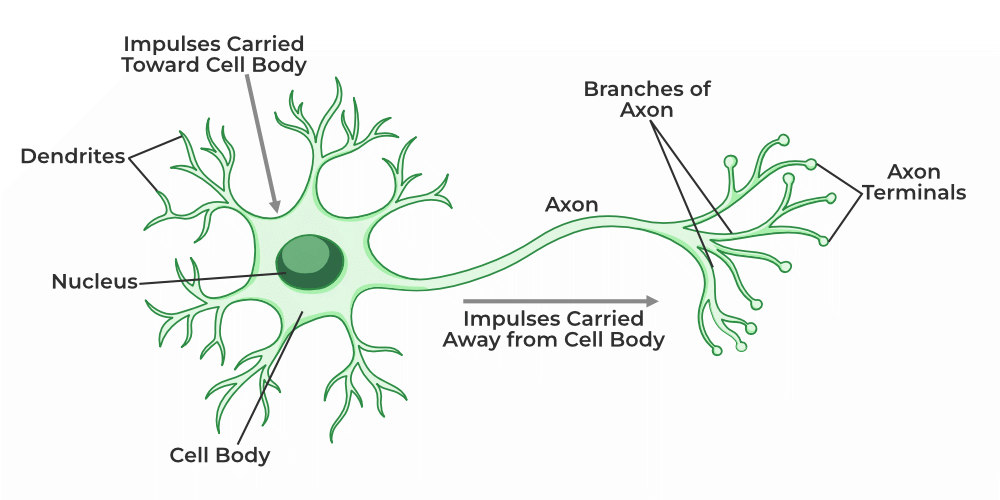
Structure of a biological neuron
Biological neuron has three basic functionality
- Receive signal from outside.
- Process the signal and enhance whether we need to send information or not.
- Communicate the signal to the target cell which can be another neuron or gland.
In the same way, neural networks also work.
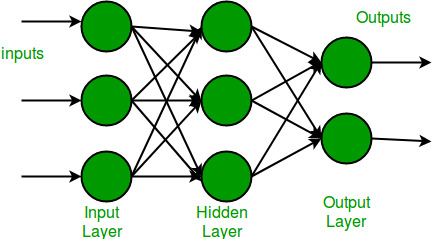
Neural Network in Machine Learning
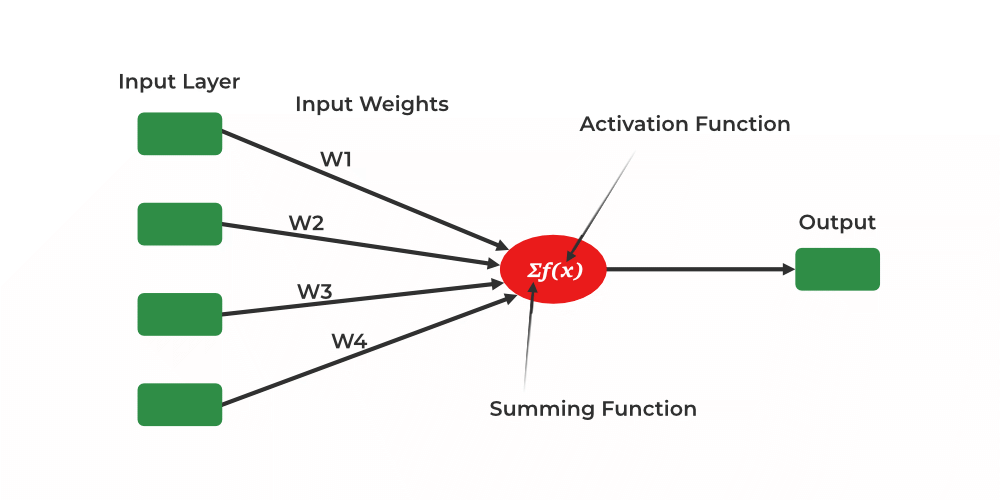
What is Single Layer Perceptron?
It is one of the oldest and first introduced neural networks. It was proposed by Frank Rosenblatt in 1958. Perceptron is also known as an artificial neural network. Perceptron is mainly used to compute the logical gate like AND, OR, and NOR which has binary input and binary output.
The main functionality of the perceptron is:-
- Takes input from the input layer
- Weight them up and sum it up.
- Pass the sum to the nonlinear function to produce the output.
Single-layer neural network
Here activation functions can be anything like sigmoid, tanh, relu Based on the requirement we will be choosing the most appropriate nonlinear activation function to produce the better result. Now let us implement a single-layer perceptron.
IMPLEMENTATION OF SINGLE-LAYER PERCEPTRON
Let us now implement a single-layer perceptron using the “MNIST” dataset using the TensorFlow library.
Step1: Import necessary libraries
- Numpy – Numpy arrays are very fast and can perform large computations in a very short time.
- Matplotlib – This library is used to draw visualizations.
- TensorFlow – This is an open-source library that is used for Machine Learning and Artificial intelligence and provides a range of functions to achieve complex functionalities with single lines of code.
Python3
import numpy as np
import tensorflow as tf
from tensorflow import keras
import matplotlib.pyplot as plt
%matplotlib inline
|
Step 2: Now load the dataset using “Keras” from the imported version of tensor flow.
Python3
(x_train, y_train),\
(x_test, y_test) = keras.datasets.mnist.load_data()
|
Step 3: Now display the shape and image of the single image in the dataset. The image size contains a 28*28 matrix and length of the training set is 60,000 and the testing set is 10,000.
Python3
len(x_train)
len(x_test)
x_train[0].shape
plt.matshow(x_train[0])
|
Output:
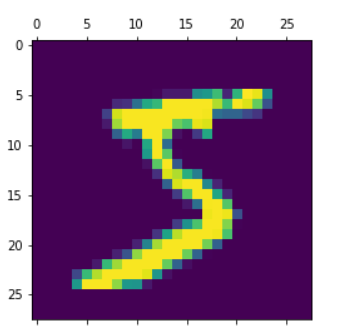
Sample image from the training dataset
Step 4: Now normalize the dataset in order to compute the calculations in a fast and accurate manner.
Python3
x_train = x_train/255
x_test = x_test/255
x_train_flatten = x_train.reshape(len(x_train), 28*28)
x_test_flatten = x_test.reshape(len(x_test), 28*28)
|
Step 5: Building a neural network with single-layer perception. Here we can observe as the model is a single-layer perceptron that only contains one input layer and one output layer there is no presence of the hidden layers.
Python3
model = keras.Sequential([
keras.layers.Dense(10, input_shape=(784,),
activation='sigmoid')
])
model.compile(
optimizer='adam',
loss='sparse_categorical_crossentropy',
metrics=['accuracy'])
model.fit(x_train_flatten, y_train, epochs=5)
|
Output:
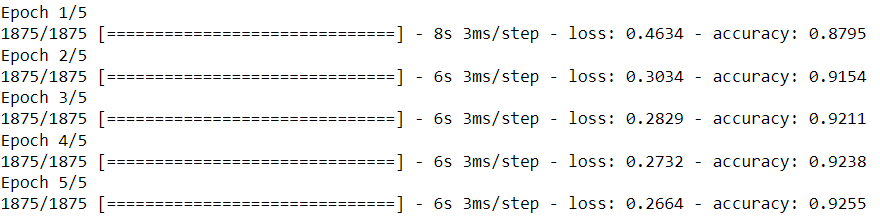
Training progress per epoch
Step 6: Output the accuracy of the model on the testing data.
Python3
model.evaluate(x_test_flatten, y_test)
|
Output:

Models performance on the testing data
Share your thoughts in the comments
Please Login to comment...