Real Estate Management using MERN
Last Updated :
05 Jan, 2024
In this article, we will guide you through the process of building a Real Estate Management Application using the MERN stack. MERN stands for MongoDB, Express, React, and Node. MongoDB will serve as our database, Express will handle the backend, React will create the frontend, and Node.js will be the runtime for our server.
Preview of final output: Let us have a look at how the final application will look like.
.jpg)
Final Preview
Prerequisites:
Approach to create Real Estate Management Website using MERN:
- Import Statements:
- Import necessary dependencies and components.
- React is imported for defining React components.
useState and useEffect are imported from React for managing state and handling side effects respectively.PropertyList and AddProperty are imported, assumed to be custom components.- Axios is imported for making HTTP requests.
- Functional Component:
- Define a functional component named
App.
- State Management:
- Use the
useState hook to manage the state of properties, which is initialized as an empty array.
- The
properties state will hold the list of properties fetched from the server.
- Data Fetching:
- Use the
useEffect hook to make an HTTP GET request to ‘http://localhost:5000/api/properties‘ when the component mounts.
- Update the
properties state with the data received from the server.
- Event Handlers:
- Define event handlers:
handleAddProperty: Takes a new property as an argument and adds it to the properties state using the setProperties function.handleContactOwner: Takes contact information as an argument and displays an alert with the contact information.handleDeleteProperty: Takes a property ID as an argument, makes an HTTP DELETE request to delete the property, and then updates the state by filtering out the deleted property.
- Component Rendering:
- Render a div containing:
- Two heading elements (
h1) with class and inline styles.
- The
AddProperty component, passing the handleAddProperty function as a prop.
- The
PropertyList component, passing the handleDeleteProperty and handleContactOwner functions, as well as the properties state.
Steps to Create the Backend:
Step 1: Create a directory for project
npm init backend
Step 2: Open Restaurant-Recommendation using the command
cd backend
Step 3: Installing the required packages
npm install express mongoose cors body-parser
This will install Express.js for the backend, Mongoose for MongoDB integration, CORS for handling cross-origin requests, and Body Parser for parsing incoming JSON requests.
Project Structure:
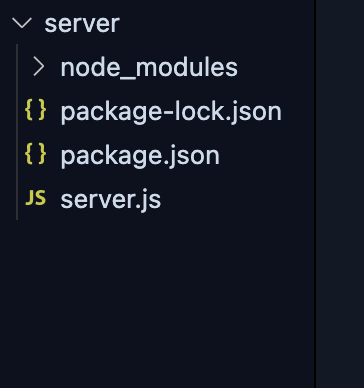
Server folder structure
The updated dependencies in package.json file for backend will look like:
"dependencies": {
    "body-parser": "^1.20.2",
    "cors": "^2.8.5",
    "express": "^4.18.2",
    "mongoose": "^8.0.0",
}
Example: Create a file named `server.js` in server folder. This file will serve as our backend server.
Javascript
const express = require("express");
const mongoose = require("mongoose");
const cors = require("cors");
const bodyParser = require("body-parser");
const app = express();
const PORT = process.env.PORT || 5000;
app.use(cors());
app.use(express.json());
app.use(bodyParser.json());
mongoose
useNewUrlParser: true,
useUnifiedTopology: true,
})
.then(() => {
console.log("Connected to MongoDB");
});
const propertySchema = new mongoose.Schema({
title: String,
description: String,
image: String,
contact: String,
reviews: [
{
user: String,
rating: Number,
comment: String,
},
],
});
const Property = mongoose.model("Property", propertySchema);
app.post("/api/properties", async (req, res) => {
try {
const { title, description, image, contact } = req.body;
if (!title || !description || !image || !contact) {
return res
.status(400)
.json({ message: "Incomplete property data" });
}
const newProperty = new Property({
title,
description,
image,
contact,
reviews: [],
});
const savedProperty = await newProperty.save();
res.status(201).json(savedProperty);
} catch (error) {
console.error("Error adding property:", error);
res.status(500).json({ message: "Internal Server Error" });
}
});
app.get("/api/properties", async (req, res) => {
try {
const properties = await Property.find();
res.json(properties);
} catch (error) {
res.status(500).json({ message: error.message });
}
});
app.post("/api/properties/:id/review", async (req, res) => {
const { user, rating, comment } = req.body;
try {
const property = await Property.findById(req.params.id);
property.reviews.push({ user, rating, comment });
await property.save();
res.status(201).json(property);
} catch (error) {
res.status(400).json({ message: error.message });
}
});
app.delete("/api/properties/:id", async (req, res) => {
const propertyId = req.params.id;
try {
const deletedProperty = await Property.findByIdAndDelete(propertyId);
if (!deletedProperty) {
return res.status(404).json({ message: "Property not found" });
}
res.json({ message: "Property deleted", deletedProperty });
} catch (error) {
console.error("Error deleting property:", error);
res.status(500).json({ message: "Internal Server Error" });
}
});
app.listen(PORT, () => {
console.log(`Server is running on port ${PORT}`);
});
|
Step 3: Defining the Property Schema and API Endpoints
Continue the `server.js` file by defining the Property schema and implementing API endpoints for adding properties, getting all properties, adding reviews, and deleting properties.
This is already implemented in Step 2.
 // Define the Property schema
const propertySchema = new mongoose.Schema({
  title: String,
  description: String,
  image: String,
  contact: String,
  reviews: [
    {
      user: String,
      rating: Number,
      comment: String,
    },
  ],
});

const Property = mongoose.model('Property', propertySchema);
Steps to Create the Frontend:
Step 1: Set up React frontend using the command.
npx create-react-app client
Step 2: Navigate to the project folder using the command.
cd client
Step 3: Install axios
npm i axios
Project Structure:

Frontend project structure
The updated dependencies in package.json for frontend will look like:
"dependencies": {
    "axios": "^1.5.1",
    "react": "^18.2.0",
    "react-dom": "^18.2.0",
    "react-scripts": "5.0.1",
    "web-vitals": "^2.1.4"
}
Example: Below is the client code.
Javascript
import React, { useState, useEffect } from "react";
import PropertyList from "./components/PropertyList";
import AddProperty from "./components/AddProperty";
import axios from "axios";
import "./App.css";
const App = () => {
const [properties, setProperties] = useState([]);
useEffect(() => {
axios
.then((response) => setProperties(response.data))
.catch((error) => console.error(error));
}, []);
const handleAddProperty = (newProperty) => {
setProperties((prevProperties) => [...prevProperties, newProperty]);
};
const handleContactOwner = (contact) => {
alert(`Contacting the owner of property is ${contact}`);
};
const handleDeleteProperty = (propertyId) => {
axios
.delete(`http:
.then((response) => {
setProperties((prevProperties) =>
prevProperties.filter(
(property) => property._id !== propertyId
)
);
})
.catch((error) => console.error(error));
};
return (
<div style={{}}>
<h1 className="gfg" style={{ margin: "10px 10px" }}>
GFG
</h1>
<h1 style={{ marginTop: "10px" }}>Real Estate Management</h1>
<div>
<AddProperty onAddProperty={handleAddProperty} />
<PropertyList
onDeleteProperty={handleDeleteProperty}
properties={properties}
onContactOwner={handleContactOwner}
/>
</div>
</div>
);
};
export default App;
|
Javascript
import React, { useContext, useEffect, useState } from "react";
import ProductItem from "./ProductItem";
import { itemContext } from "../context/itemContext";
import "../App.css";
const ProductList = () => {
const { products } = useContext(itemContext);
const [sortedProducts, setSortedProducts] = useState([...products]);
const [minPrice, setMinPrice] = useState(0);
const [maxPrice, setMaxPrice] = useState(3000);
const [selectedType, setSelectedType] = useState("all");
useEffect(() => {
setSortedProducts([...products]);
}, [products]);
const handleSortByPrice = () => {
const sorted = [...sortedProducts].sort((a, b) => a.price - b.price);
setSortedProducts(sorted);
};
const handleFilterByPriceRange = () => {
const filtered = products.filter(
(product) => product.price >= minPrice && product.price <= maxPrice
);
setSortedProducts(filtered);
};
const handleFilterByType = () => {
if (selectedType === "all") {
setSortedProducts([...products]);
} else {
const filtered = products.filter(
(product) => product.type === selectedType
);
setSortedProducts(filtered);
}
};
return (
<div className="prdt-list">
<h2>Product List</h2>
<div className="filter-btn">
<button onClick={handleSortByPrice}>Sort by Price</button>
<label>
Min Price:
<input
type="number"
value={minPrice}
onChange={(e) => setMinPrice(Number(e.target.value))}
/>
</label>
<label>
Max Price:
<input
type="number"
value={maxPrice}
onChange={(e) => setMaxPrice(Number(e.target.value))}
/>
</label>
<button onClick={() => handleFilterByPriceRange()}>
Filter by Price Range
</button>
<label>
Filter by Type:
<select
value={selectedType}
onChange={(e) => setSelectedType(e.target.value)}
>
<option value="all">All</option>
<option value="Fruit">Fruit</option>
<option value="Vegetable">Vegetable</option>
{}
</select>
</label>
<button onClick={handleFilterByType}>Filter by Type</button>
</div>
<ul className="item-card">
{sortedProducts.map((product) => (
<ProductItem key={product._id} product={product} />
))}
</ul>
<div className="buy-now-btn">Buy Now</div>
</div>
);
};
export default ProductList;
|
Javascript
import React, { useState } from 'react';
import axios from 'axios';
import '../App.css'
const AddProperty = ({ onAddProperty }) => {
const [newProperty, setNewProperty] = useState({
title: '',
description: '',
image: '',
contact: '',
});
const handleAddProperty = () => {
.then(response => {
onAddProperty(response.data);
setNewProperty({
title: '',
description: '',
image: '',
contact: '',
});
})
.catch(error => console.error(error));
};
return (
<div>
<h2 style={{ "color": "#007BFF" }}>
Add a New Property
</h2>
<form onSubmit={(e) => {
e.preventDefault();
handleAddProperty();
}}>
<div className="form-row">
<label>Title:
<input type="text"
value={newProperty.title}
onChange={(e) =>
setNewProperty(
{
...newProperty,
title: e.target.value
})}
required />
</label>
<label>Description:
<input type="text"
value={newProperty.description}
onChange={
(e) =>
setNewProperty(
{
...newProperty,
description: e.target.value
})} required />
</label>
</div>
<div className="form-row">
<label>Image URL:
<input type="text"
value={newProperty.image}
onChange={
(e) =>
setNewProperty(
{
...newProperty,
image: e.target.value
})} required />
</label>
<label>Contact: <input type="text"
value={newProperty.contact}
onChange={
(e) => setNewProperty(
{
...newProperty,
contact: e.target.value
})} required />
</label>
</div>
<button type="submit"
style={{ backgroundColor: "blue" }}>
Add Property
</button>
</form>
</div>
);
};
export default AddProperty;
|
CSS
input {
border: 2px solid black;
}
.property-list {
display: flex;
flex-wrap: wrap;
gap: 20px;
}
.property-card {
border: 1px solid #ddd;
border-radius: 18px;
padding: 15px;
width: -moz-fit-content;
width: fit-content;
box-shadow: 0 14px 18px rgba(0, 0, 0, 0.1);
background-color: #fff;
margin-bottom: 3rem;
}
.property-card h3 {
margin-bottom: 10px;
}
.property-card button {
background-color: #007BFF;
color: #fff;
border: none;
padding: 8px;
cursor: pointer;
border-radius: 4px;
}
button {
background-color: #007BFF;
}
.property-card button:hover {
background-color: #0056b3;
}
img {
height: 200px;
width: 300px;
border-radius: 10px;
margin-bottom: 10px;
}
.list-container {
display: flex;
flex-direction: row;
justify-content: center;
gap: 15px;
}
h1,
h2 {
text-align: center;
}
f
.property-card {
border: 1px solid #ddd;
border-radius: 10px;
box-shadow: 0 4px 8px rgba(0, 0, 0, 0.1);
padding: 20px;
margin: 20px;
width: 300px;
}
.property-card h2 {
margin-bottom: 15px;
color: #333;
}
.property-card label {
display: block;
margin-bottom: 10px;
color: #333;
}
.property-card input {
width: 100%;
padding: 8px;
margin-bottom: 10px;
box-sizing: border-box;
}
.property-card button {
background-color: #007BFF;
color: #fff;
border: none;
padding: 10px;
cursor: pointer;
border-radius: 4px;
}
.property-card button:hover {
background-color: #0056b3;
}
.form-container {
max-width: 300px;
margin: 20px auto;
padding: 20px;
background-color: #f7f7f7;
border-radius: 8px;
box-shadow: 0 4px 8px rgba(0, 0, 0, 0.1);
}
.form-row {
display: flex;
gap: 20px;
margin-bottom: 15px;
}
.form-row label {
flex: 1;
}
.form-row input {
flex: 2;
padding: 8px;
width: 100%;
box-sizing: border-box;
}
button {
background-color: #007BFF;
color: #fff;
border: none;
padding: 10px;
cursor: pointer;
border-radius: 4px;
}
button:hover {
background-color: #0056b3;
}
form {
padding: 10px;
}
.gfg {
background-color: green;
text-align: center;
color: white;
padding: 15px;
border-radius: 10px;
margin-bottom: -20px;
}
.list {
margin-top: -50px;
}
|
Sep to Start Server and React App:
- To start backend server: Go to server folder inside terminal and write below command
node server.js
- To start frontend server: Go to client folder inside terminal and write below command
npm start
Output:
Output
Output of Data saved in Database:
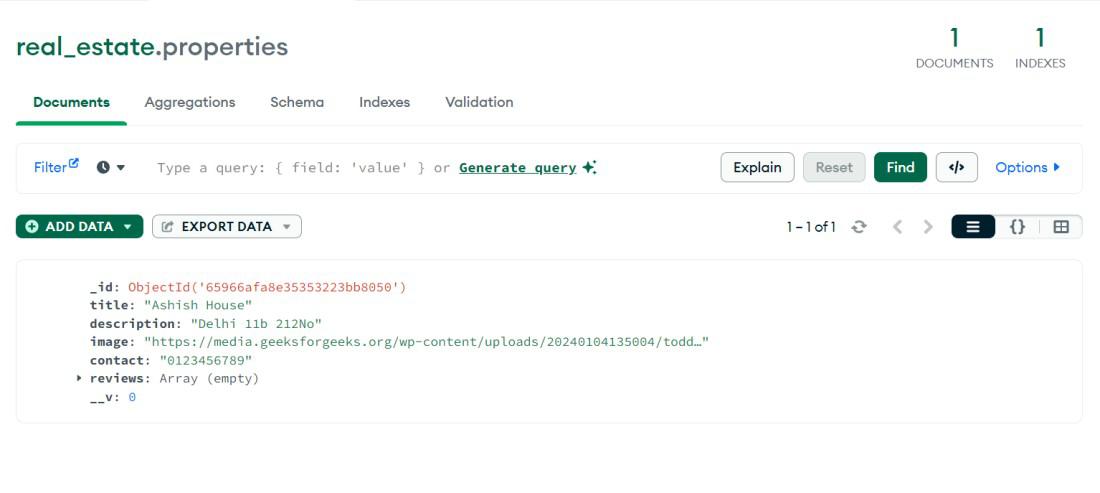
Db
Share your thoughts in the comments
Please Login to comment...