In the vast realm of operating systems, Linux has emerged as a robust and versatile choice, powering everything from personal computers to enterprise-level servers. One of its standout features is Logical Volume Management (LVM), a powerful storage management system that offers enhanced flexibility, scalability, and reliability for handling storage devices in Linux environments. LVM revolutionizes how disk partitions and physical storage are managed, providing an abstract layer that simplifies storage administration and facilitates efficient utilization of available resources. By introducing logical volumes, volume groups, and physical books, LVM enables seamless storage management, allowing administrators to dynamically resize, migrate, and allocate storage space as per their evolving needs.
Throughout the article, we will provide real-world examples and command-line instructions, enabling readers to follow along and gain hands-on experience with LVM.
Environment Setup
Note: If you have already set up your virtual machine, you may skip the setup portion and proceed directly to the installation steps. Please ensure that you have two virtual hard disks attached to your machine before continuing.
To facilitate the content of this article, we will simulate a virtual environment by creating a virtual machine. Within this virtual machine, we will guide you through the installation process of Ubuntu 22.04, with a particular focus on utilizing LVM for storage management.
Downloading Virtualbox
Before proceeding with this article, ensuring you have the most up-to-date version of VirtualBox installed on your system is essential. VirtualBox is a powerful software application for running virtual machines, making it an essential tool for the steps outlined in this guide.
Step 1: Go to this website and download the latest version of Virtualbox:
https://www.virtualbox.org/wiki/Downloads
Step 2: Please ensure that you choose the appropriate file that corresponds to your specific operating system. For instance, if you are utilizing the latest version of Ubuntu, you should select the Linux Distributions option to proceed accordingly.

Select the Linux Distributions option.

Select your version of Linux.
Step 3: Proceed with the installation of the downloaded package using the package manager provided by your distribution. After installation, you will get a window like this:
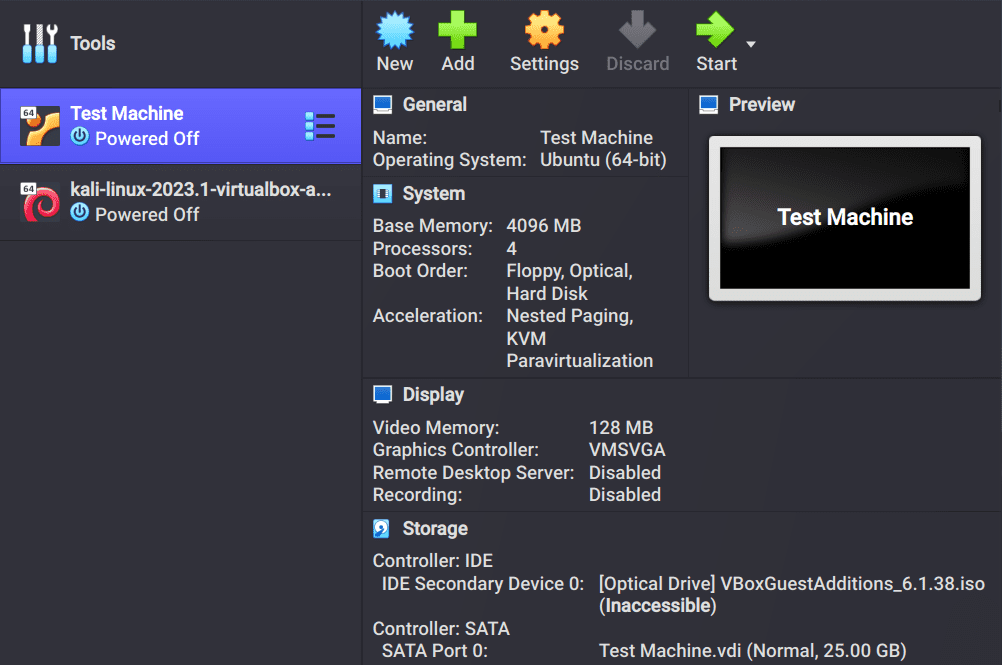
Virtualbox Window
Download Ubuntu
Step 4: To install Ubuntu 22.04, you’ll have to acquire the ISO file. This file is essentially an ISO image that includes all the required installation files and data needed to set up the operating system on your computer.
Download the file from the below link:
https://ubuntu.com/download/desktop
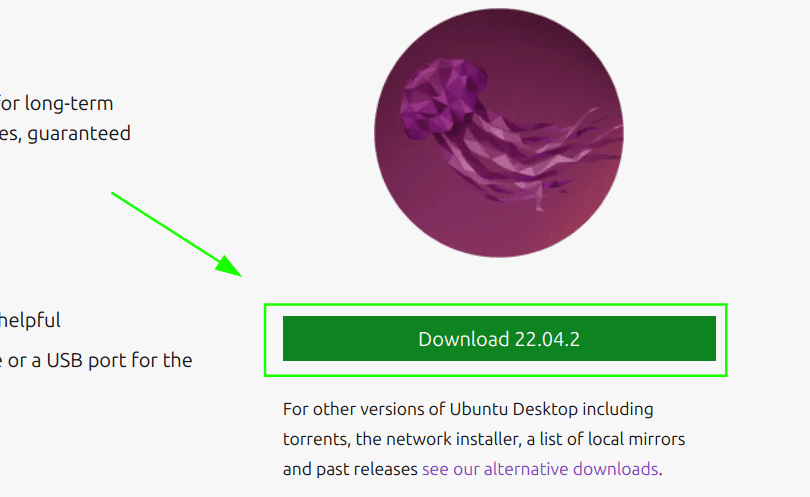
Obtain Ubuntu by selecting the button provided for downloading.
Step 5: Once you have obtained the Ubuntu installation files, proceed to set up a new virtual machine within VirtualBox.
Creating a New Virtual Machine

Create a New Virtual Machine
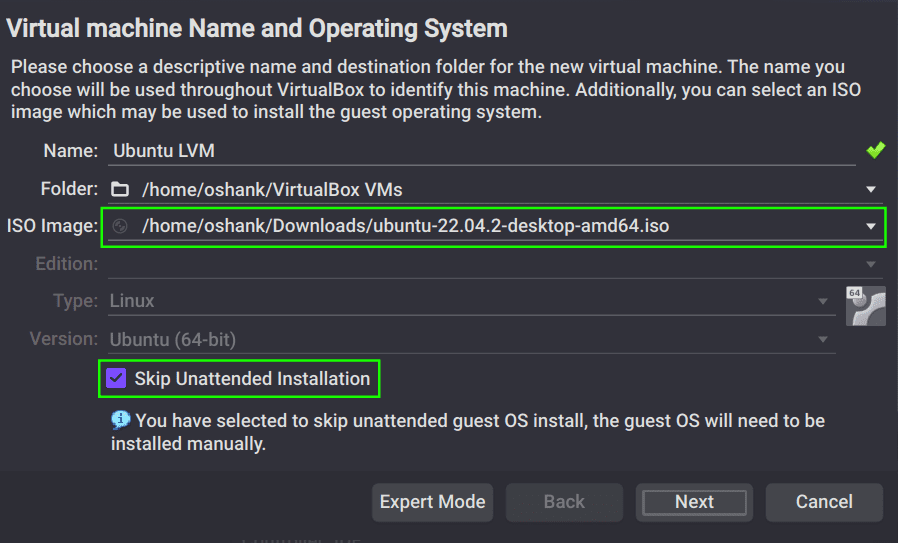
Link the ISO Image that we’ve Downloaded
- Memory: Give at least 4 GB of RAM space to the machine.
- CPU: Allocate a minimum of two CPU cores. In case your current device does not meet the requirements, consider running VirtualBox on an alternative device.
Step 6: By default, a Virtual Hard Disk is automatically generated when creating a virtual machine. However, for this article, we will create an additional hard drive specifically designated for installing Ubuntu using LVM.

Access the settings of the newly created virtual machine
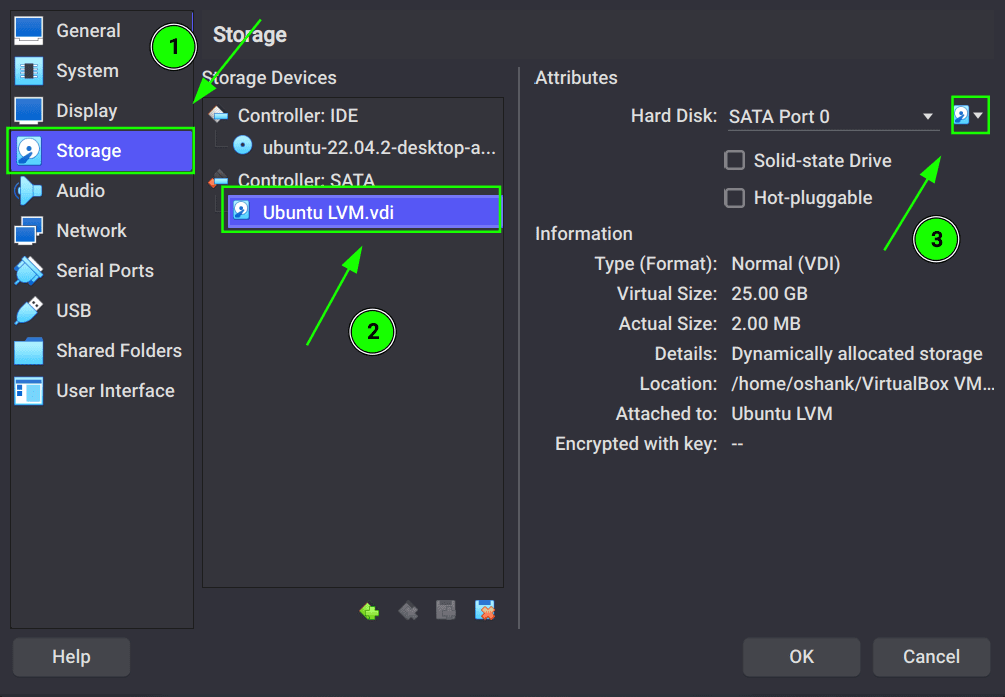
Access the storage settings
Step 7: Proceed to the 3rd part and select Choose/Create a hard disk file and create a new virtual hard disk.
Step 8: After completing the process of creating the virtual hard disk, select the disk and click on the “Choose” button.
Step 9: Next, navigate to the “Controller” option and proceed to add the previously created virtual disk.

Navigating to Controller
Step 10: Now, choose the older disk and incorporate it into the virtual machine.
Select the older disk
At this stage, we have completed the setup of our virtual machine. We can now proceed with the installation process, specifically focusing on installing the machine on an LVM partition.
Installing Ubuntu on LVM Partition
Step 1: Initiate the virtual machine and once it begins, opt for the “Try Ubuntu” option.
Step 2: Launch the terminal application and execute the command “sudo fdisk -l“. This command will display a list of available disks. Locate the two virtual hard disks that were created in the previous section and make note of their respective locations.
sudo fdisk -l
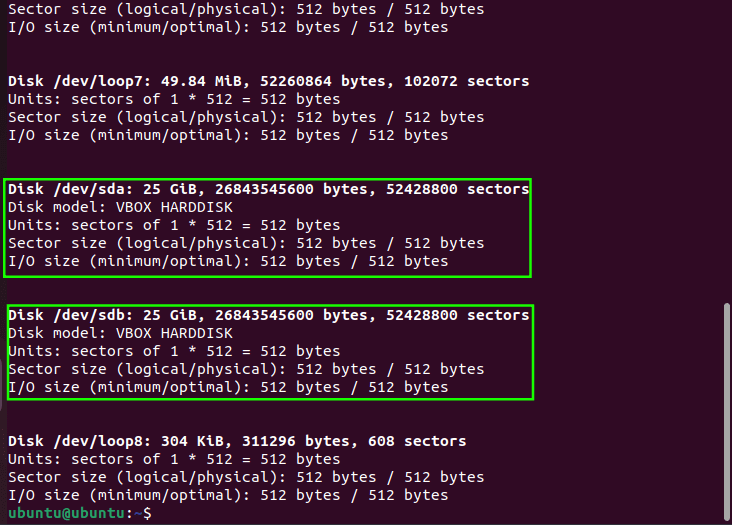
Listing all available disks
Step 3: In the next step, we will utilize the “pvcreate” command to create a physical volume of each virtual disk.
sudo pvcreate /dev/sda /dev/sdb
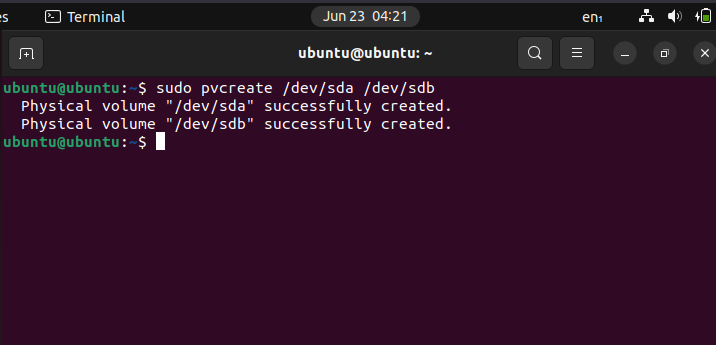
Creating a Physical Volume of Each Virtual Disk
Step 4: Now, let’s create a volume group that encompasses the LVM physical volumes you have created. Execute the following command to create the volume group named “ubuntu_vol_group“:
vgcreate ubuntu_vol_group /dev/sda /dev/sdb

Creating Volume Group
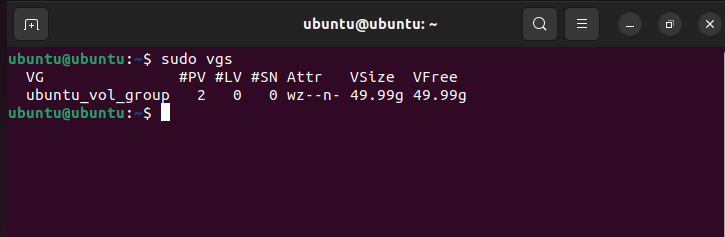
Listing Newly Created Volume Group
Step 4: Next, let’s create two volume groups. The first volume group will be allocated for the boot partition and should have a size of 512MB, while the second volume group will be designated for the root partition and should utilize the remaining available space.
sudo lvcreate -L 512M -n boot ubuntu_vol_group
sudo lvcreate -L 49.49G -n root ubuntu_vol_group

Creating two volume groups

Listing newly created two volume group
Step 5: At this point, you can start your Ubuntu installation by using the standard procedures.
Step 6: On the Installation Type page, choose the “Something Else” option.
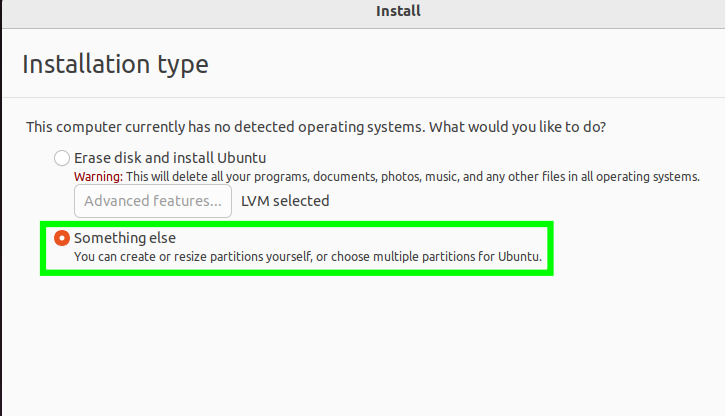
Select the “Something Else” option and click Continue
Step 7: Select the LVM partitions that were previously created for the boot and root respectively.

Select the volumes respectively
Step 8: Click on the “Install Now” button, proceed with setting up your desired username and password, and initiate the installation of the operating system.
If you have diligently followed the instructions, you should now have a fully functional system installed on an LVM partition. It is important to note that this installation was performed within a virtual environment to avoid any potential complications with your actual system. You can utilize the same installation steps to install any operating system directly on your hardware. However, when installing on real hardware, there is no need to create virtual disks as outlined in this article.
Conclusion
By applying the knowledge gained from this article, you can confidently install and manage operating systems on your hardware, leveraging the benefits of LVM for efficient storage management. Remember to exercise caution when making changes to your real system and always ensure that you have appropriate backups in place.
Share your thoughts in the comments
Please Login to comment...