Locating Strategies By Tag Name Using Java
Last Updated :
20 Mar, 2024
Web application testing must be rigorous and thorough. For this reason, many tests for web applications are automated. Selenium is an open-source framework that allows us to automate web browser testing.
In the following sections, we will look at how to use tag names to locate elements in our HTML code using Java and Selenium. Then we will also see how we can access text inside those tags.
Steps for Locating Elements By Tag Name in Java
Step 1: Create a Project
Create a Maven project in your Java IDE. For this tutorial, I will be using the Community Edition of IntelliJ Idea IDE. Alternatively, you could use others like Eclipse IDE or the NetBeans IDE that are open source. Navigate to File > New > Project to initiate the project setup.
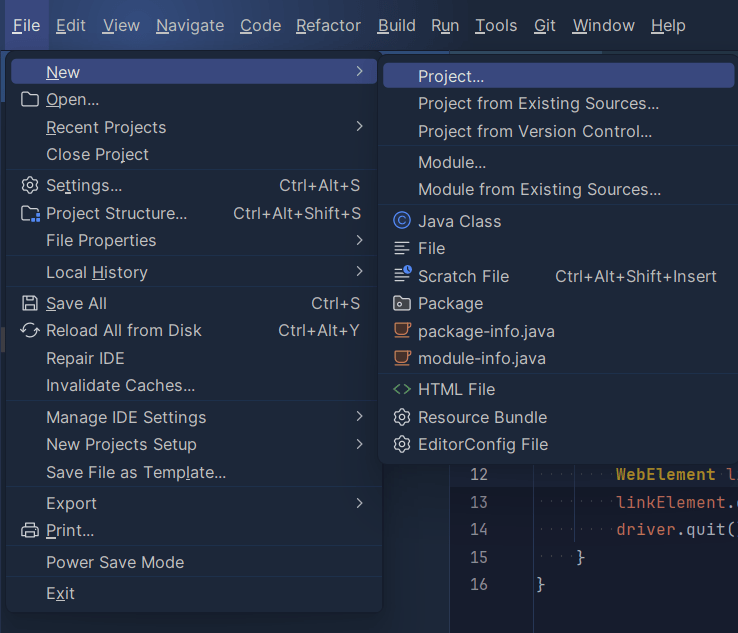
Navigating to creating the New Project option
Step 2: Set Up the Project Configuration
Next, we will look at the configuration settings for our project. When you click the Project button from the previous step, a new dialogue box will open. In this, choose a name for your project and the build type as Maven.
The main configuration that we will set here is the build-system and the java language level that we want to use in our project.
Maven is a build tool for Java. You specify what libraries you need in your pom.xml file. Maven reads this file and downloads these libraries and automatically adds them to the classpath. This saves you from manually doing these steps. From the classpath, the JRE is able to use these external libraries to run the project.
The language level we will choose is Java-17. This looks like as follows:
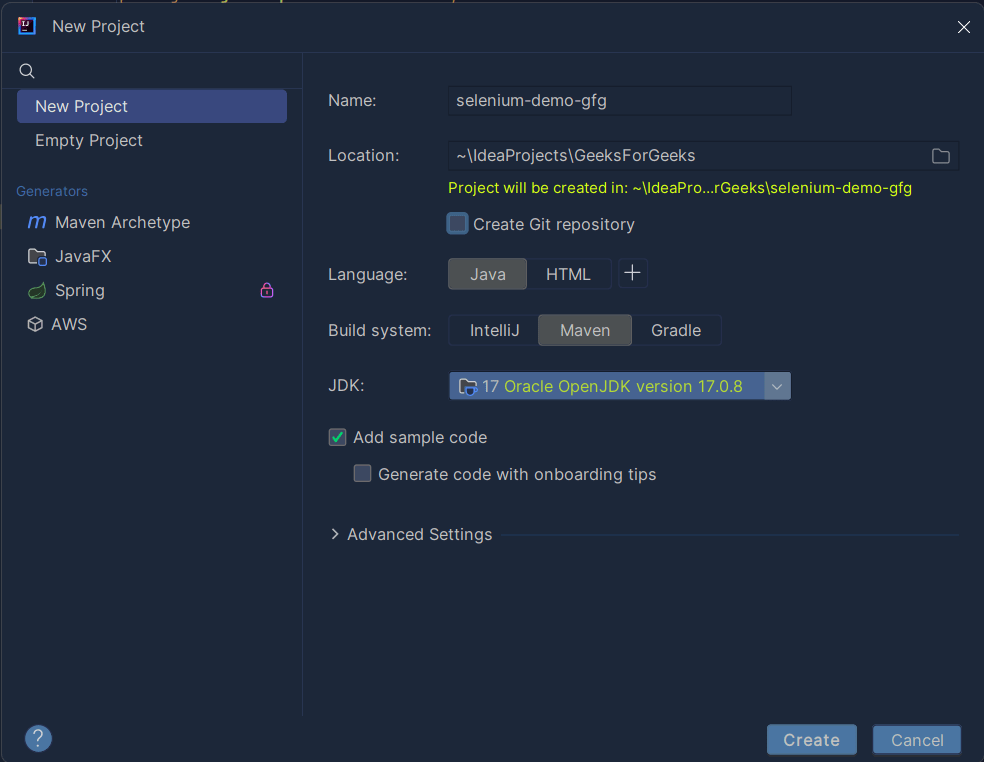
Project Settings
When you are done, click on the create button at the bottom of the dialogue box.
Step 3: Add the Selenium Dependency
Now add the following selenium dependency in the pom.xml file:
<dependency>
            <groupId>org.seleniumhq.selenium</groupId>
            <artifactId>selenium-java</artifactId>
            <version>4.18.1</version>
</dependency>
Now, your pom.xml file should match the following:
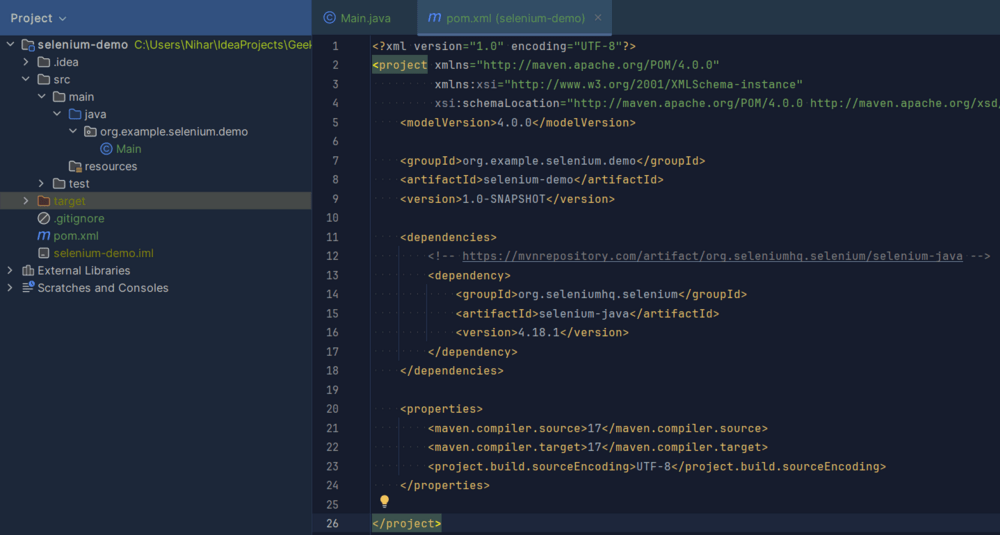
pom.xml
Step 4: Building The main class
Now we will develop the main class. We will create a simple automation in this example. It consists of the following steps:
- Open the browser
- Locate elements using the tag name
- See how to access text inside it
- Close the browser
Without any human interactions. Modify the existing code in your main class as:-
Java
public class Main {
    public static void main(String[] args) {

          //Use the web driver of your pre-installed browser
        WebDriver driver=new ChromeDriver();

          //use the link you want to open
        driver.get("https://www.geeksforgeeks.org/");

          //Locate element using tag names, feel free to replace div with other elements
        WebElement linkElement= driver.findElement(By.tagName("div"));

        //Print to the console the text that id directly inside the first div element
        System.out.println(linkElement.getText());

        //Close the Browser
        driver.quit();
    }
}
Step 5: Testing the Automation
Now, we will test the automation we have just created. Upon running the code, we get the output of this is as:

Text inside the first div
Step 6: Error Handling
Now, what happens if try to look for a tag that does not exist in our code?
We see an ugly error on the console and the code behaves weirdly. The error looks like as follows:
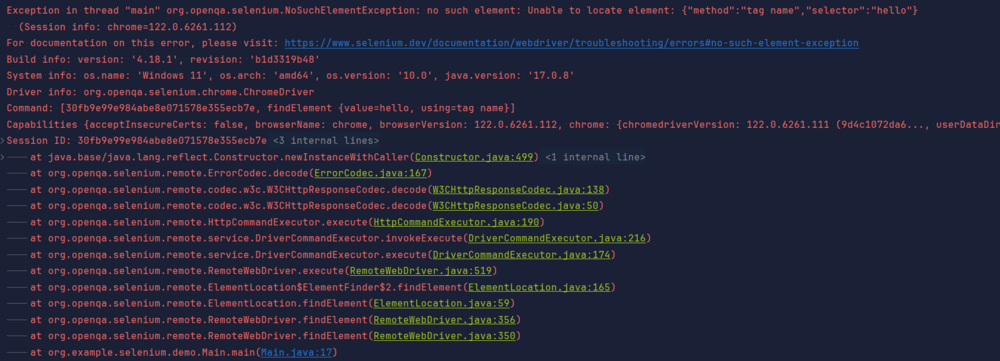
NoSuchElementException
To avoid such situations, we can enclose our code in a try-catch block.
Modify the code above as:
Java
public class Main {
public static void main(String[] args) {
//Use the web driver of your pre-installed browser
WebDriver driver=new ChromeDriver();
//use the link you want to open
driver.get("https://www.geeksforgeeks.org/");
try {
//Locate element using tag names, feel free to replace div with other elements
WebElement linkElement= driver.findElement(By.tagName("hello"));
//Print to the console the text that id directly inside the first div element
System.out.println(linkElement.getText());
}
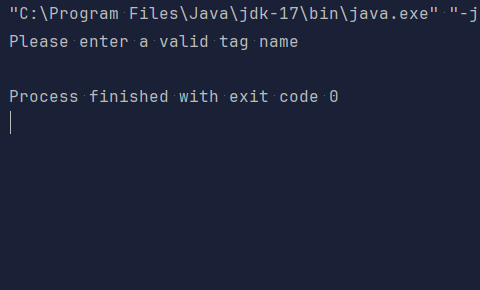
catch (Exception e) {
System.out.println("Please enter a valid tag name");
}
//Close the Browser
driver.quit();
}
}
Now when you try to run the code you see a simple message that tells you the source of your problem and does not cause the application to behave weirdly. The message logged on the console is as follows:
Locating strategies with partial link text on various Browsers
Selenium Web Driver currently provides support for Google Chrome, Internet Explorer, Safari, Microsoft Edge, and Firefox Browser. The dependency we have used in this tutorial is sufficient for all of these drivers. If you wish to have only browser-specific libraries in your application, you could add the specific libraries for each of these drivers:
1. Chrome Driver
<!– https://mvnrepository.com/artifact/org.seleniumhq.selenium/selenium-chrome-driver –>
<dependency>
<groupId>org.seleniumhq.selenium</groupId>
<artifactId>selenium-chrome-driver</artifactId>
<version>4.18.0</version>
</dependency>
2. IE Driver
<!– https://mvnrepository.com/artifact/org.seleniumhq.selenium/selenium-ie-driver –>
<dependency>
<groupId>org.seleniumhq.selenium</groupId>
<artifactId>selenium-ie-driver</artifactId>
<version>4.18.0</version>
</dependency>
3. Safari Driver
<!– https://mvnrepository.com/artifact/org.seleniumhq.selenium/selenium-safari-driver –>
<dependency>
<groupId>org.seleniumhq.selenium</groupId>
<artifactId>selenium-safari-driver</artifactId>
<version>4.18.0</version>
</dependency>
4. Microsoft Edge Driver
<!– https://mvnrepository.com/artifact/org.seleniumhq.selenium/selenium-edge-driver –>
<dependency>
<groupId>org.seleniumhq.selenium</groupId>
<artifactId>selenium-edge-driver</artifactId>
<version>4.18.0</version>
</dependency>
5. Firefox Driver
<!– https://mvnrepository.com/artifact/org.seleniumhq.selenium/selenium-firefox-driver –>
<dependency>
<groupId>org.seleniumhq.selenium</groupId>
<artifactId>selenium-firefox-driver</artifactId>
<version>4.18.0</version>
</dependency>
Just add any of these for the browser that you want to automate and you are good to go.
Conclusion
In this article, we looked at how we can locate elements using tag names. If you have any queries, please feel free to comment below.
FAQ’s on Locating Strategies By Tag Name
Q1. Why does this feature even exist if we can use Xpath?
Ans: We can indeed locate many possible elements using XPath. But, the downside of this is that your code becomes very hard to read and maintain. Furthermore, modern websites have a very large HTML code. This makes it difficult to identify and keep track of the tree structure of the document. This is why locating elements by tag names makes it simpler and a more beginner-friendly alternative than xpath.
Q2. What happens if I have multiple tags of the same type?
Ans: If you have multiple tags of the same type then the one which appears the first in your code is returned by default.
Q3. Can I use this on the title tag?
Ans: Yes you can use it for the title tag but it is not recommended. This is because the title tag lies inside the HTML head tag and is processed differently than the contents of the HTML body tag. It is best to limit the use of the locating strategy by tag name to the contents of the body tag only.
Share your thoughts in the comments
Please Login to comment...