Locating Strategies By Class Name Using Java
Last Updated :
14 Mar, 2024
Efficiently locating elements by their Class Name is important for successful automation testing in Java. In this article, we explore the use of Selenium’s By.className() method to locate web elements, providing step-by-step guidance on setting up a Java project, adding Selenium JAR files, and demonstrating a practical example of locating and interacting with elements on a webpage.
Steps to Locate Strategies By Class Name Using Java
Step 1: Download Selenium from Official Website
Visit Selenium from the official website. Click on the latest version and download the Selenium package.
Step 2: Extract the Selenium Package
After downloading the Selenium package, unzip or extract the downloaded file to access the contents. This step is important for setting up and using Selenium in your Java project.
Step 3: Create Java Project in Eclipse IDE
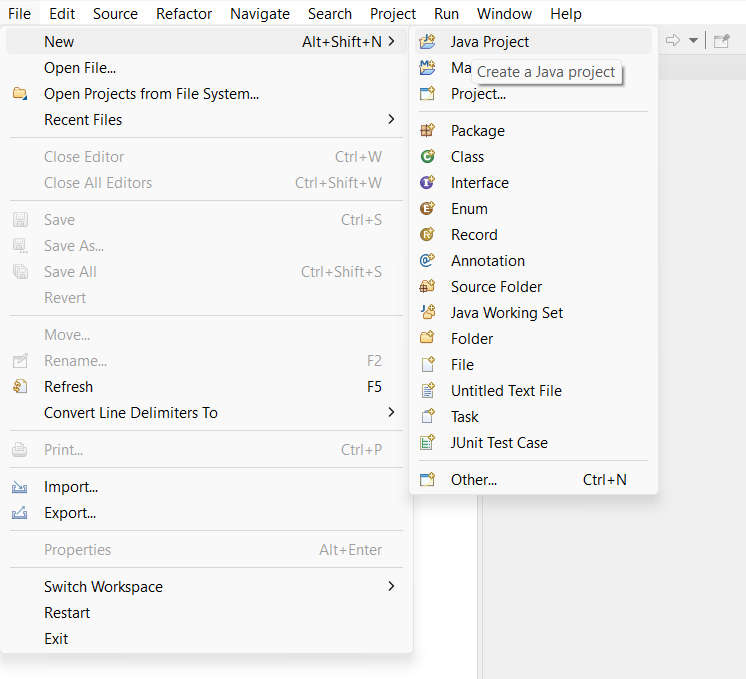
Open Eclipse IDE and create a new Java project by navigating to File > New. This sets up the environment for your Selenium automation project within Eclipse.
Step 4: Name the Java Project
Provide a meaningful and suitable name for your Java project when prompted during the creation process in Eclipse. This ensures clarity and organization in your Selenium automation project.
Step 5: Add Selenium Jar to Project Build Path
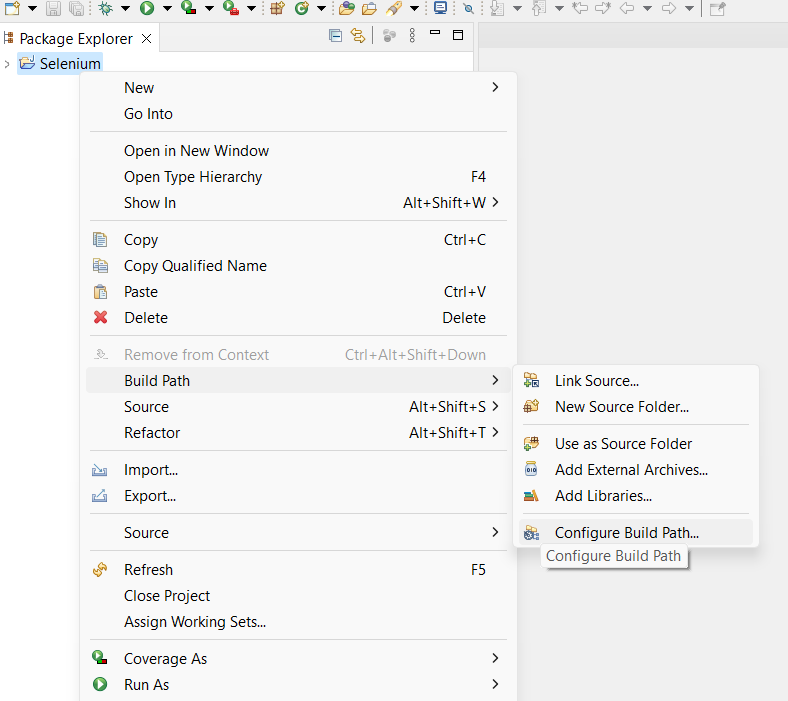
Right-click on the created Java project in Eclipse, then navigate to Build Path and select Configure Build Path. Add the previously downloaded Selenium JAR files to the project’s build path. This step is important for integrating Selenium libraries into your Java project.
Step 6: Add Selenium JAR to Project Libraries
Inside Eclipse, go to Project Properties, then click on Libraries. Select Classpath and choose “Add External JARs.” Locate the Selenium JAR file you downloaded on your device, select it, and click Apply and Close. This step ensures that the Selenium JAR file is successfully added to your Java project’s libraries.
Step 7: Create a New Class File
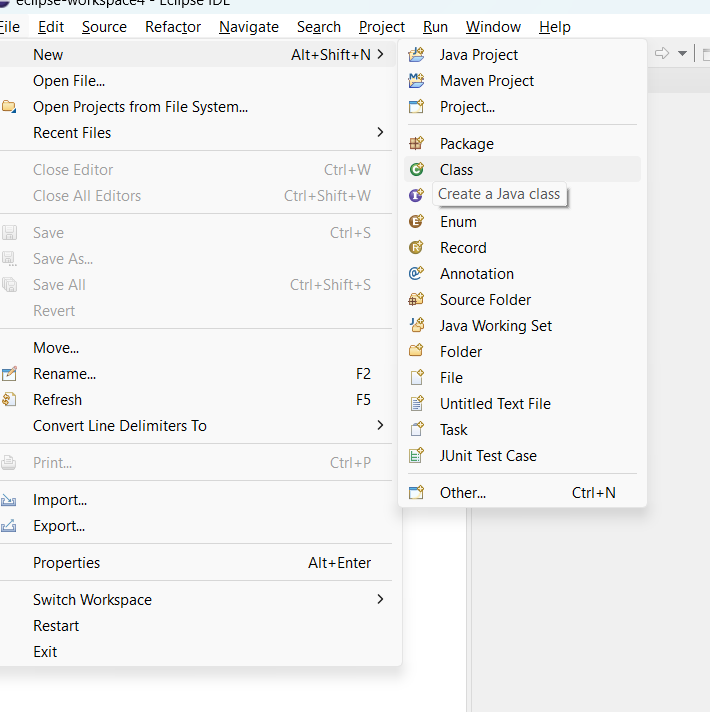
Right-click on the “src” folder within your Java project in Eclipse. Choose “New” and then select “Class” to create a new Java class file. This step allows you to start writing and organizing your Selenium automation code within Eclipse.
Step 8: Selenium WebDriver Coding
Initialize the Selenium WebDriver to interact with the browser.
WebDriver driver = new ChromeDriver();
Open the desired URL, for example, www.google.com.
driver.get(“https://webpage.com”);
Now locate the web element in the webpage through its Class Name.
1. Open URL: www.google.com.
2. Right-click on the “search bar ” text on the sample web page and select Inspect Element.
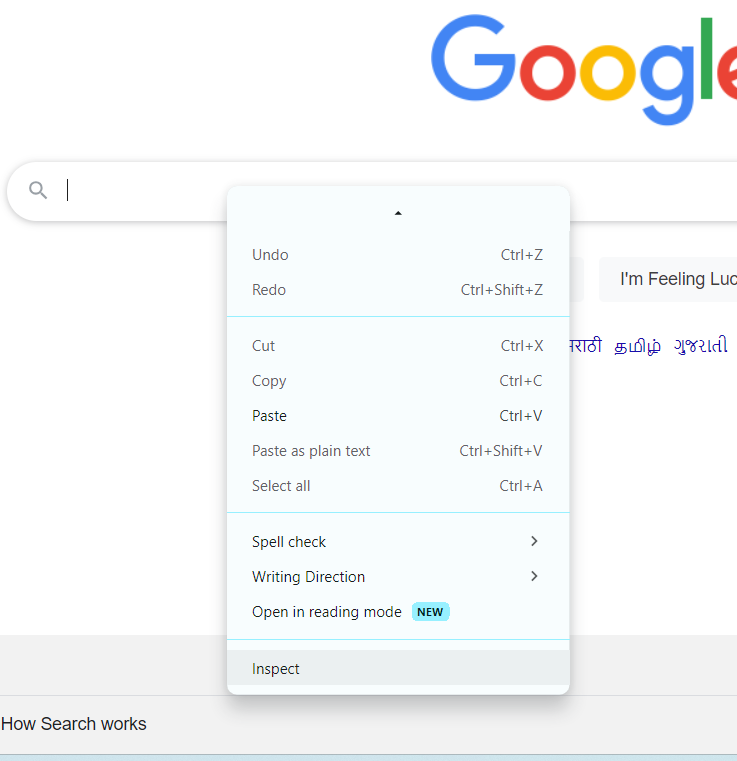
3. It will launch a window containing all the specific codes involved in the development.
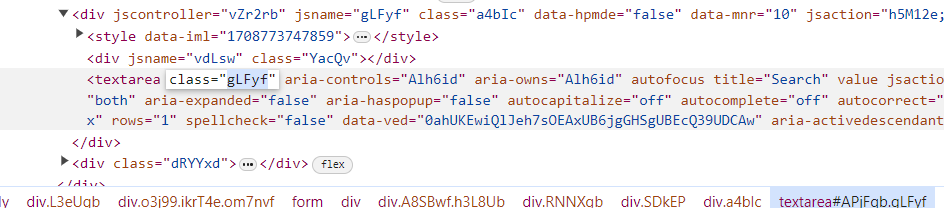
4. Find the Class Name of the desired web element (e.g., “gLFyf” for the search bar on www.google.com) using the browser’s Inspect Element feature.
WebElement element = driver.findElement(By.className(“gLFyf”);
Example:
This Java Selenium example initializes a ChromeDriver, navigates to Google’s homepage, locates the search bar element by its class name (“gLFyf”), and enters “amazon.com” into the search field before closing the browser.
Java
// Importing Selenium Libraries
import org.openqa.selenium.By;
import org.openqa.selenium.WebDriver;
import org.openqa.selenium.WebElement;
import org.openqa.selenium.chrome.ChromeDriver;

public class ClassNameExample {
    public static void main(String[] args)
    {

        // Create a new instance of the ChromeDriver
        WebDriver driver = new ChromeDriver();
        // To maximize the Screen
        driver.manage().window().maximize();

        // Navigate to the web page with the dropdown
        driver.get("https://google.com");

        // locating element by link text
        WebElement searchbar
            = driver.findElement(By.className("gLFyf"));

        // performing sendkeys action on located element
        searchbar.sendKeys("amazon.com");

        // close the browser
        driver.quit();
    }
}
Output
Conclusion
In conclusion, efficiently locating elements by class name is important for effective automation testing in Java using Selenium. The outlined steps guide users through setting up a Java project, adding Selenium dependencies, and exemplify the process with a practical example of locating and interacting with elements on a webpage. Mastering these strategies enhances the robustness and reliability of Selenium-based automation scripts, contributing to successful test automation projects.
Share your thoughts in the comments
Please Login to comment...