JPA – List Mapping
Last Updated :
09 Apr, 2024
JPA in Java is referred to as Java Persistence API(JPA). List mapping in JPA is a key feature for managing relationships between entities in an application. In this article, we will discuss the concept of List Mapping in JPA and its application. List mappings in JPA allow us to represent one-to-many relationships between entities using a Java collection, especially in the list of applications.
Implementation Steps of JPA List Mapping
1. Define the Entity
Define the entities with the appropriate relationships of the JPA application. For example, consider the entities Student and Course, the student can be enrolled in multiple courses and it can form one-to-many relationships.
Student Entity:
@Entity
public class Student {
    @Id
    @GeneratedValue(strategy = GenerationType.IDENTITY)
    private Long id;
    private String name;

    @OneToMany(mappedBy = "student", cascade = CascadeType.ALL, fetch = FetchType.LAZY)
    private List<Course> courses = new ArrayList<>();

    // Getters and setters
}
Course Entity:
@Entity
public class Course {
    @Id
    private Long id;
    private String name;

    // Getters and setters
}
In the above example, the Student class represents the table in the database and the @OneToMany annotation establishes the one-to-many relationship between the Student and Course entities of the application.
2. Configure the Persistence
In the JPA application, we need to the configure the persistence settings either through the persistence.xml of the project.
<persistence-unit name="PersistenceUnit" transaction-type="RESOURCE_LOCAL">
    <!-- Entity classes -->
    <class>com.example.model.Student</class>
    <class>com.example.model.Course</class>

    <!-- Database connection properties -->
    <properties>
        <!-- Database connection details -->
    </properties>
</persistence-unit>
The XML file can configure the persistence unit named as the PersistenceUnit and it lists the entities classes to manage by the JPA application.
3. Define the Database Schema Generation
In JPA application, we can automatically the generate the database schema based on the entity definitions and it can manually create the database schema using DDL scripts of the application.
4. Using the EntityManager
EntityManager is the primary interface for interacting with persistence context and it provides the methods for the persisting, retrieving, deleting and updating the entities of the JPA application.
EntityManager em = JPAUtil.getEntityManager();
EntityTransaction tx = em.getTransaction();

try {
    tx.begin();

    // Create and persist entities
    // Perform operations like persist, merge, remove, etc.

    tx.commit();
} catch (Exception e) {
    if (tx != null && tx.isActive()) {
        tx.rollback();
    }
    e.printStackTrace();
} finally {
    em.close();
    JPAUtil.close();
}
5. Retrieving the Data
We can retrieve the data using the JPQL queries or the EntityManager methods of the application.
Example:
List<Student> students = em.createQuery("SELECT s FROM Student s", Student.class).getResultList();
for (Student student : students) {
    System.out.println("Student: " + student.getName());
    System.out.println("Courses Enrolled:");
    for (Course course : student.getCourses()) {
        System.out.println("- " + course.getName());
    }
}
The above code can retrieves the all students from the database along with their enrolled courses and it can demonstrate the use of the JPQL queries of the application.
Bidirectional vs Unidirectional Mapping:
- Bidirectional mapping can involves the mapping reference on the both sides of the relationship and it can enable the traversal from the both ends of the JPA application.
- Unidirectional mapping can involves maintaining the references only on one side of the relationship into the application.
FetchType:
- FetchType.LAZY: It can be used to the load the associated with the entities lazily when accessed of the JPA application.
- FetchType.EAGER: It can load the associated with the entities eagerly along with the owning entity of the application.
Cascade operations:
- CascadeType.ALL: It propagates all the operations like persist, merge, remove and refresh to the associated with the entities of the application.
- CascadeType.PERSIST: It can be used to the propagate the persist operations of the application.
- CascadeType.MERGE: It can be used to the propagate the merge operation of the application.
- CascadeType.REMOVE: It can be used to the propagate the remove operation of the application.
- CascadeType.REFRESH: It can be used to the propagate the refresh operation of the application.
Project Implementation of the List Mapping in JPA
Step 1: First, we will create a JPA project using Intellij Idea IDE. The project named as jpa-list-mapping-demo.
Step 2: Now, we will add the following dependencies into the created JPA project.
Dependencies:
<dependency>
            <groupId>org.hibernate.orm</groupId>
            <artifactId>hibernate-core</artifactId>
            <version>6.0.2.Final</version>
        </dependency>
        <dependency>
            <groupId>org.glassfish.jaxb</groupId>
            <artifactId>jaxb-runtime</artifactId>
            <version>3.0.2</version>
        </dependency>
        <dependency>
            <groupId>org.junit.jupiter</groupId>
            <artifactId>junit-jupiter-api</artifactId>
            <version>${junit.version}</version>
            <scope>test</scope>
        </dependency>
        <dependency>
            <groupId>org.junit.jupiter</groupId>
            <artifactId>junit-jupiter-engine</artifactId>
            <version>${junit.version}</version>
            <scope>test</scope>
        </dependency>
        <dependency>
            <groupId>mysql</groupId>
            <artifactId>mysql-connector-java</artifactId>
            <version>8.0.28</version>
        </dependency>
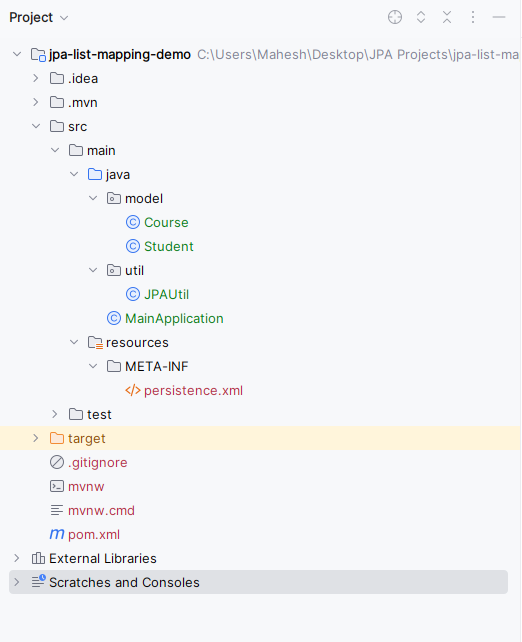
Now the project structure will look like below image:
Step 3: Now, open the persistance.xml file and write the below code for MYSQL database configuration of the database.
XML
<?xml version="1.0" encoding="UTF-8" standalone="yes"?>
<persistence xmlns="https://jakarta.ee/xml/ns/persistence"
             xmlns:xsi="http://www.w3.org/2001/XMLSchema-instance"
             xsi:schemaLocation="https://jakarta.ee/xml/ns/persistence https://jakarta.ee/xml/ns/persistence/persistence_3_0.xsd"
             version="3.0">
    <persistence-unit name="PersistenceUnit">

        <properties>
            <property name="javax.persistence.jdbc.url" value="jdbc:mysql://localhost:3306/example"/>
            <property name="javax.persistence.jdbc.user" value="root"/>
            <property name="javax.persistence.jdbc.password" value=""/>
            <property name="javax.persistence.jdbc.driver" value="com.mysql.jdbc.Driver"/>
            <property name="hibernate.dialect" value="org.hibernate.dialect.MySQL5Dialect"/>
            <property name="hibernate.hbm2ddl.auto" value="update"/>
        </properties>

    </persistence-unit>
</persistence>
Step 4: After all the above steps, now create a package named model and create an entity class inside that package named as Student. Go to src > main > java > model > Student and write the below code file..
Java
package model;


import jakarta.persistence.*;

import java.util.ArrayList;
import java.util.List;

@Entity
public class Student {
    @Id
    @GeneratedValue(strategy = GenerationType.IDENTITY)
    private Long id;
    private String name;

    @OneToMany(mappedBy = "student", cascade = CascadeType.ALL, fetch = FetchType.LAZY)
    private List<Course> courses = new ArrayList<>();

    // Getters and setters

    public Long getId() {
        return id;
    }

    public void setId(Long id) {
        this.id = id;
    }

    public String getName() {
        return name;
    }

    public void setName(String name) {
        this.name = name;
    }

    public List<Course> getCourses() {
        return courses;
    }

    public void setCourses(List<Course> courses) {
        this.courses = courses;
    }
}
- This class represents the entity Student in the database.
- The JPA annotation is added to define its mapping to the corresponding database table.
- It contains fields for student ID, name, and List of courses, and getter and setter methods for these fields.
Step 5: Create the new Java package named as model. In that package, create a new entity class named Course. Go to src > main > java > model > Course and put the below code.
Java
package model;


import jakarta.persistence.*;

@Entity
public class Course {
    @Id
    @GeneratedValue(strategy = GenerationType.IDENTITY)
    private Long id;
    private String name;

    @ManyToOne
    @JoinColumn(name = "student_id")
    private Student student;

    // Getters and setters

    public Long getId() {
        return id;
    }

    public void setId(Long id) {
        this.id = id;
    }

    public String getName() {
        return name;
    }

    public void setName(String name) {
        this.name = name;
    }

    public Student getStudent() {
        return student;
    }

    public void setStudent(Student student) {
        this.student = student;
    }
}
- This class represents the entity Course in the database.
- The JPA annotation is added to define its mapping to the corresponding database table.
- It contains fields for course ID, name, and many-to-one relationship of the Students, and getter and setter methods for these fields.
Step 6: Create a new Java package named util in that package, create the new Entity Java class for the creation of the entity and it named as JPAUtil. Go to src > main > java > util > JPAUtil and put the below code.
Java
package util;

import jakarta.persistence.EntityManager;
import jakarta.persistence.EntityManagerFactory;
import jakarta.persistence.Persistence;

/**
 * Utility class for managing JPA (Jakarta Persistence API) resources.
 */
public class JPAUtil {

    private static final EntityManagerFactory entityManagerFactory;

    // Static block to initialize the EntityManagerFactory
    static {
        entityManagerFactory = Persistence.createEntityManagerFactory("PersistenceUnit");
    }

    /**
     * Retrieves an instance of EntityManager.
     */
    public static EntityManager getEntityManager() {
        return entityManagerFactory.createEntityManager();
    }

    /**
     * Closes the EntityManagerFactory.
     */
    public static void close() {
        entityManagerFactory.close();
    }
}
Step 7: Create a new Java class and named as the MainApplication. Go to src > main > java > MainApplication and put the below code.
Java
import jakarta.persistence.EntityManager;
import jakarta.persistence.EntityTransaction;
import model.Course;
import model.Student;
import util.JPAUtil;

import java.util.List;

public class MainApplication {
    public static void main(String[] args) {
        EntityManager em = JPAUtil.getEntityManager();
        EntityTransaction tx = em.getTransaction();

        try {
            tx.begin();

            // Create students
            Student student1 = new Student();
            student1.setName("Syam Sunder");

            Student student2 = new Student();
            student2.setName("Eswar");

            // Create courses
            Course course1 = new Course();
            course1.setName("Java");
            course1.setStudent(student1);

            Course course2 = new Course();
            course2.setName("HTML");
            course2.setStudent(student1);

            Course course3 = new Course();
            course3.setName("CSS");
            course3.setStudent(student2);

            em.persist(student1);
            em.persist(student2);
            em.persist(course1);
            em.persist(course2);
            em.persist(course3);

            tx.commit();

            // Retrieve students with their courses
            List<Student> students = em.createQuery("SELECT s FROM Student s", Student.class).getResultList();
            for (Student student : students) {
                System.out.println("Student: " + student.getName());
                System.out.println("Courses Enrolled:");
                for (Course course : student.getCourses()) {
                    System.out.println("- " + course.getName());
                }
            }
        } catch (Exception e) {
            if (tx != null && tx.isActive()) {
                tx.rollback();
            }
            e.printStackTrace();
        } finally {
            em.close();
            JPAUtil.close();
        }
    }
}
- The MainApplication demonstrates basic CRUD operations using JPA (Jakarta Persistence API).
- It creates and persists instances of students and courses, establishes relationships between them, and then retrieves and prints the students along with the courses they are enrolled in.
- Finally, it handles transactions and closes the entity manager and connection resources properly.
pom.xml:
XML
<?xml version="1.0" encoding="UTF-8"?>
<project xmlns="http://maven.apache.org/POM/4.0.0"
         xmlns:xsi="http://www.w3.org/2001/XMLSchema-instance"
         xsi:schemaLocation="http://maven.apache.org/POM/4.0.0 https://maven.apache.org/xsd/maven-4.0.0.xsd">
    <modelVersion>4.0.0</modelVersion>

    <groupId>org.example</groupId>
    <artifactId>jpa-list-mapping-demo</artifactId>
    <version>1.0-SNAPSHOT</version>
    <name>jpa-list-mapping-demo</name>

    <properties>
        <project.build.sourceEncoding>UTF-8</project.build.sourceEncoding>
        <maven.compiler.target>11</maven.compiler.target>
        <maven.compiler.source>11</maven.compiler.source>
        <junit.version>5.9.2</junit.version>
    </properties>

    <dependencies>
        <dependency>
            <groupId>org.hibernate.orm</groupId>
            <artifactId>hibernate-core</artifactId>
            <version>6.0.2.Final</version>
        </dependency>
        <dependency>
            <groupId>mysql</groupId>
            <artifactId>mysql-connector-java</artifactId>
            <version>8.0.28</version>
        </dependency>
        <dependency>
            <groupId>org.glassfish.jaxb</groupId>
            <artifactId>jaxb-runtime</artifactId>
            <version>3.0.2</version>
        </dependency>
        <dependency>
            <groupId>org.junit.jupiter</groupId>
            <artifactId>junit-jupiter-api</artifactId>
            <version>${junit.version}</version>
            <scope>test</scope>
        </dependency>
        <dependency>
            <groupId>org.junit.jupiter</groupId>
            <artifactId>junit-jupiter-engine</artifactId>
            <version>${junit.version}</version>
            <scope>test</scope>
        </dependency>
    </dependencies>

    <build>
        <plugins>
        </plugins>
    </build>
</project>
Step 8: Once the project is done, run the application and we will get the output like the below image.

The above example demonstrates a simple Java application using JPA for the List mapping and it includes the entity classes for the Student and Course along with the JPA utility class for the managing the EntityManager instances.
Share your thoughts in the comments
Please Login to comment...