JPA – Entity Introduction
Last Updated :
02 Apr, 2024
Java Persistence API (JPA) can facilitate the development of Java applications by providing a framework for managing relational data in Java applications and JPA is one of the key concepts in entities. Entities can represent and use persistent data stored in a relational database map to corresponding database tables.
Understanding JPA Entities
JPA entities are Java classes that can be mapped to database tables and these classes define the structure of the data and act as a bridge between the object-oriented world of Java and the relational world of the database.
Steps to Create a JPA Entity:
- Define the java class and it can annotate it with the @Entity to mark it as an entity.
- Define fields in the class to represent columns in the database table.
- It can be annotated fields with the appropriate JPA annotations like @OneToOne and @OneToMany etc.
- It can configure the data source and the persistence unit in the persistance.xml file.
- It can use the EntityManager to perform the CRUD operations on the entities.
JPA Entity Example Project
We can develop a simple JPA project that can use entity and address entity mapped both of entities that can save the user data into the MYSQL database.
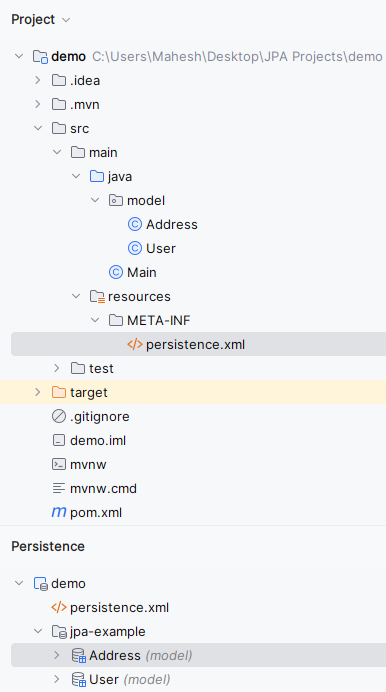
Step 1: Create the new JPA project using the InteljIdea named as a demo once create the project then the file structure looks like the below image.
Step 2: Open the open.xml and add the below dependencies into the project.
XML
<!-- Database Driver (MySQL in this example) -->
<dependency>
      <groupId>mysql</groupId>
      <artifactId>mysql-connector-java</artifactId>
      <version>8.0.28</version>
</dependency>
<dependency>
      <groupId>org.hibernate.orm</groupId>
      <artifactId>hibernate-core</artifactId>
      <version>6.0.2.Final</version>
</dependency>
<dependency>
      <groupId>org.glassfish.jaxb</groupId>
      <artifactId>jaxb-runtime</artifactId>
      <version>3.0.2</version>
</dependency>
<dependency>
  <groupId>org.junit.jupiter</groupId>
  <artifactId>junit-jupiter-api</artifactId>
  <version>${junit.version}</version>
  <scope>test</scope>
</dependency>
<dependency>
      <groupId>org.junit.jupiter</groupId>
      <artifactId>junit-jupiter-engine</artifactId>
      <version>${junit.version}</version>
      <scope>test</scope>
</dependency>
Step 3: Open the persistence.xml and put the below code into the project and it can configure the database of the project.
XML
<?xml version="1.0" encoding="UTF-8" standalone="yes"?>
<persistence xmlns="https://jakarta.ee/xml/ns/persistence"
             xmlns:xsi="http://www.w3.org/2001/XMLSchema-instance"
             xsi:schemaLocation="https://jakarta.ee/xml/ns/persistence https://jakarta.ee/xml/ns/persistence/persistence_3_0.xsd"
             version="3.0">

    <persistence-unit name="jpa-example" transaction-type="RESOURCE_LOCAL">
        <class>model.Address</class>
        <class>model.User</class>
        <properties>
            <property name="jakarta.persistence.jdbc.url" value="jdbc:mysql://localhost:3306/example"/>
            <property name="jakarta.persistence.jdbc.user" value="root"/>
            <property name="jakarta.persistence.jdbc.password" value=""/>
            <property name="jakarta.persistence.jdbc.driver" value="com.mysql.jdbc.Driver"/>
            <property name="hibernate.dialect" value="org.hibernate.dialect.MySQL5Dialect"/>
            <property name="hibernate.hbm2ddl.auto" value="update"/>
        </properties>

    </persistence-unit>
</persistence>
Step 4: Create the Java package named as the model in that package create the Java class named as the User.
Go to src > main > java > model > User and put the below code.
Java
package model;
import jakarta.persistence.*;

/**
 * Represents a user entity in the application.
 */
@Entity
public class User {
    @Id
    @GeneratedValue(strategy = GenerationType.IDENTITY)
    private Long id; // Unique identifier for the user.

    private String name; // The name of the user.

    @OneToOne(cascade = CascadeType.ALL)
    @JoinColumn(name = "address_id", referencedColumnName = "id")
    private Address address; // The address associated with the user.

    /**
     * Retrieves the unique identifier of the user.
     * @return The user's ID.
     */
    public Long getId() {
        return id;
    }

    /**
     * Sets the unique identifier of the user.
     * @param id The user's ID.
     */
    public void setId(Long id) {
        this.id = id;
    }

    /**
     * Retrieves the name of the user.
     * @return The name of the user.
     */
    public String getName() {
        return name;
    }

    /**
     * Sets the name of the user.
     * @param name The name of the user.
     */
    public void setName(String name) {
        this.name = name;
    }

    /**
     * Retrieves the address associated with the user.
     * @return The user's address.
     */
    public Address getAddress() {
        return address;
    }

    /**
     * Sets the address associated with the user.
     * @param address The user's address.
     */
    public void setAddress(Address address) {
        this.address = address;
    }
}
Step 5: Create the one newer Java class named as the Address.
Go to src > main > java > model > Address and put the below code.
Java
package model;

import jakarta.persistence.*;
import java.util.List;

/**
 * Represents an address entity in the application.
 */
@Entity
public class Address {
    @Id
    @GeneratedValue(strategy = GenerationType.IDENTITY)
    private Long id; // Unique identifier for the address.

    private String street; // The street of the address.

    private String city; // The city of the address.

    @OneToMany(mappedBy = "address", cascade = CascadeType.ALL)
    private List<User> users; // The list of users associated with this address.

    /**
     * Retrieves the unique identifier of the address.
     * @return The address ID.
     */
    public Long getId() {
        return id;
    }

    /**
     * Sets the unique identifier of the address.
     * @param id The address ID to set.
     */
    public void setId(Long id) {
        this.id = id;
    }

    /**
     * Retrieves the street of the address.
     * @return The street of the address.
     */
    public String getStreet() {
        return street;
    }

    /**
     * Sets the street of the address.
     * @param street The street to set for the address.
     */
    public void setStreet(String street) {
        this.street = street;
    }

    /**
     * Retrieves the city of the address.
     * @return The city of the address.
     */
    public String getCity() {
        return city;
    }

    /**
     * Sets the city of the address.
     * @param city The city to set for the address.
     */
    public void setCity(String city) {
        this.city = city;
    }

    /**
     * Retrieves the list of users associated with this address.
     * @return The list of users.
     */
    public List<User> getUsers() {
        return users;
    }

    /**
     * Sets the list of users associated with this address.
     * @param users The list of users to set.
     */
    public void setUsers(List<User> users) {
        this.users = users;
    }
}
Step 6: Create the Main class and put the below code for the Entity manager of the class.
Go to src > main > java > Main and put the below code.
Java
import jakarta.persistence.EntityManager;
import jakarta.persistence.EntityManagerFactory;
import jakarta.persistence.Persistence;
import model.Address;
import model.User;

/**
 * A class demonstrating basic usage of JPA (Java Persistence API).
 */
public class Main {
    public static void main(String[] args) {
        // Create EntityManagerFactory using persistence unit name
        EntityManagerFactory emf = Persistence.createEntityManagerFactory("jpa-example");

        // Create EntityManager
        EntityManager em = emf.createEntityManager();

        // Create and persist a new user with address
        em.getTransaction().begin(); // Begin transaction
        Address address = new Address();
        address.setStreet("111 Srikakulam");
        address.setCity("City");
        em.persist(address); // Persist the address entity

        User user = new User();
        user.setName("Mahesh");
        user.setAddress(address);
        em.persist(user); // Persist the user entity along with associated address
        em.getTransaction().commit(); // Commit transaction

        // Retrieve user with associated address
        User retrievedUser = em.find(User.class, user.getId());
        System.out.println("Retrieved User: " + retrievedUser.getName());
        System.out.println("User's Address: " + retrievedUser.getAddress().getStreet() + ", " + retrievedUser.getAddress().getCity());

        // Close EntityManager and EntityManagerFactory
        em.close();
        emf.close();
    }
}
pom.xml:
XML
<?xml version="1.0" encoding="UTF-8"?>
<project xmlns="http://maven.apache.org/POM/4.0.0"
         xmlns:xsi="http://www.w3.org/2001/XMLSchema-instance"
         xsi:schemaLocation="http://maven.apache.org/POM/4.0.0 https://maven.apache.org/xsd/maven-4.0.0.xsd">
    <modelVersion>4.0.0</modelVersion>

    <groupId>org.example</groupId>
    <artifactId>demo</artifactId>
    <version>1.0-SNAPSHOT</version>
    <name>demo</name>

    <properties>
        <project.build.sourceEncoding>UTF-8</project.build.sourceEncoding>
        <maven.compiler.target>11</maven.compiler.target>
        <maven.compiler.source>11</maven.compiler.source>
        <junit.version>5.9.2</junit.version>
    </properties>

    <dependencies>
        <dependency>
            <groupId>org.hibernate.orm</groupId>
            <artifactId>hibernate-core</artifactId>
            <version>6.0.2.Final</version>
        </dependency>
        <dependency>
            <groupId>org.glassfish.jaxb</groupId>
            <artifactId>jaxb-runtime</artifactId>
            <version>3.0.2</version>
        </dependency>
        <dependency>
            <groupId>org.junit.jupiter</groupId>
            <artifactId>junit-jupiter-api</artifactId>
            <version>${junit.version}</version>
            <scope>test</scope>
        </dependency>
        <dependency>
            <groupId>org.junit.jupiter</groupId>
            <artifactId>junit-jupiter-engine</artifactId>
            <version>${junit.version}</version>
            <scope>test</scope>
        </dependency>

        <!-- https://mvnrepository.com/artifact/org.projectlombok/lombok -->
        <dependency>
            <groupId>org.projectlombok</groupId>
            <artifactId>lombok</artifactId>
            <version>1.18.30</version>
            <scope>provided</scope>
        </dependency>


        <!-- Database Driver (MySQL in this example) -->
        <dependency>
            <groupId>mysql</groupId>
            <artifactId>mysql-connector-java</artifactId>
            <version>8.0.28</version>
        </dependency>
    </dependencies>

    <build>
        <plugins>
        </plugins>
    </build>
</project>
Step 7: Once the project is completed, run the application then show the User and address as output. Refer the below image for the better understanding of the concept.

If we follow the above procedure, then we can successfully build the JPA application of the demonstration of the Entity Concept of the JPA.
Conclusion
JPA entities are the fundamental building blocks for the developing the Java applications with database interaction and understanding the entities is the crucial for the effective utilization of the JPA in application development. By following the proper steps and utilizing the appropriate annotations and developers can be seamlessly integrate the entities into the application therefore the improving the code maintainability and database interaction efficiency.
Share your thoughts in the comments
Please Login to comment...