How to Install Microsoft PowerToys on Windows 11?
Last Updated :
14 Apr, 2024
Microsoft PowerToys is a set of utilities designed to empower users with advanced features and functionalities not readily available within the standard Windows operating system. From enhanced window management to productivity-boosting tools, PowerToys offers a plenty of options to tailor your Windows experience to your specific need. So, installing PowerToys on windows can be a beneficial add-on.
In this article, We will show you How to Install & Use PowerToys on Windows 11.
List of Methods to Install Microsoft PowerToys on Windows 11:
Method 1: Install Microsoft PowerToys From the Microsoft Store
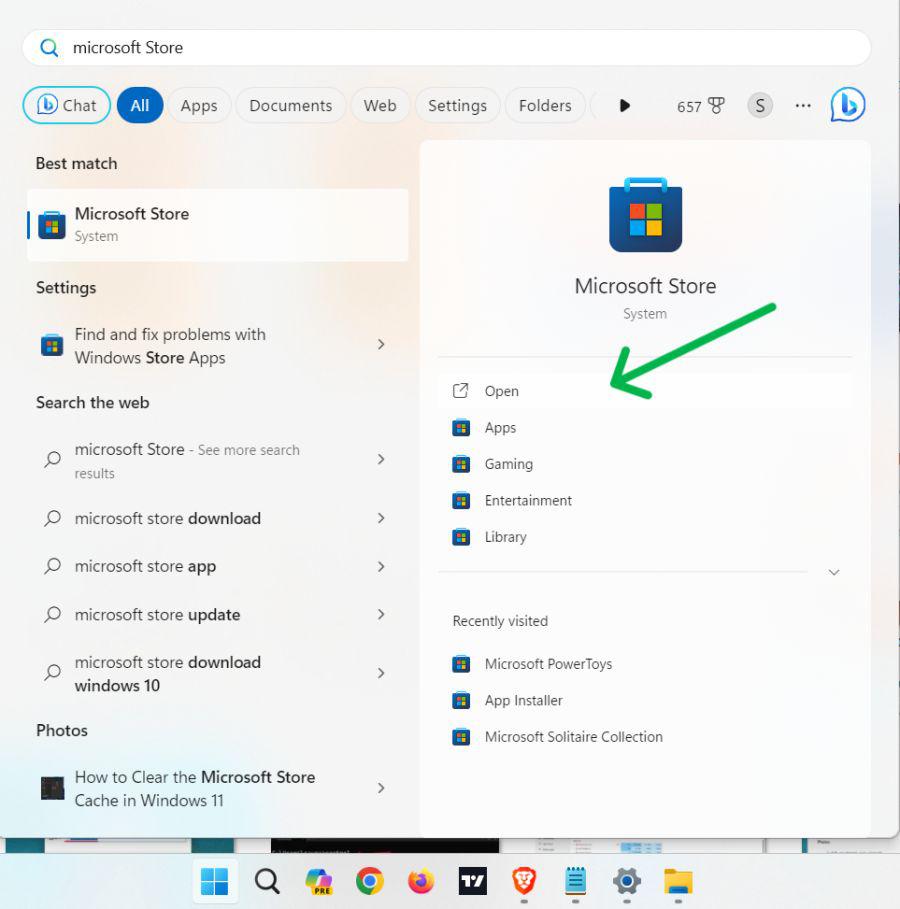
Step 1: To open Microsoft Store press Win + S then on search bar type “Microsoft Store”
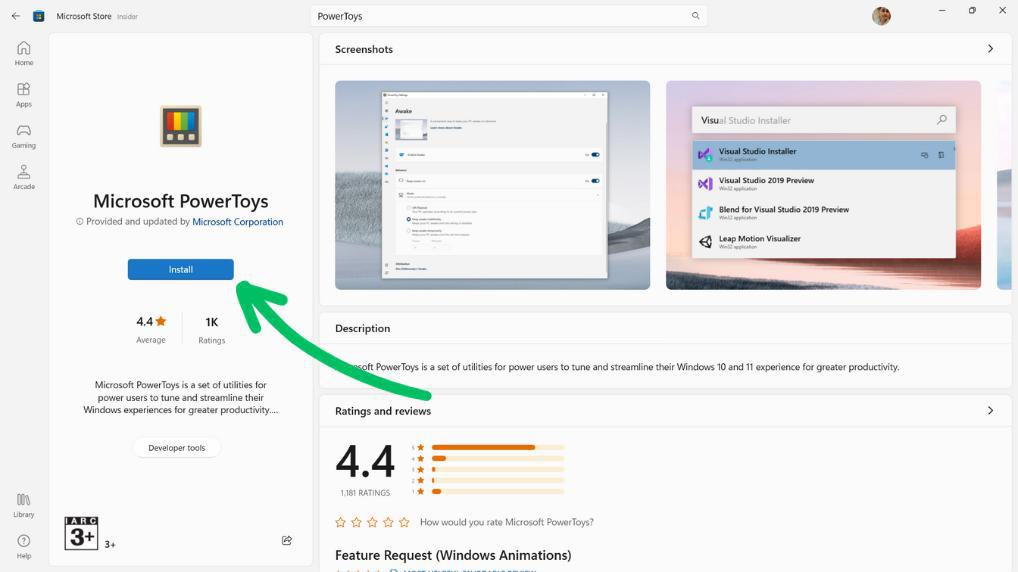
Step 2: Search for “PowerToys” in the store’s search bar.
Step 3: Click on the PowerToys app from the search results.

Step 4: Click on the “Install” button to begin the installation.
Method 2: Install Microsoft PowerToys from GitHub
For users who prefer manual installation, install Microsoft PowerToys on windows 11 from GitHub is an alternative option. here are the steps on how to install Microsoft PowerToys on Windows.
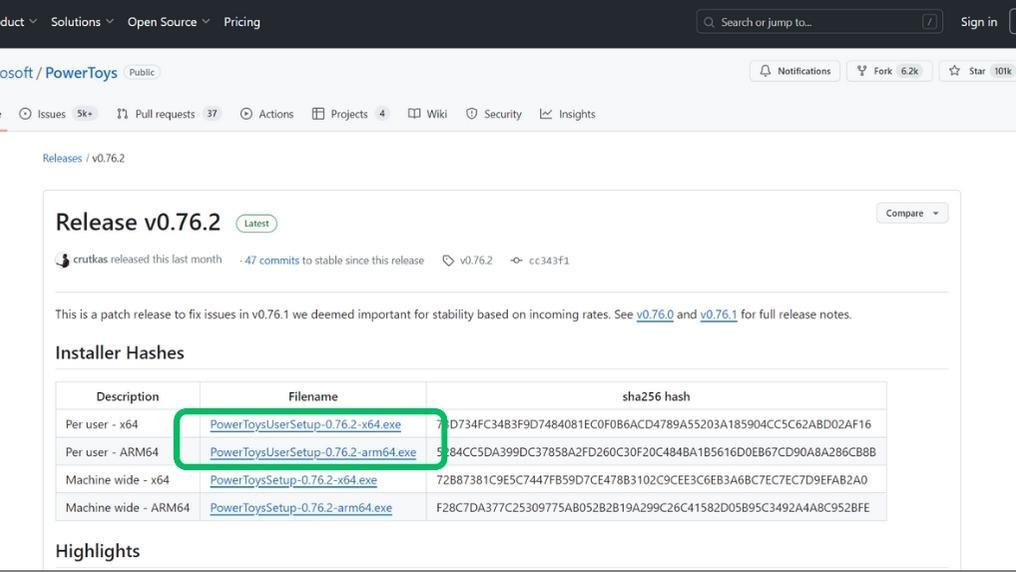
Step 1: Visit the PowerToys GitHub repository at https://github.com/microsoft/PowerToys/releases/tag/v0.76.2
Step 2: Choose the file matching your architecture (x64 or arm64) under “Assets.”
Step 3: Double-click the downloaded file and follow the on-screen instructions.
Step 4: Select which utilities you want to install during the setup process.
Method 3: Install Microsoft PowerToys Through the Command Prompt
You can also install Microsoft Powertoys on Windows 11 from Command Prompt. Here are the list of steps:
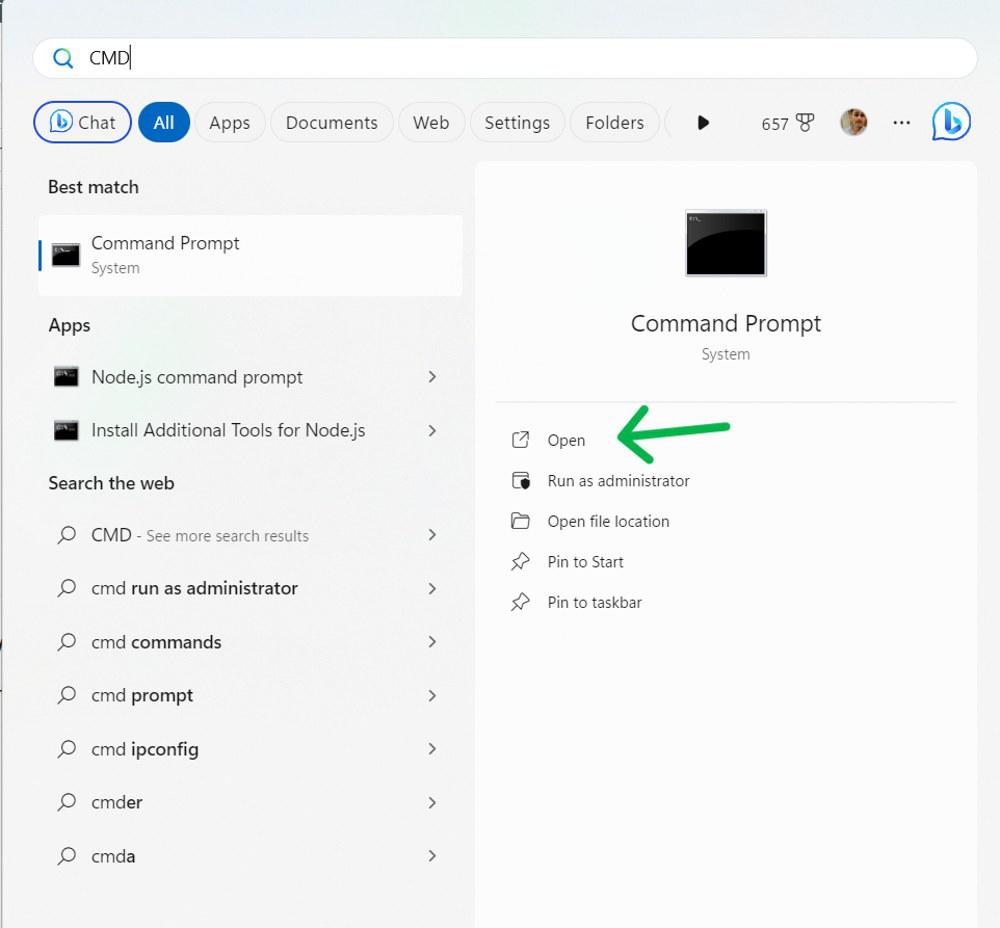
Step 1: Press Win + S then on search bar type “CMD” then click on “Run as administrator”
Step 2: Then, On CMD type this following command and hit Enter button then type “YES“
winget install --id Microsoft.PowerToys

Method 4: Install Microsoft PowerToys using Windows PowerShell
Installing PowerToys from PowerShell can be an alternative way to Install Microsoft PowerToys On Windows 11. Here are the list of the steps :
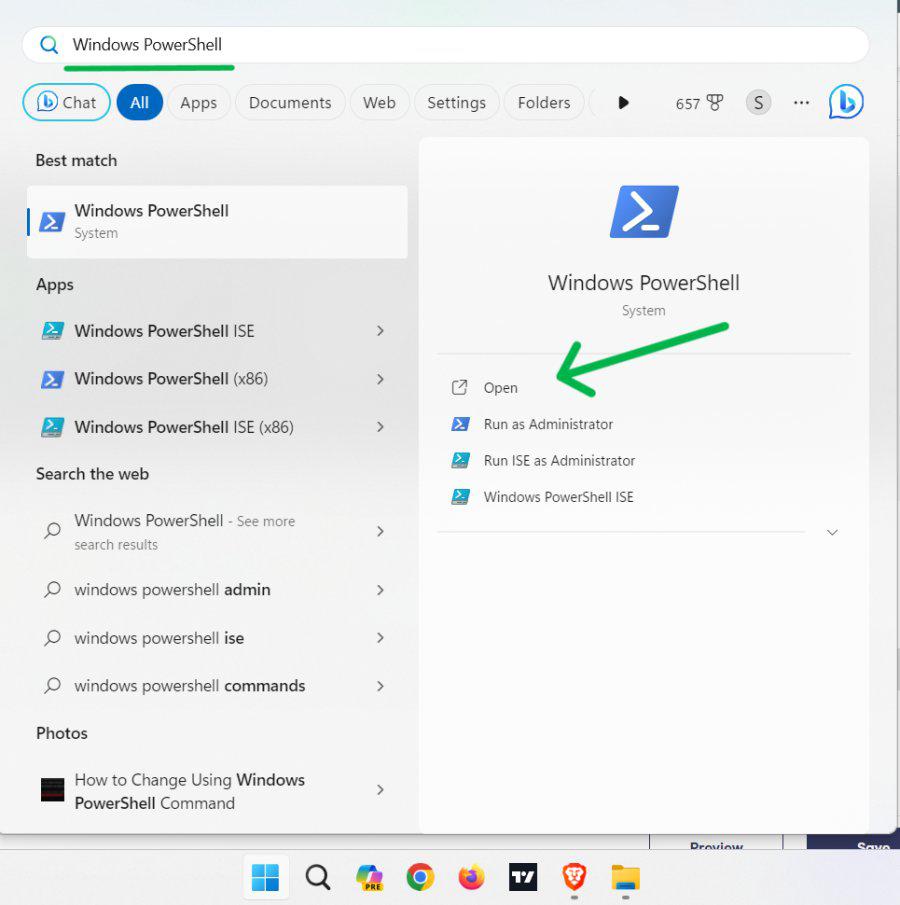
Step 1: Press Win + S then on search bar type “PowerShell” then click on “Run as administrator”
Note: You can also check to install and set up android studio on windows.
Step 2: Type this following command and hit Enter button.
winget install Microsoft.PowerToys --source winget
Step 3: In UAC click on “YES” button
Conclusion
In conclusion, there are multiple methods available for installing Microsoft PowerToys on Windows 11, such as through the Microsoft Store, GitHub, Command Prompt, or PowerShell. Users can choose the installation method that best suits their preferences to access the various features offered by PowerToys.
How to install PowerToys on Windows 11/10 – FAQ’s
How to Install Microsoft PowerToys on Windows 11?
To install Microsoft PowerToys on Windows 11, open the Microsoft Store, search for “PowerToys,” and click “Install.” Another way to install PowerToys is using CMD, simple open CMD with admin rights, run “winget install –id Microsoft.PowerToys,” and press Enter.
Where is the default install location for PowerToys?
C:\Program Files\PowerToys.
Can you install PowerToys without admin?
No! PowerToys needs administrator permission to control the settings of it
Is PowerToys available for Windows 10?
Yes, PowerToys also available for windows 10
Share your thoughts in the comments
Please Login to comment...