How to pass a Node.js variable to the inside of a Pug script tag ?
Last Updated :
07 Mar, 2024
In Node.js with Pug, we can pass the variables to the Pug template engine using the res.render method. To make the variable available inside the Pug script tag, we include it in the object passed to res.render and then reference it within the Pug file using the syntax “#{variableName}” inside the script tag.
In this article, we will explore the two different approaches along with the processes of passing a Node.js variable to the inside of a Pug script tag
Steps to Create Pug Application:
Step 1: Create a backend server using the following command in your project folder.
npm init -y
Step 2: Install the necessary package in your server using the following command.
npm i express pug
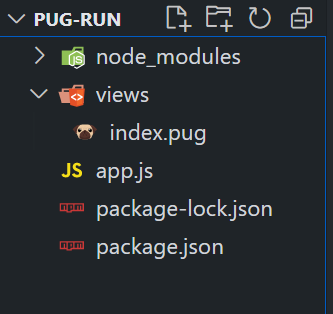
Folder Structure:
Dependencies:
"dependencies": {
    "express": "^4.18.2",
    "pug": "^3.0.2"
}
Passing Variable inside Pug Script Tag using Inline Variable
- In this approach, we are using the Pug template engine to render an HTML page in Node.js. The data object containing variables like title and message is passed to the template using res.render.
- Within the Pug script tag, the inline variable #{data.message} is used to embed the Node.js variable into the generated JavaScript code, allowing dynamic data integration on the client-side.
Syntax to pass inline Variable:
script.
    // JS code
    var yourVariable = '#{pugVar}';
Example: Below is an example to pass a Node.js variable to the inside of a Pug script tag.
HTML
//- index.pug
doctype html
html
head
title= data.title
body
h1= data.message
script.
var greeting = "#{data.message}";
console.log(greeting);
|
Javascript
const express = require('express');
const app = express();
const port = 3000;
app.set('view engine', 'pug');
app.get('/', (req, res) => {
const geeksData = {
title: 'GeeksforGeeks Example',
message: 'Hello, Geeks!'
};
res.render('index', { data: geeksData });
});
app.listen(port, () => {
console.log(`Server is running at http:
});
|
To run the application, we need to start the server by using the below command.
node app.js
Output:
Passing Variable inside Pug Script Tag using Data Attribute
- In this approach, we are using the Data Attribute method in a Pug template to embed data.
- The data-geeks-category attribute is assigned to a div element, allowing the category information to be easily accessed via JavaScript.
- This enables dynamic client-side interaction by retrieving and logging the category from the data attribute within the embedded script.
Syntax to pass data attribute:
html
    head
    body
        div(data-your-attribute='#{pugVar}')
            // HTML content
        script.
            const yourDataValue = document.querySelector('div').dataset.yourAttribute;
            // JavaScript code using the data attribute value
Example: Below is an example to pass a Node.js variable to the inside of a Pug script tag.
HTML
//- index.pug
doctype html
html
head
title= data.title
body
h1= data.message
div(data-geeks-category= data.category)
script.
const geeksData = {
message: '#{data.message}',
category: '#{data.category}'
};
const category = document.querySelector('div').dataset.geeksCategory;
console.log(`Message: ${geeksData.message}, Category: ${category}`);
|
Javascript
const express = require('express');
const app = express();
const port = 3000;
app.set('view engine', 'pug');
app.get('/', (req, res) => {
const geeksData = {
title: 'GeeksforGeeks',
message: 'Hello, Geeks!',
category: 'Programming'
};
res.render('index', { data: geeksData });
});
app.listen(port, () => {
console.log(`Server is running at http:
});
|
To run the application, we need to start the server by using the below command.
node app.js
Output:
Share your thoughts in the comments
Please Login to comment...