How to Install Rufus on Ubuntu Mate?
Last Updated :
29 Jan, 2024
Rufus is a utility that is used to create bootable USB flash drives, such as pen drives or memory sticks. Its main purpose is to flash bootable ISOs and BIOS. Although its size is small, Rufus contains all the required tools that you will need.
Indeed, Rufus is not available for any Linux distributions; it is specifically designed for Windows systems. While its primary purpose is to flash Windows ISOs onto a flash drive, it can also be utilized to flash a Linux image onto a flash drive with ease. You can utilize alternative software options like Balena Etcher for flashing Linux ISOs onto a flash drive. Similarly, if you desire to flash a Windows ISO onto a USB drive, you may use the WinUSB utility.
We will focus on flashing a Ubuntu Mate ISO into a flash drive from a Windows system.
Downloading Rufus
1. You can download rufus from the official website – https://rufus.ie/en/

Download the preferred version of rufus
2. Navigate to the installation folder and execute the file; a new window of Rufus will then appear on your screen.

Initial screen of the rufus software
Downloading ISO File
1. Go to this website and download the latest ISO of Ubuntu Mate – https://ubuntu-mate.org/download/amd64/

Download the latest version of ubuntu mate
2. Insert a USB drive and select it in the rufus software.

Select the installation drive
3. Select the ISO file that you want to flash.
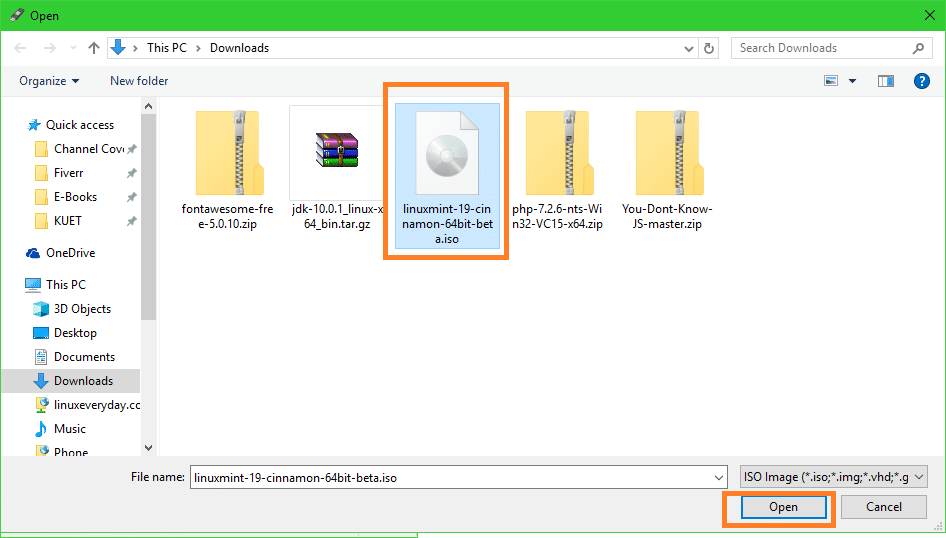
Select the iso file
Installation
1. From here the START option will appear in the Rufus software. Leave everything to the default and don’t change anything.
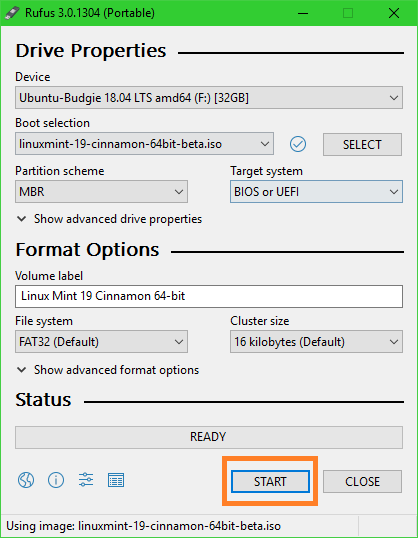
Start the flashing process to flash the image file.
2. Click on YES.
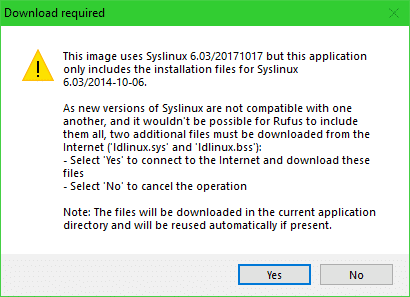
Click on YES
3. Next select the option “Write in ISO mode (Recommended)” if you don’t know what you are doing.
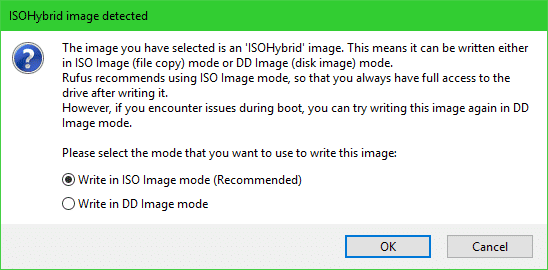
Select the recommended option
4. The process may take a while to complete, depending on the write speed of your USB drive. Once it is completed, click CLOSE and you will have successfully flashed the Ubuntu Mate ISO onto the USB drive.

Click on CLOSE to complete the process
Conclusion
At this point, you will have a USB drive ready to be used as a live installation medium. In this article, we state that there is no Rufus utility for Linux distributions; it is only available for Windows systems. Instead, you might consider alternative utilities like Balena Etcher. We then proceeded with the installation of a live media (ISO) of Ubuntu Mate on a flash drive. Now, you can use it as a live installation medium or simply plug it into a device for testing.
Share your thoughts in the comments
Please Login to comment...