How to Install & Configure MariaDB on Ubuntu
Last Updated :
05 Feb, 2024
MariaDB is one of the most widely used open-source RDBMS. It is widely popular for its efficiency, dependability, and convenience. In case we use Ubuntu as a system and require a stable database solution, the process of installation and configuration of MariaDB is quite easy. In this article, we will understand how to install and set up MariaDB on Ubuntu system.
Install and Configure MariaDB on Ubuntu
In this section, we will go through how to Install and Configure MariaDB on Ubuntu in a detailed manner. Let’s understand in step by step manner.
Step 1: Update System
Before we start, it is always a good idea to update the package list so that we are installing the latest available packages. Open a terminal window and run the following commands:
sudo apt update
Updating the package list ensures we install the latest available packages for a secure and optimized installation.
Output:
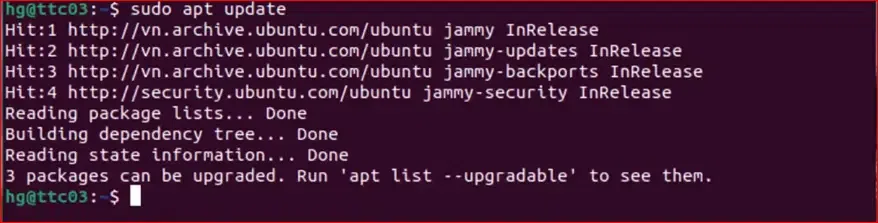
Update System
Step 2: Install MariaDB Server
2.1 – Install the MariaDB Packages
To install MariaDB, use the following command:
sudo apt install mariadb-server mariadb-client -y
The -y flag allows for automatic confirmation of the installation prompts.
Output:
.webp)
Install the MariaDB Packages
2.2 – Start and Enable the MariaDB service to start with the system
Initiate the MariaDB service and configure it to start with the system using the following commands:
sudo systemct1 start mariadb
sudo systemct1 enable mariadb
Output:

Start and Enable the MariaDB service
2.3 – Check the Status of the MariaDB Service
Verify that MariaDB is running correctly on our system by checking its status:
sudo systemct1 status mariadb
Output:

Check Status
Step 3: Secure MariaDB
MariaDB comes with a security script that can help we secure our installation. Run the following command:
3.1 Set up and Enhance the Security of the MySQL Database System after Installation
sudo mysql_secure_installation
The script will prompt we to do several things, such as setting a root password (if we haven’t already during installation), removing anonymous users, disallowing remote root login, and removing the test database. Follow the prompts and answer ‘Y’ for yes or ‘N’ for no according to our preferences.
Output:
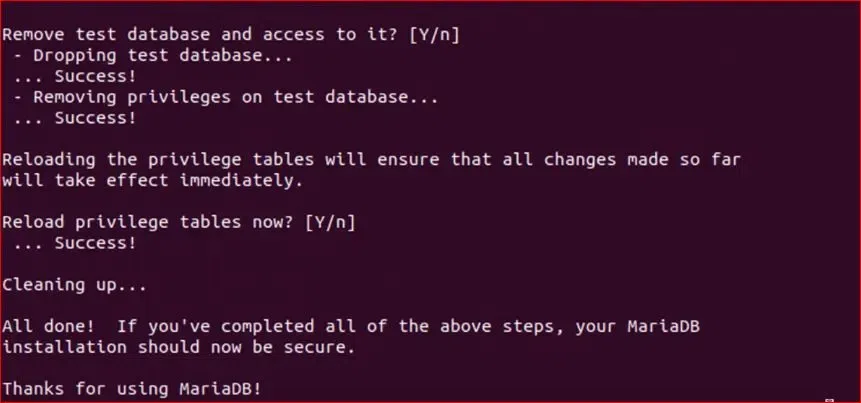
Enhance the Security
3.2 Verify
After completing the security setup, verify the installation by entering the MariaDB shell and running:
sudo mysql -uroot -p
Output:
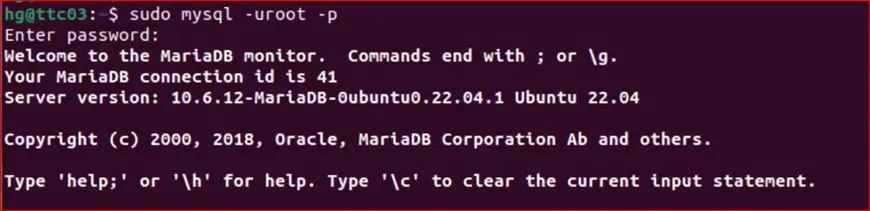
Verify Installation
show databases
Output:
This command will give the list of database which will automatically get created by the system when MariaDB is successful installed on the system.
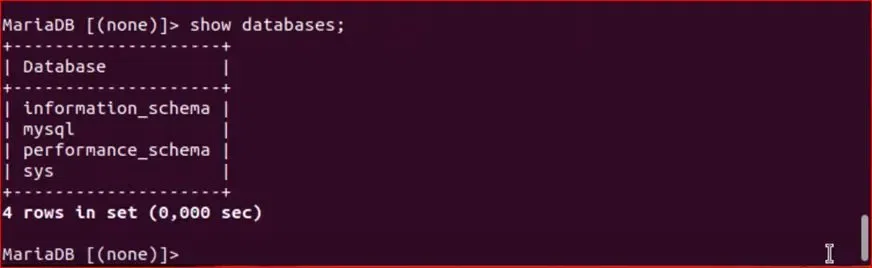
Verify
Step 4: Adjust Firewall
To enhance security, adjust our firewall settings to allow MariaDB traffic. Execute the following commands:
sudo ufw enable
sudo ufw allow 3306
sudo ufw reload
If we need to connect remotely to a MariaDB server a deploy a complex system with multiple servers, we need open port 3306 on the firewall. This allows these servers to connect and interact with the shared database.
.webp)
Adjust Firewall
Step 5: Exit the shell
Once we have completed the above steps, exit the MariaDB shell by typing:
exit
Conclusion
Overall, we have successfully installed and configured MariaDB on our Ubuntu system. Now we have a robust and secure database server that can be used for our applications. Be sure to apply database security best practices and regularly back up our databases to maintain data integrity and availability.
Share your thoughts in the comments
Please Login to comment...