How to Install and Configure MongoDB in Ubuntu?
Last Updated :
17 Apr, 2024
MongoDB is a popular NoSQL database offering flexibility, scalability, and ease of use. Installing and configuring MongoDB in Ubuntu is a straightforward process, but it requires careful attention to detail to ensure a smooth setup.
In this guide, we’ll learn how to install and configure MongoDB in Ubuntu. We’ll walk you through each step, from installation to configuration, enabling you to harness the power of MongoDB on your Ubuntu system.
Let’s look at the requirements for installing MongoDB in Ubuntu.
Requirements to Install and Configure MongoDB in Ubuntu
- MongoDB 7.0 Community Edition supports the following 64-bit Ubuntu LTS (long-term support) releases on x86_64 architecture:
- Ubuntu 22.04 LTS (“Jammy”)
- Ubuntu 20.04 LTS (“Focal”)
- Review the Production Notes document before deploying MongoDB in a production environment.
Steps to Install and Configure MongoDB in Ubuntu
MongoDB can be installed on Ubuntu with the use of the following commands. These commands are easy to run on the terminal and make the installation process handy. Follow the steps given below to install MongoDB:
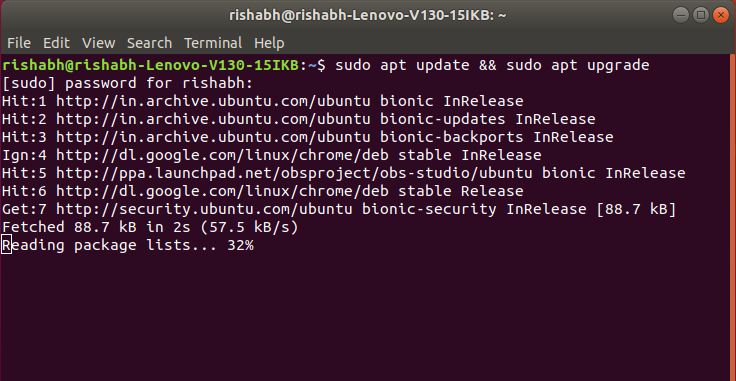
Step 1: First you need to update and upgrade your system repository to install MongoDB. Type the following command in your terminal and then press Enter.
sudo apt update && sudo apt upgrade
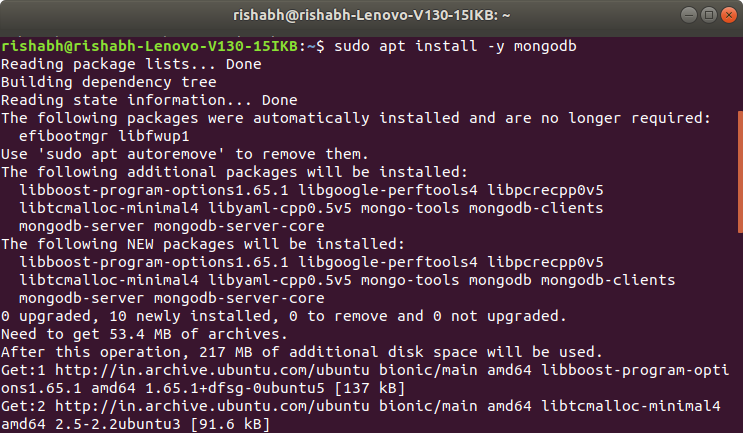
Step 2: Now, install the MongoDB package using ‘apt‘. Type the following command and press Enter.
sudo apt install -y mongodb
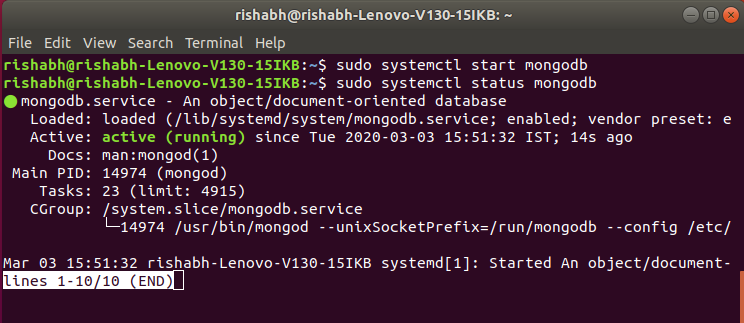
Step 3: Check the service status for MongoDB with the help of following command:
sudo systemctl status mongodb

systemctl verifies that MongoDB server is up and running.
Step 4: Now check if the installation process is done correctly and everything is working fine. Go through the following command:
mongo --eval 'db.runCommand({ connectionStatus: 1 })'
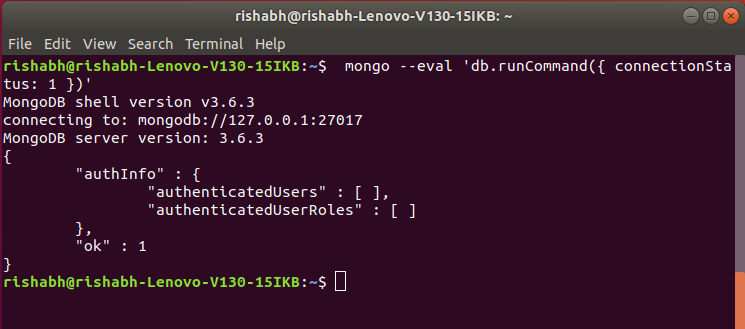
the value “1” in ok field indicates that the server is working properly with no errors.
Step 5: MongoDB services can be started and stopped with the use of following commands: To stop running the MongoDB service, use command :
sudo systemctl stop mongodb
MongoDB service has been stopped and can be checked by using the status command:
sudo systemctl status mongodb
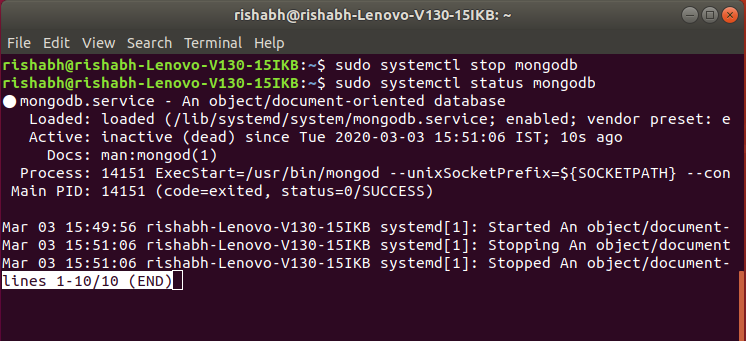
As it can be seen that the service has stopped, to start the service we can use :
sudo systemctl start mongodb
Step 6: Accessing the MongoDB Shell
MongoDB provides a command-line interface called the MongoDB shell, which allows you to interact with the database.
To access the MongoDB shell, simply type the following command in your terminal:
mongo
You are now connected to the MongoDB server, and you can start executing commands to create databases, collections, and documents.
Features of MongoDB
- Document-Oriented: MongoDB stores data in flexible, JSON-like documents called BSON (Binary JSON), which allows for easy storage and retrieval of complex data structures.
- Scalability: MongoDB is designed to scale horizontally across multiple servers, making it suitable for handling large volumes of data and high-traffic applications.
- High Performance: MongoDB’s architecture is optimized for high performance, with features such as indexing, sharding, and replica sets to ensure fast data retrieval and processing.
- Flexible Schema: MongoDB does not enforce a strict schema like traditional relational databases, allowing for dynamic schema evolution and easy handling of changing data requirements.
- Rich Query Language: MongoDB supports a powerful query language that allows for complex queries, aggregations, and data manipulation operations.
- High Availability: MongoDB provides features such as replica sets and automatic failover to ensure high availability and data durability.
- Horizontal Scaling: MongoDB supports horizontal scaling through sharding, allowing data to be distributed across multiple servers to handle increased load and storage requirements.
Use Cases of MongoDB
- Content Management and Delivery: MongoDB is well-suited for content management systems and delivery platforms that require storing and serving large volumes of unstructured content such as articles, images, and videos.
- Real-Time Analytics: MongoDB’s flexible data model and high-performance capabilities make it an excellent choice for real-time analytics applications, allowing organizations to analyze large volumes of data and derive insights quickly.
- Mobile and IoT Applications: MongoDB’s flexible schema and support for geospatial queries make it ideal for storing and processing data from mobile devices and Internet of Things (IoT) sensors.
- E-commerce: MongoDB can be used to build scalable e-commerce platforms that require handling complex product catalogs, user profiles, and transaction data.
- Social Networking: MongoDB is well-suited for social networking applications that need to store and process large amounts of user-generated content, relationships, and activity feeds.
- Log and Event Data: MongoDB’s high write throughput and flexible data model make it suitable for storing and analyzing log and event data generated by web servers, applications, and IoT devices.
- Catalog and Inventory Management: MongoDB can be used to build catalog and inventory management systems for e-commerce, retail, and supply chain management applications.
Conclusion
In this article we discussed MongoDB’s flexibility, scalability, and ease of use make it a popular choice for various applications. Installing and configuring MongoDB on Ubuntu is straightforward but requires attention to detail. By following the provided steps, users can easily set up MongoDB on their systems and utilize its features for content management, real-time analytics, e-commerce, and more.
The included FAQs address common queries, ensuring a smooth installation process of MongoDB and enabling users to leverage MongoDB’s power efficiently for their projects.
How to Install and Configure MongoDB in Ubuntu – FAQ
Can I install MongoDB on Ubuntu using apt-get?
Yes, MongoDB can be installed on Ubuntu using the apt package manager. You can use the command `sudo apt install mongodb` to install MongoDB on your Ubuntu system.
How can I verify if MongoDB is running after installation on Ubuntu?
You can check the status of the MongoDB service using the command `sudo systemctl status mongodb`. If MongoDB is running, you’ll see an output indicating that the service is active and running.
What is the default port for MongoDB in Ubuntu?
By default, MongoDB listens for connections on port 27017. You can change this port by editing the MongoDB configuration file located at `/etc/mongod.conf`.
How do I access the MongoDB shell after installation on Ubuntu?
To access the MongoDB shell, simply open a terminal window and type the command `mongo`. This will connect you to the MongoDB server, allowing you to execute commands and interact with the database.
Is it necessary to configure MongoDB after installation on Ubuntu?
While MongoDB can be used with its default configuration after installation, it’s recommended to configure it based on your specific requirements. Configuration options include changing the default port, enabling authentication, setting up replica sets, and more. You can edit the MongoDB configuration file located at `/etc/mongod.conf` to make these changes.
Share your thoughts in the comments
Please Login to comment...