MongoDB: Getting Started
Last Updated :
07 Sep, 2021
Introduction to MongoDB
Terminologies:
A MongoDB Database can be called as the container for all the collections.
- Collection is a bunch of MongoDB documents. It is similar to tables in RDBMS.
- Document is made of fields. It is similar to a tuple in RDBMS, but it has dynamic schema here. Documents of the same collection need not have the same set of fields
Getting Started
After you install MongoDB, you can see all the installed file inside C:\ProgramFiles\MongoDB\ (default location). In the C:\Program Files\MongoDB\Server\3.2\bin directory, there are a bunch of executables and a short-description about them would be:
mongo: The Command Line Interface to interact with the db.
mongod: This is the database. Sets up the server.
mongodump: It dumps out the Binary of the Database(BSON)
mongoexport: Exports the document to Json, CSV format
mongoimport: To import some data into the DB.
mongorestore: to restore anything that you’ve exported.
mongostat: Statistics of databases
Now, you can start running the MongoDB Server. Fire up a Command Prompt and go to the location where MongoDB executables are installed (C:\Program Files\MongoDB\Server\3.2\bin\ but this path might change in future). Just type “mongod” and it will pop an error saying the path \data\db doesn’t exist:
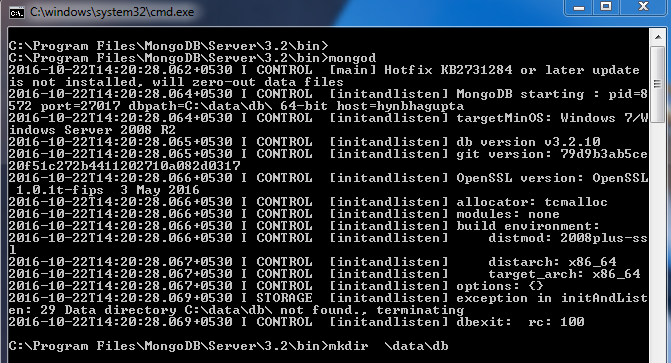
This means that the default path of storage C:\data\db was not found. So you can make a directory C:\data\db on your own or with the mkdir command. You can also change the default path by the switch –dbpath <path> with the “mongod” command.
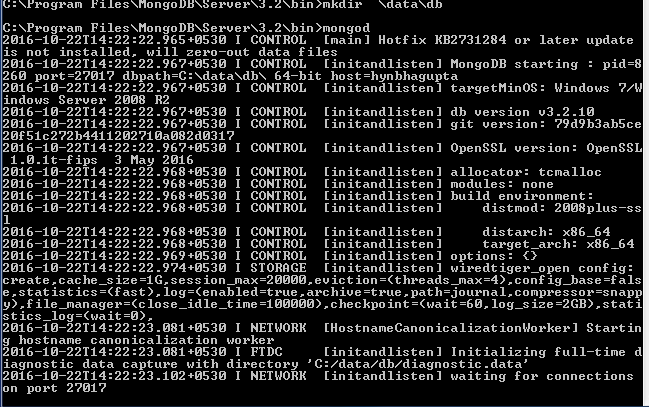
After making this directory, run the “mongod” command again and it will start the server on the port 27017.
Now, we need to start our client. So, open up another terminal and change the directory to the MongoDB path. Just type “mongo” and your client would be up, trying to connect to the server.
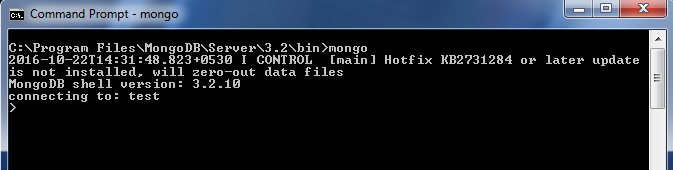
This would be the CLI to interact and administer the databases. This shell is kind-of a JS console. You can try in different JS commands to check that out. Since our client is up, we can now start working on the database. We can see that the database in use is named as “test”. You can see the databases using “see dbs” and switch to other databases like “local” by typing “use <dbname>”.
Note that there are no existing collections. This can be seen by typing the command “show collections”.
Let’s start by adding some data into our database. We can create a collection by the method db.createCollection(name, { size : …, capped : …, max : … } )
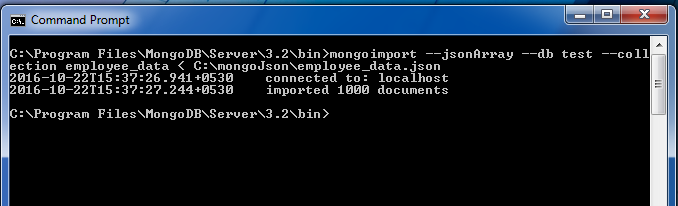
But we have created a randomly generated json file( of employee data) and we would import it onto our database by typing
mongoimport --jsonArray --db test --collection employee_data <
C:\mongoJson\employee_data.json
This would import the Employee data json document referred by the path given in the collection named “employee_data” of database “test”.
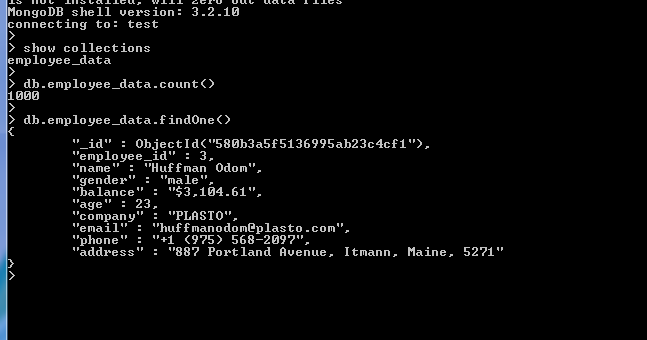
Now to ensure the collection is imported you can type “show collections” in the shell. You can use methods like count(), find(), findOne() to do some very basic queries with your document.
You can see that in every document there is a field called “_id” which was not provided in the data imported. The reason is that MongoDB provides a default “_id” (if not provided explicitly) which is a 12 byte hexadecimal number which assures the uniqueness of every document. You can even change this “_id” field but this is not recommended.
Indexing: You can also use indexing if your query returns more than one document. For example, db.employee_data.find() returns all the documents in the collection but if you just want the 7th one then, just do db.employee_data.find()[6] and it will return the specific document. [Note : Indexing starts from 0 here].
Projections: Let’s say for a query you want only some specific details and not the whole set of detail in the document. You can use projections for this. After your query object just make the needed fields as 1 and others would be assumed as 0 automatically. But remember that the “_id” field is always assumed to be 1 implicitly and if you don’t want to see the ugly looking “_id” field, then you need to say this in your projection by “_id : 0”
Queries:
1. Find the number of employees with company “GEEKS FOR GEEKS”
> db.employee_data.find( { company= “GEEKS FOR GEEKS” } ).count()
2. Show the detail of all the employees named “Sandeep Jain”
> db.employee_data.find( { name: “Sandeep Jain” }
Here, all the documents which matches with the given name would show up.
3. Show the age, gender and email, but not “_id” of the employee named “Harshit Gupta”. (Assume that there is only one employee named Harshit Gupta). Usage of Projections
> db.employee_data.find( { name: “Harshit Gupta” }, { _id:0, age:1, gender:1, email:1 } )
We can also store the output of queries into variables and then make interesting queries with them too.
4. Print the name of all the female employees.
> var femaleEmp = db.employee_data.find( { gender: “female” } )
for ( var i = 0 ; i < femaleEmp.count() ; i++){
print ( femaleEmp[i].name)
}
> db.employee_data.find( { gender: "female" }, { _id:0, name:1 } )
Note that the 1st solution just prints out the names while 2nd one prints it in Object Format.
Article By Harshit Gupta:
Kolkata based Harshit Gupta is an active blogger having keen interest in writing about algorithms,technical blogs, stories, and personal life experiences. Besides being passionate about writing, he also loves coding and dancing. Currently working in AMD, he is an active blog contributor at GeeksforGeeks. You can reach him at harshitguptablog.wordpress.com.
Share your thoughts in the comments
Please Login to comment...