How To Docker SetUp Three Architecture Setup ?
Last Updated :
22 Feb, 2024
This article provides an easily understandable explanation on using Docker to build a three-tier architecture. In this 3tier architecture we use WordPress as frontend application and MySQL as backend database and both the application with a customized network in docker. It provides a step-by-step guidelines for seamless integration and configuration of the workflow, logic inside Docker containers. By using Docker’s containerization we can efficiently deploy and manage each layer, In this you will learn how to improve the scalability and portability of their applications practically performing all.
What is Docker?
Docker is a container platform tool that facilitates developers to automate the deployment of applications inside lightweight and portable containers. In these containers are standalone, executable software packages that come with everything that is needed to run using software, including the code, runtime, libraries, and system tools. Docker uses containerization technology to encapsulate applications and their dependencies, ensuring consistency across different environments.
What is 3-Tier Architecture?
Three-tier architecture is a software design pattern that divides an application into three interconnected layers: presentation, logic, and data. The presentation layer handles user interface and interaction, the logic layer (business layer) manages application functionality, and the data layer stores and retrieves information from databases. This modular structure enhances scalability, maintainability, and flexibility in developing and deploying applications.
Step By Step Implementation Of Docker Setup 3-Tier Architecture
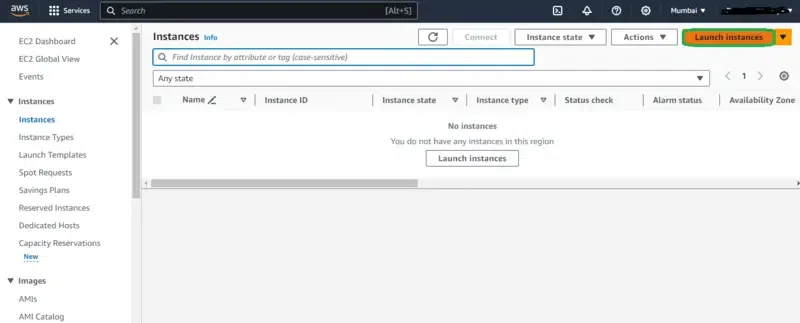
Step 1: Sign To AWS Console
- Navigate to the AWS Console.
- Sign In the AWS Account with your credentials.
- Navigate to EC2 Dashboard
- Click on Launch Instance as shown in the below Screenshot.
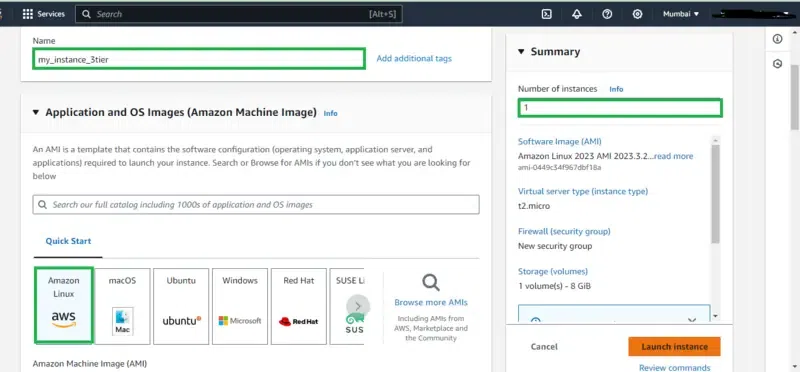
Step 2: Configure The Instance
- Provide the instance Name to the Instance.
- Choosing The AMI for the Instance.
- Enter 1 in number of Instances.
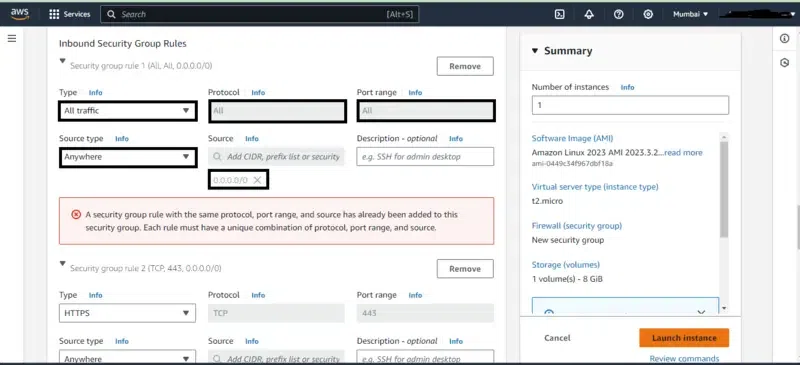
Step 3: Configure The Security Groups
- Now Configure the security groups making the allow of all traffic from all ports , all protocols to make free from the network issues of AWS Instance.
- Note: For providing security you can customize the ports and protocol by restricting them.
- After configuring the security groups, click on the Launch Instance.
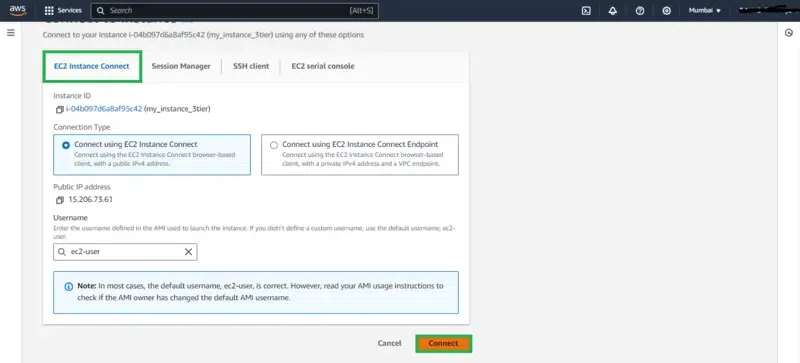
Step 4: Connect To The Running Instance
- Wait till The creating instance come to the running state.
- Once the instance come to the running state, select it and try on connecting as shown in the screenshot.

Step 5: Connect To The EC2 Console
- Now try on connecting to the EC2 Console to provide the command line interface to it.
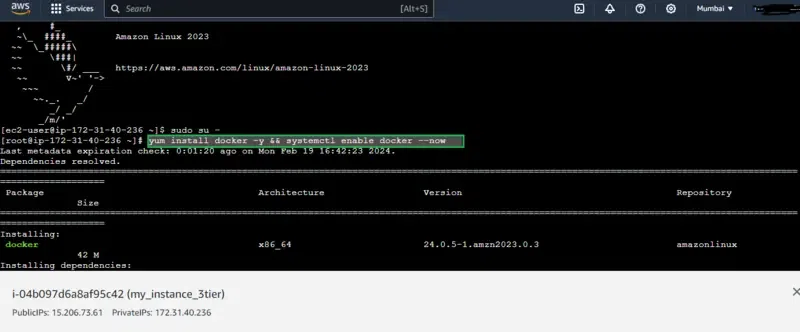
Step 6: Set Up The Docker Software
- Switch to the root user from ec2-user to provide adminstrator power.
- Install the docker software with the command “yum install docker -y”.
- After the Installation of docker enable the docker service to run the docker command. The following command helps for this:
yum install docker -y && systemctl enable docker --now
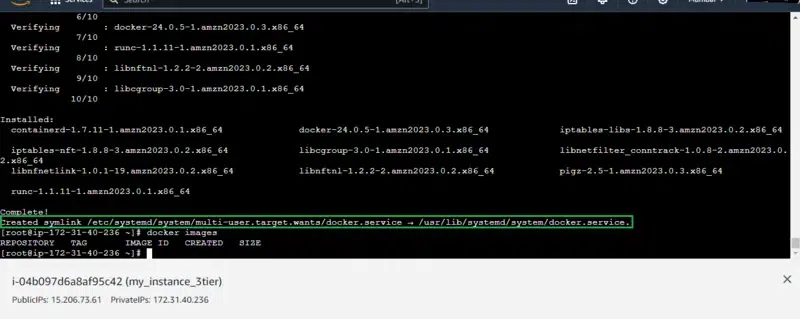
Step 7: Verify The Docker Service
- From the screenshot, with the highlight box shows you the successful installation and running of the docker service.
- Try on running any docker commands to verify again.
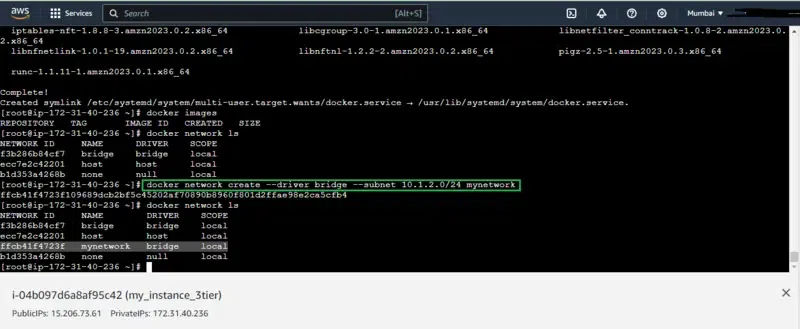
Step 8: Create The Custom Network
- Create a docker network with network driver bridge.
- provide the CIDR format with ip address and subnet by ensuring the ip range doesn’t conflicting with any other drivers ip ranges.
- Assign the name to the creating custom network as ‘mynetwork’. The command is as follows:
docker network create --driver bridge --subnet 10.1.2.0/24 mynetwork
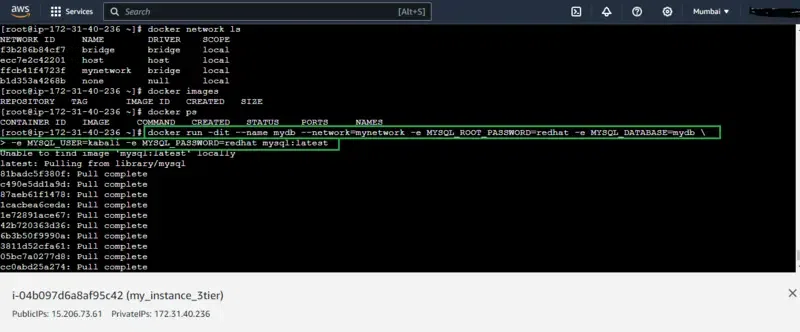
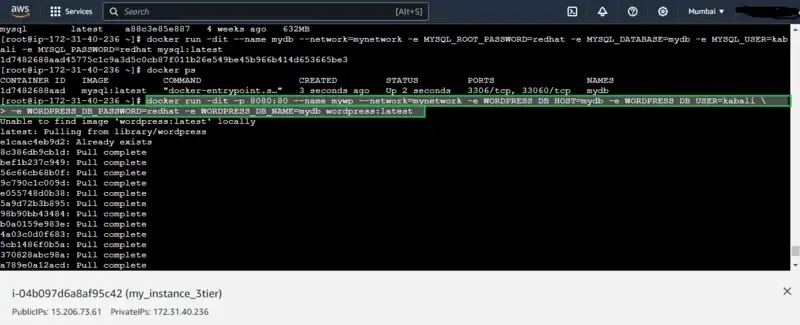
Step 9: Create The MySQL Container
- Create a database containing container for example with mysql datbase docker image.
- Provide the environmental variable such as root password, database, user and password as shown in the screenshot.
- create the container in the created custom network. The command is as follows.
docker run -dit --name mydb --network=mynetwork -e MYSQL_ROOT_PASSWORD=redhat \
-e MYSQL_DATABASE=mydb -e MYSQL_USER=kabali -e MYSQL_PASSWORD=redhat mysql:latest
Step 10: Create The WordPress Container
- Create the container with wordpress docker image using it as front application.
- For running it as a front application using port binding option with 8080:80
- Create this front wordpress applicaiton in created custom network.
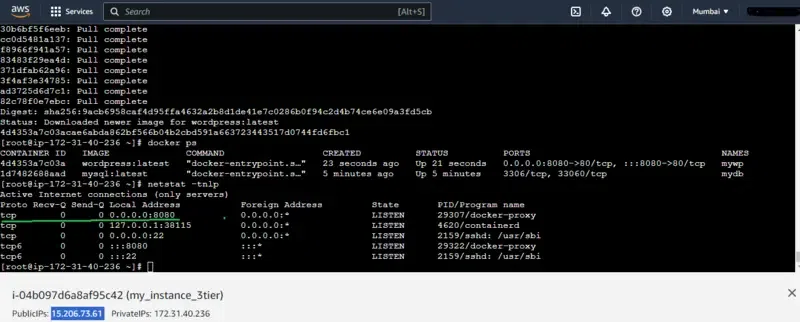
Step 11: Check The Running Ports
- Checking whether created front wordpress application running or not.
- By running the following command you see check the port numbers.
netstat -tnlp
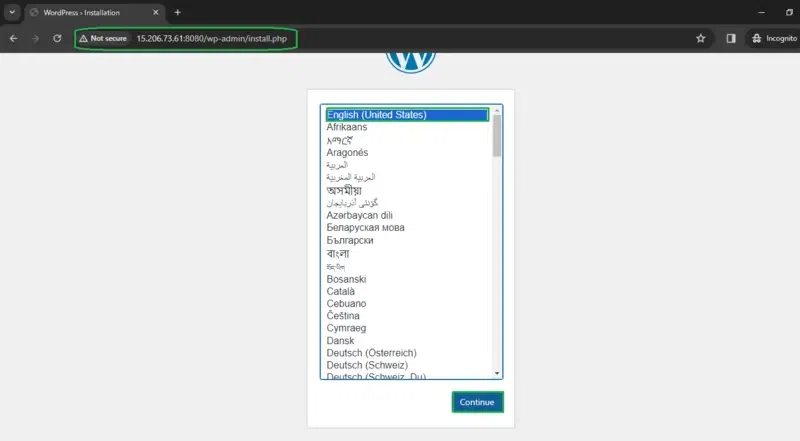
Step 12: Access The WordPress Application Through The Browser
- Access the wordpress application with your public IP from any browser that has internet connectivity.
- Browse the link as follow http://IP_ADDRESS:8080
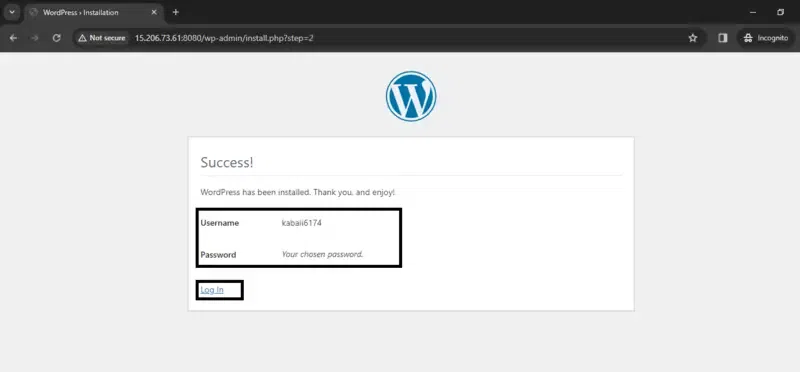
Step 13: Sign up to the WordPress Account
- Sign up for the wordpress application.
- Choose the your prefered Blogging title.
- Provide the User name and password.
- Provide the Email ID and create the account.
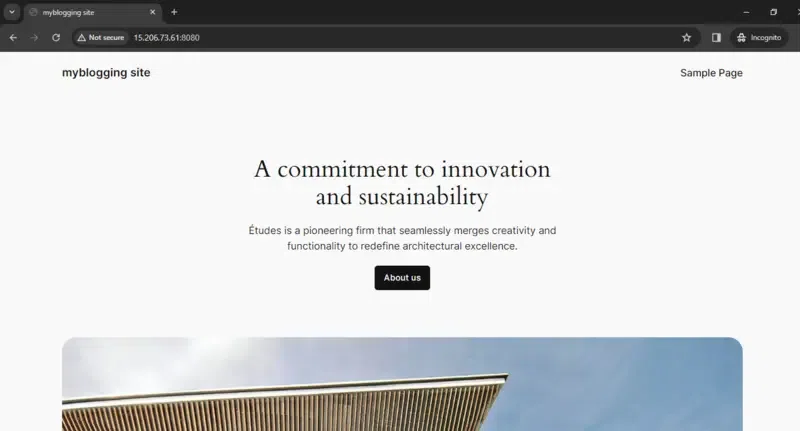
Step 14: Final 3 Tier Setup Blogging Site
- After completing all the steps your final blogging site About will be look this. Hurray we have successfully setup the 3Tier application with Docker Setup.
Conclusion
In Conclusion, Docker 3-Tier Architecture looks like a strong architecture for modern software development, providing a structure that is scalable and effective. Docker containers facilitates in making it easier to build, scale, and manage apps by breaking them into presentation, logic, and data levels. This architecture facilitates communication between the development, testing, and operations teams while also improving portability. The three-tier framework plays a key role in achieving agility, minimizing wasted resources, and guaranteeing a seamless deployment pipeline using Docker’s containerization, each of which add to a resilient and flexible software ecosystem.
Docker 3-Tier Architecture – FAQ’s
What Is 3-Tier Architecture In Docker?
Docker 3-tier architecture is a design model that comes with break downing the application into three logical components or tier such as presentation, logic, and data, each running in separate Docker containers.
What Are The Three Parts Of The Docker Architecture?
Docker architecture comes with consisting Docker client, Docker daemon, and Docker registry for working together to build, run, and distribute containerized applications.
How Does Docker Work On Different Architectures?
Docker ensuring the compatibility across various architectures on using containerization technology supporting applications to run consistently on various platforms.
What Is A Multi-Architecture Docker Image?
A multi-architecture Docker image comes with supporting multiple processor architectures, supporting the deployment on different hardware types without any modification.
How To Use 3-Tier Architecture In Docker?
On using Docker Compose for defining and managing a 3-tier architecture, specifies containers for presentation, logic, and data tiers providing an easy deployment and scalability.
Share your thoughts in the comments
Please Login to comment...