An auto-scaling group is a service that is provided in EC2 and is primarily used for an automatic increase or decrease in a number of EC2 instances based on the application’s user traffic. For example, if your application is experiencing high traffic, the auto-scaling group can launch extra instances to handle the increased load, and if the traffic coming towards to application is low, the auto-scaling group can shut down or terminate unnecessary instances for cost-saving purposes. The auto-scaling group can be created based on scaling policies, These policies can be defined for scaling in and out in response to various metrics, such as CPU utilization, network traffic, or custom metrics.
Benefits Of Using Autoscaling Group
Dynamic Resource Management: Auto-scaling groups have a capability of dynamically adding or removing EC2 instances based on the demand for the application. This means that users don’t have to manually change the number of servers or resources, because the Auto Scaling group handles it dynamically.
Available and Reliable: Auto-scaling groups help ensure the application is always run and available to users, even if one or more instances fail. If any instance crashes down, the Auto Scaling group will immediately launch a new instance to continue the application without causing any failure.
Load Balancers Facility: Auto Scaling groups have a facility of load balancers, they forward incoming traffic to instances evenly. so that the application remains available This integration helps improve the performance of the application, especially during times of high traffic.
Cost Saver: When application doesn’t have much traffic or demand, the Auto Scaling group can automatically reduce the number of servers, so users don’t pay for resources they don’t need. This can save money on cloud computing costs.
Introduction To Terraform
Terraform is multi cloud integrated tool which is used to write infrastructure as code for multiple cloud providers like aws, azure, gcp etc. terraform is widely used by many organizations because it does not depend on single cloud provider so if organizations or small scale businesses want migrate their applications from one cloud platform to other they can seamlessly do it with the help of terraform. it uses declarative template formatting which makes easy to write terraform code.
Features Of Terraform
Infrastructure as Code: Terraform allows organizations to define cloud infrastructure using code in declarative format. after written this code can be version controlled in various vcs systems like git, gitlab etc.
Resource Tracking: Terraform keeps track of the resources stored in a state file. This state file has a extension of .tf and acts as a source of truth, so Terraform knows what already exists and what needs to be changed.
Supports Multi-Cloud Providers: Terraform supports multiple cloud providers (AWS, Azure, Google Cloud, etc.). Organizations can use the same Terraform code to manage resources present or running on different clouds.
Review Execution: Before making any changes, Terraform generates an execution plan that shows what it will do (create, update, or delete resources). we can review this plan and approve it before applying the changes.
Important Terraform Commands
- terraform init: This command is used to initialize Terraform current directory.
- terraform plan: This command is used create plan for execution when entered, it shows what actions Terraform is going to take after applying the changes.
- terraform apply: This command is used apply changes which was shown in execution plan.
- terraform output: This command is used displays the output from the terraform files.
- terraform validate: This command is used verify the code in terraform whether they are written according to syntax or not.
Step By Step Guide To Create AutoScaling Group In AWS Using Terraform
Step 1: Open the Amazon EC2 console and log in with your credentials.
Step 2: Go to EC2 Console and launch one Linux EC2 instance to perform this practical
Step 3: Login to the EC2 instance and Firstly Configure your AWS Credentials using AWS Configure command.
Note: Make sure you installed AWS CLI to perform this step
/usr/local/bin/aws configure
Enter necessary fields like access key, secret key etc. of AWS account after entering the command
Step 4: After Configuring credentials now we need to install Terraform follow article Setup Terraform On Linux and Windows Machine
Step 5: After completion of installing terraform create one terraform file using vi command as below:
vi main.tf
write following code into that file which contains provider, Auto scaling group details for the creation
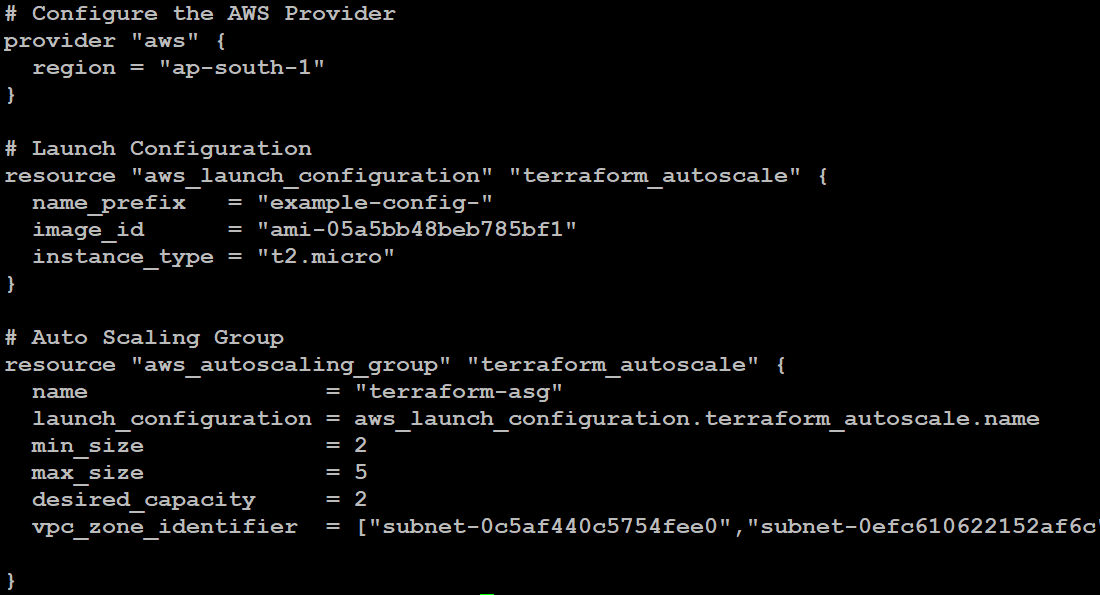
The created file named main.tf copy the below code to it. This code helps in defining the configuration resource for creating Autoscaling Group in AWS account.
# Configure the AWS Provider
provider “aws” {
region = “ap-south-1” # Replace with your desired AWS region
}
# Launch Configuration
resource “aws_launch_configuration” “terraform_autoscale” {
name_prefix = “example-config-“
image_id = “ami-05a5bb48beb785bf1” # Replace with your desired AMI ID
instance_type = “t2.micro”
}
# Auto Scaling Group
resource “aws_autoscaling_group” “terraform_autoscale” {
name = “terraform-asg”
launch_configuration = aws_launch_configuration.terraform_autoscale.name
min_size = 2 #Replace with your desired mininum size
max_size = 5 #Replace with your desired mininum size
desired_capacity = 2 #Replace with your desired capacity size
vpc_zone_identifier = [“subnet-0c5af440c5754fee0”, “subnet-0efc610622152af6c”] #Replace with your subnet id
}
Step 6: Save the file by pressing ESC button and entering :wq! command
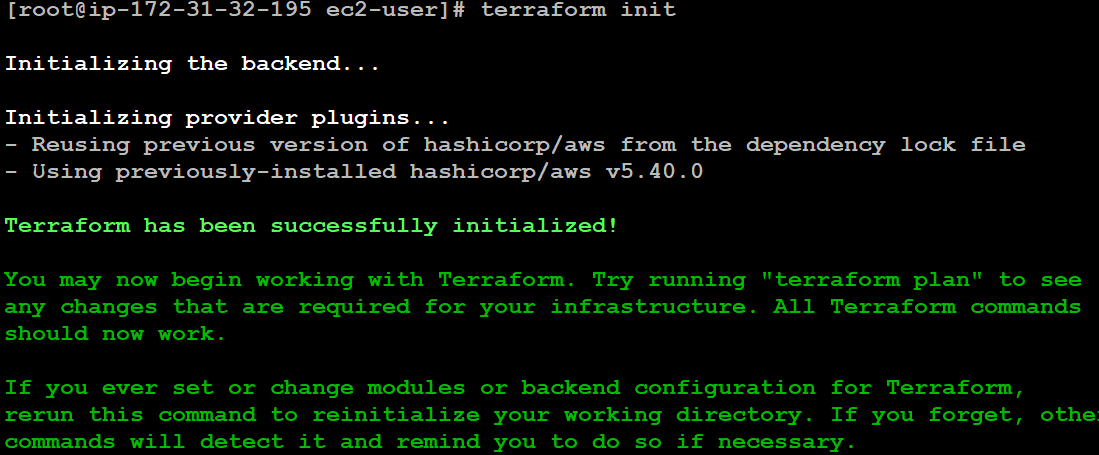
Step 7: Now we need to run this terraform file to do so, we have to firstly intialize the terraform, enter following command
terraform init
Step 8: Now Run Terraform plan command to review the changes in our terraform file
terraform plan


Step 9: After reviewing what is going to happen, we need to run terraform apply command to finally create EBS Volume
terraform apply


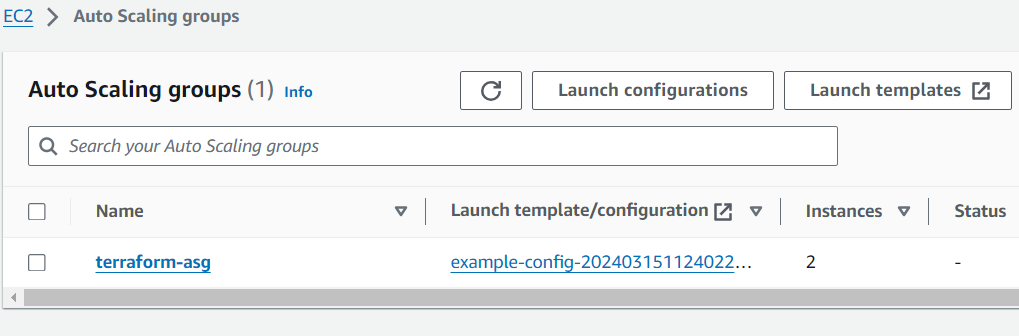
Step 10: In the final Step, go to the Auto Scaling menu in EC2 Console, you will see that auto scaling group is created using terraform
Advantages of Terraform
The following are the advantages of terraform:
- Readable Documentation: Hashicorp provided wide and readable documentation of terraform anyone who want to start with terraform they can straightforward go through the documentation and get started.
- Easy to handle : Terraform is easy to handle for new users its user friendly interface makes it very easy for users which are first time introduced to terraform
- Rollback And Force: If something goes wrong during an apply, Terraform can automatically roll back to the previous state. we can also make force resources to be must recreated on the next apply.
- Multi-Cloud Support: Terraform supports multi cloud environment, meaning it can manage infrastructure across various cloud providers like AWS, Azure, Google Cloud Platform, and more.
Disadvantages Of Terraform
The following are the disadvantages of terraform:
- Low Performance: Terraform’s performance can be decreased for complex and large infrastructures, especially during the planning and applying phases, as it needs to process and manage a large number of resources.
- Debugging of Errors: Debugging errors in Terraform, especially in large deployments, can be challenging. Limit in rollback capabilities can be additional to the troubleshooting.
- Low Visibility and Monitoring Capabilities: Terraform does not provide built-in visibility or monitoring capabilities for the resources it manages. need to depend on external tools like prometheus or cloud provider services for monitoring and visibility
- Limit in Testing and Validation: While Terraform supports basic syntax validation, it lacks IN advanced testing and validation capabilities for configurations.
Autoscaling group in aws using terraform – FAQ’s
What are the key Terraform resources required to create a Auto Scaling group?
The two key Terraform resources required to create an Auto Scaling group are aws_launch_configuration and aws_autoscaling_group.
How to associate the Auto Scaling group with an Elastic Load Balancer (ELB) or Target Group?
To associate the Auto Scaling group with an ELB, use the load_balancers argument in the aws_autoscaling_group resource and provide the names or ARNs of the ELBs.
Is it possible create multiple Auto Scaling groups using a single Terraform configuration?
Yes, just define multiple aws_launch_configuration and aws_autoscaling_group resources in a single Terraform configuration to create multiple Auto Scaling groups with different configurations.
How do you attach an Auto Scaling group to an Elastic Load Balancer?
To attach an Auto Scaling group to an Elastic Load Balancer, you need to specify the target_group_arns argument in the aws_autoscaling_group resource with the Amazon Resource Names (ARNs) of the target groups to which the instances should be registered.
Share your thoughts in the comments
Please Login to comment...