How to create an index.html File ?
Last Updated :
07 Mar, 2024
In HTML programming and the development of websites, it’s very important to create an index.html file which is known as the essential file for building a basic HTML web page. so, we will understand four simple methods or ways we can use to create an index.html file.
The index.html file is very important because it is known as a default file which means that whenever a web server looks for files to serve the visitor without specifying a particular file then it looks for the index.html file.
What is index.html and why it is used?
The index.html file serves as the homepage of a website and provides the basic and initial structure so that whenever a user visits a particular website they are automatically redirected to the index.html if there is no specific file expected. Apart from that, when you are learning HTML programming for the first time then you will also come across various tutorials where they create index.html files so let’s understand how to create an index.html file.
Steps to create index.html file in VScode
You can use any code editor to create the index.html file, for this method we will use VScode since it is the widely used code editor, let’s follow the steps mentioned below:
Step 1: Open the VScode
First of all, open Visual Studio Code, you can see in the image below I have opened VScode but you can open any code editor of your choice, then go to File>New File to create a new file:
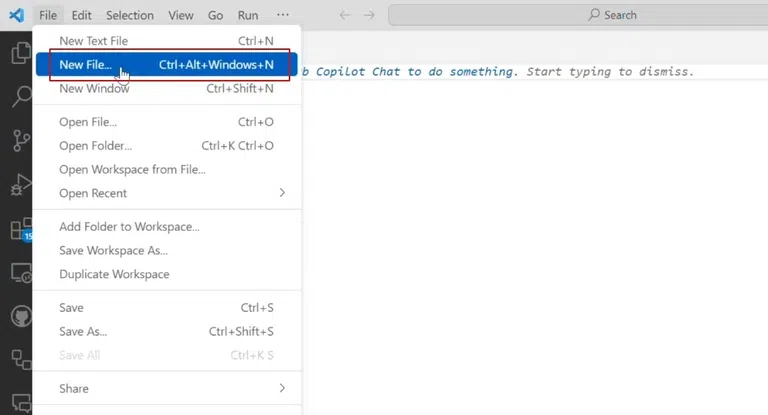
Open the VScode.
Step 2: Name the File
Once you have performed the above steps required, you will now see a window that shows what you want to name the file as, for this you will have to make sure that “Save as Type” to “All Files” and follow the following naming convention for the file:
index.html
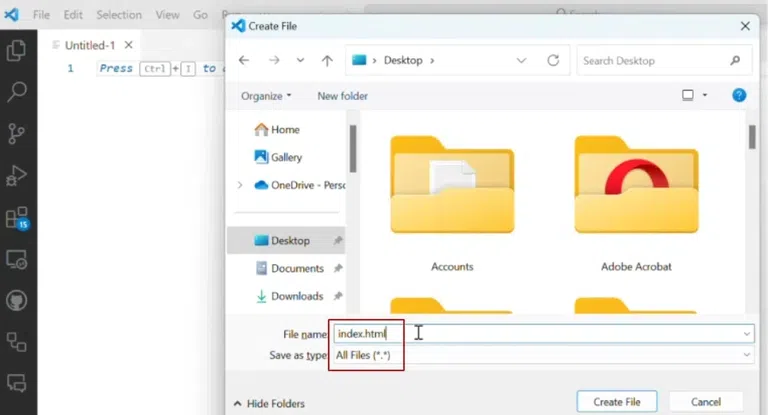
Name the File.
Step 3: Write Template of HTML
Once you have successfully created the index.html file, you will have to create the HTML code, as you may be aware that HTML file follows a proper template for writing code, below is the syntax for a simple HTML file:
<!DOCTYPE html>
<head>
</head>
<body>
</body>
</html>
In HTML, the <head>, <body>, and <html> tags serve different and unique purposes:
- <html> Tag: This is known to be the root element of the HTML page. it’s the mandatory tag that tells when a HTML code begins and ends.
- <head> Tag: This section contains meta-information about the document, such as – title, character encoding, links to external resources etc.
- <body> Tag: This section contains the main content for the document or webpage, including text, images, multimedia elements, and structural elements like headings, paragraphs, lists, etc.
Step 4: Print Hello Word on the Screen
Let’s take a look at an example of an HTML file that prints hello world on the screen, for this we will need to write the following code in the index.html file:
<!DOCTYPE html>
<html>

<head>
</head>

<body>
    <h1>Hello, World!</h1>
</body>

</html>
Steps to Run the File
Now let’s understand the steps which are required to run an index.html file:
Step 1: Save the File
Once you have written the above code in the VScode, simply click on the File>Save, otherwise you can also use the shortcut CTRL+S to save the file.
Step 2: Open the File
Now that you have saved the file, simply open the directory where the file is saved and double click to open it, it will automatically get opened via the default browser.
Output:
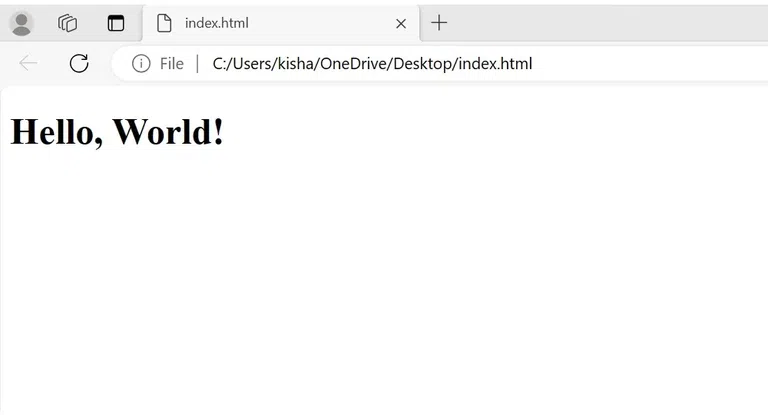
Hello world!
Example: Let’s take a look at an example where we print “Kishan from GeeksforGeeks!” in green color while also using a <title> tag as well.
HTML
<!DOCTYPE html>
<html>
<head>
<title>Kishan from GeeksforGeeks!</title>
<style>
/* CSS to style the text */
body {
background-color: #f0f0f0;
/* Background color */
}
.green-text {
color: green;
/* Text color */
}
</style>
</head>
<body>
<h1 class="green-text">Kishan from GeeksforGeeks!</h1>
</body>
</html>
|
Output:
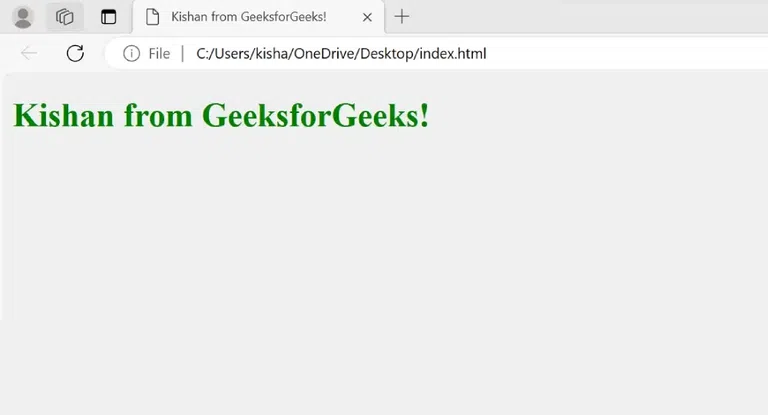
Output.
Share your thoughts in the comments
Please Login to comment...