M (MongoDB) E (Express.js) R (React.js) N (Node.js) stack is a popular Javascript language-based stack for building full-stack applications, MongoDB, ExpressJs, and NodeJs being responsible for server building and React for client-side development. This article is going to be your guide if you want to get started with the MERN stack development.
1. Setting Up Node.Js Environment
Node.Js is a Javascript runtime environment that allows you to run javascript code outside the browser console. To install Node.Js, you need to visit the Node.Js website and download the installer. In this article, we are going with the Windows Installer package.
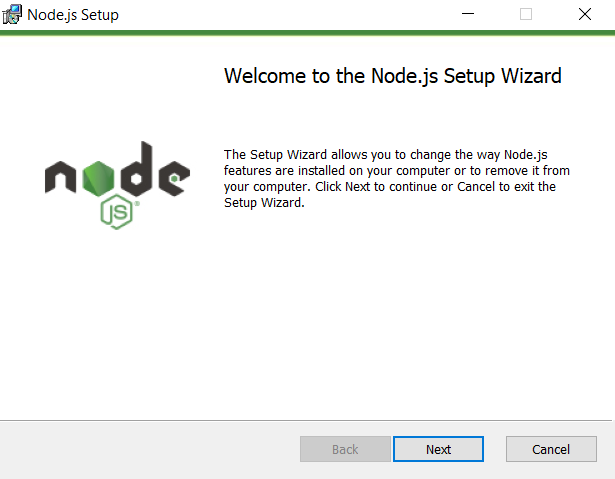
node.js installer
Proceed with the default installation. Once the installation is complete, close the installer and verify the node.js installation by writing the following command in the terminal.
node --version
npm --version
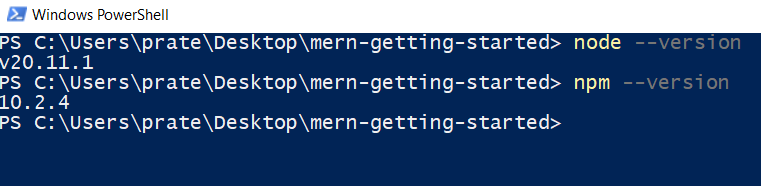
node –version
2. Starting a Node.Js Project and Installing Dependencies
Create a directory and enter into it to initialize a new Node.js Project. Further install the necessary dependecies for the MERN app (mongoose, express, cors, nodemon) using `npm` (node package manager). Here are the step by step explanation of how to do that.
Step 1: Create a new directory and enter into it by running the following commands.
mkdir mern-app-backend
cd mern-app-backend
Step 2: Intialize a new node.js project by running the following command.
npm init -y
Note: The above command will ask you for some basic details about the project. Fill them accordingly. It will also highlight the starting point of the project. You can give it any name. Here will will name it as `index.js`
Step 3: Install the required dependencies by running the following command.
npm install express mongoose cors
3. Create a basic server with Express.Js
Express.js is an application framework that simplies the creation of web servers and handling HTTP requests. We can create a we server by importing express, creating an app out of it, defining a port where the server will hold, and writing the basic `app.listen()` function.
Node
//index.js
const express = require(‘express’);
const cors = require(‘cors’);
const app = express();
const PORT = 5000;
app.use(cors());
app.listen(PORT, () => {
console.log(`Server is running on port ${PORT}`);
});
4. Connect to MongoDB
MongoDB is a NoSQL database that is used to store data in JSON-like format. To create a MongoDB database, follow the steps provided below.
Step 1: Go to MongoDB Atlas and Sign Up there.
Step 2: Once you signup, you will be forwarded to a page where your purpose to use MongoDB will be asked. Fill them as your wish.
purpose to use MongoDB demo
Step 3: With step 2 being done, you will be routed to a page where configurational details will be asked. It will ask to select server, create an user, add your current IP, create an admin username and password. Filling these details, you will require to copy the string, that will be used to make a connection to the database. Here is a demonstration of how to do all of these.
creating a mongodb atlas database
Step 4: With that done, we can create a connection to the database created by importing mongoose and passing the connection string copied. We also ned to modify the username and password tag inside that string.
Node
//index.js
const express = require(‘express’);
const cors = require(‘cors’);
const mongoose = require(‘mongoose’);
const app = express();
const PORT = 5000;
app.use(cors());
// MongoDB connection
mongoose.connect(‘mongodb+srv://<username>:<password>@mycluster.crwb89k.mongodb.net
/?retryWrites=true&w=majority&appName=mycluster’, {
useNewUrlParser: true,
useUnifiedTopology: true
});
const db = mongoose.connection;
db.on(‘error’, console.error.bind(console, ‘MongoDB connection error:’));
db.once(‘open’, () => {
console.log(‘Connected to MongoDB’);
});
app.listen(PORT, () => {
console.log(`Server is running on port ${PORT}`);
});
5. Define a Schema
An Schema is a blueprint of some data that is going to be stored in the database. We can create an schema using mongoose.Schema() class.
Javascript
const formSchema = new mongoose.Schema({
username: {
type: String,
required: true
},
password: {
type: String,
required: true
}
});
const Form = mongoose.model('Form', formSchema);
|
6. Defining a Route and Query in a Database
The route functions (get, post, put, delete) receives a callback function. That callback function receives two parameters (request and response) when someone access the route parameter. Request holds the information about incoming request while response is used to send a response back to the client. Each route combined with the port addess serves as an endpoint through which, the frontend can communicate to the backend server, send request and receive response. Provided below is the syntax through which we can create a route to submit the form data received from the frontend.
Node
app.post(‘/api/form’, (req, res) => {
const { username, password } = req.body;
const newForm = new Form({
username,
password
});
newForm.save((err, savedForm) => {
if (err) {
console.error(‘Error saving form:’, err);
res.status(500).json({ error: ‘Error saving form’ });
} else {
console.log(‘Form saved successfully:’, savedForm);
res.status(200).json({ message: ‘Form saved successfully’ });
}
});
});
7. Create a React App
React is a javascript library (not a framework) for building advanced UI. Creating a new react app is very simple. You need to run the commands provide below.
npx create-react-app my-react-app
cd my-react-app
8. Create a Component to Make a Backend Request
We can use built-in `fetch` function to make a post request to the backend. For the purpose, we can simply utilize the App.js component. Below provided is an illustration of how to create a form and submit the data utilizing the `useState hook` and adding `onClick and onChange` event listeners.
Javascript
import React, { useState } from 'react';
import './App.css';
function App() {
const [formData, setFormData] = useState({
username: '',
password: ''
});
const handleChange = (e) => {
const { name, value } = e.target;
setFormData({
...formData,
[name]: value
});
};
const handleSubmit = async (e) => {
e.preventDefault();
try {
const response = await
method: 'POST',
headers: {
'Content-Type': 'application/json'
},
body: JSON.stringify(formData)
});
if (response.ok) {
console.log('Form submitted successfully');
setFormData({
username: '',
password: ''
});
} else {
console.error('Failed to submit form');
}
} catch (error) {
console.error('Error submitting form:', error);
}
};
return (
<div className="app">
<h1>Getting Started with MERN Demonstration (Form) </h1>
<input onChange={(e) =>
handleChange(e)} className='ip-1'
name='username' placeholder='Username' type='text'
value={formData.username} />
<input onChange={(e) => handleChange(e)}
className='ip-2' name='password' placeholder='Password'
type='password' value={formData.password} />
<button onClick={handleSubmit}
className='btn'>Submit</button>
</div>
);
}
export default App;
|
9. Combining Everything to Make a MERN Application
To summarize, we successfully installed Node.js, Express.js, created a database in mongoDB, and also create a react app to submit the data into the database. Provide below are the project structure and the code structures.
Backend (mern-app-backend)
Project Structure:
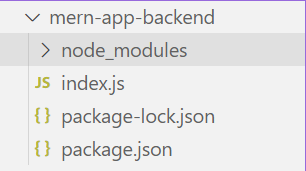
backend-project-structure
Dependencies List:
"dependencies": {
    "cors": "^2.8.5",
    "express": "^4.18.3",
    "mongoose": "^8.2.0"
  }
Code Example:
Node
// index.js
const express = require(‘express’);
const cors = require(‘cors’);
const mongoose = require(‘mongoose’);
const app = express();
const PORT = 5000;
app.use(cors());
app.use(express.json());
// MongoDB connection
mongoose.connect(‘mongodb+srv://<username>:<password>
@mycluster.crwb89k.mongodb.net /? retryWrites = true & w=majority
& appName=mycluster’, {
useNewUrlParser: true,
useUnifiedTopology: true
});
const db = mongoose.connection;
db.on(‘error’, console.error.bind(console,
‘MongoDB connection error:’));
db.once(‘open’, () => {
console.log(‘Connected to MongoDB’);
});
// Define form schema
const formSchema = new mongoose.Schema({
username: {
type: String,
required: true
},
password: {
type: String,
required: true
}
});
// Create a model based on the schema
const Form = mongoose.model(‘Form’, formSchema);
app.post(‘/api/form’, async (req, res) => {
console.log(req.body); // Now req.body should be defined
const { username, password } = req.body;
// Create a new form document
const newForm = new Form({
username,
password
});
try {
// Save the form document to the database
const savedForm = await newForm.save();
console.log(‘Form saved successfully:’, savedForm);
res.status(200).json({ message: ‘Form saved successfully’ });
} catch (err) {
console.error(‘Error saving form:’, err);
res.status(500).json({ error: ‘Error saving form’ });
}
});
app.listen(PORT, () => {
console.log(`Server is running on port ${PORT}`);
});
Note: In the MongoDB connection string, update replace the <username> and <password> with the username and password you created.
Frontend (mern-app-frontend)
Project Structure:
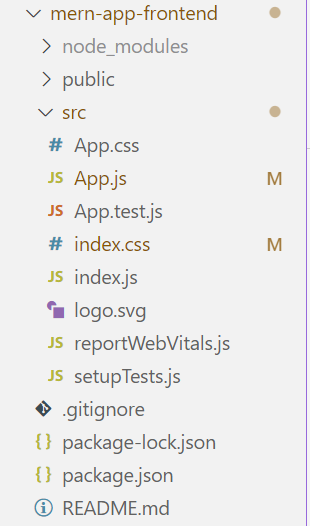
frontend-project-structure
Dependencies:
  "dependencies": {
    "@testing-library/jest-dom": "^5.17.0",
    "@testing-library/react": "^13.4.0",
    "@testing-library/user-event": "^13.5.0",
    "react": "^18.2.0",
    "react-dom": "^18.2.0",
    "react-scripts": "5.0.1",
    "web-vitals": "^2.1.4"
  }
Code Example:
CSS
.app {
display: flex;
flex-direction: column;
max-width: 400px;
margin: auto;
margin-top: 100px;
}
.ip-1 {
padding: 12px 24px;
margin-top: 20px;
}
.ip-2 {
padding: 12px 24px;
margin-top: 20px;
margin-bottom: 20px;
}
.btn {
background: rgb(35, 144, 188);
color: white;
border: none;
padding: 12px 24px;
cursor: pointer;
}
.btn:hover {
background-color: rgb(23, 105, 193);
}
|
Javascript
import React, { useState } from 'react';
import './App.css';
function App() {
const [formData, setFormData] = useState({
username: '',
password: ''
});
const handleChange = (e) => {
const { name, value } = e.target;
setFormData({
...formData,
[name]: value
});
};
const handleSubmit = async (e) => {
e.preventDefault();
try {
const response = await
method: 'POST',
headers: {
'Content-Type': 'application/json'
},
body: JSON.stringify(formData)
});
if (response.ok) {
console.log('Form submitted successfully');
setFormData({
username: '',
password: ''
});
} else {
console.error('Failed to submit form');
}
} catch (error) {
console.error('Error submitting form:', error);
}
};
return (
<div className="app">
<h1>Getting Started with MERN Demonstration (Form) </h1>
<input onChange={(e) =>
handleChange(e)} className='ip-1'
name='username' placeholder='Username'
type='text' value={formData.username} />
<input onChange={(e) =>
handleChange(e)} className='ip-2'
name='password' placeholder='Password'
type='password' value={formData.password} />
<button onClick={handleSubmit}
className='btn'>Submit</button>
</div>
);
}
export default App;
|
To start the frontend run the following command on frontend path
npm start
To start the backend run the following command on backend path
node index.js
Output:
Share your thoughts in the comments
Please Login to comment...