Exploring Data Distribution | Set 2
Last Updated :
21 Mar, 2024
Prerequisite: Exploring Data Distribution | Set 1
Terms related to Exploration of Data Distribution
-> Boxplot
-> Frequency Table
-> Histogram
-> Density Plot
Loading Libraries
Python3
import numpy as np
import pandas as pd
import seaborn as sns
import matplotlib.pyplot as plt
|
Loading Data
Python3
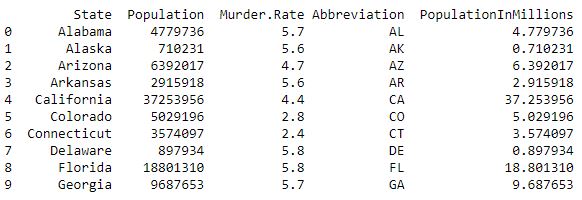
data = pd.read_csv("../data/state.csv")
data['PopulationInMillions'] = data['Population']/1000000
print (data.head(10))
|
Output :
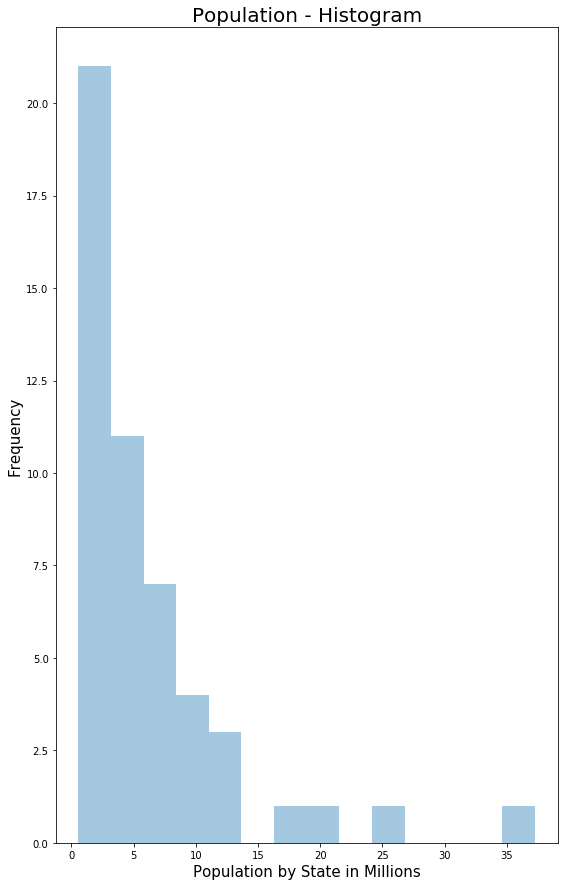
- Histogram: It is a way of visualizing data distribution through frequency table with bins on the x-axis and data count on the y-axis.
Code – Histogram
Python3
fig, ax2 = plt.subplots()
fig.set_size_inches(9, 15)
ax2 = sns.distplot(data.PopulationInMillions, kde = False)
ax2.set_ylabel("Frequency", fontsize = 15)
ax2.set_xlabel("Population by State in Millions", fontsize = 15)
ax2.set_title("Population - Histogram", fontsize = 20)
|
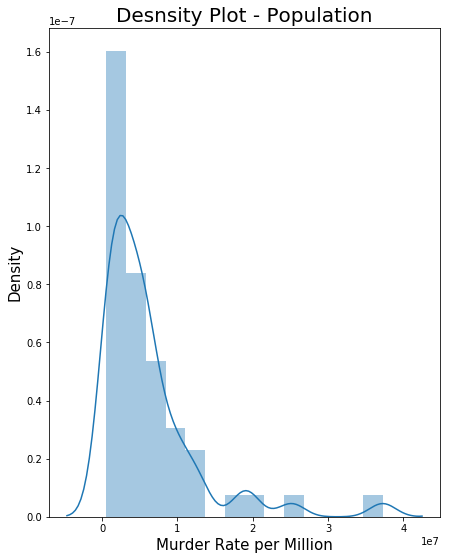
- Density Plot: It is related to histogram as it shows data-values being distributed as continuous line. It is a smoothed histogram version. The output below is the density plot superposed over histogram.
Code – Density Plot for the data
Python3
fig, ax3 = plt.subplots()
fig.set_size_inches(7, 9)
ax3 = sns.distplot(data.Population, kde = True)
ax3.set_ylabel("Density", fontsize = 15)
ax3.set_xlabel("Murder Rate per Million", fontsize = 15)
ax3.set_title("Density Plot - Population", fontsize = 20)
|
Share your thoughts in the comments
Please Login to comment...