Django Basic App Model – Makemigrations and Migrate
Last Updated :
12 Sep, 2023
In this article, we will create a basic model of an app and also learn about what are migrations in Django and migrate in Django also develop some basic understanding related to them in Python.
Makemigrations and Migrations in Django
Makemigrations and migrate are commands that are used to interact with Django models. Let’s understand in detail.
Makemigrations in Django
The makemigrations in django the command is used to create database migration files based on the changes you’ve made to your models.
Now let’s first understand what is a migration file. A migration file contains Python code that represents the changes to the database schema, such as creating new tables, altering existing tables, or adding new fields and you can see the created file after running the command
python manage.py makemigrations
When you make changes to your models, such as adding new fields, changing field types, or even creating new models, running makemigrations analyzes these changes and generates migration files that capture the changes in a human-readable format. These migration files are stored in your app’s migrations directory.
Makemigrations in django basically generates the SQL commands for preinstalled apps (which can be viewed in installed apps in settings.py) and your newly created apps’ model which you add in installed apps. It does not execute those commands in your database file. So tables are not created after makemigrations. After applying makemigrations you can see those SQL commands with sqlmigrate which shows all the SQL commands which have been generated by makemigrations. To check more about makemigrations visit – sqlite browser
Migrate in Django
Migrate in Django, as we already created the file with the help of makemigration command which already containing the changes which we want to apply in the database and for the we have apply those migration with migrate command
python manage.py migrate
The migrate command applies the changes recorded in migration files to the database. It executes the necessary SQL queries to bring the database schema in line with your models’ definitions. This command creates tables, modifies columns, adds indexes, and performs any other database-related operations needed to reflect the changes you’ve made.
The migrate command takes care of the order in which migrations are applied, ensuring that dependencies between migrations are satisfied.
Migrate in django it basically migrate executes those SQL commands in the database file. So after executing migrate all the tables of your installed apps are created in your database file.
So always keep in the mind whenever you are making a new models or changing any existing model you should always have to apply first makemigation and then migrate command to see the change you made to model must be applied to the database.
What is a Django model?
In Django, a table is created in the database using a model. This implies that each model corresponds to a single database table. The types of data that can be kept in these tables in the database are determined by the fields and behaviours specified in each model. A single source that defines the details about your data is a Django model. Each Django model is a subclass of the django Python class.db.models.Model.
Understanding Makemigrations and Migrate in Django Model
We can start our project by running the below command in the terminal but before running the command make sure you are in the right directory in which you want to create your project and that you have Django installed in your system.
python manage.py startproject geeksforgeeks
now go to the geeksforgeeks directory in which we will create a new app in order to simplify and make independent model units. To create an app run command through the terminal :
to change the directory and start your app you must run the below commands:
cd geeksforgeeks
now you are inside the Django project and can start your app by running the command
python manage.py startapp geeks
Register Django App
Adding the geeks app to the INSTALLED_APPS in settings.py of out project geeksforgeeks. The purpose of mentioning your app in the “installed apps” list is to inform Django that your app should be included and integrated into the project. This configuration is required for Django to recognize and manage your app’s components, such as models, views, templates, and more.
.png) Istalled apps
Istalled apps
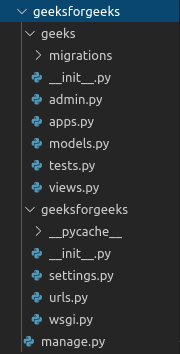
Now directory structure of the app will be,
Creating a Django Database
Now go to models.py in geeks app, Here we will create our first Django model. To create a model you need to first import the Model from django.db.models library.Now models.py will look like,
Python3
from django.db.models import Model
|
According to Django documentation, A model is the single, definitive source of information about your data. It contains the essential fields and behaviours of the data you’re storing. Generally, each model maps to a single database table. Django provides a number of predefined fields and methods to create a Model. To create a model you need to specify a model name first. Enter the following code into
models.py
Python3
from django.db import models
from django.db.models import Model
class GeeksModel(Model):
pass
|
Run the below command:
Python manage.py makemigrations
After this command run following command to finally implement database changes accordingly
Python manage.py migrate
After you run makemigrations and migrate a new table would have been created in database. You can check it from geeks -> makemigrations -> 0001_initial.py.
Python3
from django.db import migrations, models
class Migration(migrations.Migration):
initial = True
dependencies = []
operations = [
migrations.CreateModel(
name ='GeeksModel',
fields =[
('id', models.AutoField(auto_created = True,
primary_key = True, serialize = False,
verbose_name ='ID')),], ),
]
|
Now, we successfully migrated the table to the Database. you can check the table data using Django Admin.
Share your thoughts in the comments
Please Login to comment...