Kubernetes or K8s is an open-sourced container orchestration technology that is used for automating the manual processes of deploying, managing, and scaling applications withy the help of containers. Kubernetes was originally developed by engineers at Google and In 2015, it was donated to CNCF (Cloud Native Computing Foundation). In this article, we will learn how to deploy an application (a MongoDB application) using Kubernetes.
Deployment Of Applications Using Kubernetes
The Structure of the Project will be as follows, Here we will be creating:
This is how the project Structure would look like:
.webp)
In this project, we will deploy a MongoDB database application using Kubernetes in a local Minikube Kubernetes Cluster. Minikube is a one-node Kubernetes cluster where master processes and work processes both run on one node. You can choose any other local Cluster like Kind as per your requirements. We will store credentials in a ConfigMap and private credentials in a Secret. This project will give you a high level overview of how a complete application is deployed and how Kubernetes makes the process of deployment easier.
Minikube
In this tutorial, we will use Minikube which is a one node Kubernetes Cluster. Explaining further, Minikube is a one-node Kubernetes cluster where master processes and work processes both run on one node. According to the official documentation of Minikube, Minikube is local Kubernetes, focusing on making it easy to learn and develop for Kubernetes. A prerequisite to use Minikube is a Docker container or a Virtual Machine environment. Minikube provides you a way to easily deploy application on Kubernetes for learning and developing purposes even if you don’t have enough resources like memory, CPU etc.
Step By Step Guidelines For Deploying Applications In K8S
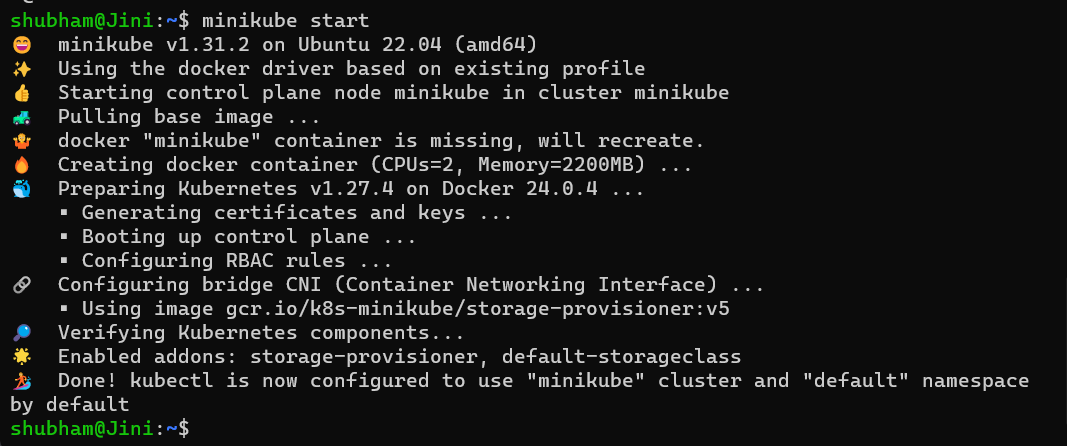
Step 0: You can skip this step if you already have a Kubernetes Cluster running in your machine. But in case you don’t have a Cluster running enter the following command to create Kubernetes locally using minikube:
minikube start
- Minikube is a one-node Kubernetes cluster where master processes and work processes both run on one node.
Step 1: Let’s create the Deployment configuration file for our mongodb application. Create a file named ‘gfg-depl.yaml’:
touch gfg-depl.yaml
- Enter the following code inside it.
apiVersion: apps/v1
kind: Deployment
metadata:
  name: gfg-deployment
  labels:
    app: mongodb
spec:
  replicas: 2
  selector:
    matchLabels:
      app: mongodb
  template:
    metadata:
      labels:
        app: mongodb
    spec:
      containers:
      - name: mongodb
        image: mongo
        ports:
        - containerPort: 27017
        env:
        - name: MONGO_INITDB_ROOT_USERNAME
          value:
        - name: MONGO_INITDB_ROOT_PASSWORD
          value:
- Since this is a configuration file that it’s going to be checked into a repository, so we would not write admin username and password inside the configuration file, we will rather create a secret from where we will reference the values.
- The Secret will be live in Kubernetes and nobody will have access to it in a git repository.
Step 2: Now we are going to create a Secret file where we will have our MONGO_INITDB_ROOT_USERNAME, and MONGO_INITDB_ROOT_PASSWORD value. The reason why we do this is because the Deployment file we will checked into a repository so for security purposes we would not want others to know the Admin username and password. Secret file will be kept with Kubernetes and not pushed to the git repository.
- Let’s create a Secret file called gfg-secret:
touch gfg-secret
- And let’s add the following code into the file:
apiVersion: v1
kind: Secret
metadata:
  name: gfg-secret
type: Opaque # this is the default type
data: # key value pairs that we want to save in secret.
  mongo-root-username:
  mongo-root-password:
Step 3: Now the value of ‘mongo-root-username’ and ‘mongo-root-password’ should not be plane text (for security purpose), it should be base64 encoded. For that we will enter the following command in our terminal:
echo -n 'shubham' | base64
- This command will base64 encode the text ‘shubham’ and you will get the encoded version of the text as output, in my case it is:
c2h1YmhhbQ==
- . You can use your username and base64 encode it. Similarly we will base64 encode our password:
echo -n 'crazyPassword' | base64
- The output in this Case is as follows:
Y3JhenlQYXNzd29yZA==

Step 4: Copy both the values and paste them in the gfg-secret.yaml . With this our Secret config file looks like this:
apiVersion: v1
kind: Secret
metadata:
  name: gfg-secret
type: Opaque # this is the default type
data: # key value pairs that we want to save in secret.
  mongo-root-username: c2h1YmhhbQ==
  mongo-root-password: Y3JhenlQYXNzd29yZA==
Step 5: One important thing to note here is that we have to create the Secret before the Deployment since we are going to reference the Secret inside of Deployment.
- The order of creation matters otherwise it would give an error. therefore, lets first create a Secret using the gfg-secret.yaml file by the following command:
kubectl apply -f gfg-secret.yaml
- And now we can reference the values of the Secret in our Deployment. This is how we can reference the values from the Secret in our gfg-depl.yaml file:
valueFrom:
    secretKeyRef:
        name: mongodb-secret
        key: mongo-root-username
- Therefore our gfg-depl.yaml file now looks like this:
apiVersion: apps/v1
kind: Deployment
metadata:
  name: gfg-deployment
  labels:
    app: mongodb
spec:
  replicas: 2
  selector:
    matchLabels:
      app: mongodb
  template:
    metadata:
      labels:
        app: mongodb
    spec:
      containers:
      - name: mongodb
        image: mongo
        ports:
        - containerPort: 27017
        env:
        - name: MONGO_INITDB_ROOT_USERNAME
          valueFrom:
            secretKeyRef:
              name: gfg-secret
              key: mongo-root-username
        - name: MONGO_INITDB_ROOT_PASSWORD
          valueFrom:
            secretKeyRef:
              name: gfg-secret
              key: mongo-root-password
- And now we can also apply this file in order to create the Deployment using the following command:
kubectl apply -f gfg-depl.yaml
Step 6: The next step would be to create an internal service so that other components or other Pods can talk to this MongoDB internal service.
Note: In YAML, you can either create a separate configuration file or one can also have two configurations in the same file, separated by three dashes (—)
- Here in this project we will put both Deployment and Service in one YAML file. So now we need to add the Service configuration to our gfg-depl.yaml file and the file will now look like:
apiVersion: apps/v1
kind: Deployment
metadata:
  name: gfg-deployment
  labels:
    app: mongodb
spec:
  replicas: 2
  selector:
    matchLabels:
      app: mongodb
  template:
    metadata:
      labels:
        app: mongodb
    spec:
      containers:
      - name: mongodb
        image: mongo
        ports:
        - containerPort: 27017
        env:
        - name: MONGO_INITDB_ROOT_USERNAME
          valueFrom:
            secretKeyRef:
              name: gfg-secret
              key: mongo-root-username
        - name: MONGO_INITDB_ROOT_PASSWORD
          valueFrom:
            secretKeyRef:
              name: gfg-secret
              key: mongo-root-password
---
apiVersion: v1
kind: Service
metadata:
  name: mongodb-service
spec:
  selector:
    app: mongodb
  ports:
    - protocol: TCP
      port: 27017
      targetPort: 27017
- And now we can also apply the Service using the same command:
kubectl apply -f gfg-depl.yaml
- This is keep the Deployment unchanged but a new Service will be created.

Step 7: And Now when we check of the list of Services running by entering the following command:
kubectl get service
- We should be able to see our mongodb-service. You should get a similar output where the kubernetes Service is actually created by Minikube.

Step 8: The next step is to create Mongo Express deployment, service and an external configuration where we can put the database URL for MongoDB. For Mongo Express, there are three important environment Variables:
ME_CONFIG_MONGODB_ADMINUSERNAME
ME_CONFIG_MONGODB_ADMINPASSWORD
ME_CONFIG_MONGODB_SERVER
- Similar to what we did earlier, we will have a separate ConfigMap for storing
ME_CONFIG_MONGODB_SERVER
And a Secret file for storing following variables information
ME_CONFIG_MONGODB_ADMINUSERNAME
ME_CONFIG_MONGODB_ADMINPASSWORD
- As part of best practice and for that we will follow this format like we followed earlier:
valueFrom:
    secretKeyRef:
        name: gfg-secret
        key: mongo-root-username
So let’s create a mongo-express.yaml file and enter the following code inside it:
apiVersion: apps/v1
kind: Deployment
metadata:
  name: mongo-express
  labels:
    app: mongo-express
spec:
  replicas: 1
  selector:
    matchLabels:
      app: mongo-express
  template:
    metadata:
      labels:
        app: mongo-express
    spec:
      containers:
      - name: mongo-express
        image: mongo-express
        ports:
        - containerPort: 8081
        env:
        - name: ME_CONFIG_MONGODB_ADMINUSERNAME
          valueFrom:
            secretKeyRef:
              name: gfg-secret
              key: mongo-root-username
        - name: ME_CONFIG_MONGODB_ADMINPASSWORD
          valueFrom:
            secretKeyRef:
              name: gfg-secret
              key: mongo-root-password
        - name: ME_CONFIG_MONGODB_SERVER
          value:
- This configuration file is incomplete as we have not added reference value for ME_CONFIG_MONGODB_SERVER env variable, we will add that after creating a ConfigMap for storing the values of these environment variables.
Step 9: The next step is to create a Configuration file for ConfigMap, create a mongo-configmap.yaml and enter the following code inside it:
apiVersion: v1
kind: ConfigMap
metadata:
  name: mongodb-configmap
data:
  database_url: mongodb-service
- Also before applying Deployment we need to app the files that it will reference, hence before applying mongo-express.yaml we should apply the mongo-configmap.yaml file:
kubectl apply -f mongo-configmap.yaml
Step 10: Now that our ConfigMap is ready, we can reference the value of database_url from the ConfigMap to the mongo-express.yaml Deployment.
- For this we will have to add the following code to the mongo-express.yaml file:
apiVersion: apps/v1
kind: Deployment
metadata:
  name: mongo-express
  labels:
    app: mongo-express
spec:
  replicas: 1
  selector:
    matchLabels:
      app: mongo-express
  template:
    metadata:
      labels:
        app: mongo-express
    spec:
      containers:
      - name: mongo-express
        image: mongo-express
        ports:
        - containerPort: 8081
        env:
        - name: ME_CONFIG_MONGODB_ADMINUSERNAME
          valueFrom:
            secretKeyRef:
              name: gfg-secret
              key: mongo-root-username
        - name: ME_CONFIG_MONGODB_ADMINPASSWORD
          valueFrom:
            secretKeyRef:
              name: gfg-secret
              key: mongo-root-password
        - name: ME_CONFIG_MONGODB_SERVER
          valueFrom:
            configMapKeyRef:
              name: mongodb-configmap
              key: database_url
- Now we can apply the mongo-express.yaml file using the following command:
kubectl apply -f mongo-express.yaml
- If we check the list of pods created by entering the following command:
kubectl get pods
- We will find three Pods running, two from gfg-depl.yaml (since we set two replicas) and one Pod from mongo-express.yaml.

Step 11: In order to access Mongo Express from a browser we will need an external service for Mongo Express so the next step is to create an external Service.
- Like we did earlier, we are creating the Service in the same file as Deployment for simplicity purposes. Therefore add the following code to your mongo-express.yaml file:
apiVersion: apps/v1
kind: Deployment
metadata:
  name: mongo-express
  labels:
    app: mongo-express
spec:
  replicas: 1
  selector:
    matchLabels:
      app: mongo-express
  template:
    metadata:
      labels:
        app: mongo-express
    spec:
      containers:
      - name: mongo-express
        image: mongo-express
        ports:
        - containerPort: 8081
        env:
        - name: ME_CONFIG_MONGODB_ADMINUSERNAME
          valueFrom:
            secretKeyRef:
              name: mongodb-secret
              key: mongo-root-username
        - name: ME_CONFIG_MONGODB_ADMINPASSWORD
          valueFrom:
            secretKeyRef:
              name: mongodb-secret
              key: mongo-root-password
        - name: ME_CONFIG_MONGODB_SERVER
          valueFrom:
            configMapKeyRef:
              name: mongodb-configmap
              key: database_url
---
apiVersion: v1
kind: Service
metadata:
  name: mongo-express-service
spec:
  selector:
    app: mongo-express
  type: LoadBalancer
  ports:
    - protocol: TCP
      port: 8081
      targetPort: 8081
      nodePort: 30000
- Now apply the Service using the following command:
kubectl apply -f mongo-express.yaml
- Now when we checkout the lists of Services running, we see that we have the two Services that we created and a kubernetes Service created by Minikube.

Step 12: We can see in the screenshot above that mongodb-service that we created is of default type ClusterIP and and the mongo-express-service that we just created is load balancer as we specified in the Configuration file.
- The ClusterIP will give the service an internal IP address which is 10.97.189.90 in our case and the load balancer will also gives service an internal IP address but in addition to that it will also give the service an external IP address where the external requests will be coming.
- In our case it says “pending” so we need to have an external ip address. In Minikube this is done by the following command:
minikube service mongo-express-service
- This will give you the following result:

- And with that, the Mongo Express application open in your web browser.
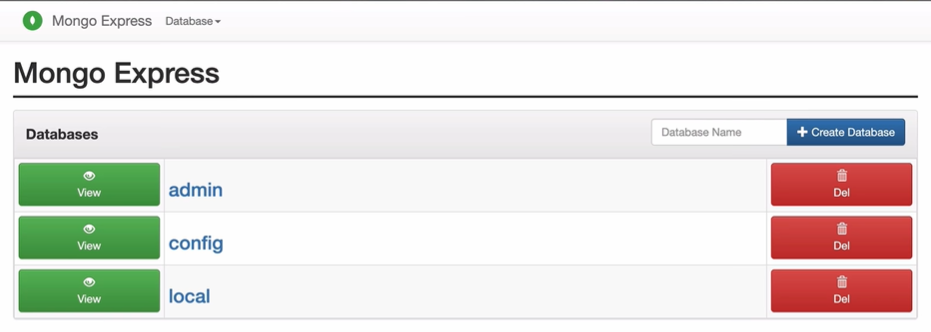
- And new you can create or delete the databases. With that our application has been deployed and we completed our tutorial. That is how we can deploy an application using Kubernetes.
Conclusion
Kubernetes or K8s is an open-sourced container orchestration technology that is used for automating the manual processes of deploying, managing and scaling applications by the help of containers. Follow the steps in the tutorial and deploy more application using Kubernetes in order to understand the process of deployment better. We hope that this article helped you improve your understanding about Kubernetes and deploying application in Kubernetes.
Deployment Of Application Using Kubernetes – FAQs
What Is Minikube?
Minikube is used to locally run Kubernetes, focusing on making it easy to learn and develop for Kubernetes.
Which Is Better For Deploying Applications Minikube Vs Kind?
Kind and Minikube are both Kubernetes development tools. Kind is more preferred since you can create multiple clusters using Kind which cannot be done in Minikube. Kind is used for testing Kubernetes, whereas Minikube is used for local development and learning purposes.
Can We Create A Deployment And A Service In Same Configuration File?
Yes, it is possible to create a Deployment and a Service in the same configuration file, we also did the same in the tutorial in previous section.
How Can We Base64 Encode Any Input?
We can base64 encode any input using the following Linux command:
echo -n 'INPUT' | base64
What Is Kubernetes Secret?
Secrets are Kubernetes objects used to store sensitive information like username, password, etc. that cannot be stored in a Configmap due to security reasons.
Share your thoughts in the comments
Please Login to comment...