Deploying An Application Using Jenkinsfile
Last Updated :
27 Mar, 2024
In the IT world, initially, there were silos between the development and testing teams that created delays in moving the application to user availability. DevOps came into the picture with a culture practice that brings automation with a lot of tools. Jenkins is one of the popular CI/CD tools. Jenkinsfile methodology helps automate the entire pipeline. In this article, we will guide you on how to deploy an application using Jenkinsfile.
Understanding Of Primary Terminologies
- Pipeline: Pipeline is a series of stages and tasks defined by Jenkinsfile with automated continuous integration and Continuous Deployment.
- Stage: A section in the Jenkins Pipeline that supports representing a specific phrase such as the build, test, or deployment process.
- Trigger: It is an event or condition that initiates the execution of pipeline, such as commit or manual triggers.
- Workspace: A directory in the Jenkins agent that helps in executing the source code, building artifacts, and creating temporary files.
Deploying An Application Using Jenkinsfile: A Step-By-Step Guide
Step 1: Log in to an AWS Account
- Navigate to AWS Console and login in with your credentials.
- Click on EC2 to go for EC2 Dashboard.

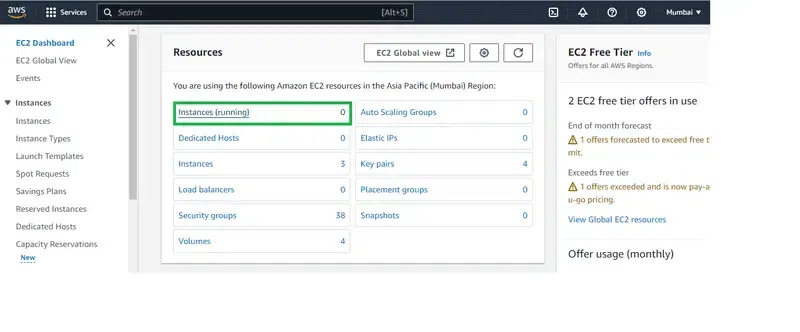
Step 2: Navigate to EC2 Dashboard
- Click on Running Instance to create a running instance.
- After landing, click on Create Instance.
Step 3: Launch Instance
- Define the sections such as providing the instance name as “my_jenkins_server” , no of instance as 1 and Choose the AMI as Amazon Linux 2 latest AMI.
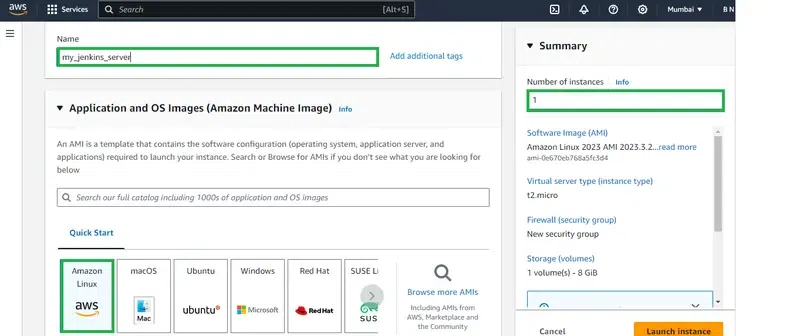
Step 4: Configure Instance
- Choose the instance type as t2.micro and choose the existing key pair.
- If you don’t have any key pair, click on create key pair and choose the key pair format type.

Step 5: Configure Network Security Groups
- Provide the network security groups by configuring them with allowing all traffic, so that they will no restrict of traffic from AWS. The following screenshot clearly illustrates that.
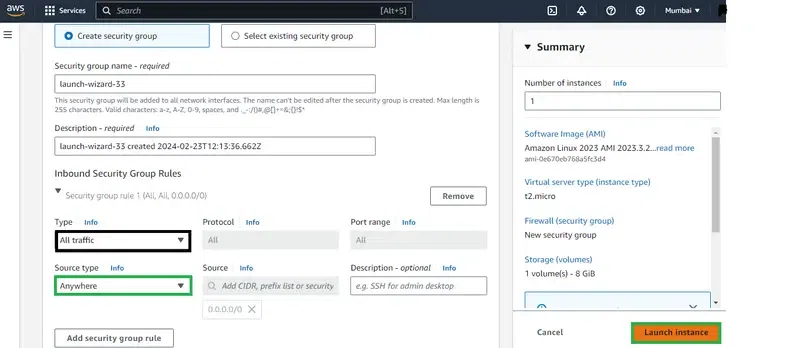
Step 6: Connect To Instance
- Review the provided definition and value. Once you confirmed with defined value click on Launch Instances.
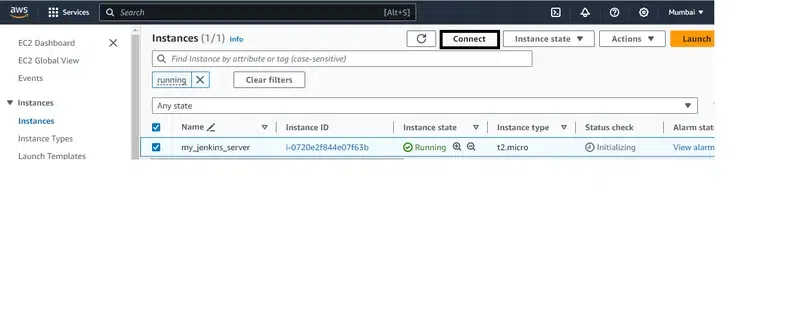
Step 7: Connect To EC2 Console
- Wait till the instance come to running state, Once it been into the running state, Go through it and navigate to EC2 Console section.
- In the EC2 Console section click on connect.

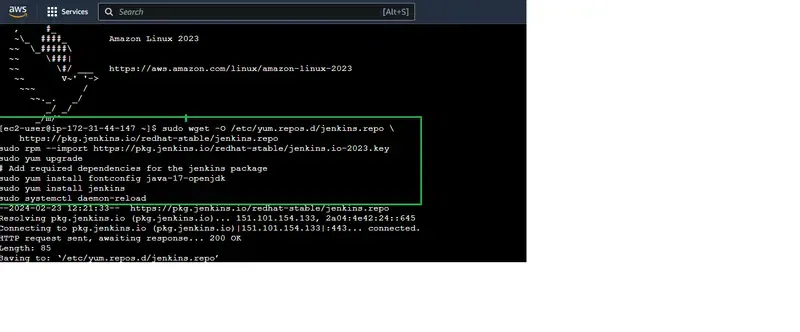
Step 8: Install Jenkins
Now Install the jenkins and Java, with the following commands:
sudo wget -O /etc/yum.repos.d/jenkins.repo \
    https://pkg.jenkins.io/redhat-stable/jenkins.repo
sudo rpm --import https://pkg.jenkins.io/redhat-stable/jenkins.io-2023.key
sudo yum upgrade
# Add required dependencies for the jenkins package
sudo yum install java* -y
sudo yum install jenkins
sudo systemctl daemon-reload
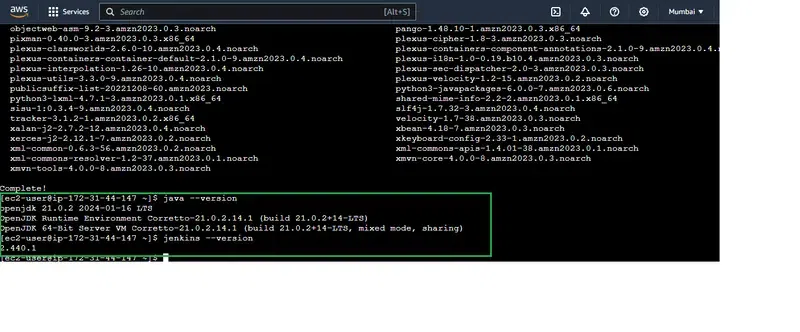
Step 9: Verify Java And Jenkins
Verify the successful installation of jenkins and java with following commands:
java --version
jenkins --version
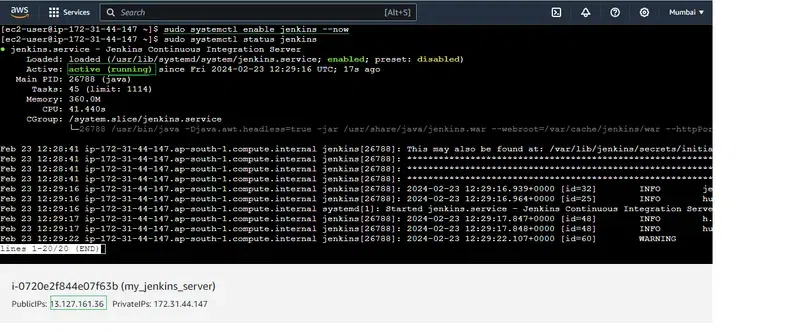
Step 10: Start Jenkins Server
- Now, start the jenkins server with the following command:
systemctl enable jenkins --now
Step 11: Access Jenkins Server
After successfully starting the jenkins server, go to the browser and enter the following url, you will the see the below jenkins server page.
http:[IP_Address]:8080
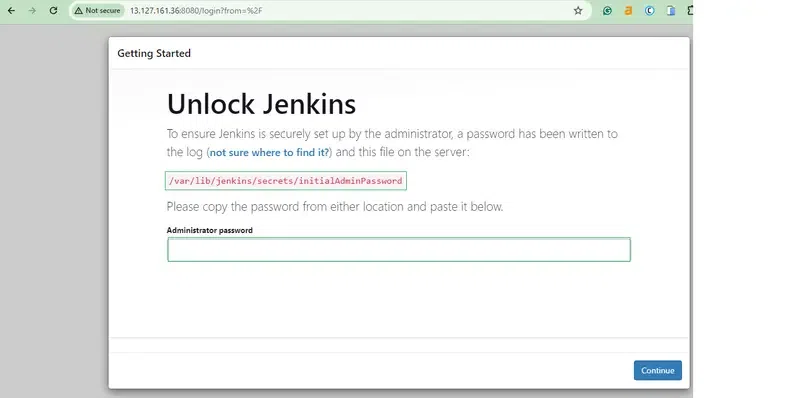
Step 12: Copy Jenkins Password
- The jenkins server asks for password as for authentication, go through provided directory in the console and copy the password from their and paste in this url.
- After successful authentication, you will landed to Inside the Jenkins Server.

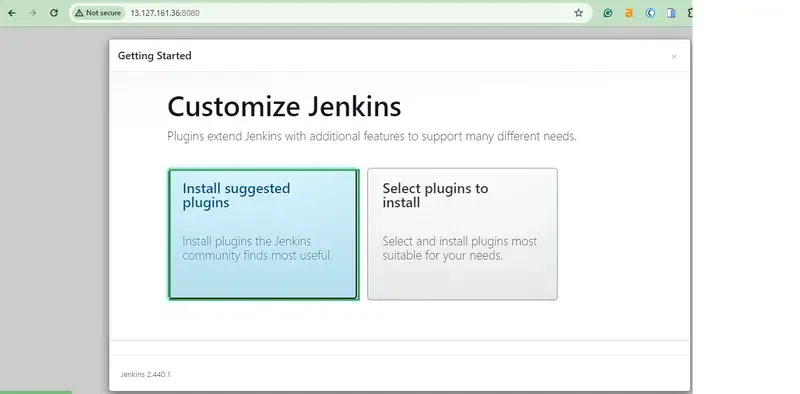
Step 13: Install Suggested Plugins
- Click on Install Suggest Plugins options, so it will help you in installing the required plugins already pre available before going for the jobs.
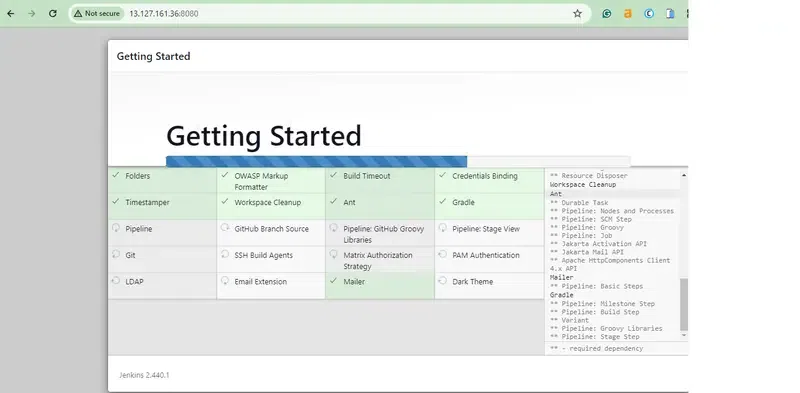
Step 14: Installation Of Plugins Completely
- The installation of suggested plugins takes some time, In the above page you can see the what are the plugins you are installing.
Step 15: Using Default Admin User
- After successfully installing the suggested plugins, It will ask for creating Admin user or go with default admin user. Here we are going with default admin user.

Step 16: Instance Configuration
- In the Instance Configuration page, you will see the url of the jenkins server page. With that provided url you can open the jenkins server from anywhere publicly.

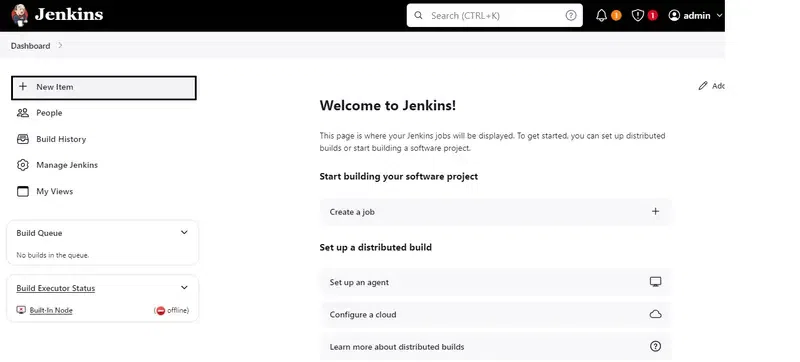
Step 17: Create A Job
Now, create an item clicking on New Item in this Jenkins Web page.
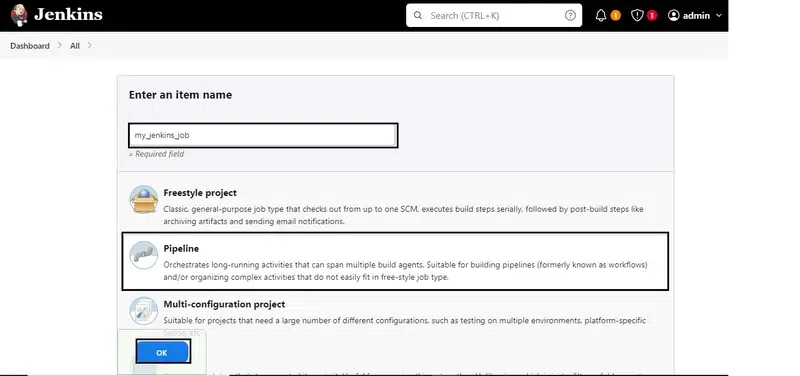
Step 18: Configure The Job
- Now, Configure the jenkins item with defining the values such as Item name, And style such Pipeline project.
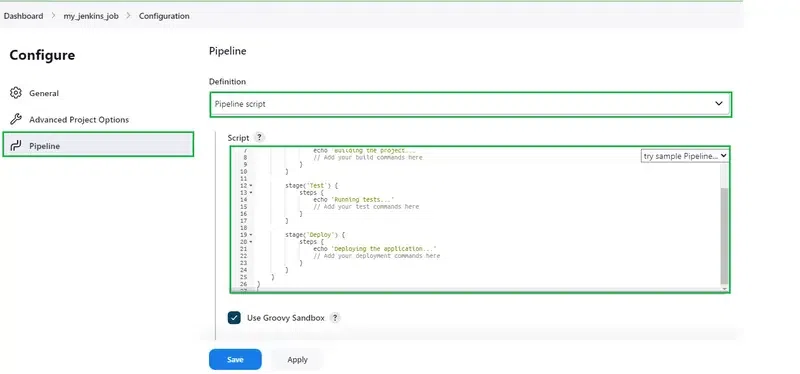
Step 19: Configure The Pipeline Job
- After navigating to Configure page, Enter into the Pipeline and then provided your application code their.
- Here, We are using the following code as a Jenkinsfile code. This code contains the stages such as Build, Test, Deploy Stages. After the execution of stages it mails status of pipeline whether it is successful or failure.
Note: Change the mail id with your one.
pipeline {
    agent any

    stages {
        stage('Build') {
            steps {
                sh 'echo "Building..."'
                sh 'mvn clean package'
            }
        }

        stage('Test') {
            steps {
                sh 'echo "Testing..."'
                sh 'mvn test'
            }
        }

        stage('Deploy') {
            steps {
                sh 'echo "Deploying..."'
                // Add deployment steps here
            }
        }
    }

    post {
        always {
            sh 'echo "Cleaning up..."'
        }

        success {
            mail to: 'developer@example.com',
                 subject: 'Pipeline Succeeded',
                 body: 'Your Jenkins Pipeline has completed successfully.'
        }

        failure {
            mail to: 'admin@example.com',
                 subject: 'Pipeline Failed',
                 body: 'Your Jenkins Pipeline has failed. Please investigate.'
        }
    }
}
- Once you configured the Jenkinfile application code, click on apply button.
Step 20: Successfully Jenkins Build
- After building the created jenkin job, you can see the successful running of the job with the below screenshot.

Deploying An Application Using Jenkinsfile – FAQ’s
What is a Jenkinsfile?
Jenkinsfile is a text based file that used for the defining the pipeline of a jenkins project with providing continuous integration and deployment.
How do I deploy an application using Jenkinsfile?
By defining deployment stages and tasks in Jenkinsfile and specifying the build, test and deployment steps with automation process.
Can I use Jenkinsfile to deploy different types of applications?
Yes, Jenkinsfile supports to deploy various types of applications such as web applications, APIs, Mobile Apps and Customizable scripts.
Does Jenkinsfile support version control integration?
yes, Jenkinsfile support version control systems like Git with providing credentials and ensuring consistency and tracebility.
Share your thoughts in the comments
Please Login to comment...