Kubernetes – Creating Deployment and Services using Helm in Kubernetes
Last Updated :
16 Apr, 2023
Prerequisite: Kubernetes
Helm is used for managing your Kubernetes Deployment. With helm, we can tear down and create a deployment with a single command. we will be creating deployment and services using Helm in Kubernetes. For simplicity, we will be using the nginx image.
Deployment of nginx using Helm
Step 1: We need to install the Helm. You can install Helm on Linux using the following command.
curl https://baltocdn.com/helm/signing.asc
| gpg --dearmor | sudo tee /usr/share/keyrings/helm.gpg > /dev/null
sudo apt-get install apt-transport-https --yes
echo "deb [arch=$(dpkg --print-architecture)
signed-by=/usr/share/keyrings/helm.gpg]
https://baltocdn.com/helm/stable/debian/ all main"
| sudo tee /etc/apt/sources.list.d/helm-stable-debian.list
sudo apt-get update
sudo apt-get install helm
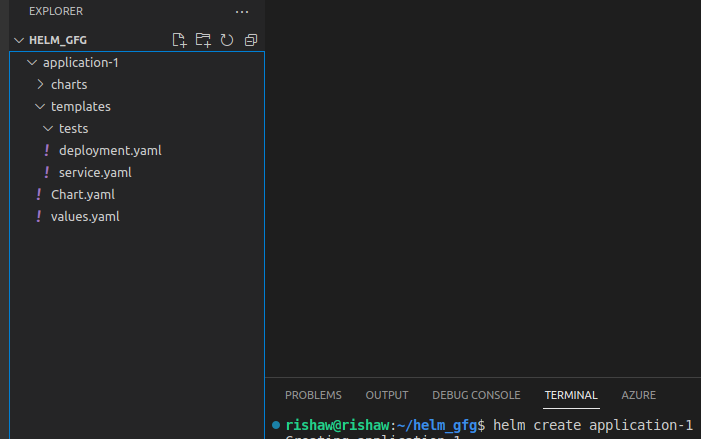
Step 2: Once the installation is completed create a folder, navigate to it and open it in the terminal and create an application using helm. You can use the command:
helm create application-name
Step 3: Once the application is created we can see that there are a lot of files created in the folder application-1. This is how your folder should look now.
For now, we will be deleting notes.txt, _, and helpers.tpl, hpa.yaml, ingrress.yaml, service account.yaml, .helmignore. We are deleting these files because we will be working only with deployment.yaml and service.yaml as we are creating a deployment for nginx and exposing it using the NodePort service.
Definition of Helm Files
- _helpers.tpl: It is a template file that contains reusable snippets of YAML code which can be included in other YAML files.
- deployment.yaml: Defines the Kubernetes Deployment for the chart.
- hpa.yaml: Defines the Horizontal Pod Autoscaler for the chart.
- Ingress.yaml: Defines the Kubernetes ingress for the chart.
- serviceaccount.yaml: Defines the Kubernetes ServiceAccount for the chart.
- .helmignore: It is a file that specifies all files and directories that should be ignored when packaging the chart.
- services.yaml: Defines the Kubernetes Services for the chart.
- values.yaml: This is a file containing the default values for the chart’s configurable parameters.
- chart.yaml: This is a file containing the metadata about the chart, such as its name, version, and maintainer.
- NOTES.txt: This is a file containing the any notes or instructions for the user when installing the chart.
Now once the files are deleted, we need to update our deployment.yaml, service.yaml, and values.yaml file. As we are not using ingress, service account, etc. we will be replacing all the contents of the files with our code. Our code is very simple for demonstration purposes.
Step 4: Update the values of values.yaml by replacing all the content with the following. We have deleted all the unnecessary key-value pairs which weren’t required by us. We have only used deployment and service so that the values can be fetched in our yaml files.
Step 5: Replace the contents of the deployment.yaml with the following code.
Similarly, we have replaced the already existing code with our code where we have used the image of nginx with the latest tag which is fetched from values.yaml file using the command {{.Values.deployment.image.app }}: {{.Values.deployment.image.version }}. We have also opened container ports with TCP Protocol at Port 80.
Step 6: Similarly replace the contents of service.yaml with the following.
We have replaced the contents of the service.yaml files with our code. The nodePort is fetched from values.yaml file using the code {{ .Values.service.port }}.
Step 7: Once the files are updated, navigate to folder application-1 from the terminal and write the following command.
helm install chart-gfg .
As we can see Deployment challenges and service challenges are up and running successfully. To view them we can use the commands.
kubectl get all
Now with the help of the following command, we get the IP of the node we can access our page using the internal IP + 32685.
kubectl get nodes -o wide
Step 8: To delete deployments and services simply use the command.
helm uninstall chart-gfg
As we can see, everything is deleted. This was a high-level overview of creating deployments using Helm in Kubernetes.
Like Article
Suggest improvement
Share your thoughts in the comments
Please Login to comment...