Deploying a TensorFlow 2.1 CNN model on the web with Flask
Last Updated :
11 May, 2020
When starting to learn Machine Learning, one of the biggest issues people face is deploying whatever they make to the web for easier demonstration/use. This article will help those beginners bridge the gap between creating a TensorFlow model and deploying it on the web with Flask and hopefully gain some insight on the issues TensorFlow and Flask have.
Creating a Model
First we will have to train our model using TensorFlow and Keras’s ImageDataGenerator. For this, We have downloaded 12500 images of Cat’s and 12500 images of dogs respectively. To train a model using ImageDataGenerator first install keras and tensorflow,
pip install keras
pip install tensorflow
We have trained a model using transfer learning from InceptionV3 model. For a tutorial on transfer learning visit this link. After the model has been trained, we will need to execute the following command which creates a model folder of the trained model. (Before TensorFlow 2.0, a model file was created instead of a model folder).
model.save('Name_of_model')
|
Creating Flask Application
Then, we will have to install Flask. Flask is a micro-framework in Python which is extensively used to deploy ML models on the web, we will have to install flask using the following command.
pip install flask
Coming to the webpage we want to build. Create a HTML page according to your preference, we have created a basic webpage with a button to upload an image and a button to predict what the image is. This code sends the image as a post request and stores it in the folder “uploaded/image/” where a prediction is made from here. Courtesy of Shubham S. Naik from Stack Overflow. The code is divided into 2 files, namely a .js file an a .html file. Copy the below code into a file named upload.html and save it in a folder named templates.
<!DOCTYPE html>
<html>
<head>
rel="stylesheet" type="text/css" />
<meta charset=utf-8 />
<script src="{{ url_for('static', filename='upload.js') }}"></script>
<style>
article,
aside,
figure,
footer,
header,
hgroup,
menu,
nav,
section {
display: block;
}
</style>
</head>
<body>
<input type='file' name='file' onchange="readURL(this);" />
<img id="blah" src="#" alt="your image" />
<button type="submit">Submit & predict</button>
</form>
</body>
</html>
|
Copy the below code into a file named upload.js and save it in a folder called static.
function readURL(input) {
if (input.files && input.files[0]) {
var reader = new FileReader();
reader.onload = function (e) {
$('#blah')
.attr('src', e.target.result)
.width(150)
.height(200);
};
reader.readAsDataURL(input.files[0]);
}
}
|
After this is done, we will need ImageDataGenerator to make a prediction of an image once it has been trained. First we will load the model using
model = tf.keras.models.load_model('Name_of_model')
|
Then, we will need to import ImageDataGenerator. Now, coming to the flask the flask code. Copy the below code into a Code.py file and place it in the root directory. The complete Python code is as follows:-
from flask import Flask, render_template, request
from werkzeug import secure_filename
from keras.preprocessing.image import ImageDataGenerator
import tensorflow as tf
import numpy as np
import os
try:
import shutil
shutil.rmtree('uploaded / image')
% cd uploaded % mkdir image % cd ..
print()
except:
pass
model = tf.keras.models.load_model('model')
app = Flask(__name__)
app.config['UPLOAD_FOLDER'] = 'uploaded / image'
@app.route('/')
def upload_f():
return render_template('upload.html')
def finds():
test_datagen = ImageDataGenerator(rescale = 1./255)
vals = ['Cat', 'Dog']
test_dir = 'uploaded'
test_generator = test_datagen.flow_from_directory(
test_dir,
target_size =(224, 224),
color_mode ="rgb",
shuffle = False,
class_mode ='categorical',
batch_size = 1)
pred = model.predict_generator(test_generator)
print(pred)
return str(vals[np.argmax(pred)])
@app.route('/uploader', methods = ['GET', 'POST'])
def upload_file():
if request.method == 'POST':
f = request.files['file']
f.save(os.path.join(app.config['UPLOAD_FOLDER'], secure_filename(f.filename)))
val = finds()
return render_template('pred.html', ss = val)
if __name__ == '__main__':
app.run()
|
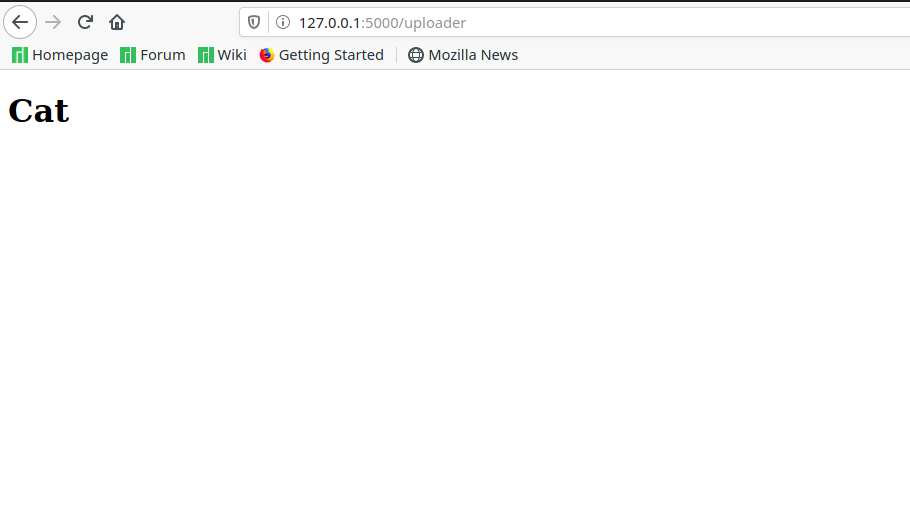
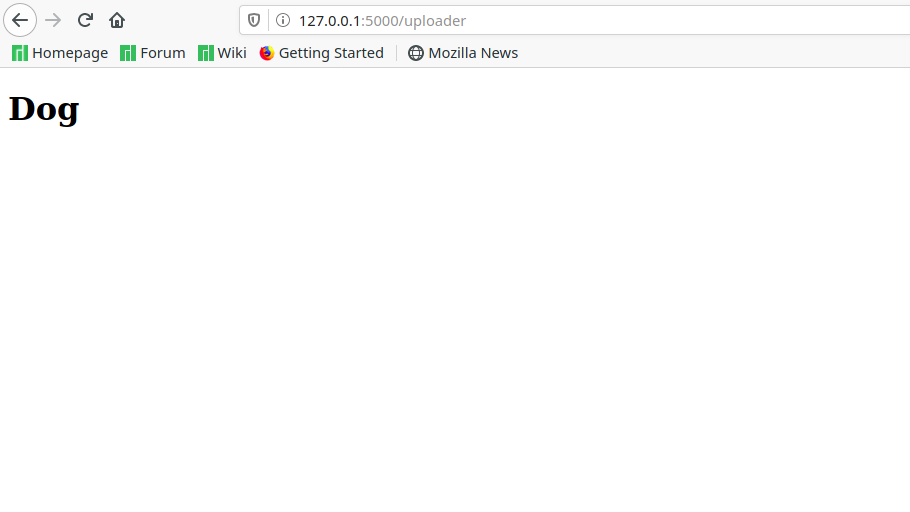
Finally we need to render a html page for the final prediction. Copy the below code and place save it as pred.html in templates folder.
<!DOCTYPE html>
<html>
<body>
<h1>{{ ss }}</h1>
</body>
</html>
|
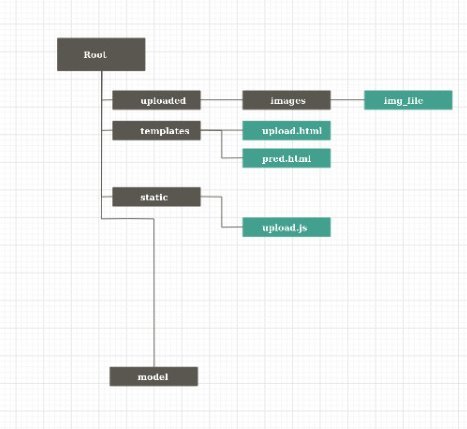
The final folder structure is described as follows :-
The black colored flags are folders and blue flags are files.
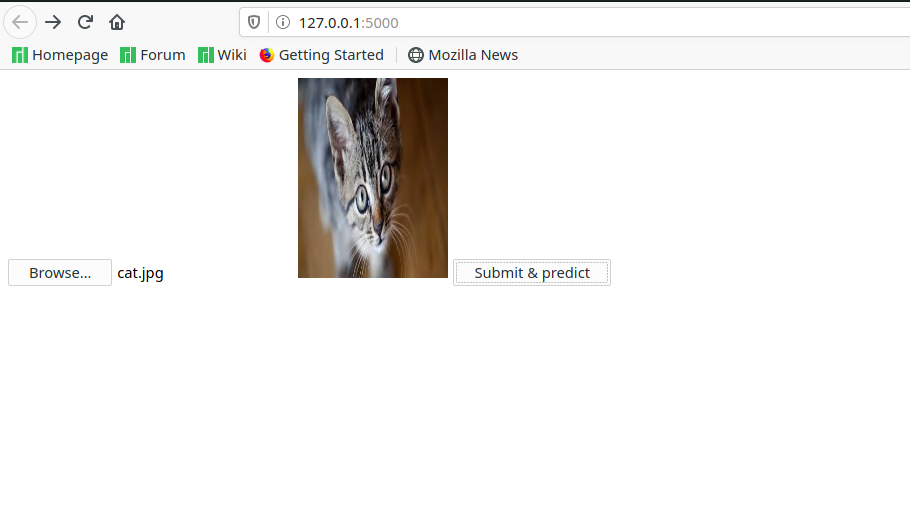
Output
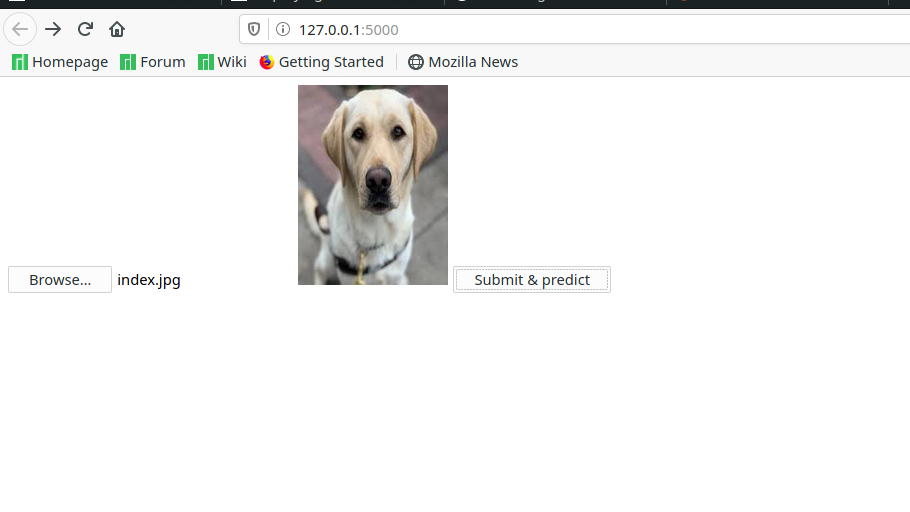
Finally, all we need to do is run the file code.py and go to http://127.0.0.1:5000/ to see the output
Note : Every time a prediction is made, please delete the images in uploaded/image before uploading a new one or you might get an Internal Server error.
Share your thoughts in the comments
Please Login to comment...