Training of Convolutional Neural Network (CNN) in TensorFlow
Last Updated :
10 Jan, 2022
In this article, we are going to implement and train a convolutional neural network CNN using TensorFlow a massive machine learning library.
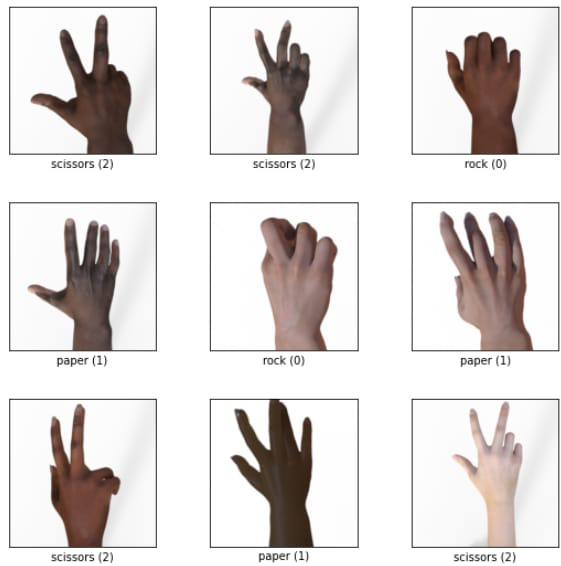
Now in this article, we are going to work on a dataset called ‘rock_paper_sissors’ where we need to simply classify the hand signs as rock paper or scissors.
Stepwise Implementation
Step 1: Importing the libraries
We are going to start with importing some important libraries. They are TensorFlow, NumPy, Matplotlib, and finally from TensorFlow, we need TensorFlow datasets and Keras
Python
pip install -q tensorflow tensorflow-datasets
import matplotlib.pyplot as plt
import numpy as np
import tensorflow as tf
import tensorflow_datasets as tfds
from tensorflow import keras
|
Step 2: Loading the dataset
Before choosing the dataset feel free to explore all the datasets available in TensorFlow
Output:
['abstract_reasoning',
 'accentdb',
 'aeslc',
 'aflw2k3d',
 'ag_news_subset',
 'ai2_arc',
 'ai2_arc_with_ir',
 'amazon_us_reviews',
 'anli',
 'arc',
 'bair_robot_pushing_small',
 'bccd',
 'beans',
 'big_patent',
 ....
 ..
 .
Before loading the dataset we shall see some info about our dataset so that it will be easy for us to work with the data and to gather some very important information.
Python
Dataset = tfds.builder('rock_paper_scissors')
info = Dataset.info
print(info)
|
Output:
tfds.core.DatasetInfo(
    name='rock_paper_scissors',
    full_name='rock_paper_scissors/3.0.0',
    description="""
    Images of hands playing rock, paper, scissor game.
    """,
    homepage='http://laurencemoroney.com/rock-paper-scissors-dataset',
    data_path='C:\\Users\\ksaty\\tensorflow_datasets\\rock_paper_scissors\\3.0.0',
    download_size=Unknown size,
    dataset_size=Unknown size,
    features=FeaturesDict({
        'image': Image(shape=(300, 300, 3), dtype=tf.uint8),
        'label': ClassLabel(shape=(), dtype=tf.int64, num_classes=3),
    }),
    supervised_keys=('image', 'label'),
    disable_shuffling=False,
    splits={
    },
    citation="""@ONLINE {rps,
    author = "Laurence Moroney",
    title = "Rock, Paper, Scissors Dataset",
    month = "feb",
    year = "2019",
    url = "http://laurencemoroney.com/rock-paper-scissors-dataset"
    }""",
)
Finally loading the dataset,
Python
ds_train = tfds.load(name="rock_paper_scissors", split="train")
ds_test = tfds.load(name="rock_paper_scissors", split="test")
|
Output:
Downloading and preparing dataset Unknown size (download: Unknown size, generated: Unknown size, total: Unknown size) to C:\Users\ksaty\tensorflow_datasets\rock_paper_scissors\3.0.0…
Dl Completed…: 100%
2/2 [00:50<00:00, 25.01s/ url]
Dl Size…: 100%
219/219 [00:50<00:00, 4.38 MiB/s]
Dataset rock_paper_scissors downloaded and prepared to C:\Users\ksaty\tensorflow_datasets\rock_paper_scissors\3.0.0. Subsequent calls will reuse this data.
Some of the examples
Step 3: Analyzing and preprocessing the images
First, to keep it clean we are going to iterate over the data and store it as a NumPy array and cancel the dimensions of the image and store it as train_images, and test images with labels.
Python
train_images = np.array([image['image'].numpy()[:, :, 0]
for image in ds_train])
train_labels = np.array([image['label']
.numpy() for image in ds_train])
test_images = np.array([image['image'].numpy()[:, :, 0] for image in ds_test])
test_labels = np.array([image['label'].numpy() for image in ds_test])
|
and then, now we are going to reshape the images and then convert the datatype to float32 from uint8, and then we are going to get all the values down to 0 to 1 for making it easier for the model to learn from it.
Python
train_images = train_images.reshape(2520, 300, 300, 1)
test_images = test_images.reshape(372, 300, 300, 1)
train_images = train_images.astype('float32')
test_images = test_images.astype('float32')
train_images /= 255
test_images /= 255
|
Step 4: A basic convolutional neural network
Now we are going to create a basic CNN with only 2 convolutional layers with a relu activation function and 64 and 32 kernels and a kernel size of 3 and flatten the image to a 1D array and the convolutional layers are directly connected to the output layer.
And for compiling we use Adam optimizer and for the loss we are using SparseCategoricalCrossentropy() and for metrics, we use accuracy and going to fit the data.
Python
model = keras.Sequential([
keras.layers.Conv2D(64, 3, activation='relu',
input_shape=(300, 300, 1)),
keras.layers.Conv2D(32, 3, activation='relu'),
keras.layers.Flatten(),
keras.layers.Dense(3, activation='softmax')
])
model.compile(optimizer='adam',
loss=keras.losses.SparseCategoricalCrossentropy(),
metrics=['accuracy'])
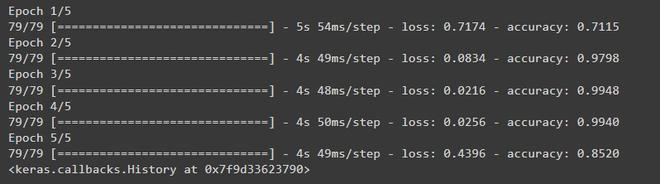
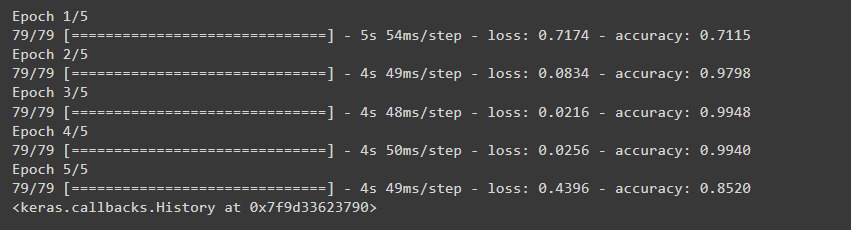
model.fit(train_images, train_labels, epochs=5,
batch_size=32)
|
Output:
And to evaluate the model
Python
model.evaluate(test_images, test_labels)
|

As you can see there is a very low accuracy in unseen data this is called model overfitting which means the model is overfitted by the training data so it cannot handle the unseen data to solve this we can modify the model a little bit.
Better convolutional neural network
We can improve this model by adding:
- Dropout nodes
- Pooling
- Fully connected dense layers
Python
model = keras.Sequential([
keras.layers.AveragePooling2D(6, 3,
input_shape=(300, 300, 1)),
keras.layers.Conv2D(64, 3, activation='relu'),
keras.layers.Conv2D(32, 3, activation='relu'),
keras.layers.MaxPool2D(2, 2),
keras.layers.Dropout(0.5),
keras.layers.Flatten(),
keras.layers.Dense(128, activation='relu'),
keras.layers.Dense(3, activation='softmax')
])
model.compile(optimizer='adam',
loss=keras.losses.SparseCategoricalCrossentropy(),
metrics=['accuracy'])
model.fit(train_images, train_labels, epochs=5,
batch_size=32)
|
Now if we evaluate our model, As you can see the model has improved a lot.

These are the steps to train a convolutional neural network.
Note: You can still make some tweaks and turns to the model to increase the accuracy. IT is a continuous learning process.
Share your thoughts in the comments
Please Login to comment...