How to Create Vnet in Azure using Terraform ?
Last Updated :
26 Apr, 2024
Azure Vnet also called Azure Virtual Network is a network that provides various network-related services in Azure. It connects groups of resources and isolates them from outside access in azure cloud. In this article let’s see how we can set up Azure Virtual Network using Terraform.
Understanding Of Primary Terminologies
The following are the primary components of Azure Vnet related to Terraform:
- Terraform: It is Infrastructure as an infrastructure-as-a-service tool that allows the deployment of resources to multiple cloud providers through code.
- Azure Virtual Network: In Microsoft Azure, a Virtual network is an isolated network that protects a group of resources.
- IaaC: Infrastructure as a Code allows to representation of cloud infrastructure in the form of code.
Setup Azure Virtual Network Using Terraform: A Step-By-Step Guide
Step 1: Set Up Terraform
- Download the Terraform zip from the installation page of the Terraform website.
- Extract and paste the terraform folder to the required location and add the path to runnable in environment variables.
- For MacOs install the terraform using HomeBrew.
Step 2: Set Up Azure CLI
- Download the Azure CLI setup from the official website.
- Run the installer and follow the steps to install.
.png)
- For MacOs install the Azure CLI using below HomeBrew Command.
brew update && brew install azure-cli
Step 3: Configure Azure CLI
- Open terminal and run below command.
az login
- A browser window will open for login. Login with your azure credentials. Once it is done you will see output as below.
.jpg)
Step 4: Create Terraform Code
- Goto your project folder and create main.tf file.
- Add terraform block to code with azure as required provider with latest version. You can find the latest version at hashicorp registry.
- Terraform block should look like below. You can add required version to avoid invalidation.
terraform {
  required_providers {
    azurerm = {
        source = "hashicorp/azurerm"
        version = "~>3.0"
    }
  }
}
- Now add provider as azurerm like below. Specify other details as required.
provider "azurerm" {
  features {}
}
- Add configuration for Virtual Network. For this article we will add only required arguments. You can specify other arguments if required.
resource "azurerm_virtual_network" "samplevnet" {
  name = "samplevnet"
  resource_group_name = "DeepsLab"
  location = "eastus"
  address_space = [ "10.0.0.0/16"]

  subnet {
    name = "subnet-A"
    address_prefix = "10.0.1.0/24"
  }
}
- We have specified name for Virtual network. We have specified the location and resource group where virtual network should be created.
- we have added a subnet with /24 prefix in the virtual network.
- The complete code will look like below.
terraform {
  required_providers {
    azurerm = {
        source = "hashicorp/azurerm"
        version = "~>3.0"
    }
  }
}

provider "azurerm" {
  features {}
}

resource "azurerm_virtual_network" "samplevnet" {
  name = "samplevnet"
  resource_group_name = "DeepsLab"
  location = "eastus"
  address_space = [ "10.0.0.0/16"]

  subnet {
    name = "subnet-A"
    address_prefix = "10.0.1.0/24"
  }
}
Step 5: Apply The Terraform Code
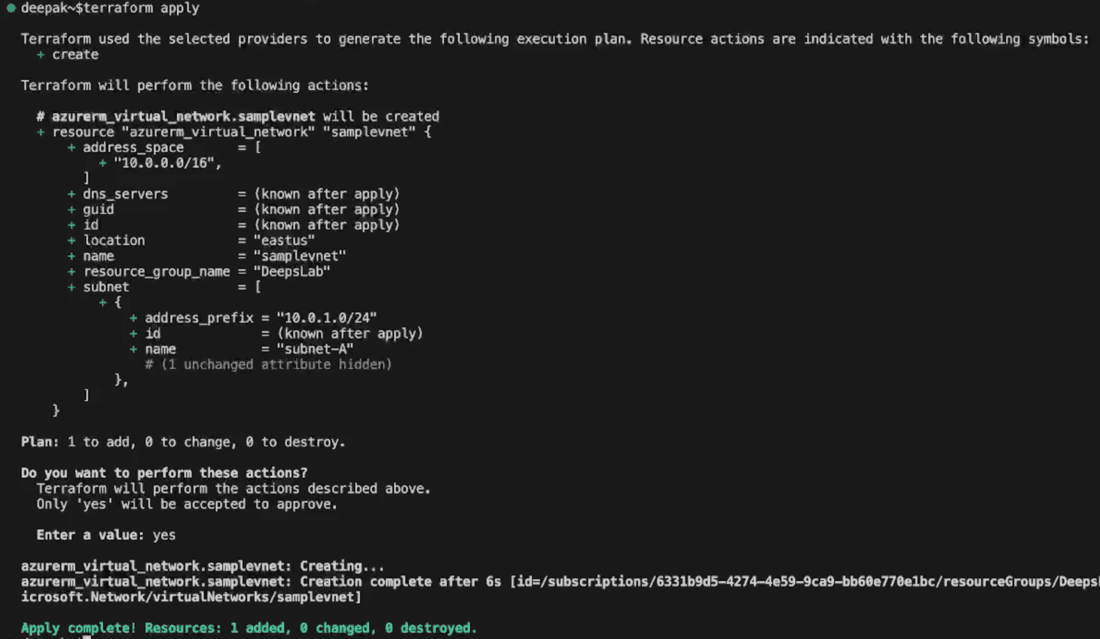
- Once the code is ready you can apply it.
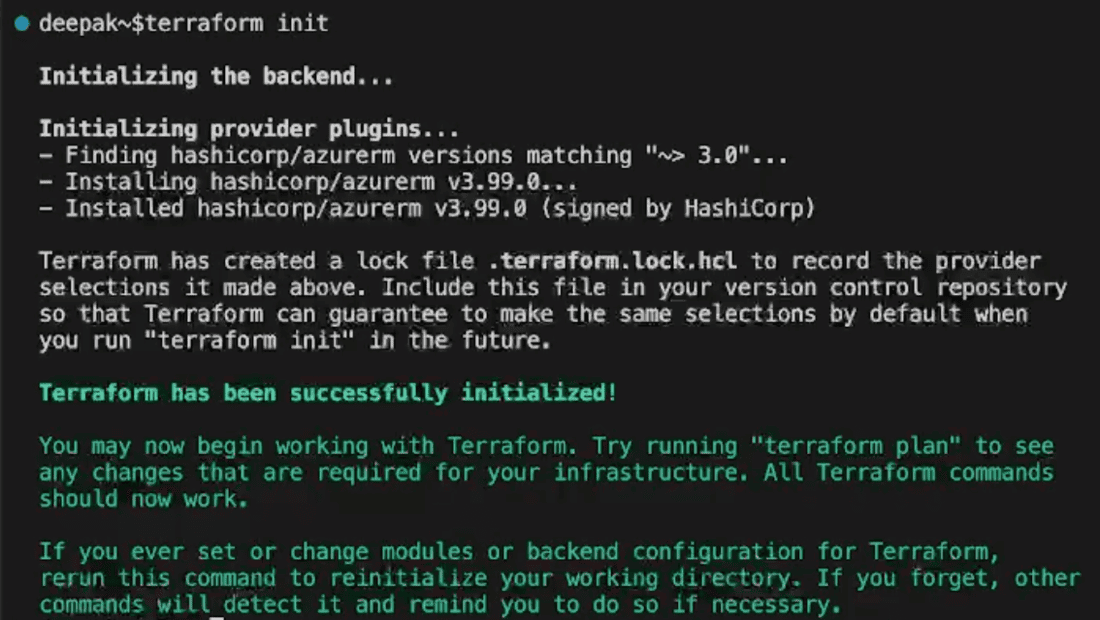
- First init the terraform by running below command in project folder where main.tf is present.
terraform init
- After successful output of terraform apply the changes using below command.
terrraform apply
- After verifying type “yes” to confirm and apply.
- Terraform will start creating network.
- You can also verify deployment by visiting Virtual Networks page of Azure.

Conclusion
We have successfully created Azure Virtual Network with the help of terraform in this article. the configuration described can be further modified to make changes to subnets and network in azure. This is how terraform allows reusable and modifiable configuration of infrastructure.
How to create vnet in azure using terraform – FAQ’s
What is a virtual network (VNet) in Azure?
A virtual network is a logically isolated network in Azure that allows resources to communicate with each other, the internet, and on-premises networks securely. It acts as a private network in the cloud.
What tools do I need to create a virtual network in Azure using Terraform?
You need Terraform installed on your local machine or a CI/CD pipeline, and access to an Azure subscription with the necessary permissions to create resources.
Can I customize the virtual network further?
Yes, you can customize various aspects of the virtual network such as subnets, security rules, DNS settings, and peering configurations according to your requirements.
How do I manage changes to the virtual network over time?
You can version control your Terraform configuration files and use Terraform’s plan and apply workflow to manage changes. When you need to update the virtual network, you modify the Terraform configuration and apply the changes.
Are there any best practices I should follow when creating a virtual network in Azure with Terraform?
Yes, follow best practices such as using variables for parameters, organizing your Terraform code into modules for reusability, and using remote state management for collaboration and concurrency.
Share your thoughts in the comments
Please Login to comment...