How to Create Azure SQL Data Base using Terraform
Last Updated :
30 Apr, 2024
Azure SQL database is a managed database service in Azure. It allows the storage of data in an organized and safe manner in Azure Cloud. Azure SQL database is highly scalable and flexible as compared to other databases. In this article let’s see how we can set up Azure SQL Database using Terraform.
What is Terraform?
Terraform is an infrastructure as a code tool used for provisioning cloud resources with the help of code. It manages the state of cloud infrastructure and allows its management flexibly. It makes updating, destroying and reprovisioning of resources easy and simple.
What is Azure SQL DB?
Azure SQL Database is a managed service provided by Microsoft Azure. It is a relational database service that allows storage of relational data in Azure Cloud. It provides features such as high availability, security, maintenance and scalability. Azure DB can be used for setting up multiple databases with different types of SQL DBMS engines.
Understanding Of Primary Terminologies Related to Azure SQL DB And Terraform
The following are the primary components of Azure Vnet related to Terraform:
Setup Azure SQL Database Using Terraform: A Step-By-Step Guide
Step 1: Set Up Terraform
- Download the Terraform zip from the installation page of the Terraform website.
- Extract and paste the terraform folder to the required location and add the path to runnable in environment variables.
- For MacOs install the terraform using HomeBrew.
Step 2: Set Up Azure CLI
- Download the Azure CLI setup from the official website.
- Run the installer and follow the steps to install.
.png)
- For MacOs install the Azure CLI using below HomeBrew Command.
brew update && brew install azure-cli
Step 3: Configure Azure CLI
- Open terminal and run below command.
az login
- A browser window will open for login. Login with your azure credentials. Once it is done you will see output as below.
.jpg)
- As we can see output is printed with details of logged in user and azure details.
Step 4: Create Terraform Code
- Goto your project folder and create main.tf file.
- Add terraform block to code with azure as required provider with latest version. You can find the latest version at hashicorp registry.
- Terraform block should look like below. You can add required version to avoid invalidation.
terraform {
  required_providers {
    azurerm = {
        source = "hashicorp/azurerm"
        version = "~>3.0"
    }
  }
}
- Now add provider as azurerm like below. Specify other details as required.
provider "azurerm" {
  features {}
}
- To create a database first we need to create a SQL server which can be used for creating multiple databases. Add configuration for server .Make sure you give unique name to server.
resource "azurerm_sql_server" "deepslabtestsqlserver" {
  name = "deepslabtestsqlserver"
  resource_group_name = "DeepsLab"
  location = "eastus"
  version = "12.0"
  administrator_login = "dbmasteradmin"
  administrator_login_password = "DBmasterrootadmin@21"

  tags = {
    "environment"= "test"
  }
}
- Now add configuration for service account which is required for accessing Database. Again the name should be unique across Azure.
resource "azurerm_storage_account" "deepslabteststorageac" {
  name = "deepslabteststorageac"
  resource_group_name = "DeepsLab"
  location = "eastus"
  account_tier = "Standard"
  account_replication_type = "LRS"
}
- Finally Add configuration for SQL Database. For this article we will add only required arguments. You can specify other arguments if required.
resource "azurerm_sql_database" "deepslabtestdb" {
  name = "deepslabtestdb"
  resource_group_name = "DeepsLab"
  location = "eastus"
  depends_on = [ azurerm_storage_account.deepslabteststorageac ]
  server_name = azurerm_sql_server.deepslabtestsqlserver.name

  tags = {
    "environment"= "test"
  }
}
- We have specified name, resource group and location for SQL Database. The depends_on states that storage account creation is required before provisioning database.
- As you can see we have specified server name where the database should be created.
- The complete code will look like below.
terraform {
  required_providers {
    azurerm= {
        source = "hashicorp/azurerm"
        version = "~>3.0"
    }
  }
}

provider "azurerm" {
  features {}
}

resource "azurerm_sql_server" "deepslabtestsqlserver" {
  name = "deepslabtestsqlserver"
  resource_group_name = "DeepsLab"
  location = "eastus"
  version = "12.0"
  administrator_login = "dbmasteradmin"
  administrator_login_password = "DBmasterrootadmin@21"

  tags = {
    "environment"= "test"
  }
}

resource "azurerm_storage_account" "deepslabteststorageac" {
  name = "deepslabteststorageac"
  resource_group_name = "DeepsLab"
  location = "eastus"
  account_tier = "Standard"
  account_replication_type = "LRS"
}

resource "azurerm_sql_database" "deepslabtestdb" {
  name = "deepslabtestdb"
  resource_group_name = "DeepsLab"
  location = "eastus"
  depends_on = [ azurerm_storage_account.deepslabteststorageac ]
  server_name = azurerm_sql_server.deepslabtestsqlserver.name

  tags = {
    "environment"= "test"
  }
}
Step 5: Apply The Terraform Code
- Once the code is ready you can apply it.
- First init the terraform by running below command in project folder where main.tf is present.
terraform init
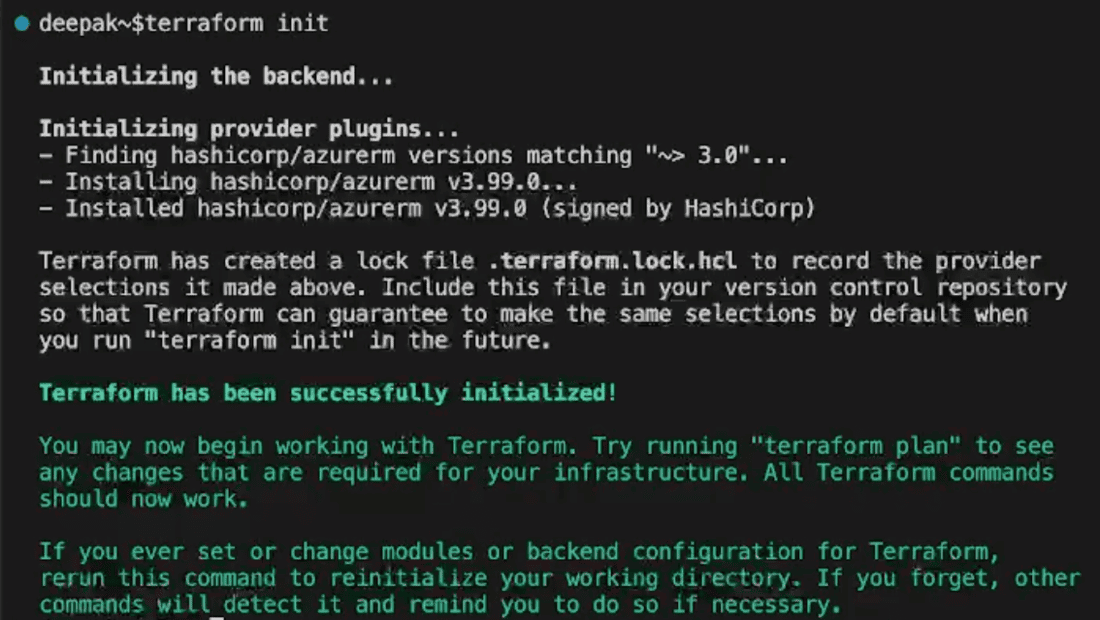
- Terraform is initialized as above. It will install terraform provider and create lock files for configuration.
- After successful output of terraform apply the changes using below command.
terrraform apply
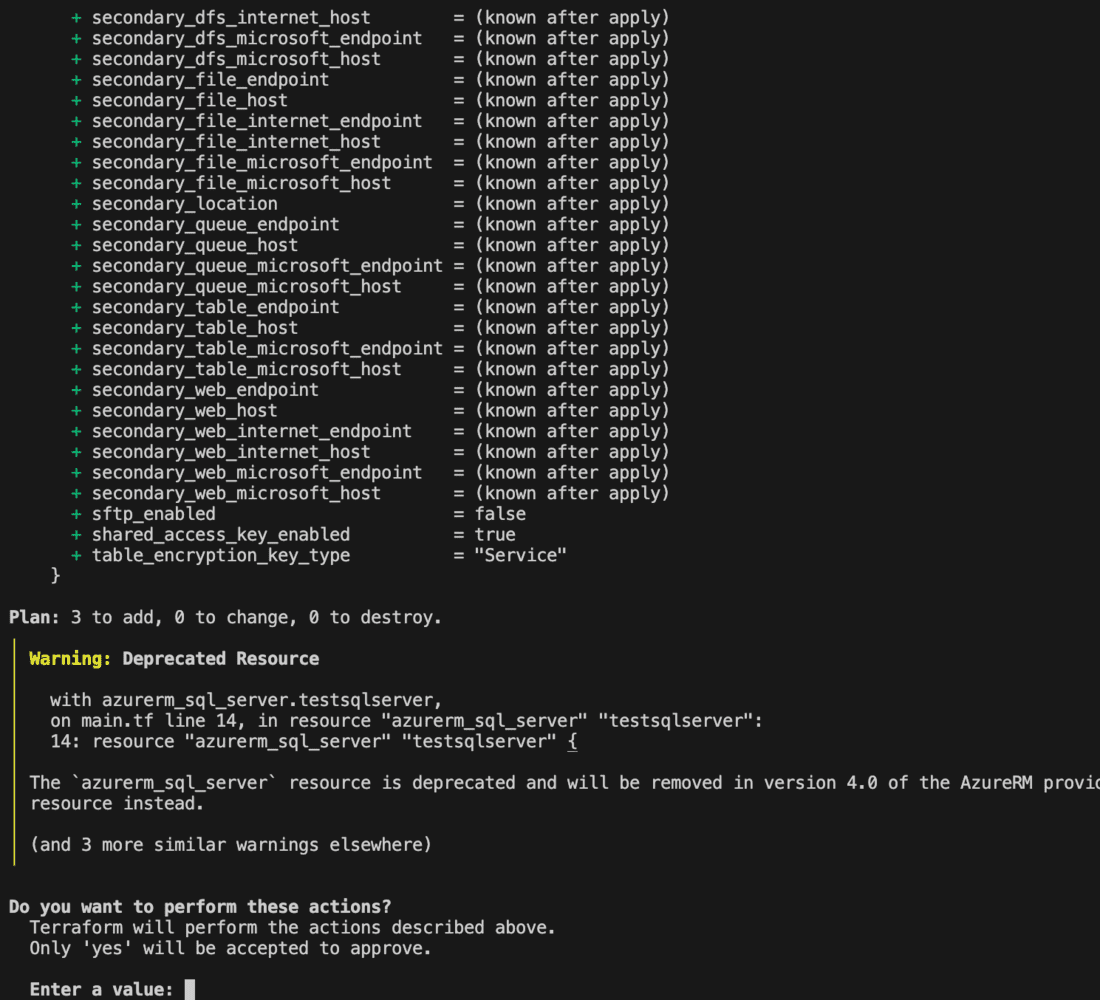
- Terraform apply will display the details of infrastructure to be provisioned as below .After verifying type “yes” to confirm and apply.
- Terraform will start creating resources. It will print id and creation complete status as below .
.png)
- You can also verify deployment by visiting Virtual Networks page of Azure.
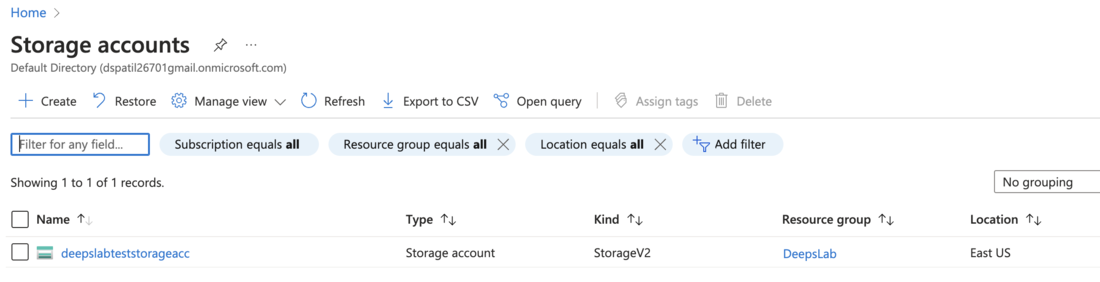
- The Storage account has deployed successfully in Azure portal
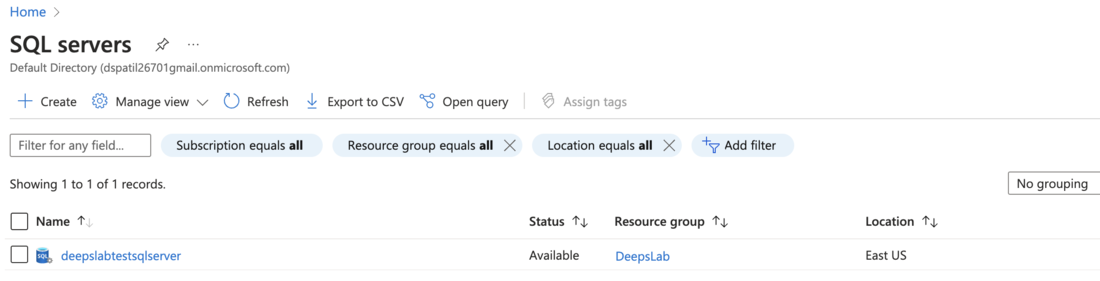
- The SQL Server has deployed on Azure portal
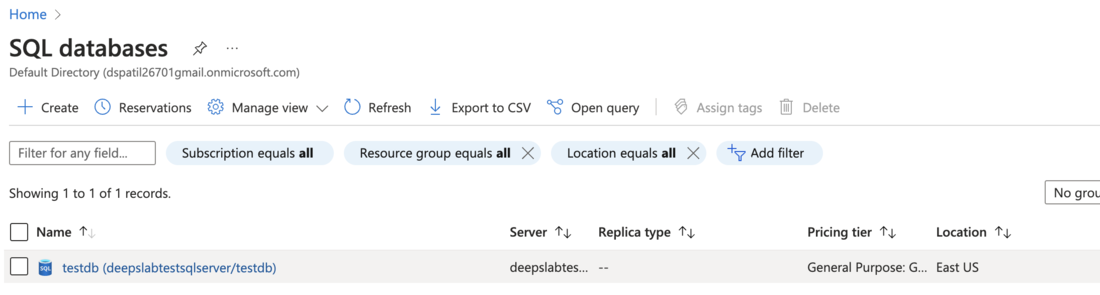
- The SQL Database has Deployed on Azure Portal
Conclusion
We have successfully created Azure SQL Database with the help of terraform in this article. the configuration described can be further modified to make changes to database and SQL server. This is how terraform allows reusable and modifiable configuration of infrastructure.
How to create Azure SQL Database using Terraform – FAQ’s
Why use Terraform for creating Azure SQL Database?
Terraform simplifies and automates the process of provisioning infrastructure, including Azure SQL Database. By defining infrastructure as code, you can easily manage and version your database configuration, making it reproducible and consistent across environments.
What information do I need to provide in my Terraform configuration file?
In your Terraform configuration file, you’ll need to specify details such as the name of the database, resource group, server name, server admin login, and password. You can also configure additional settings like the database edition, pricing tier, and desired performance characteristics.
Can Terraform automatically manage the lifecycle of my Azure SQL Database?
Yes, Terraform can manage the lifecycle of your Azure SQL Database, including provisioning, updating, and destroying resources. This means you can easily make changes to your database configuration and apply them with Terraform, ensuring consistency and reliability.
Can I manage multiple Azure SQL Databases with Terraform?
Yes, Terraform supports managing multiple Azure SQL Databases within the same configuration file. You can define multiple database resources with different configurations and Terraform will manage them accordingly.
Where can I find examples and documentation for creating Azure SQL Database with Terraform?
The Terraform documentation and community resources provide numerous examples and guides for creating Azure SQL Database using Terraform. You can explore the official Terraform documentation, HashiCorp‘s tutorials, and community forums for more information and assistance.
Share your thoughts in the comments
Please Login to comment...