Docker is a powerful containerization tool that enables developers to package their applications and their dependencies into a single unit called Docker image. The Docker image offers seamless deployment, scalability, and portability. In this article, I will make sure that you understand what is docker and guide you through the steps to create a Docker image.
What is Docker?
Docker is a tool that simplifies software packaging and deployment. It wraps application and their dependencies into compact units called containers. Docker containers share a host operating system kernel which makes them lightweight, fast, and resource-efficient. It provides a standardized way to package, distribute, and execute applications. It allows developers to create, test, and deploy applications on any operating system or cloud platform without any worry about compatibility issues or hardware requirements.
What is Docker Image?
Docker Image is a light weighted executable package, that contains all the packages, softwares, libraries that is required to run a piece of code or an application. Docker Images streamlines the deployment process with ensuring consistency across different environments and simplifyying the software distributions.
Why Create Docker Images?
Creating a Docker Images facilitates with protability, consistency and efficiency in software deployment. The following are the reasons to create a docker images:
- Portability: Docker images encapsulates the applications and dependencies and let them make portable across different environments.
- Consistency: It provides consistency in deployment and deployment by reducing comptability challenges inbetween development and production environments.
- Efficiency: Creating of docker images enhances the containerization technology for faster startup times, scalability and efficient resource utilization.
How to Create Docker Image With Dockerfile: A Step-By-Step Guide
Step 1: Creating A Dockerfile
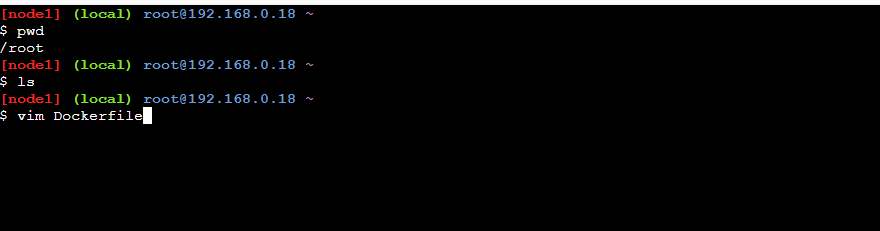
- Firstly we have to create a file with name Dockerfile in your directory.
vim Dockerfile
- The following illustrates about creating a Dockerfile:
Step 2: Write Dockerfile Instructions
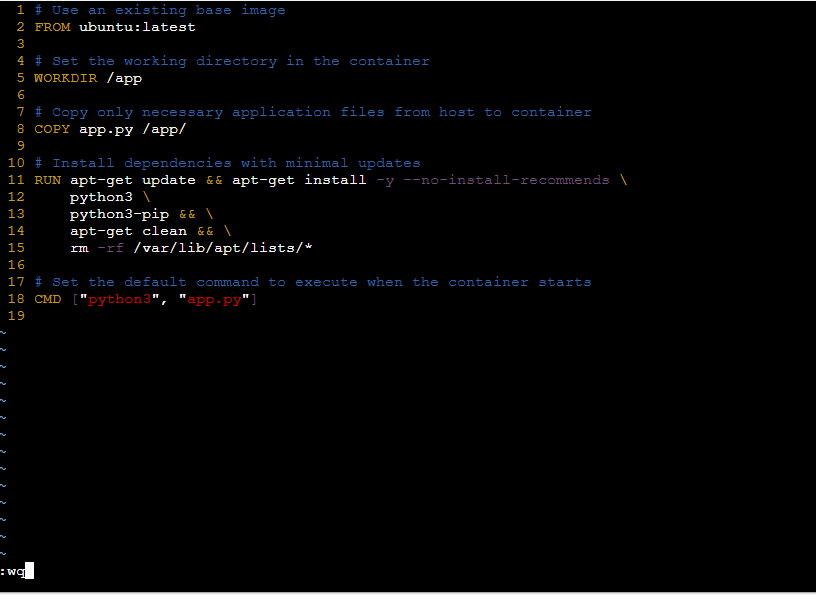
- Inside the Dockerfile write the instructions that needed for defining environment and setup needed for an application that typically includes for specifying image, copying file, installing dependencies and configuring the runtime environment.
# Use an existing base image
FROM ubuntu:latest

# Set the working directory in the container
WORKDIR /app

# Copy application files from host to container
COPY . .

# Install dependencies
RUN apt-get update && apt-get install -y \
    python3 \
    python3-pip

# Set the default command to execute when the container starts
CMD ["python3", "app.py"]
- The following screenshot specifies about defining the docker instructions:
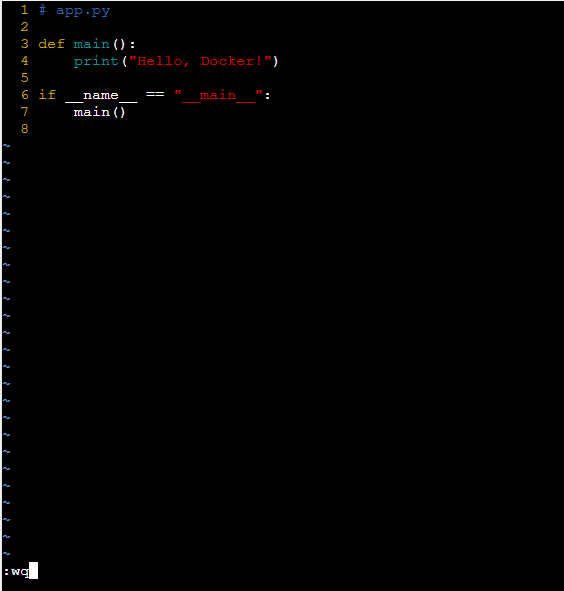
- Here also ensure to have app.py sample python application as shown in the following:
# app.py

def main():
    print("Hello, Docker!")

if __name__ == "__main__":
    main()
- The following screenshot specifies about providing a python application:
Step 3: Build Your Docker Image
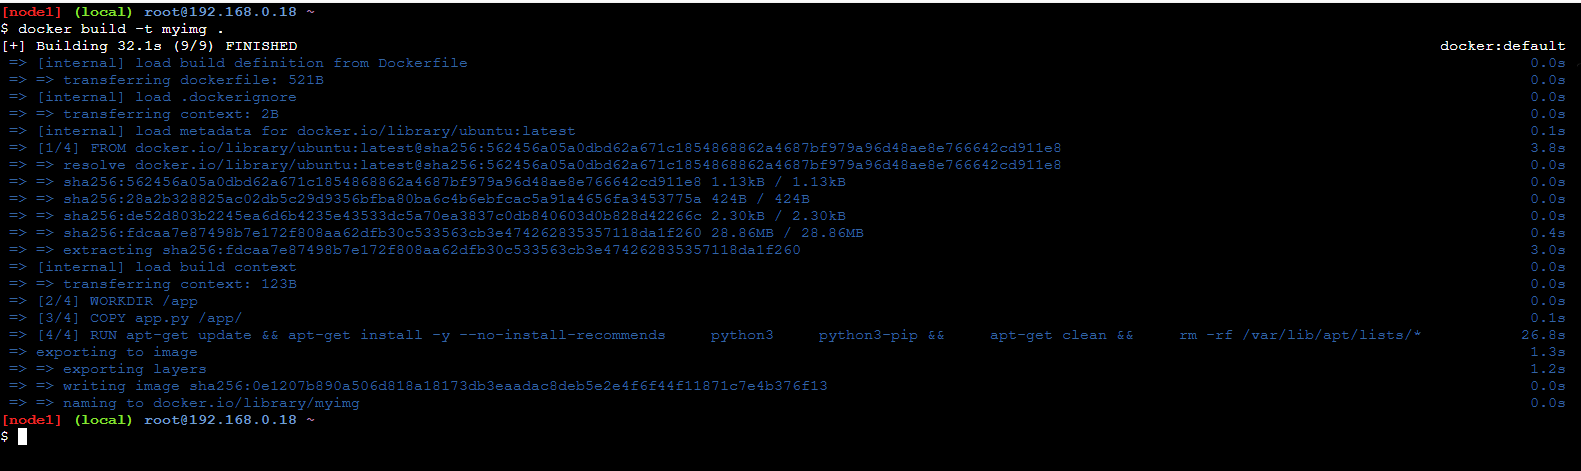
- Here, in the step build the docker image from the Dockerfile using the following command:
docker build -t myimg .
- The following screenshot specifies about building a docker image:
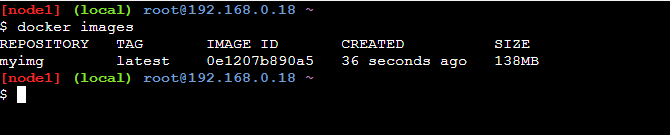
Step 4: Verify The Image
- After once buildig the docker image verify it whether it is created successful or not with running following command:
docker images
- The following command specifies the successful creation of docker image:
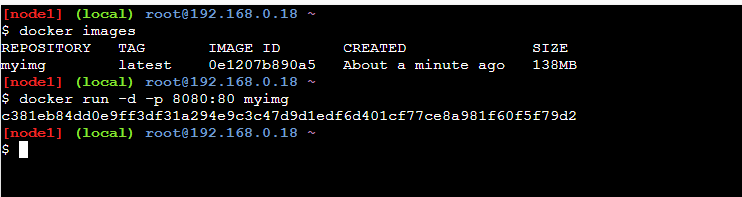
Step 5: Test the Docker Image ( Optional )
- For the testing the docker image locally try on creating a container with that image with the following command:
docker run -d -p 8080:80 myimg
- The following screenshot specifies about the creating a container to the new build docker image:
How to Create A Base Image Using Scratch? A Step-By-Step Guide
Step 1: Prepare Your files
- Firstly prepare the files or binaries that you want to include in the creating minimal Ubuntu Image. Here the files should be essential binaries or configurations.
Step 2: Create A Root File System
- Setup a minimal root file system for Ubuntu. It typically involves creating directories such as /bin , /etc and /usr and populate them essential files and directories.
Step 3: Download Ubuntu Base Packages
- Now, try to download the base packages for Ubuntu. Here you will need to fetch the essential packages that are required for a minimal Ubuntu system. These essential packages includes libc , coreutils, apt , bash and other essential utilities.
Step 4: Install Essential Packages
- Extract the downloaded base packages into your root file system and try to configure them as necessary. Ensure that essential packages are properly installed and configured for providing a functional ubuntu environment.
Step 5: Create A Dockerfile
- Now, create a file with name “Dockerfile” in your project working directory and define the instructions in that file for building the ubuntu base image from scratch from your custom root file system. The dockerfile looks as follows:
# Use Scratch as the base image
FROM scratch

# Copy the custom root file system into the image
COPY ./rootfs /

# Set the entry point
ENTRYPOINT ["/bin/bash"]
Step 6: Build The Docker Image
- On using the following command build the docker image from the Dockerfile.
docker build -t myubuntuimage .
Step 7: Verify The Docker Image
- After the successful build, verify the docker image with executing the following command:
docker images
How to Create a Full Image Using tar?
The following are the steps to create a docker image using a tarball effectively:
Step 1: Prepare Files
- Try on gathering all the files and directories that you want ot include in Docker Image.
Step 2: Create A Tarball
- On using tar command create a tarball (.tar file) that containing your files.
tar -czf image.tar.gz .
Step 3: Create Dockerfile
- Now, a Dockerfile with specifying the instructions to load and extract the tarball into the creating docker image.
Step 4: Build the DockerImage
- Build a docker image from the dockerfile on using the following command:
docker build -t myimage .
Step 5: Verify The Docker Image
- After once successfully building the docker image, verify it by listing the docker images:
docker images
How to Optimize Your Docker Image Size?
The following are the recommended suggestions for optimizing your Docker Image size:
- Choose A Minimal Base Image: Select a light weighted base image like alpine for reducing overall docker image size.
- Minimize Layers: Each image layer adds size to the Image. To reduce it ensure to have less Image layers, by combining multi commands with one RUN instruction.
- Clean Up After Installations: Ensure to remove the unnecessary softwares and files after the installation of packages and keep the image size minimal. Using commands like `apt-get clean` or `yum clean all`.
- Use Multi-Stage Builds: On utilizing the multi-stage builds we can seperate the build environment from the runtime environment. It helps in removing unncessary
How to Host Your Docker Image?
The following steps help in hosting your docker images:
Step 1: Choose Container Registry
Step 2: Tage Your Docker Image
- Use one local image in your docker that you want to host and change the tag of that docker image as shown in the following format.
docker tag <image_tag> <registry_url>/<repository_name>:<tag>
Step 3: Login to the Registry
- Now, authenticate with the container registry using the following command and access your account:
docker login
Step 4: Push Your Docker Image
- After successful login in, push the docker image into the docker hub with the following command:
docker push <registry_url>/<repository_name>:<tag>
Step 5: Access Your Hosted Image
- Once the docker image is successfully pushed, it will be hosted in the container registry and it can be accessed by others for deployment or sharing.
Examples of Docker Commands for Creating a Dockerfile
The following are the examples of Docker Commands for creating a Dockerfile:
1. Creating a Dockerfile
- The following command can be used for creating Dockerfile:
touch Dockerfile
2. Editing The Dockerfile
- The following command can be used for customizing or editing the Dockerfile
nano Dockerfile
3. Building Image From A Dockerfile
- The following command can be used for building Image from a Dockerfile:
docker build -t myapp .
Dockerfile vs Docker Image Vs Container
- The following are the major comparisons between with Dockerfile, Docker Image and Docker Containers:
|
Aspects
|
Dockerfile
|
Docker Image
|
Docker Container
|
|
Definition
|
Dockerfile is a text file that contains a set of instructions that is required to build a docker image.
|
Docker Image is an excutable software package.
|
Docker Container is an running instance of an Container Image.
|
|
Purpoe
|
It is helpful for defining and set uping the environment.
|
It acts as static snapshot of an application.
|
It is useful for creating a runnable isntance of an Image.
|
|
Content
|
It contains instructions for building an Docker Image.
|
It contains complete snapshot of filesystem.
|
It is a running instance of a docker image.
|
|
Life Cycle
|
It can be edited and reused
|
Docker image is immutable after once it is build
|
It temporarily can be stopped or removed. The life of container is the life of the program its runs inside.
|
|
Persistance
|
It can be stored in source code repositories
|
It can be stored in Docker registry
|
It exists only when running.
|
Docker Image Commands
The following are the some of the Docker Image Commands:
1. List Images
- The following command is used for listing the Docker Images
docker images
2. Pull Image From Registry
- The following command is used to pull a Docker Image from a Registry
Syntax
docker pull <Docker_image>
Example
Docker pull ngnix:latest
3. Change Docker Image Name or Tag
- The following command is used for changing the docker image name or tag
Syntax
docker tag <image_id> <new_image_name>:<tag>
4. Remove Docker Image
- The following command is used for removing a Docker Image
docker rmi <Image_id>
Key Commands of Docker Image And Docker Container
The following are the key command of Docker Image:
|
Features
|
Docker Image Commands
|
|
List Images
|
docker images
|
|
Pull a Docker Image
|
docker pull <image_name>
|
|
Build A Docker Image
|
docker build -t <image_name> .
|
|
Changing Tag of DockerImage
|
docker tag <Image_id> <new_img_name>:<tag>
|
|
Push A Docker Image
|
docker push <Image_name>
|
The following are the key commands of Docker Container:
|
Features
|
Docker Container Commands
|
|
List Containers
|
docker ps
|
|
Create A Docker Container
|
docker create <Image_name>
|
|
Run A Docker Container
|
docker run <Image_name>
|
|
Start A Docker Container
|
docker start <container_id>
|
|
Remove A Docker Container
|
docker rm <container_id>
|
Examples of Docker Image UseCases
The following are the some of the examples of docker image:
1. Web Servers: Docker Images are commonly used for packaging and deploying the web server applications such as Apache HTTP server and Nginx. These Docker Images contains necessary configurations, dependencies that needed to host websites or web applications.
2. Databases: Docker Images provide a effective and convient way for deploying databases like MYSQL, PostgreSQL or MongoDB.
3. Microservices: Docker is so popular for building and deploying the microservices applications. It is well supported for microservice based architecture. Docker Image facilitates in this with scaling, versioning and with deployment of individual components.
4. CI/CD Pipelines: Docker Images play a vital role in continuous Integration and Continuous Deployment ( CI/CD ) pipelines.
How To Create A Docker Image On Docker Desktop: A Step-By-Step Guide
Step 1 : Start the Docker engine . On windows just start the Docker Desktop .

On Ubuntu start the docker service using the command:
sudo systemctl start docker
Step 2 : Create a html file . We are going to dockerize a html file here in the upcoming steps .
<!DOCTYPE html>
<html lang="en">
<head>
    <meta charset="UTF-8">
    <meta name="viewport" content="width=device-width, initial-scale=1.0">
    <title>How to create docker image</title>
</head>
<body>
    <H1>Hey geeks to create a docker image you have to write a Dockerfile and then build it using
        docker command .
    </H1>
</body>
</html>

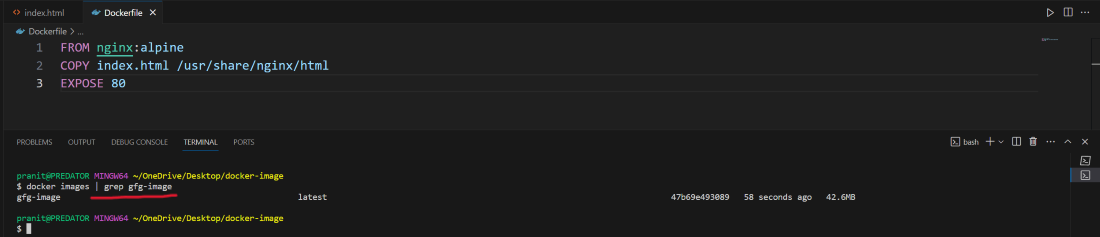
Step 3 : Then create a text document having name Dockerfile in the same folder as the html file. Here in this Dockerfile, all the instructions and commands will be written to create a Docker image . In the Dockerfile specify the base image , working directory and port number on which the website is running .
FROM nginx:alpine
COPY index.html /usr/share/nginx/html
EXPOSE 80

Step 4 : Build a docker image . Here mention a name for the Docker image and also mention the path of Dockerfile .
docker build -t gfg-image .

Step 5 : After successful build you can check whether the image is present or not .
docker images | grep gfg-image
Step 6 : Then you can run the image and access it through localhost .
docker run -d -p 80:80 gfg-image
- Here -d indicates that container running in detached mode and -p indicates the port number through which you can access the website .


How to Create a Docker Image from Docker Container? A Step-By-Step Guide
Step 1: Run A Container
- Firstly start a running container in your local docker based on the image you want convert into a new Docker image. Run the container with the following command:
Syntax
docker run [Options] <Container_name> <Container_Image>
Example
docker run -dit --name mycontainer1 ubuntu:latest
Step 2: Commit Changes
Do the changes in your container while it’s running like adding additional packages or configuring settings. Then commit the running container into image using following command:
docker commit <container_id> <new_img_name>
Step 3: Verify the New Image
After once commiting the changes, verify that new docker image by listing all the docker images using following command:
docker images
Step 4: Tag And Push
- Now, if you intrested to move or share this new docker image somewhere else, first host in any container registry. Here we are choosing docker hub.
- Firstly change the tag name of the docker image, by running the following command:
docker tag <new_image_name> <registry_url>/<repository_name>:<tag>
- Push the docker image into the docker hub using the following command:
docker push <registry_url>/<repository_name>:<tag>
Conclusion
You have successfully learned about what is Docker and also created a Docker image for a simple static website . As you learn more about Docker , you will find it to be a valuable tool in your development and deployment workflows .
Create Docker Image – FAQs
What Is a Dockerfile?
Dockerfile is a text document which contains a set of instructions to build a Docker image . It specifies the base image, working directory, dependencies , port number and other commands to configure the image .
How To Build a Docker Image From a Dockerfile ?
To build a Docker image from a Dockerfile , you have to use “docker build -t <image name> <path of Dockerfile>” command .
What Is Docker Registry ?
A Docker Registry is a storage for named Docker images . It also allows you to distribute Docker images to different environments .
How To View The Running Containers ?
Use command ‘docker ps’ to see the running docker containers .
Can I Edit a Docker Image After It Is Created ?
The answer is no . You have to make changes in the Dockerfile and then rebuild the image .
What is the command to create Docker Image?
On using the docker build command we can create a docker image. Its syntax will looks as follows:
docker built -t <registry>/<repository_name>:<tag> <docker_build_content>
Share your thoughts in the comments
Please Login to comment...