Configure Active Profile in SpringBoot via Maven
Last Updated :
08 Apr, 2024
In Spring Boot, Profiles allows us to define sets of configurations for different environments or use cases. Active Profile in Spring Boot dynamically changes the behavior of the application based on the active profile. Maven is a popular tool that can be used to build the automation tool for Java projects. It can be utilized to manage the profiles in the Spring Boot applications effectively.
Profiles in Spring Boot
Profiles in Spring Boot allow us to define different sets of configurations for various environments or use cases. These profiles help in managing application behavior such as connecting to different databases. It can enable or disable certain features or it can specify the environment-specific properties.
-> Spring Boot Profiles
Create separate property files for each profile such as the application-dev.properties and application-prod.properties and it can specify the profile-specific configurations of the application.
application-dev.properties:
greeting.message=Hello (Development)
application-prod.properties:
greeting.message=Hello (Production)
-> Maven Profiles
Maven Profiles provides the mechanism to customize the build configurations based on the different conditions or requirements. With Maven profiles, It defines different sets of dependencies, plugins, properties, and other build settings. It allows us to tailor the build process for specific scenarios.
Maven Profiles:
Define the Maven profiles in the pom.xml file and it can specify the activation criteria and configuration of the Spring application.
<profiles>
    <profile>
        <id>dev</id>
        <activation>
            <activeByDefault>true</activeByDefault>
        </activation>
        <properties>
            <spring.profiles.active>dev</spring.profiles.active>
        </properties>
    </profile>
    <profile>
        <id>prod</id>
        <properties>
            <spring.profiles.active>prod</spring.profiles.active>
        </properties>
    </profile>
</profiles>
Project Implementation to Configure Active Profile in Spring Boot via Maven
Now, we will develop a simple Spring project that can configure the active profile of the Spring application.
Step 1: We will create a spring project using Spring STS IDE by adding below mentioned dependencies to the project.
Dependencies:
- Spring Web
- Lombok
- Spring Dev Tools
Once the Spring project has created, the file structure of the project will look like the image below.

Step 2: Open the pom.xml and put the below code for the configure active profiles in the Spring Boot application.
    <profiles>
        <profile>
            <id>dev</id>
            <properties>
                <activatedProperties>dev</activatedProperties>
            </properties>
        </profile>
        <profile>
            <id>prod</id>
            <properties>
                <activatedProperties>prod</activatedProperties>
            </properties>
        </profile>
    </profiles>
Step 3: Open the application.properties file and put the below code the profiles configuration.
spring.application.name=spring-profiles-demo

spring.profiles.active=dev
Step 4: Open the application-dev.properties file and put the below code the development configuration of the application.
greeting.message=Hello (Development)
Step 5: Open the application-prod.properties file and put the below code the production configuration of the application.
greeting.message=Hello (Production)
Step 6: Create the new java class named as GreetingsMessage.
GreetingsMessage.java
Java
package org.example.springprofilesdemo;

import org.springframework.beans.factory.annotation.Value;
import org.springframework.stereotype.Service;

@Service
public class GreetingsMessage {

    // Injecting greeting.message property value from application.properties
    @Value("${greeting.message}")
    private String greetingMessage;

    // Method to greet the user with the configured message
    public String greetUser(String name) {
        return greetingMessage + " " + name + "!";
    }
}
Step 7: Create a new java class named as GreetingsController.
GreetingsController.java
Java
package org.example.springprofilesdemo;

import org.springframework.beans.factory.annotation.Autowired;
import org.springframework.web.bind.annotation.GetMapping;
import org.springframework.web.bind.annotation.PathVariable;
import org.springframework.web.bind.annotation.RestController;

@RestController
public class GreetingsController {

    // Autowiring GreetingsMessage bean
    @Autowired
    private GreetingsMessage greetingsService;

    // Mapping GET requests to /greet/{name}
    @GetMapping("/greet/{name}")
    public String greet(@PathVariable String name) {
        // Invoking the greetUser method of GreetingsMessage bean
        return greetingsService.greetUser(name);
    }
}
Step 8: Open the main class file and write the below code.
Java
package org.example.springprofilesdemo;

import org.springframework.beans.factory.annotation.Autowired;
import org.springframework.boot.SpringApplication;
import org.springframework.boot.autoconfigure.SpringBootApplication;

@SpringBootApplication
public class SpringProfilesDemoApplication {

    public static void main(String[] args) {
        SpringApplication.run(SpringProfilesDemoApplication.class, args);
    }
}
Step 9: Once completed the project, run the application as spring project. If runs successfully, then the run the application at port 8080. Refer the below image for the better understanding.
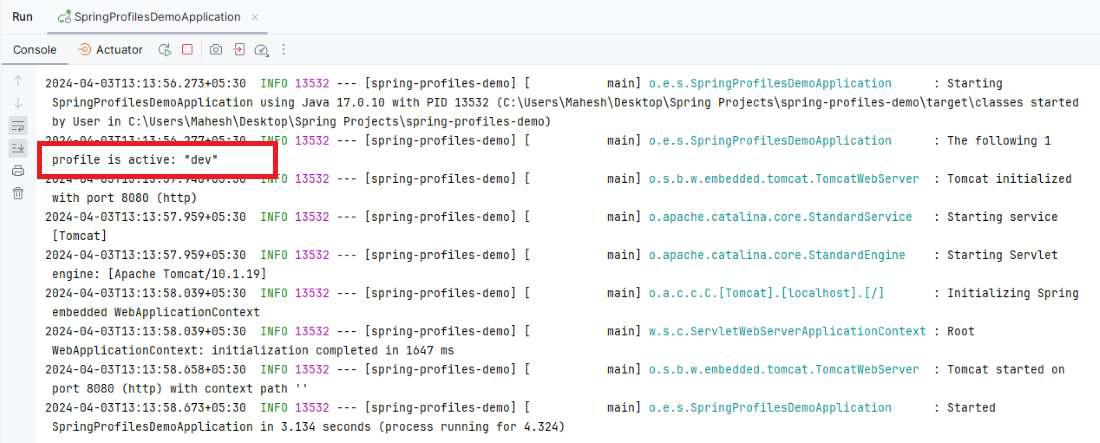
Output:
GET http://localhost:8080/greet/mahesh

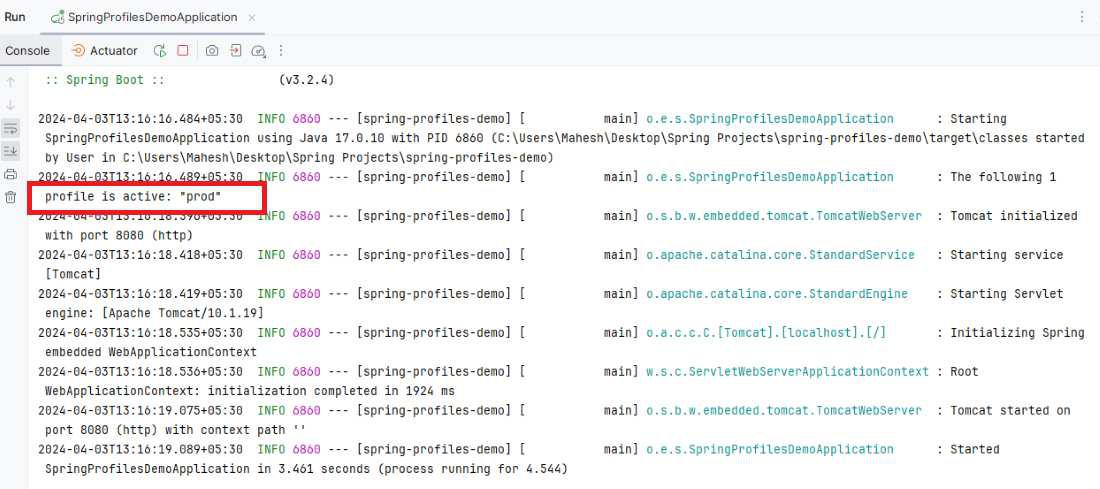
Set the production of the application properties of the application.
Open application.properties change the profile.
spring.application.name=spring-profiles-demo

spring.profiles.active=prod
Again the run the application:
Output:
GET http://localhost:8080/greet/syam
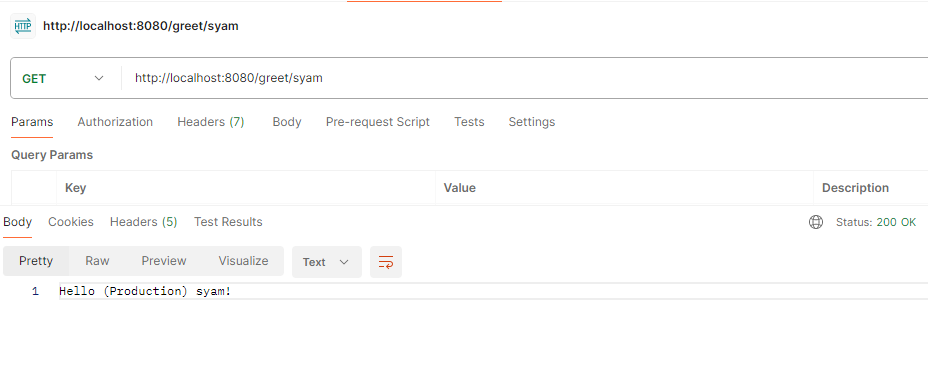
If we follow the above steps, then we can successfully configure the active profiles in the Spring Boot application.
Share your thoughts in the comments
Please Login to comment...