Spring Boot – Configuring a Main Class
Last Updated :
08 Apr, 2024
Spring Boot simplifies the process of creating and running Java applications by providing a set of conventions and auto configurations. The main class in the Spring Boot application acts as the entry point where the application starts the execution. It is responsible for bootstrapping the Spring context, initializing the necessary configurations, and starting the embedded web server if the application is the web application.
Key Terminologies:
- Spring Boot: A popular framework designed to simplify the process of building production-ready and stand-alone Spring-based applications.
- Main Class: The class containing the main() method which can serve as the entry point for the Java applications. In Spring Boot, the main class can initiate the Spring context and start the application.
- @SpringBootApplication: An annotation in the Spring Boot that combines the @EnableAutoConfiguration, @ComponenScan,mark and @Configuration. It can mark the main class as the configuration class and it can enable the auto-configuration of the Spring application. It triggers the component scanning to detect Spring components.
- SpringApplication: The class can be provided by the Spring Boot for the bootstrapping Spring applications. It can provide a convenient way to bootstrap the Spring context and start the application.
- Embedded Web Server: The web server that is packaged within the application and it can started automatically by the Spring Boot application. Example is Tomcat server.
- Dependency Management: The process of managing external dependencies in the Java project. Tools like Maven and Gradle are the most commonly used for dependency management in Spring Boot applications.
Main Class Configuration in Spring Boot
The main class in the Spring Boot application can typically contain the main() method and it can act as the entry point for the application. This class can initialize the Spring context and start the embedded web server. It is annotated with @SpringBootApplication which combines the three annotations @Configuration, @ComponentScan, and @EnableAutoConfiguration. It can simplify the configuration process of the Spring Application.
- @Configuration: This annotation can be used to indicate that the class is the bean definition on the classpath.
- @EnableAutoConfiguration: This annotation is used to enable the Spring Boot auto-configuration feature and can automatically configure the Spring application based on the classpath and other configurations.
- @ComponentScan: This can be used to tell Spring to find and find other Spring Components such as controllers, stores, and services in the current package as well as its subpackages.
The main() method servers the entry point of the Spring application and it can use the SpringApplication.run() to bootstrap the Spring context and start the application.
Project Implementation to Configure Main Class in Spring Boot
Step 1: Create a Spring project using Spring Initializr, on creating the project add the following dependencies into the project.
Dependencies:
- Spring Web
- Lombok
- Spring Dev Tools
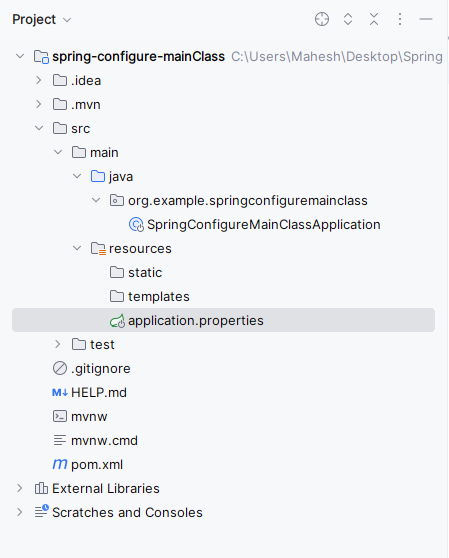
After successfully creating the project, the file structure will look like the below image.
Step 2: Open the application.properties file and put the below code for the server port configuration to the project.
spring.application.name=spring-configure-mainClass
server.port=8081
Step 3: Open the Default main class of the Spring Application. The class which contains the main() method is the main class of the application.
Java
package org.example.springconfiguremainclass;

import lombok.extern.slf4j.Slf4j;
import org.springframework.boot.SpringApplication;
import org.springframework.boot.autoconfigure.SpringBootApplication;
import org.springframework.web.bind.annotation.GetMapping;
import org.springframework.web.bind.annotation.RestController;

@SpringBootApplication // Indicates that this class is a Spring Boot application configuration class
@RestController // Marks this class as a REST controller
@Slf4j // Lombok annotation for logging
public class SpringConfigureMainClassApplication {

    @GetMapping("/check") // Defines a GET endpoint "/check"
    public String demo() {
        log.info("Controlling working..."); // Logs an INFO-level message
        return "Demo of the configuring the main class of the Spring Boot Application"; // Returns a string response
    }

    public static void main(String[] args) {
        SpringApplication.run(SpringConfigureMainClassApplication.class, args); // Entry point of the application
    }

}
- This Spring Boot application’s main class is annotated with
@SpringBootApplication, indicating it as the configuration class. - It also defines a REST controller with a single endpoint (“/check”) that returns a demo message.
- Also, it utilizes Lombok’s
@Slf4j annotation for logging purposes.
pom.xml:
XML
<?xml version="1.0" encoding="UTF-8"?>
<project xmlns="http://maven.apache.org/POM/4.0.0" xmlns:xsi="http://www.w3.org/2001/XMLSchema-instance"
    xsi:schemaLocation="http://maven.apache.org/POM/4.0.0 https://maven.apache.org/xsd/maven-4.0.0.xsd">
    <modelVersion>4.0.0</modelVersion>
    <parent>
        <groupId>org.springframework.boot</groupId>
        <artifactId>spring-boot-starter-parent</artifactId>
        <version>3.2.4</version>
        <relativePath/> <!-- lookup parent from repository -->
    </parent>
    <groupId>org.example</groupId>
    <artifactId>spring-configure-mainClass</artifactId>
    <version>0.0.1-SNAPSHOT</version>
    <name>spring-configure-mainClass</name>
    <description>spring-configure-mainClass</description>
    <properties>
        <java.version>17</java.version>
    </properties>
    <dependencies>
        <dependency>
            <groupId>org.springframework.boot</groupId>
            <artifactId>spring-boot-starter-web</artifactId>
        </dependency>

        <dependency>
            <groupId>org.springframework.boot</groupId>
            <artifactId>spring-boot-devtools</artifactId>
            <scope>runtime</scope>
            <optional>true</optional>
        </dependency>
        <dependency>
            <groupId>org.projectlombok</groupId>
            <artifactId>lombok</artifactId>
            <optional>true</optional>
        </dependency>
        <dependency>
            <groupId>org.springframework.boot</groupId>
            <artifactId>spring-boot-starter-test</artifactId>
            <scope>test</scope>
        </dependency>
    </dependencies>

    <build>
        <plugins>
            <plugin>
                <groupId>org.springframework.boot</groupId>
                <artifactId>spring-boot-maven-plugin</artifactId>
                <configuration>
                    <excludes>
                        <exclude>
                            <groupId>org.projectlombok</groupId>
                            <artifactId>lombok</artifactId>
                        </exclude>
                    </excludes>
                </configuration>
            </plugin>
        </plugins>
    </build>

</project>
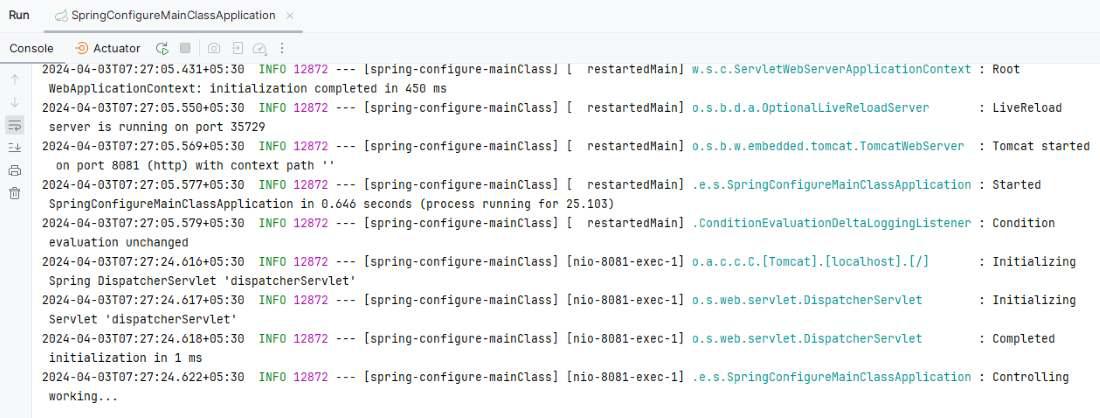
Step 4: Once the spring project completed, run it as a spring application. Once it runs successfully, then it will start at port 8081.
Output:
Endpoint:
GET http://localhost:8081/check
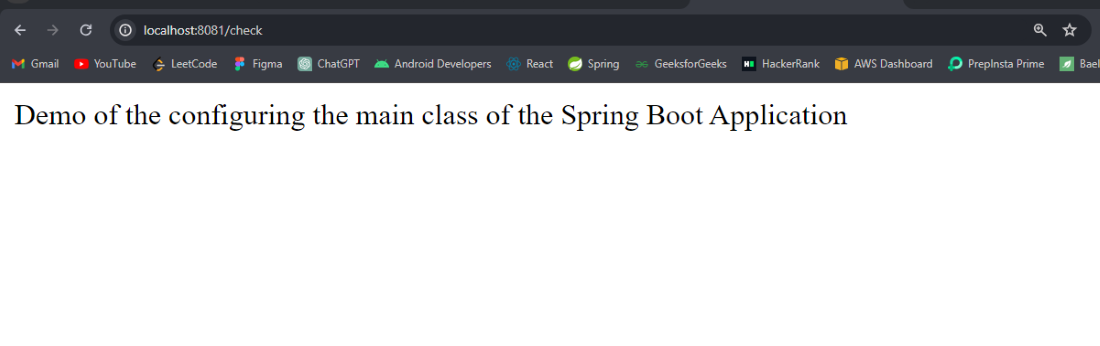
If we follow the above steps, we can successfully build the spring application and demonstration of Configuring the Main Class of the Spring application.
Share your thoughts in the comments
Please Login to comment...