Setting Active Profile and Config Location from Command line in Spring Boot
Last Updated :
23 Apr, 2024
In Spring Boot, Profiles and Configurations settings play an important role in managing the application behavior across the different environments. By default, Spring Boot looks for the application properties or YAML files in classpath to the configure the application. It is necessary to specify configuration settings or the active specific profiles from the command line.
Spring Boot allows specifying active profiles and configuration locations from the command line using system properties. It enables overriding default configurations and activating profiles dynamically during application startup.
Key Terminologies:
- Profile: This is used to set configuration options that can be activated based on specific environments. Profiles enable application behavior for different scenarios such as development, staging, and production.
- Configuration Properties: These define various aspects of the application’s behavior such as database connections, server ports, and logging levels. These properties are typically stored in configuration files.
- Active Profiles: These are the profiles that are currently enabled or activated within the Spring Boot application. By specifying active profiles, we can determine which set of configuration properties will be loaded and applied during runtime of the Spring application.
Project Implementation to Set Active Profile and Config Location from Command line in Spring Boot
We can create a new Spring Boot project to demonstrate setting the active profile and configuring the location from the command line in the Spring Boot application.
Step 1: We can create the spring project including the below dependencies into the project.
Dependencies:
- Spring Web
- Spring Dev Tools
- Lombok
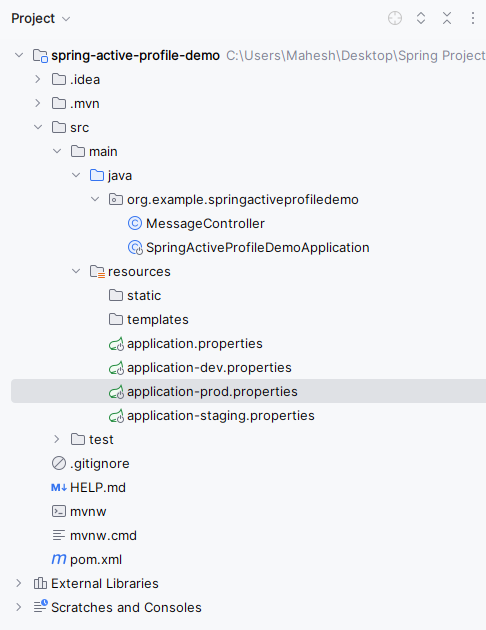
Once the Spring project is created with the above dependencies added, the file structure looks like the image below.
Step 2: We will add Configuration Files to the Spring project.
application.properties: This properties file can be default configuration of the spring application.
spring.application.name=spring-active-profile-demo

server.port= 8500

spring.profiles.active=dev
application-dev.properties: This properties file can be development configuration of the spring application.
# application-dev.properties
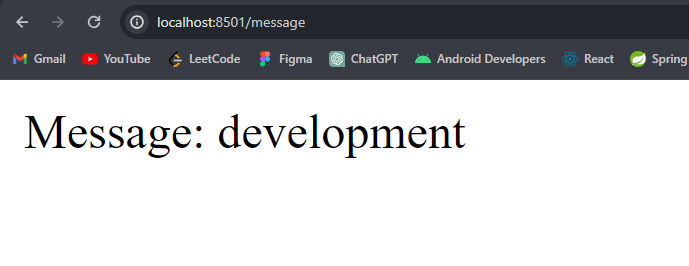
server.port= 8501
app.message=development
application-prod.properties: This properties file can be production configuration of the spring application.
# application-prod.properties
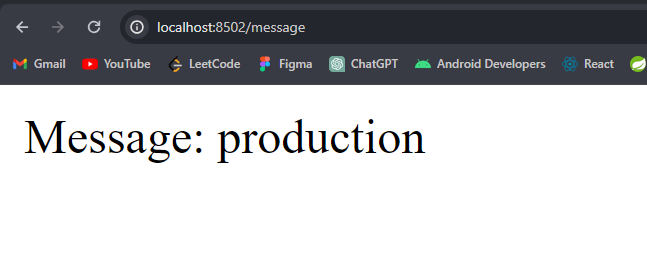
server.port= 8502
app.message=production
application-staging.properties: This properties file can be staging configuration of the spring application.
# application-staging.properties

server.port= 8503

app.message=staging
Step 3: Create the java class named as the MessageController.
Go to src > org.example.springactiveprofiledemo > MessageController and put the below code.
Java
package org.example.springactiveprofiledemo;

import org.springframework.beans.factory.annotation.Value;
import org.springframework.web.bind.annotation.GetMapping;
import org.springframework.web.bind.annotation.RestController;

// Controller class to handle requests related to messages
@RestController
public class MessageController {

    // Injecting value from application.properties using @Value annotation
    @Value("${app.message}")
    private String message;

    // Endpoint to retrieve the message
    @GetMapping("/message")
    public String getMessage() {
        return "Message: " + message;
    }
}
Step 4: Open the main class and insert the following code.
Java
package org.example.springactiveprofiledemo;

import org.springframework.boot.SpringApplication;
import org.springframework.boot.autoconfigure.SpringBootApplication;

@SpringBootApplication
public class SpringActiveProfileDemoApplication {

    public static void main(String[] args) {
        SpringApplication.run(SpringActiveProfileDemoApplication.class, args);
    }
}
pom.xml:
XML
<?xml version="1.0" encoding="UTF-8"?>
<project xmlns="http://maven.apache.org/POM/4.0.0" xmlns:xsi="http://www.w3.org/2001/XMLSchema-instance"
         xsi:schemaLocation="http://maven.apache.org/POM/4.0.0 https://maven.apache.org/xsd/maven-4.0.0.xsd">
    <modelVersion>4.0.0</modelVersion>
    <parent>
        <groupId>org.springframework.boot</groupId>
        <artifactId>spring-boot-starter-parent</artifactId>
        <version>3.2.5</version>
        <relativePath/> <!-- lookup parent from repository -->
    </parent>
    <groupId>org.example</groupId>
    <artifactId>spring-active-profile-demo</artifactId>
    <version>0.0.1-SNAPSHOT</version>
    <name>spring-active-profile-demo</name>
    <description>spring-active-profile-demo</description>
    <properties>
        <java.version>17</java.version>
    </properties>
    <dependencies>
        <dependency>
            <groupId>org.springframework.boot</groupId>
            <artifactId>spring-boot-starter-web</artifactId>
        </dependency>

        <dependency>
            <groupId>org.springframework.boot</groupId>
            <artifactId>spring-boot-devtools</artifactId>
            <scope>runtime</scope>
            <optional>true</optional>
        </dependency>
        <dependency>
            <groupId>org.projectlombok</groupId>
            <artifactId>lombok</artifactId>
            <optional>true</optional>
        </dependency>
        <dependency>
            <groupId>org.springframework.boot</groupId>
            <artifactId>spring-boot-starter-test</artifactId>
            <scope>test</scope>
        </dependency>
    </dependencies>

    <build>
        <plugins>
            <plugin>
                <groupId>org.springframework.boot</groupId>
                <artifactId>spring-boot-maven-plugin</artifactId>
                <configuration>
                    <excludes>
                        <exclude>
                            <groupId>org.projectlombok</groupId>
                            <artifactId>lombok</artifactId>
                        </exclude>
                    </excludes>
                </configuration>
            </plugin>
        </plugins>
        <finalName>profile-demo</finalName>
    </build>

</project>
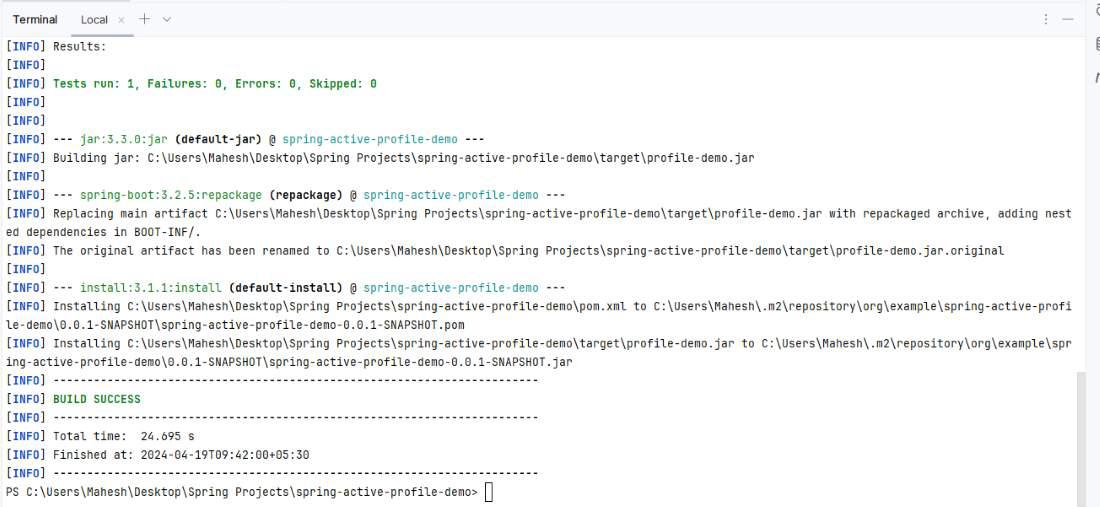
Step 5: Now, we will build the Spring boot application using the below command and it can generate the jar file into the target folder location of the project.
mvn clean install
Output:
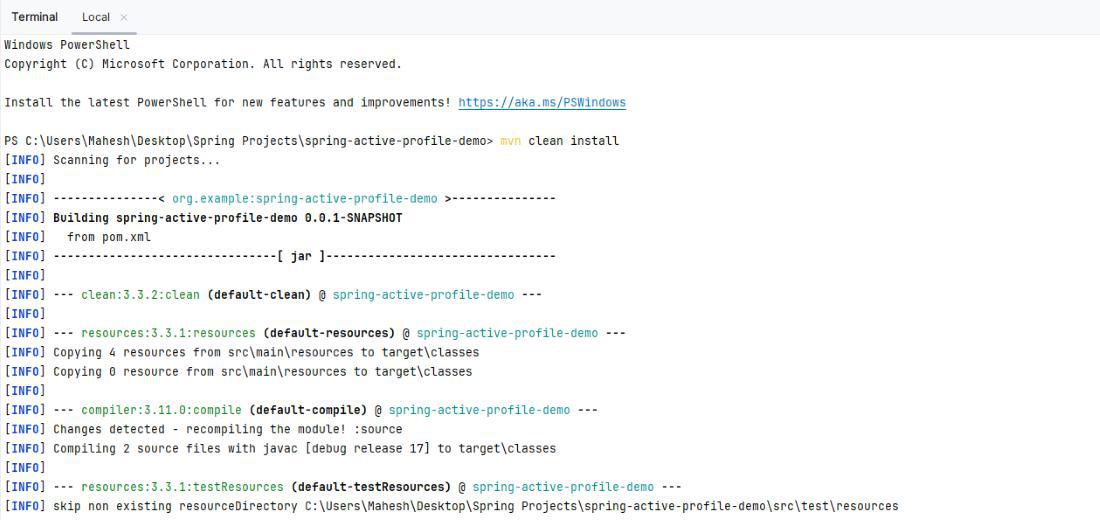
Test runs and Build Success:
Step 6: We will now Run the Application using below command line and it can specify the active profiles of the spring application.
cd target
java -jar profile-demo.jar
Active Profiles of Spring Application
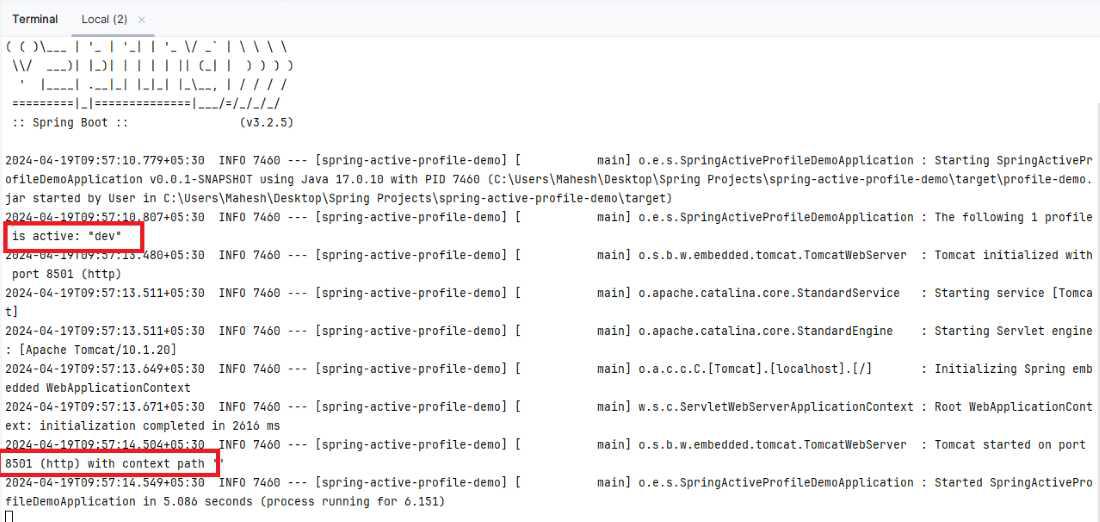
Output:
Step 7: Run the Application as Production profile.
java -jar profile-demo.jar --spring.profiles.active=prod
Production Profile Output:
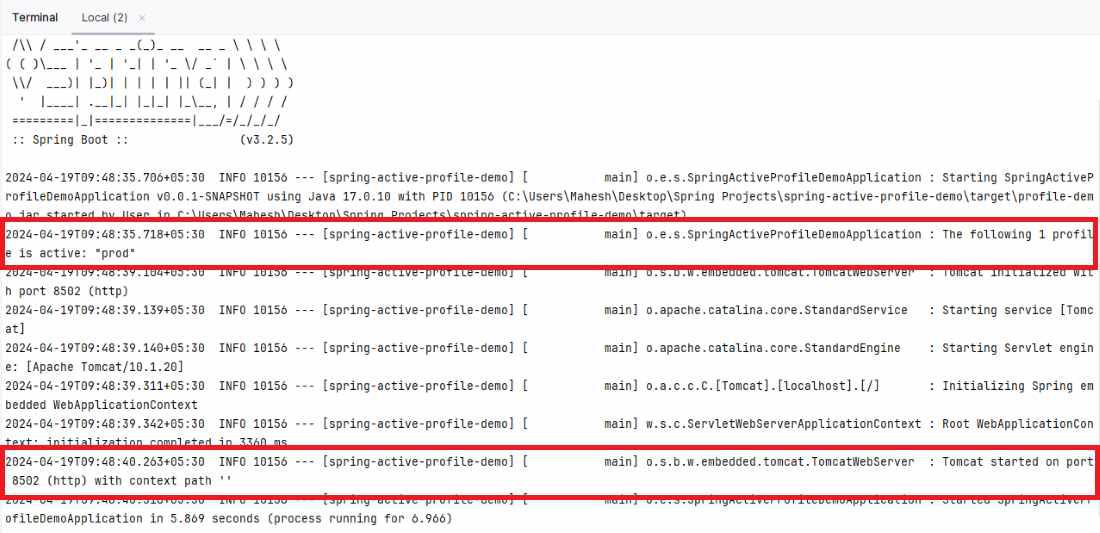
Output:
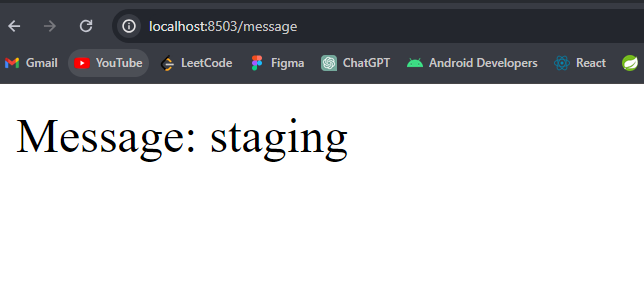
Step 8: Run the Application as Staging profile.
java -jar profile-demo.jar --spring.profiles.active=staging
Staging profile Output:
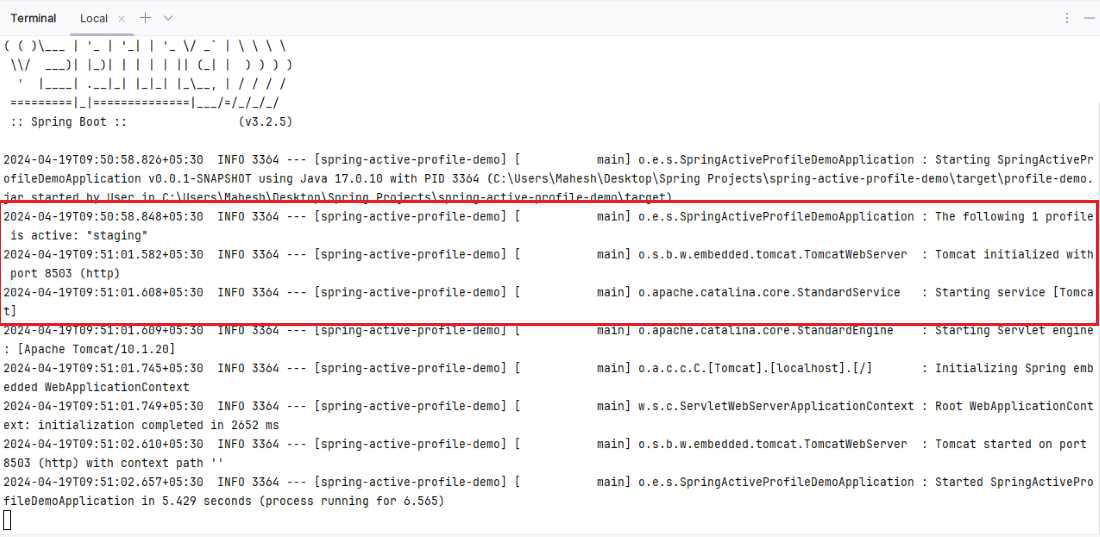
Output:
By the following these steps, we can created the simple spring project example where we can dynamically set the active profiles and it can configuration locations based on the different deployment environments of the Spring application.
Share your thoughts in the comments
Please Login to comment...