Wireframes in Figma
Last Updated :
14 May, 2024
Wireframing is the basic building block of successful design. It gives a bare bones layout that shows how digital interfaces will look and work. In digital design, Figma has become a strong tool. It combines wireframing and prototype creation smoothly. This beginner’s guide looks into the basics of using Figma for wireframing. It explores how useful it is for making practical and user-friendly design prototypes.
Types of Wireframes
Regarding wireframes, engineers often use two main types: low-fidelity and high-fidelity. Let’s start by talking about low-fidelity wireframes.
1. Low-Fidelity Wireframes: A Basic Overview
Think of low-fidelity wireframes as rough sketches or blueprints. They provide a basic outline of the layout and where the content will go, but they don’t include too many details. It’s like drawing a simple floor plan for a house, showing the rooms and their general sizes, but not getting into specifics like furniture placement or color schemes.
Benefits of Low-Fidelity Wireframes for Early-Stage Projects
- Quick Iteration: Enables rapid exploration of design ideas, crucial for early-stage projects.
- Focus on Functionality: Simplified outlines direct attention to the structure and flow of the interface.
- Cost-Effectiveness: Reduces time and resources required, allowing for experimentation without significant investment.
- Ease of Modification: Simple designs make it easy to incorporate feedback and iterate quickly.
- Clear Communication: Provides a straightforward way to convey design concepts without unnecessary details.
- Early User Feedback: Facilitates early testing and feedback collection, improving usability.
- Reduced Bias: Avoids aesthetic distractions, keeping focus on usability and functionality.
- Risk Reduction: Rapid prototyping and testing mitigate the risk of investing in ineffective design directions.Quick Iteration
A Mobile App Example
For example, imagine you’re an engineer working on a new mobile app. You might start by creating a low-fidelity wireframe that shows the main screens and how they connect to each other. You might use simple shapes and placeholders for buttons, text, and images, just to give a general sense of what the app will look like.
2. Transitioning to High-Fidelity Wireframes: Refining the Design
High-fidelity wireframes are like the polished and refined versions of low-fidelity wireframes. They are the ones that bring the design to life, resembling the final product in terms of its visual appearance and functionality. Think of them as the blueprint that includes all the intricate details, such as colors, typography, images, and even interactive elements like buttons and dropdown menus.
Benefits of High-Fidelity Wireframes
- Realistic Representation: Detailed and realistic, closely resembling the final product for better visualization.
- Detailed Interaction: Design Incorporates interactive elements like animations, facilitating understanding of UX.
- User Testing: Ideal for usability testing as it closely resembles the final product.
- Client Presentation: Conveys professionalism, helping build confidence and facilitate decision-making.
- Improved Communication: Fosters clearer communication between stakeholders, aiding in understanding design intent.
- Efficient Development: Serves as a detailed blueprint for developers, streamlining the development process.
- Brand Consistency: Ensures consistency with brand identity, incorporating accurate branding elements.
- Marketing and Promotion: Useful for creating promotional materials, showcasing the product and generating interest.Realistic Representation
How to Design Wireframes in Figma?
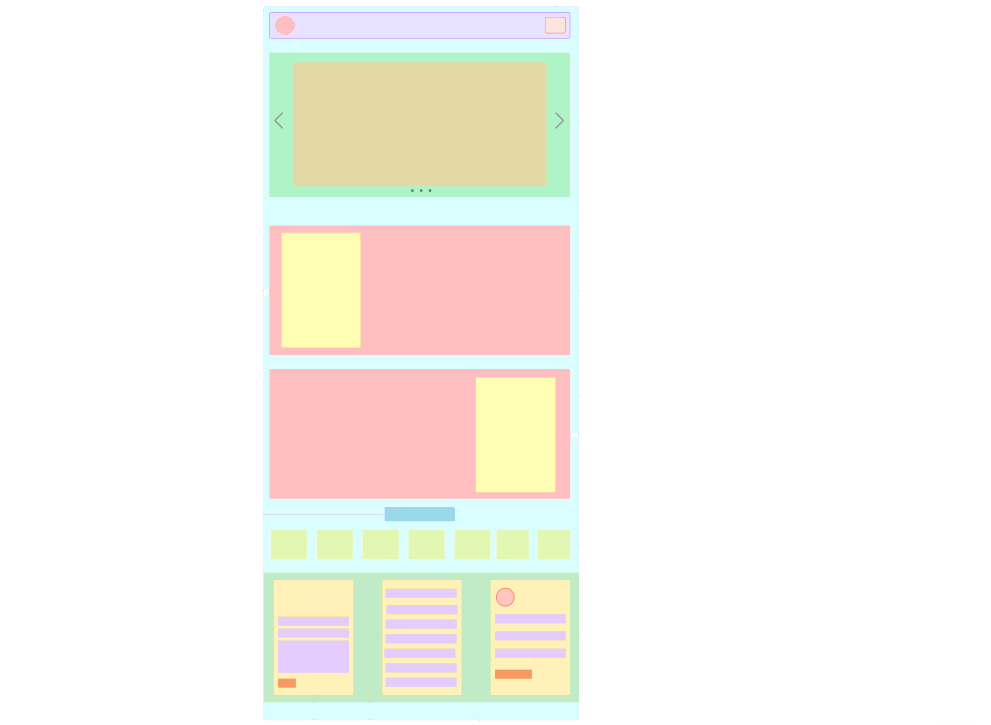
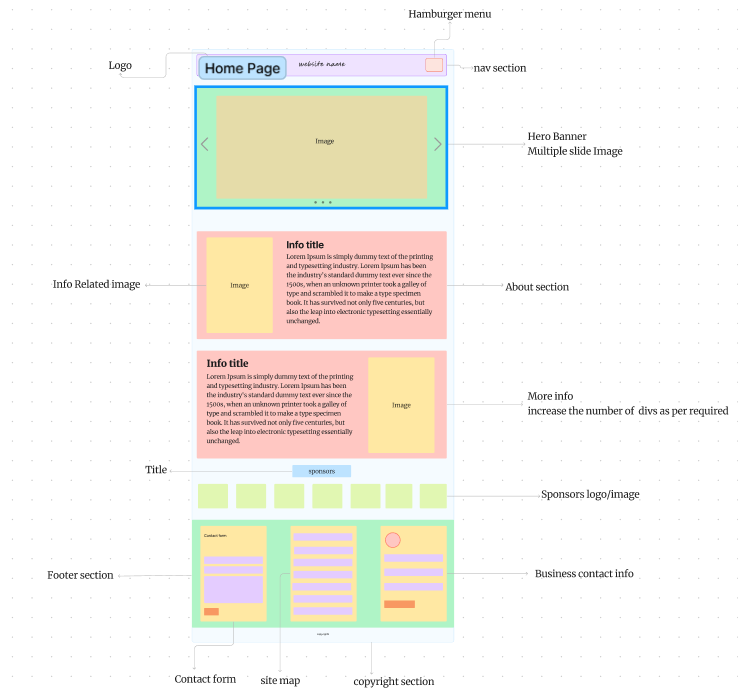
Step 1. Wireframing: Let’s start by making a blueprint for the design. A wireframe shows the basic layout and content sections. We’ll sketch out the header, footer, and main areas on the page. It’s like a simple map for the design.

Website Home Page Blueprint
Step 2. Creating the Grid: After the wireframe, we create a grid. It has horizontal and vertical lines that cross. This grid helps organize everything neatly on the page. We’ll use it to align the logo, navigation menu, and other content pieces. The grid keeps things tidy and lined up properly.
Grid View
Step 3. Designing the Header: First, we will tackle the header which would showcase the logo, navigation, and other top page elements. The logo would stand out in top left corner, and the navigation would have clear, readable fonts.
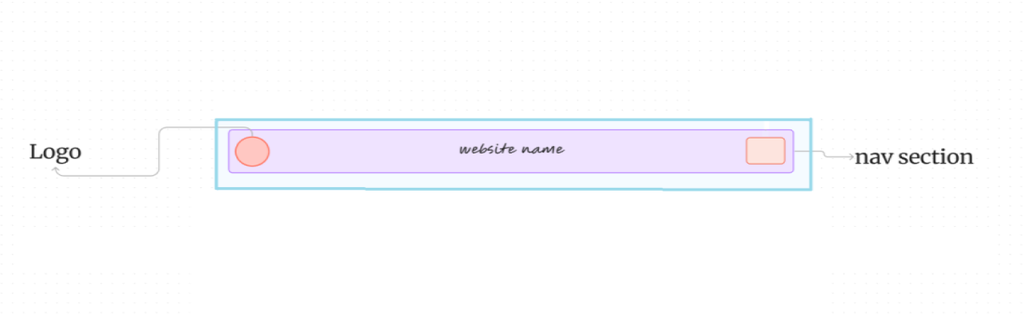
Header Section
Step 4. Designing the Footer: After that, we’d work on the footer containing copyright info, social media links, and other bottom page content. We’d make sure this section is well-designed and organized.
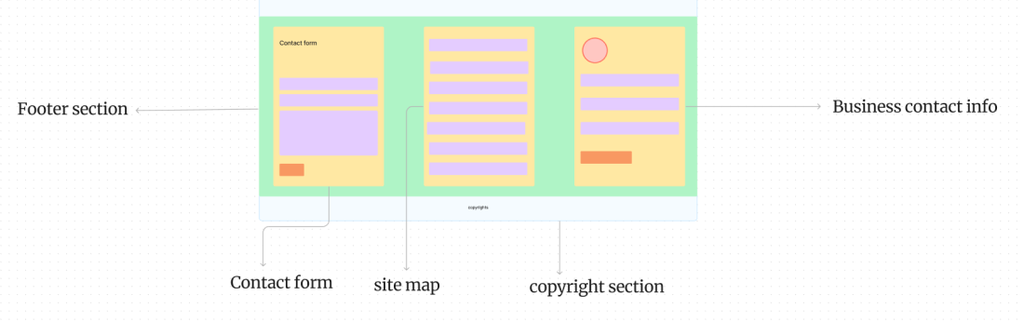
Footer Section
Step 5. Designing the Main Content Area: Then, the main content area would be our focus. This includes the eye-catching hero image, “About” section, and any other main page content. The hero image must be visually striking to engage visitors. For the “About” section, we’d use concise, clear typography.
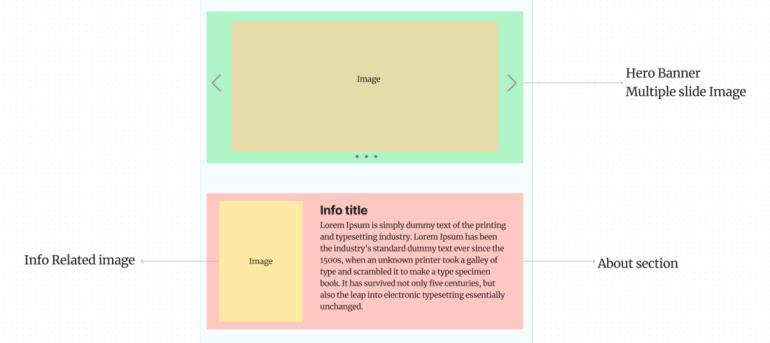
About Section
Step 6. Adding Interactivity: After the basic blueprint is finalized, liveliness gets incorporated through CSS animations, hover effects, and similar methods. Such inclusion enhances engaging user experiences dynamically.
Step 7. Testing and Refining: To ensure effectiveness and ease for users, the design then undergoes testing and refining based on user reviews and analytics findings. Layout, typography, and other elements receive modifications during this phase.
Final View
Overall, designing this way blends technical prowess, creative vision, and user-focused principles. By following a structured approach and meticulously attending to details, creating visually captivating yet highly functional designs for achieving objectives becomes feasible.
Properties of Wireframes in Figma
- Structural Skeleton: Wireframes in Figma serve as a structural skeleton, outlining the basic layout and functionality of a design.
- Low-Fidelity Representation: They are typically low-fidelity representations, focusing on content placement and functionality rather than visual aesthetics.
- Modular Components: Wireframes often consist of modular components such as boxes, placeholders, and basic shapes, making them easy to manipulate and rearrange.
- Interactivity: While wireframes primarily focus on structure, Figma allows for basic interactivity, enabling simple click-through prototypes to test user flow.
Conclusion
Wireframing is the basic building block of successful design. It gives a bare bones layout that shows how digital interfaces will look and work. In digital design, Figma has become a strong tool. It combines wireframing and prototype creation smoothly. This beginner’s guide looks into the basics of using Figma for wireframing. It explores how useful it is for making practical and user-friendly design prototypes.
Share your thoughts in the comments
Please Login to comment...