What is the purpose of the onClick event in React?
Last Updated :
13 Feb, 2024
The onClick event plays an important role for enhancing user interactions with components in react applications which allows developers/programmers to call a function or method that gets executed when a particular element is clicked. Whether triggering a state change, navigating to another page, or performing a custom action, the onClick event is a fundamental tool for creating interactive and dynamic user interfaces.
Pre-requisites:
Approach:
Different approaches are followed for example functional and class component methods along with arrow function method. Each method offers flexibility and caters to different coding styles. This article gives developers practical experience by providing a step-by-step guide for creating React applications with the onClick event.
The onClick event can be handled by React in several ways.
Functional Component Concept: A functional component is used to define the click handler function in the component body.
Javascript
const MyComponent = () => {
const handleClick = () => {
};
return <button onClick={handleClick}>Click me</button>;
};
|
Class Component Concept: With class components, the click handler is defined as a method within the class.
Javascript
class MyComponent extends React.Component {
handleClick() {
}
render() {
return <button onClick={this.handleClick}>Click me</button>;
}
}
|
Arrow Function Concept: The click handler is defined as a separate function, which can be reused across components, by the arrow function approach.
Javascript
const handleClick = () => {
};
const MyComponent = () => <button onClick={handleClick}>Click me</button>;
|
Steps to Create React Application And Installing Module:
Step 1: Create a ReactJS project:
npx create-react-app button-click
Step 2: Navigate to the project:
cd button-click
Step 3: After setting up react environment on your system, we can start by creating an App.js file and create a directory by the name of components in which we will write our desired function.
Project Structure:
.png)
project structure of the app
The updated dependencies in package.json file will look like.
"dependencies": {
    "@testing-library/jest-dom": "^5.16.4",
    "@testing-library/react": "^13.2.0",
    "@testing-library/user-event": "^13.5.0",
    "bootstrap": "^5.1.3",
    "react": "^18.1.0",
    "react-dom": "^18.1.0",
    "react-icons-kit": "^2.0.0",
    "react-redux": "^8.0.2",
    "react-scripts": "^5.0.1",
    "redux": "^4.2.0",
    "web-vitals": "^2.1.4"
}
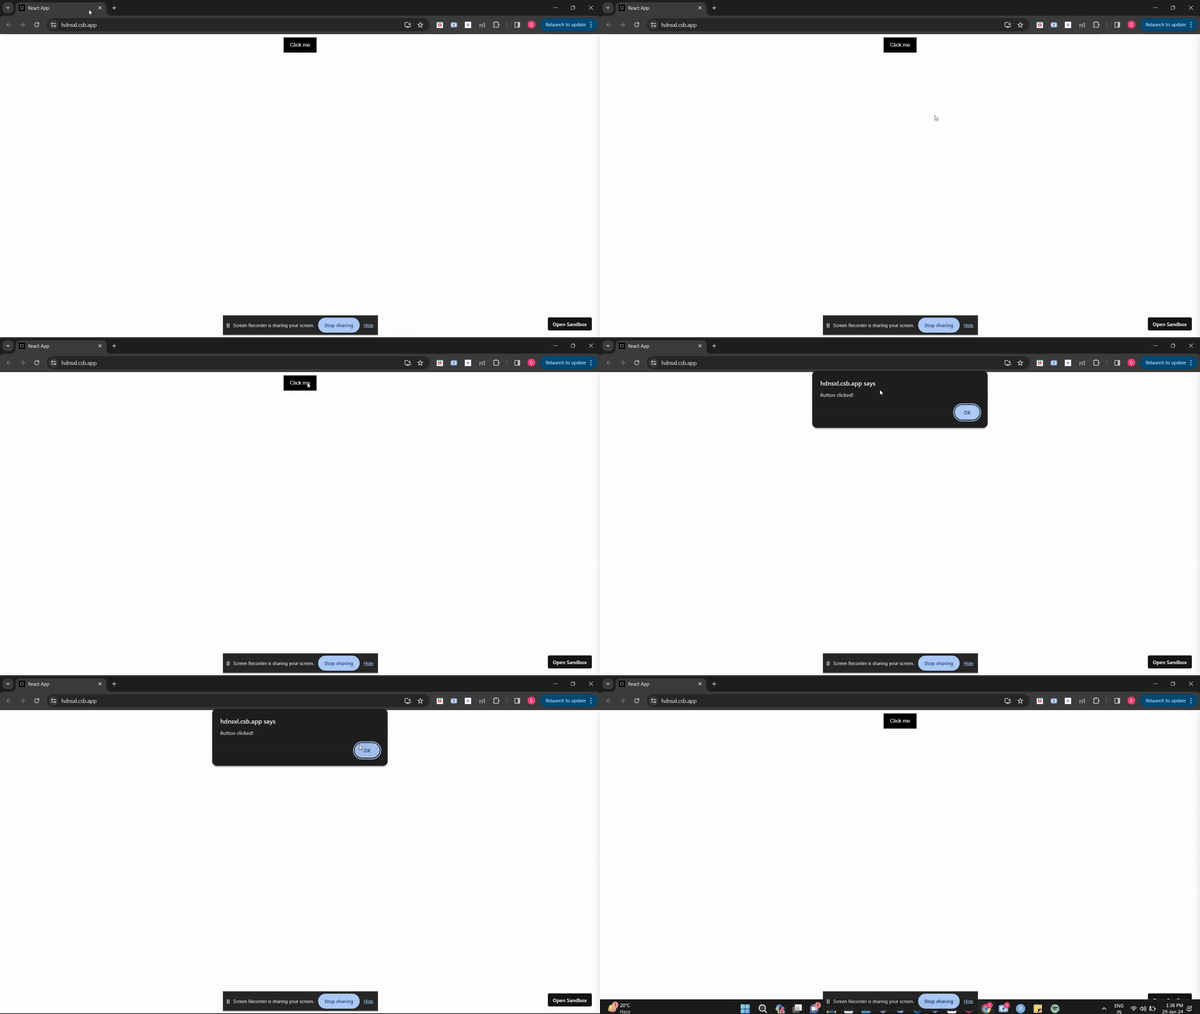
Example 1: In this example, we will demonstrate how to add a simple button with “onClick” event in our application.
It creates a button that causes the handleClick function to be called when you click, resulting in an alert message. Different stylesheet have been added to include background and padding properties using inline styling.The component is centered in the div, and a default export of this module includes an entire component.
Javascript
import React from "react";
const App = () => {
const handleClick = () => {
alert("Button clicked!");
};
return (
<div>
<center>
<button
style={{
color: "white",
backgroundColor: "black",
padding: "10px 15px",
}}
onClick={handleClick}
>
Click me
</button>
</center>
</div>
);
};
export default App;
|
Output:

Output of example 1
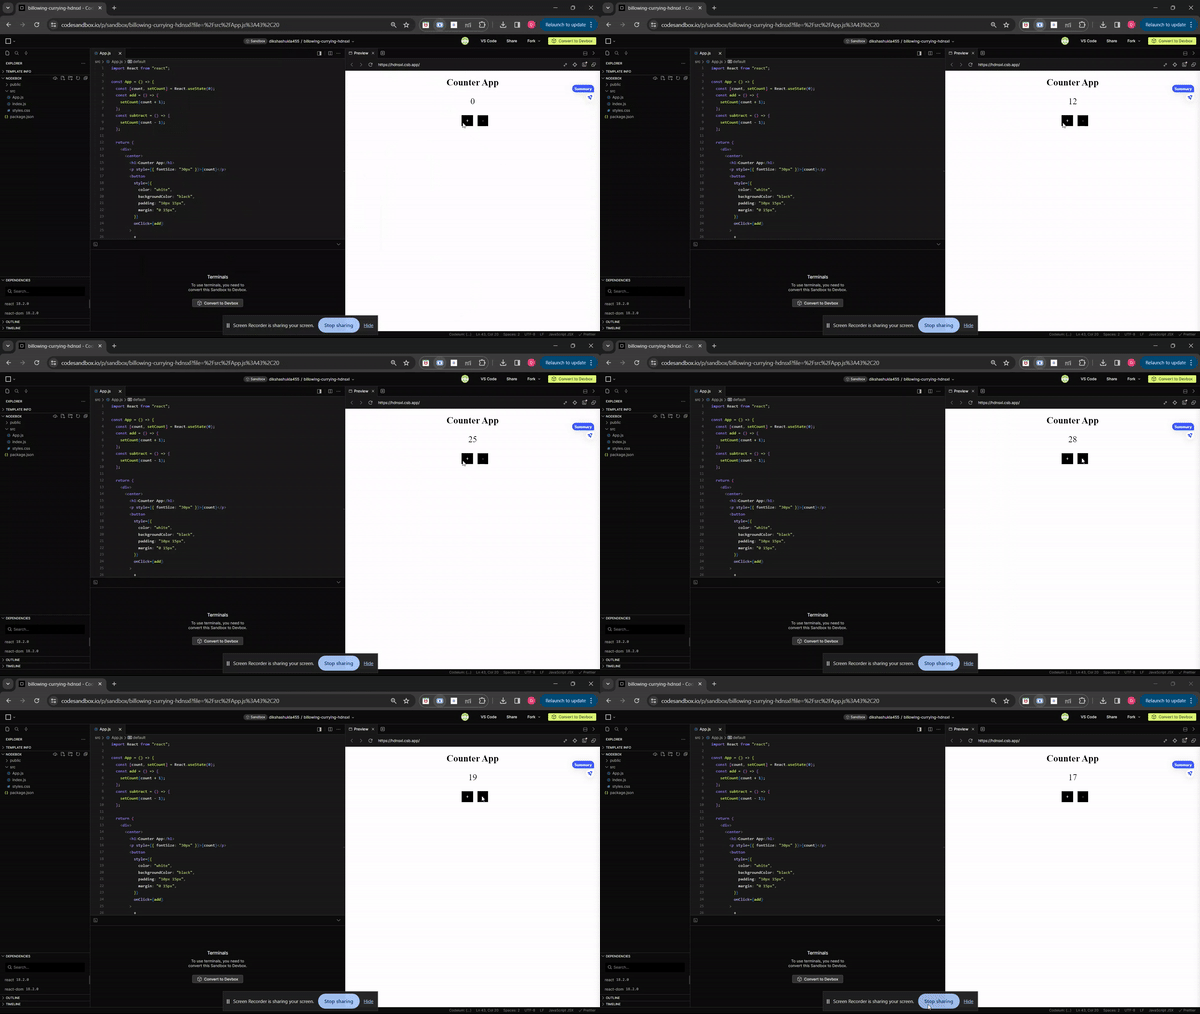
Example 2: In this example, The basic counter application uses the code below. By using the useState hook, it maintains a count state. The component shows the count value and has buttons for increment and decrement buttons as icons. When buttons are clicked, the count state is updated to trigger an add or remove operation. The component is exported as a default export of the module, which has its key centered around “Counter App”.
Javascript
import React from "react";
const App = () => {
const [count, setCount] = React.useState(0);
const add = () => {
setCount(count + 1);
};
const subtract = () => {
setCount(count - 1);
};
return (
<div>
<center>
<h1>Counter App</h1>
<p style={{ fontSize: "30px" }}>{count}</p>
<button
style={{
color: "white",
backgroundColor: "black",
padding: "10px 15px",
margin: "0 15px",
}}
onClick={add}
>
+
</button>
<button
style={{
color: "white",
backgroundColor: "black",
padding: "10px 15px",
}}
onClick={subtract}
>
-
</button>
</center>
</div>
);
};
export default App;
|
Output:

Output of example 2
Share your thoughts in the comments
Please Login to comment...