In our daily technological advancements we should utilize the renewable sources like sun ,wind, water etc. Particularly for the solar energy the operations and applications are huge. For the applications of solar energy we should monitor and optimize the solar powered systems using these types of embedded systems. So in here we will use Arduino ,LDR in this embedded project .In the description below we will get a complete idea of how does this system works ,what are the major advantages, disadvantages ,How does each component works with detailed diagrams and simulations.
What is Smart Sun Light Detection?
The purpose of Smart Sunlight detection is monitoring ,analyzing the Sunlight using technology and based on that we will apply changes in our life like decreasing or increasing the intensity of bulbs , changing speed of fans ,adjusting the thermostat in our homes etc. We can also make the water flow into the farms using this system automatically. Without intervening of any humans this system will process the sunlight data and take actions like turning on the bulb ,buzzer in this system .
What is Arduino?
Arduino is an open source hardware and software company , project and user community that designs and manufactures single – board microcontroller kits for building digital devices. Using we can built many prototypes like door-lock system, bluetooth controlled cars, agriculture system etc.
What is Light Detecting sensor?
In this project the importance of LDR is very important as the intensity of sunlight is required. It is crucial in Horticulture and Indoor Farming ( control lighting conditions for the cultivation of crops),solar tracking systems in renewable energy installations, photography and film production, aquariums(maintaining the right light levels is vital for the health of aquatic life) etc.
Components Required for Smart Sun-Light Detection
- Arduino Uno
- LDR (Light Dependent Resistor)
- 10kΩ Resistor
- Piezo Sensor
- Breadboard and jumper wires
- USB cable for Arduino
- Arduino IDE Software
Arduino
Arduino boards are able to read inputs – light , a finger on a button through sensors and turn it into an output – activating a motor, turning on an LED etc. It has 13 digital pins for digital outputs, inputs, etc. and 6 Analog pins for analog input and outputs. It is main crucial component to implement the logic we have written in code.
Light Dependent Resistor
The resistance of the LDR decreases with an increase in light intensity. This property allows us to use them for making light sensing circuits. At one terminal it requires 5v and analog input pin and other requires the ground pin. Light-dependent resistors made with photosensitive semiconductor materials like Cadmium Sulphide (CdS), lead sulfide, lead selenide, indium antimonide, or cadmium selenide and they are placed in a Zig-Zag shape as you can see in the pic below.

LDR
Resistors
The resistor absorbs the electrical energy in the process where it acts as a hindrance to the flow of electricity by reducing the voltage, and it is dissipated as heat. It is one of the basic component that any circuit requires if it wants to pass current and manipulate the currents across the circuit like multiple joints etc.
Piezo Buzzer
Piezo buzzer works by applying an alternating voltage to the piezoelectric ceramic material. The introduction of such an input signal causes the piezoceramic to vibrate rapidly, resulting in the generation of sound waves. It is used in alarms ,buzzers etc .These are generally small in size ,making easier to integrate in circuits.

Piezo Buzzer
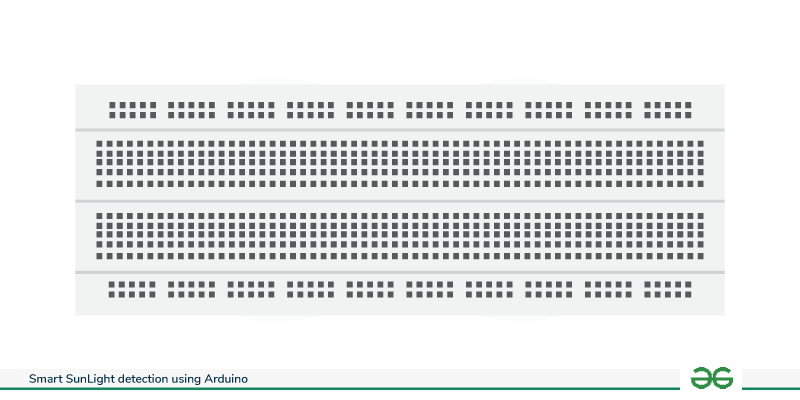
Breadboard
It is generally used for making connections of circuits simpler and easier especially for temporary purposes. The ports between red and blue line has connected internally across the horizontal line. While remaining ports are connected vertically, upper half and bottom half are not connected.
Breadboard
Arduino Cable
It is a cable required to connect the Arduino and power it up and you can dump the code in the Arduino through Arduino IDE . Once you dumped the code you can use a battery to power it as the code remains in the Arduino .But if you want to see the value you can only see it through the Arduino IDE ‘s Serial monitor.
Arduino IDE
This is the software we are going to use for this embedded project .This software is used for various projects .Here we are going to write the code and verify it whether we have any errors in our code if exists in which line and what is the error is shown by Arduino ide software. After verifying we will dump the code into the Arduino using Arduino cable .
We have to select : tools -> board -> Arduino uno in the Arduino IDE
We also have to select :tools -> COM port -> (you have to choose whatever the respective COM port is available for you)
Working of Smart Sun-Light Detection Using Arduino
LDR is a light-dependent resistor that changes its resistance when different amounts of light fall on it. Based on that it gives a analog value of resistance. Since, We can use light source like Sun or flash light As the LDR is connected to the analog input pin (A0) on Arduino, we can get the light intensity as the Arduino will calculate the LDR’s resistance, which is inversely proportional to light intensity.
From Arduino IDE serial monitor we can observe the sunlight intensity values .These value according to our logic if it crosses the threshold value which we given in code then the buzzer and the light will be turned on as they are both connected to the 13th digital pin of Arduino .This readings will be continuously taken from the LDR and process through the Arduino.

Diagram-of-Sunlight-Detection-System
Pin Connections
- Connect one terminal of LDR to 5V on Arduino.
- Connect the other terminal to a 10kΩ resistor.
- Connect the other end of 10kΩ resistor to ground (GND) pin on Arduino.
- From the junction between LDR and resistor make a connection to analog input pin on Arduino (example:- A0 In this case).
- Check all the connections are properly connected.
Program
// initialize pins as input,output for Sensor
void setup()
{
  pinMode(A0,INPUT);
  pinMode(13, OUTPUT);
  Serial.begin(9600);
}
// Defining global variables
int value=0;
void loop()
{
 // Reads the LightIntensity and stores in variable value
  value=analogRead(A0);
  Serial.print(value);
  Serial.print("\n");
  if(value>500)
  {
    digitalWrite(13,HIGH);
  }
  else
  {
    digitalWrite(13,LOW);
  }
}
Simulation
The Tinkercad to create this simulation – You can create an account(Google, Autodesk, email) and use Tinkercad for free.
.png)
Simulation
Output
The following table and the graph gives the output of this experiment of sunlight detection using Arduino .
.png)
Reading in the Serial monitor
The graph is shown here according to the output which shows the results in proper way of sunlight detection using arduino .
.png)
Output
Advantages
- This is system which does not need to monitor 24/7
- It is fully automated and useful
Disadvantages
- we have to provide battery power to Arduino from time to time.
- This system should not get wet like keeping in a environment near to rain etc.
- This data can only seen through Arduino ide.
Conclusion
In conclusion by using this Smart Sunlight detection project also an (Embedded circuit ) we can track the amount of light we are receiving from the Sun from time to time using the LDR , monitor , Arduino we are goin to see the data (Sunlight values ) using the Arduino IDE . The main objective of this smart sunlight detection project is to track or alert us if there is any sudden high increase in Sunlight or Sunlight value crossing the threshold value (It is an analog value which will we given by us in the program) ,we will get an alert using the Alarm (Piezo Buzzer) and lights which is the output we want to stay alert at any give moment of time safe from the sunlight. we can also add a display screen to show the time and Sunlight we are receiving from the sun at that moment of time using this project.
Frequently Asked Questions
1. Does building this system requires any coding knowledge?
Basics should be enough for building this system. Although if you want to integrate more sensors then you might require a bit more knowledge in coding.
2. Does usage solar panel helps in this project?
Yes, definitely then we have to provide a rechargeable battery for this system.
3. Can weather affect this system?
Only extreme weather can affect this system . In the remaining conditions it will provide an accurate data of sunlight intensity.
4. Can I expand this system to more application based?
Yes ,you can by using NodeMCU ,(app or web) based application you can easily monitor the data from anywhere you want.
Share your thoughts in the comments
Please Login to comment...