How to Setup a Telegram Business Account
Last Updated :
06 Feb, 2024
How to SetUp Telegram Business Account – Quick Steps
- Open the Telegram App
- Create a Channel
- Invite Members
- Add Content
- Interact with Customers
- Promote your Channel
Telegram is a well-known app nowadays, mainly used for instant communication but most people use it in many ways such as for calling, texting, and so on. Telegram gives you many features by which you can accomplish any task on Telegram.
In this post, you will learn to setup a business account on Telegram by using some of the features of Telegram.
What is Telegram Bussiness Account?
A Telegram Business Account is a feature on the Telegram messaging app designed for businesses to connect with customers. It offers tools for customer support, broadcasting messages, and promoting products/services. If we talk about setting up a business account on Telegram then it will be easy to set up with the help of Telegram’s features.
To create a business account on Telegram, all you need is a dedicated channel or group on which you can post your products and business details so that you can interact with your customers.
What is a Telegram Bussiness Account Used for?
A Telegram Business Account is used by businesses for:
- Communication with customers
- Providing customer support
- Sending updates and announcements
- Promoting products or services
How to Setup Telegram Business Account?
Step 1: Open the Telegram App
To launch the Telegram app on your Desktop navigate to the Telegram icon and give it a click.
.webp)
Click on the Telegram icon to open Telegram App
Step 2: Create a Channel
In order to start or make a business account you have to create a channel first so that you can make your business famous by growing your channel.Click on Three Bars to open a drop-down menu.
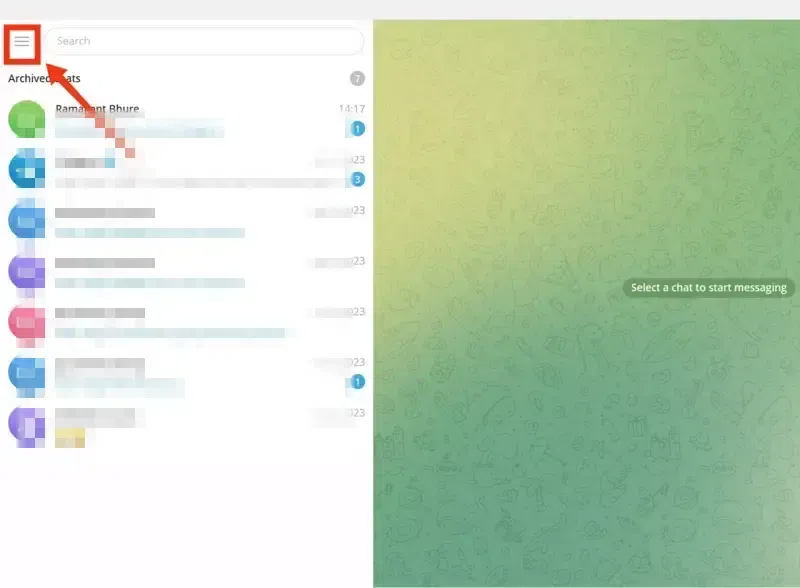
Click on Three Dots
Step 3: Select “New Channel”
Select “New Channel” from the drop-down menu.
.webp)
Select “New Channel”
Step 4: Give Channel >> Add Description >> Click “Create”
Give your Channel a Name and click on the “Create” button to create the channel.
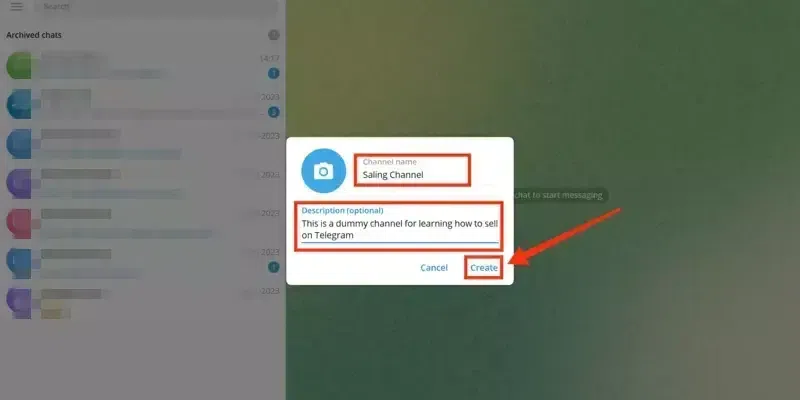
Give Channel name >> Click Create
Step 5: Add Contacts
Now after creating your channel for business add your contacts to your channel so that your channel should get a number of subscribers. To do so navigate to your created channel and click on the “Invite” icon present on the right-side of the interface.
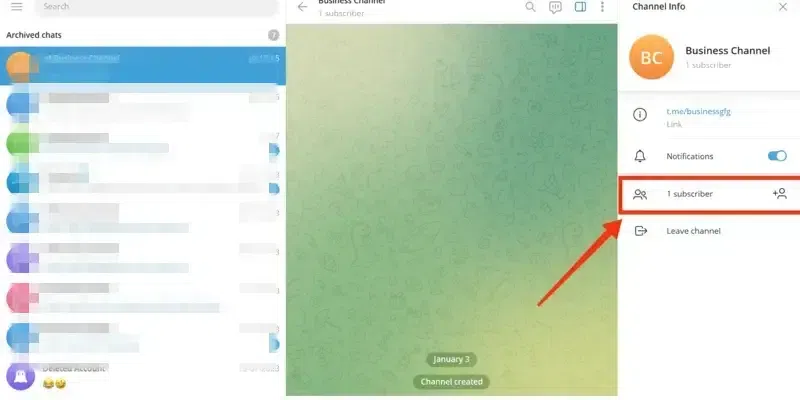
Add Contacts
Step 6: Select Contact >> Click “Add”
When you will click on the “Invite” icon a list of all your contacts will appear on the from which you can select the contacts that you want to add to your channel. After selecting your desired contacts to be added click on the “Add” button to add the contacts.
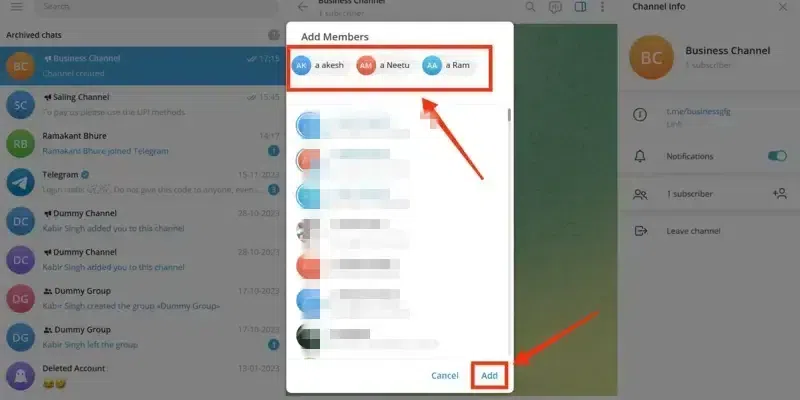
Select Contact >> Click “Add”
Step 7: Add Channel Description
For a business channel you need to add a brief and attractive description which can attract people to visit and subscribe your channel. Click on your Channel Profile and then click on Three Dots present over your Channel Name.
.webp)
Tap on your Channel Icon >> Click on Three Dots
Step 8: Select “Manage Channel”
Select Manage Channel from the drop-down menu to move to the Channel Settings.
.webp)
Select Manage Channels
Related Articles:
Step 9: Add Description
Start writing a description about your business that you are going to start on the channel such as you can describe about your business, can tell about advantages of your business. The more engaging description you will add the more traffic on your channel will increase.
.webp)
Add the Description
Step 10: Manage Administrators
While you are starting a business you will need some admins to manage your channel with you or in your absence, so to add administrator go to the Channel Settings and search for the “Administrators” tab. Click on the Administrator tab to manage the admins of your channel.
.webp)
Select Administrators in Channel Settings
Step 11: Click on Add Administrator
In the Administrators tab you can manage your admins by assigning them or by removing them, now to add the admin click on the “Add Administrator” button located at the bottom of the interface.
.webp)
Click on “Add Administrator”
Step 12: Select Contact
Now a list of your channel members will appear on the screen select your desired contact to be assigned as an admin of the channel.
.webp)
Select your desired Administrator
Step 13: Manage Permissions >> Click “Save” Button
After selecting your desired contact to be your admin all the permissions of the contact will appear, so manage the permissions and click on the “Save” button to continue. By repeating the steps you can assign another admin for your channel.
.webp)
Manage Permissions >> Click “Save” Button
Step 14: Add Content
Visualizing your content into the channel attracts the people more towards your channel, so after assigning the admins for your channel start posting your content in your channel.
You can post images and attractive text to tell about your business to the people, once people will start coming to your channel you should start giving offer posts in your channel to increase your channel’s growth.
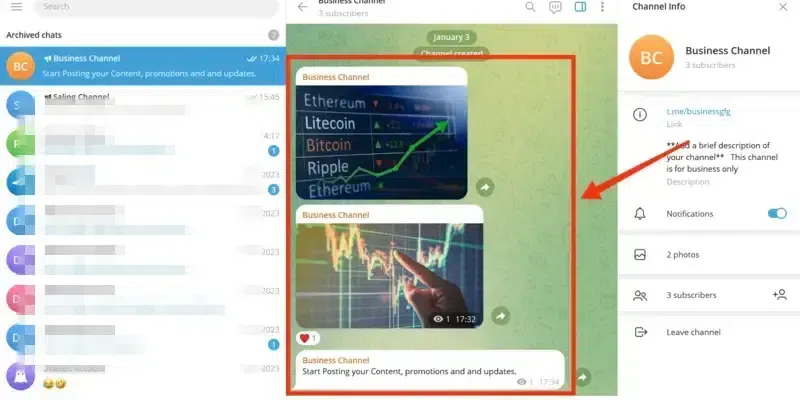
Add Content
Step 15: Interact with Users
Interacting with users maintains your channel’s reputation and service by which customer will be satisfied and customer satisfaction in a business is most important. You can interact with your customers by a feedback in which the customers will provide their problem and you will resolve their problem or you can also communicate with them by the individual chat.
Sharing more images and telling a brief history about your product can attract the customers and you can also provide offers to the customers.
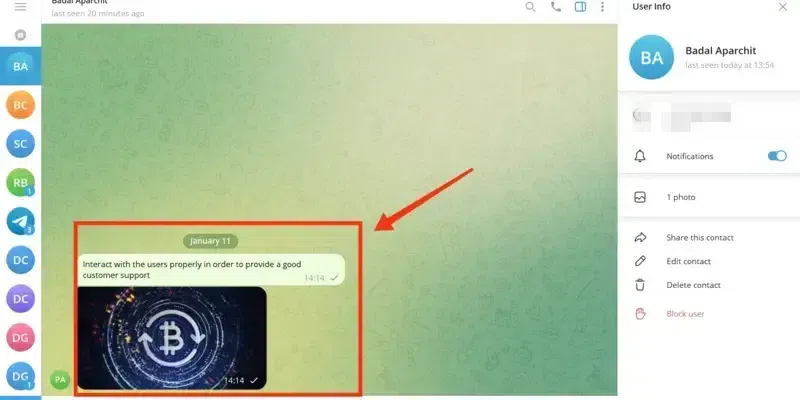
Interact with Users
Step 16: Promote your Channel >> Share your Channel
Promoting your channel increases your growth extremely so you should also promote your channel on the social media platforms such as Instagram, Facebook, etc. To do so copy the channel’s link located at top of the description and start sharing it directly to your known platforms that will help you in increasing your channel’s growth.
.webp)
Share your Channel >> Copy Channel Link
Related Articles:
Conclusion
In conclusion, setting up a Telegram Business Account is simple and beneficial for businesses to connect with customers effectively. With features like channels, messaging, and broadcasting, businesses can communicate, provide support, share updates, and promote products seamlessly. By utilizing these tools, businesses can enhance customer engagement and satisfaction, ultimately leading to better business outcomes.
How to Setup a Telegram Business Account – FAQs
How can I create a Telegram Channel for my business?
To create a Telegram channel for your Business go to the menu by clicking on the Three Horizontal bars present at the top-left corner of the interface and click on “New Channel” for creating a channel and then Invite Members to your Channel.
Can I integrate my business services with Telegram?
Yes, you can integrate my business services with the Telegram as Telegram gives API access which allow developers to integrate services with their Telegram account.
What is the difference between a Telegram Channel and a Bot for a business account?
The major difference between a Telegram channel and a bot is that a Telegram channel is a one-way communication platform and a bot is a two-way communication platform.
Share your thoughts in the comments
Please Login to comment...