Selenium with Java Tutorial
Last Updated :
01 May, 2024
Selenium is a widely used tool for testing web-based applications that checks if they are doing as expected. It is a prominent preference amongst testers for cross-browser testing and is viewed as one of the most reliable systems for web application automation evaluation. Selenium is also platform-independent, so it can provide distributed testing using the Selenium Network.
Its features, reach, and strong community assistance make it a powerful device for effective web application testing.
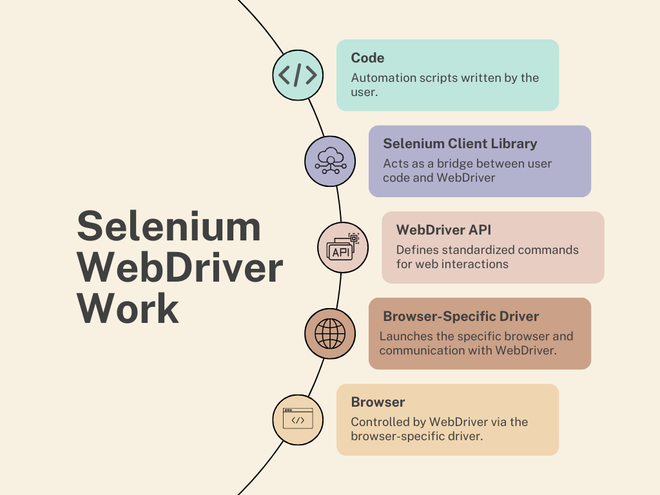
Working for the Selenium is explained below:
- User code: The user creates automation scripts. These scripts contain instructions and commands for interacting with web elements and web pages.
- Selenium Client Library: This library acts as a bridge between user code and WebDriver. It provides several APIs that allow user code to control web browsers and facilitate web interaction commands.
- WebDriver API: The WebDriver API defines custom instructions for internet interfaces. Various browser providers have applied their own WebDriver implementations which can be well matched with this API. It establishes a common language for browser automation.
- Browser-precise driving force: Each browser (e.g., Chrome, Firefox) has its personal WebDriver implementation (e.g., ChromeDriver, GeckoDriver). These drivers are liable for starting a specific browser and setting up a conversation channel with the WebDriver.
- Browser: The Webdriver sends commands to the browser to execute specific actions, like clicking elements or inputting text, which the browser then carries out accordingly.
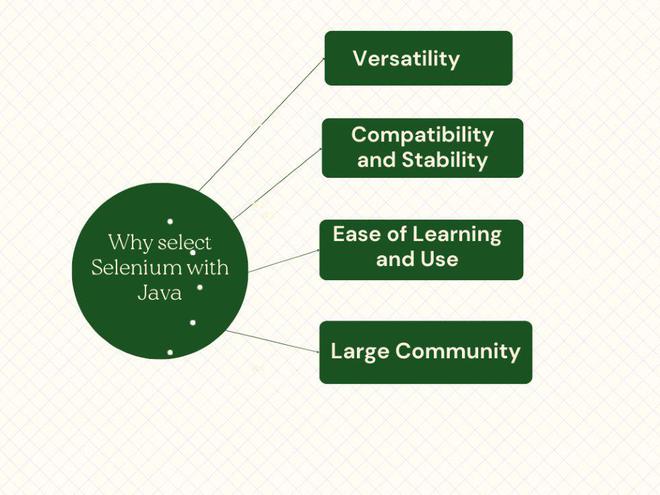
Why Select Selenium with Java?
Below we have mentioned the reasons to choose Selenium with Java for testing the application.
- Versatility: Java is one of the most typically used languages for web automation examining. It holds a massive matter of libraries and programs under Selenium WebDriver.
- Compatibility and Stability: Selenium has superior service Java making it a very compatible and robust integration.
- Ease of Learning and Use: Java is known for its readability and ease of learning, rendering it accessible for both amateurs and advanced coders.
- Large Community: Java has a large group of developers and inspectors using Selenium and Java which furnish valuable information, maintenance, CE, and solutions to common issues and struggles encountered by Selenium users.
Step 1: Firstly, configure the Java Development Kit on your system. If not configured, then refer to the following installation steps here.
Step 2: Ensure that Java has been successfully installed on your system by running the command.
java -version
Step 3: Now, install an Integrated Development Environment (IDE) such as Eclipse, IntelliJ IDEA, or NetBeans. For this, we are using Eclipse so download it from here.
Step 4: Install the Selenium WebDriver library for Java. Download it from here. Extract the Zip File and complete the installation.
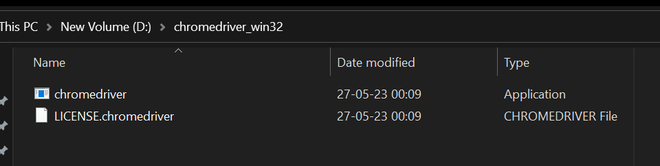
Step 5: We need web browsers such as Chrome, Firefox, Edge, or Safari. So, for this article demonstration, we will use the Chrome browser. A ChromeDriver executable file that matches your Chrome version. Download the latest release from here.
Step 6: Extract the zip file and copy the path where the chromedriver.exe file is, it is required in further steps. (e.g. – D:/chromedriver_win32/chromedriver.exe)
Create a Selenium with Java project in Eclipse
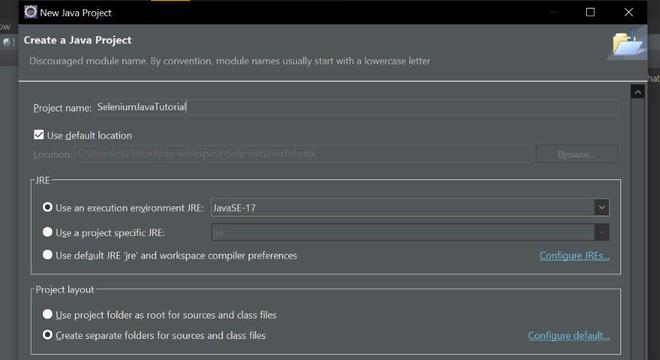
Step 1: Launch Eclipse and select File -> New -> Java Project.
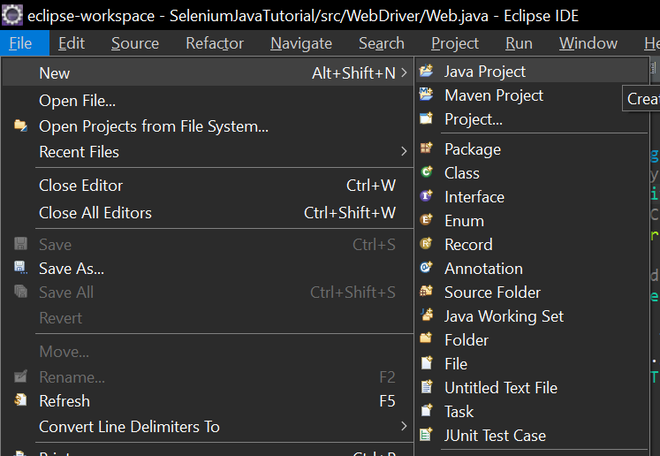
Step 2: Enter a name for your project (e.g., SeleniumJavaTutorial) and click Finish.
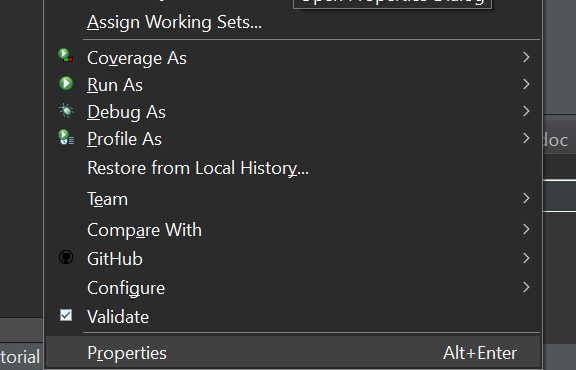
Step 3: Right-click on your project in Package Explorer and select Properties.
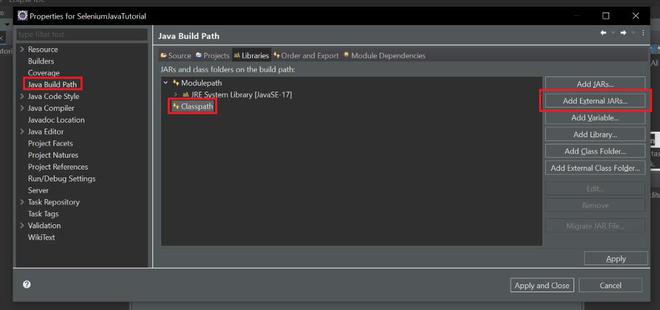
Step 4: Select Java Build Path from the left panel click on the libraries tab and then select Classpath. Click on Add External JARs and browse to the location where you downloaded the Selenium WebDriver library (e.g., selenium-java-4.1.0.zip).
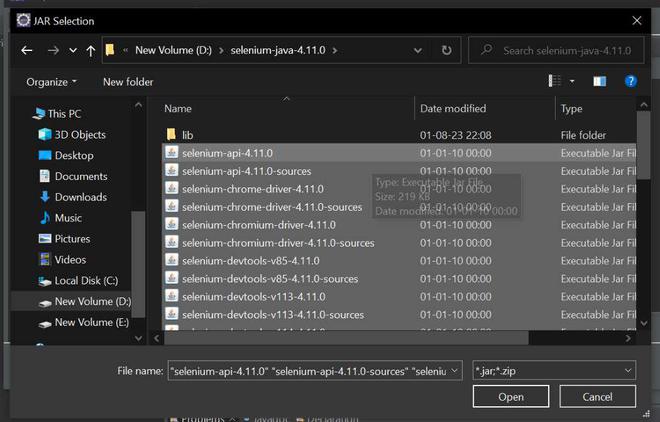
Step 5: Select all the JAR files inside the zip file and click Open and also all the files inside the lib folder. (D:\selenium-java-4.11.0, D:\selenium-java-4.11.0\lib).
Step 6: Click Apply and Close to save the changes.

Step 7: Create a new package under your project by right-clicking on the src folder and selecting New -> Package.
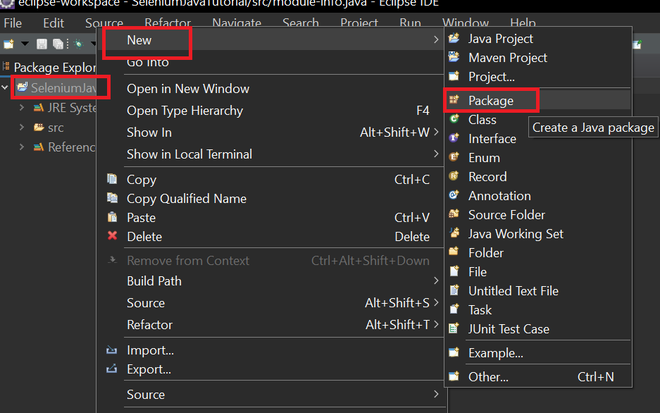
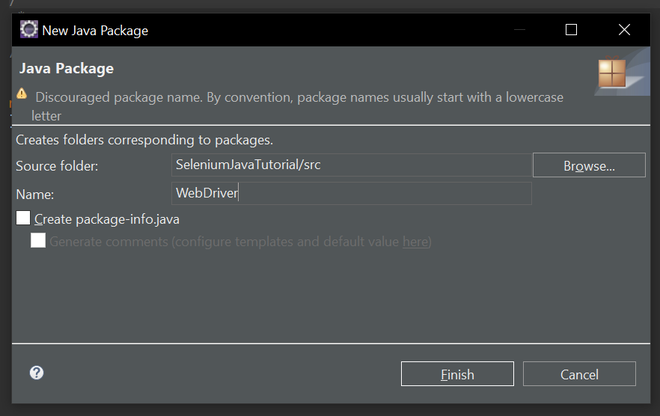
Step 8: Add the name of your package (e.g., WebDriver)
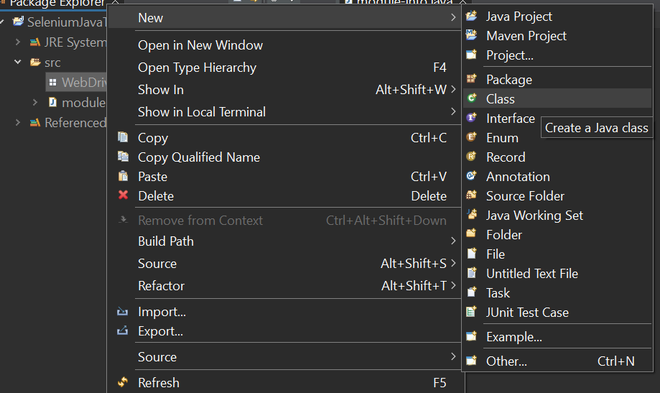
Step 9: Create a new class under your package (e.g., WebDriver) by right-clicking on the package and selecting New -> Class, then Enter a name for your class and click Finish.
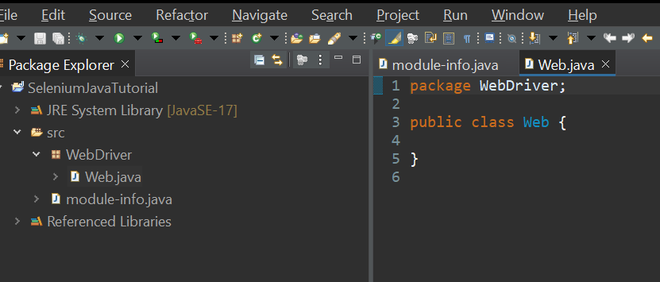
Step 10: After all the steps your file structure looks like this.
Steps for Writing Code
Step 1: Import the required packages at the top of your class:
import org.openqa.selenium.WebDriver;
import org.openqa.selenium.chrome.ChromeDriver;
After importing if still getting errors in import just delete the module-info.java file.
Step 2: Create a main class inside the Web class.
public class Web {
public static void main(String[] args) {
}
}
Step 3: Set the system property for ChromeDriver (path to chromedriver executable). (e.g., D:/chromedriver_win32/chromedriver.exe)
System.setProperty(“webdriver.chrome.driver”, “D:/chromedriver_win32/chromedriver.exe”);
Step 4: Create an instance of ChromeDriver.
WebDriver driver = new ChromeDriver();
Step 5: Navigate to the desired website.
driver.get(“https://www.geeksforgeeks.org/”);
Step 6: Get and print the page title.
String pageTitle = driver.getTitle();
System.out.println(“Page Title: ” + pageTitle);
Step 7: Wait for a few seconds.
try {
Thread.sleep(3000);
} catch (InterruptedException e) {
e.printStackTrace();
}
Step 8: Close the browser.
driver. Quit();
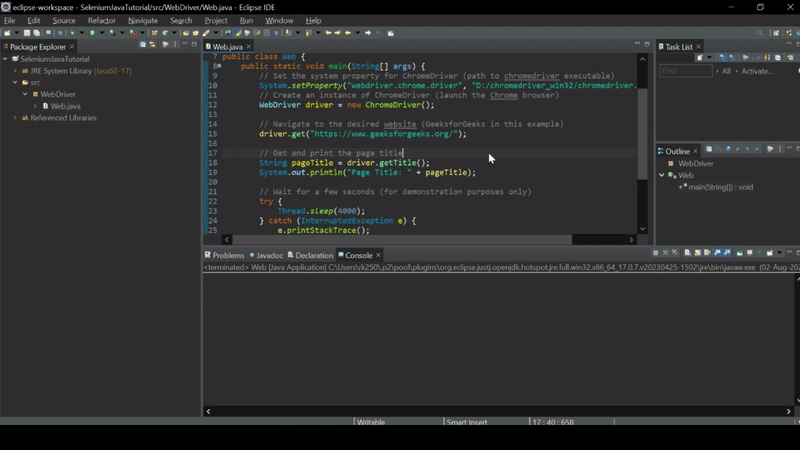
Below is the Java program to implement the above approach:
Java
// Java program to implement
// the approach
package WebDriver;

import org.openqa.selenium.WebDriver;
import org.openqa.selenium.chrome.ChromeDriver;

public class Web {
    public static void main(String[] args)
    {
        // Set the system property for ChromeDriver (path to
        // chromedriver executable)
        System.setProperty(
            "webdriver.chrome.driver",
            "D:/chromedriver_win32/chromedriver.exe");
        // Create an instance of ChromeDriver (launch the
        // Chrome browser)
        WebDriver driver = new ChromeDriver();

        // Navigate to the desired website (GeeksforGeeks in
        // this example)
        driver.get("https://www.geeksforgeeks.org/");

        // Get and print the page title
        String pageTitle = driver.getTitle();
        System.out.println("Page Title: " + pageTitle);

        // Wait for a few seconds (for demonstration
        // purposes only)
        try {
            Thread.sleep(3000);
        }
        catch (InterruptedException e) {
            e.printStackTrace();
        }

        // Close the browser
        driver.quit();
    }
}
Output:
Share your thoughts in the comments
Please Login to comment...