Real-Time Polling App with Node and React
Last Updated :
04 Mar, 2024
In this article, we’ll walk through the step-by-step process of creating a Real-Time Polling App using NodeJS, ExpressJS, and socket.io. This project will showcase how to set up a web application where users can perform real-time polling.
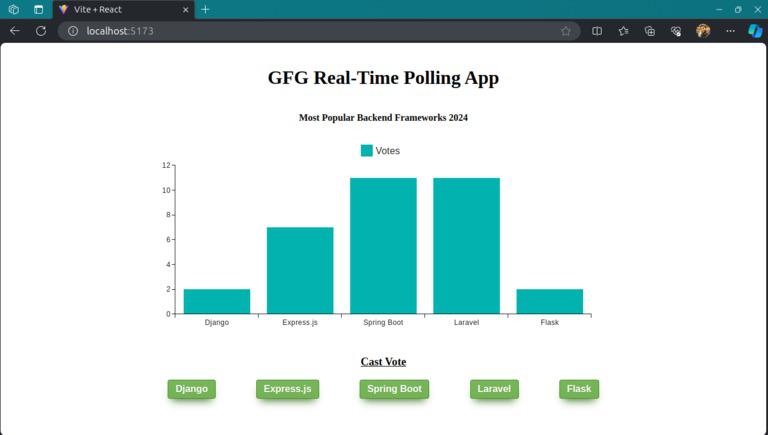
Preview of final output: Let us have a look at how the final application will look like:
Prerequisites:
Approach to create a Real-time Polling Application:
- The
BarChart component is a visual representation of poll data for different backend frameworks.
- It receives real-time updates via a WebSocket connection using the
socket.io-client library.
- The component displays a bar chart with vote counts for each framework and allows users to cast votes by clicking on corresponding buttons.
- Establishes a WebSocket connection using
io('http://localhost:5000') via useMemo.
- Uses
useEffect to handle connection events and attempts to reconnect in case of errors.
- Renders the
BarChart component, passing the socket connection as a prop.
- Creates an Express server and a Socket.io server.
- Defines an initial set of backend frameworks with vote counts.
- Handles WebSocket connections and updates in real-time.
- Logs user connections, emits initial data, and updates data on vote events
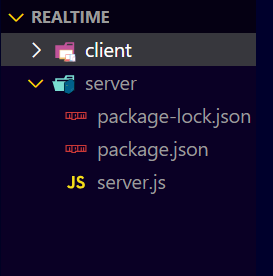
Steps to Create the Backend Server:
Step 1: Create a directory for project
mkdir server
cd server
Step 2: Initialized the Express app and installing the required packages
npm init -y
Step 3: Install the required dependency in your server using the following command.
npm i express nodemon socket.io
Project Structure:
The updated dependencies in package.json file of backend will look like:
"dependencies": {
    "cors": "^2.8.5",
    "express": "^4.18.2",
    "socket.io": "^4.7.4"
}
Example: Write the following code in server.js file
Javascript
const express = require("express");
const http = require('http');
const { Server } = require("socket.io");
const app = express();
const port = 5000;
const server = http.createServer(app);
const io = new Server(server, {
cors: {
origin: "*",
credentials: true
}
});
const frameworks = {
"0": { votes: 0, label: "Django" },
"1": { votes: 0, label: "Express.js" },
"2": { votes: 0, label: "Spring Boot" },
"3": { votes: 0, label: "Laravel" },
"4": { votes: 0, label: "Flask" }
};
io.on("connection", (socket) => {
console.log("User", socket.id)
io.emit("update", frameworks);
socket.on("vote", (index) => {
if (frameworks[index]) {
frameworks[index].votes += 1;
}
io.emit("update", frameworks);
});
});
server.listen(port, () =>
console.log(`Listening at http:
);
|
Start your application using the following command.
node server.js
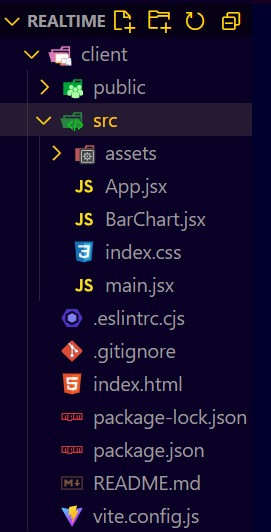
Steps to Create the Frontend:
Step 1: Initialize the React App with Vite and installing the required packages.
npm create vite@latest -y
Step 2: Navigate to the root of the project using the following command.
cd client
Step 3: Install the necessary package in your project using the following command.
npm install socket.io-client @mui/x-charts
Step 4: Install the node_modules using the following command.
npm install
Project Structure:
The updated dependencies in package.json file of frontend will look like:
"dependencies": {
    "@mui/x-charts": "^6.19.5",
    "react": "^18.2.0",
    "react-dom": "^18.2.0",
    "socket.io-client": "^4.7.4"
},
"devDependencies": {
    "@types/react": "^18.2.56",
    "@types/react-dom": "^18.2.19",
    "@vitejs/plugin-react": "^4.2.1",
    "eslint": "^8.56.0",
    "eslint-plugin-react": "^7.33.2",
    "eslint-plugin-react-hooks": "^4.6.0",
    "eslint-plugin-react-refresh": "^0.4.5",
    "vite": "^5.1.4"
}
Example: Write the following code in frontend files of the project
CSS
.bar {
display: flex;
justify-content: center;
width: 100%;
}
h1 {
text-align: center;
margin: 40px;
}
h3 {
text-align: center;
}
h4 {
text-align: center;
}
.myButton {
box-shadow: 0px 10px 14px -7px #3e7327;
background: linear-gradient(to bottom, #77b55a 5%, #72b352 100%);
background-color: #77b55a;
border-radius: 4px;
border: 1px solid #4b8f29;
display: inline-block;
cursor: pointer;
color: #ffffff;
font-family: Arial;
font-size: 16px;
font-weight: bold;
padding: 6px 12px;
text-decoration: none;
text-shadow: 0px 1px 0px #5b8a3c;
}
.myButton:hover {
background: linear-gradient(to bottom, #72b352 5%, #77b55a 100%);
background-color: #72b352;
}
.myButton:active {
position: relative;
top: 1px;
}
.btn {
display: flex;
width: 60%;
justify-content: space-around;
gap: 30px;
margin: auto;
}
|
Javascript
import {
useEffect,
useMemo,
} from "react"
import Bar from "./BarChart.js"
import { io } from 'socket.io-client'
function App() {
const socket = useMemo(() =>
useEffect(() => {
socket.on('connect', () =>
console.log(socket.id))
socket.on('connect_error', () => {
setTimeout(() =>
socket.connect(), 5000)
})
return () => {
socket.off('connect', () =>
console.log("connected"));
socket.off('disconnect', () =>
console.log("connected"));
};
}, [])
return (
<>
<h1>GFG Real-Time Polling App</h1>
<Bar socket={socket} />
</>
)
}
export default App
|
Javascript
import * as React from 'react';
import {
BarChart
} from '@mui/x-charts/BarChart';
export default function Bar({ socket }) {
const [DT, setData] = React.useState([]);
React.useEffect(() => {
socket.on('update', (frameworks) => {
const newData = []
for (const key in frameworks) {
if (frameworks.hasOwnProperty(key)) {
const { votes, label } = frameworks[key];
newData.push(votes)
}
}
setData(newData)
})
}, [])
const updateVote = (id) => {
socket.emit('vote', id)
}
return (
<>
<h4>Most Popular Backend Frameworks 2024</h4>
<div className='bar'>
<BarChart
width={800}
height={350}
series={[
{
data: DT.length > 0 ?
DT : [0, 0, 0, 0, 0],
id: 'uvId', label: 'Votes'
},
]}
xAxis={[{
data: ["Django", "Express.js",
"Spring Boot", "Laravel", "Flask"],
scaleType: 'band'
}]}
/>
</div>
<h3><u>Cast Vote</u></h3>
<div className='btn'>
<button className='myButton'
onClick={() => updateVote(0)}>
Django
</button>
<button className='myButton'
onClick={() => updateVote(1)}>
Express.js
</button>
<button className='myButton'
onClick={() => updateVote(2)}>
Spring Boot
</button>
<button className='myButton'
onClick={() => updateVote(3)}>
Laravel
</button>
<button className='myButton'
onClick={() => updateVote(4)}>
Flask
</button>
</div>
</>
);
}
|
To start client server:
npm run dev
Output:
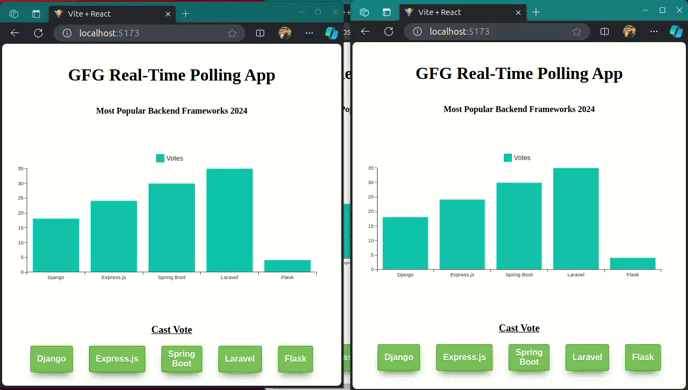
Output
Share your thoughts in the comments
Please Login to comment...