In November 2015, Google’s deep artificial intelligence research division introduced TensorFlow, a cutting-edge machine learning library initially designed for internal purposes. This open-source library revolutionized the field, which helped researchers and developers in building, training, and deploying machine learning models. With TensorFlow, the implementation of various machine learning algorithms and deep learning applications, including image recognition, voice search, and object detection, became seamlessly achievable. In this article, we will delve into the methodologies of object detection leveraging TensorFlow’s capabilities.
What is Object Detection?
A computer vision methodology or technique called object detection is used to find and identify things in pictures or video frames. This entails determining the area in which the object is most likely to be located, utilizing boundary boxes to locate the coordinates of each thing that is found, and labeling the object (e.g., male, female, bicycle, motorbike). Either custom model development or pre-trained models can be used to achieve this.
Approaches to build Object Detection Model
In object detection involves image processing in which we identify and locate objects within an image or video frame. Generally image processing in deep neural network is done with the help of convolutional neural networks (CNNs), using these we can either use a pre-built convolutional neural networks architecture model or we can create our custom convolutional neural networks architecture model to do object detection
- Creating & Training a Custom Object Detection Model: To create and train a custom object detection model from scratch. We need to create a model architecture through which the model will learn to extract features like objects of interest to do so. We also required a large label data set in which we will be manually labeling the objects in images or a frame in a video, and we might also need to set up the layer weights in the CNN. This whole process will take a very long time and is hard for a beginner.
- Use a Pretrained Object Detection Model: Using pre-trained models will reduce the tedious work of creating model architectures and hyperparameter tuning. Leveraging these pre-trained models, we can tap into their expertise in object detection and fine-tune them for our specific application. This approach can lead to quicker results since these detectors have already been trained on thousands, if not millions, of images.
Workflow of Object Detection
Whether we create a custom object detection model or use a pretrained one, we will need to decide what type of object detection network we want to use:
- Two-Stage Network
- Single-Stage Network
Two-Stage Networks
In Two-Stage Network, we have two stages for processing the prediction, where in stage 1, the model uses the CNN and its variants to identify region proposals (it is the subset of images that may contain an object). After this stage, i.e., in stage 2, the model uses classification and regression to classify and draw boundaries for region proposals.
.webp)
Two-Stage Networks
- Input Preprocessing: In this stage, input images are resized to a fixed size, and pixel values are normalized. Data augmentation techniques may also be employed, using which datasets can be enhanced to capture more variation in input images by adding variations such as rotation, flipping, or brightness adjustments.
- Feature Extraction: The processed image is then passed to a pre-built CNN, which will extract relevant features. In this CNN, we have two types of layers: convolutional layers, which detect edges, shapes, and patterns in the image, and pooling layers, which reduce spatial dimensions and capture invariant features.
- Region Proposal: In this step, we predict candidate regions representing the potential object location or region of interest with the help of the Region Proposal Network (RPN).
- RoI Pooling or RoI Align: After identifying candidate regions, each candidate region is extracted from the feature maps and resized to a fixed size using RoI pooling or RoI align, ensuring that features for each region are spatially aligned.
- Classification and Regression Head: Afterwards, the features of the region are supplied into distinct heads for regression and classification. Each potential region is given a class label by the classification head, and each region’s object’s box coordinates (x, y, width, and height) are refined by the regression head.
- Non-Maximum Suppression (NMS): Now to eliminate redundant detections, NMS is applied to filter out duplicate predictions with high overlap.
- Output Prediction: A collection of bounding boxes representing the detected items in the image, along with the matching class labels, makes up the final output.
Post-processing:
If required, additional post-processing steps might be applied, such as applying thresholds to confidence scores or filtering out predictions based on specific criteria.
Note: These models are slower compared to Single-Stage Network Models but can achieve high accuracy.
Single-Stage Networks
Unlike object detection with Two-Stage Networks which relies external region proposal networks (RPNs) or other methods to generate candidate regions, Single models use a predefined set of anchor boxes to generate candidate regions which can be decoded to generate the final bounding boxes for the objects
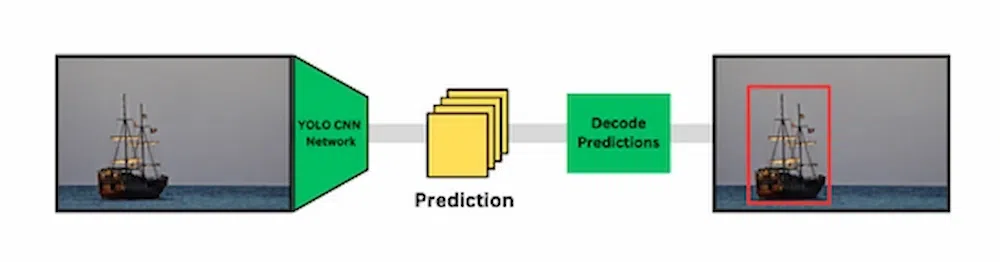
- Input Preprocessing: The input image is resized to a fixed size and pixel values are normalized. Some models also employ data augmentation techniques to enhance the dataset.
- Feature Extraction: The processed image is then passed to a pre-built CNN, which will extract relevant features. In this CNN, we have two types of layers: convolutional layers, which detect edges, shapes, and patterns in the image, and pooling layers, which reduce spatial dimensions and capture invariant features.
- Anchor Boxes/Default Boxes: To predict the candidate regions, instead of relying on external region proposal networks (RPNs) or other methods to generate candidate regions, these models use a predefined set of anchor boxes or default boxes. These boxes are designed to cover a range of object sizes and aspect ratios.
- Bounding Box Prediction: Each anchor box predicts bounding box coordinates (x, y, width, and height) and a confidence score for object detection. The confidence score represents the model’s confidence that an object is present within the anchor box.
- Non-Maximum Suppression (NMS): To eliminate redundant detections, NMS is applied to filter out duplicate predictions with high overlap.
- Output Prediction: The output consist of a collection of bounding boxes representing the detected items in the picture, along with the matching class labels.
Post-processing:
If needed additional post-processing steps may be applied, such as applying thresholds to confidence scores or filtering out predictions based on specific criteria.
Note: Thses single-stage networks have higher speeds than two-stage networks, but may not achieve the same precision, in cases such as images having little objects.
Object Detection Using Tensorflow
Using the TensorFlow Object Detection API, we can easily do object detection. We can download the model suitable to our system capabilities from the TensorFlow API GitHub Repository. Here is a step-by-step procedure to use TensorFlow for Object Detection:
TensorFlow Object Detection API
TensorFlow offers an Object Detection API that makes object detection simple to implement. It comes with a number of pre-trained models and tools that make it quick and easy for developers to build, train, and deploy object detection models.
Create a Project Directory
Under a path of your choice, create a new folder. Name it Tensorflow.
Clone TensorFlow Models Repository
The TensorFlow Models repository contains the code for various object detection models. We’ll clone this repository in our project directory. Open a terminal in the project directory to clone the TensorFlow Models Repository using the following command:
git clone https://github.com/tensorflow/models.git
After getting this API in your system, rename the folder from models-master to models
Installing dependencies
The next step is to install all the dependencies needed for this API to work on your local PC. Type this command after activating your virtual environment.
pip install tensorflow pillow Cython lxml jupyter matplotlib contextlib2 tf_slim
If you have a GPU in your PC, use this instead. You will have a better performance
pip install tensorflow-gpu pillow Cython lxml jupyter matplotlib contextlib2 tf_slim
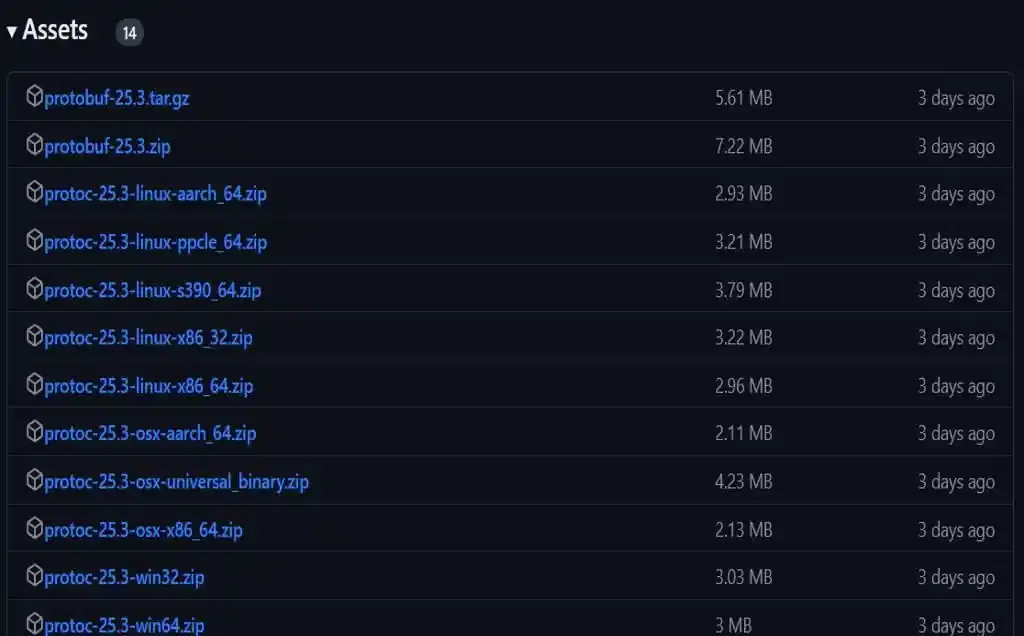
Protobuf Installation/Compilation
Now we need to download Protocol Buffers (Protobuf) the tensorflow object detection model uses protuff to configure a model and the training parameters before the framework can be used the Proto libraries must be compiled. Download the appropriate version of Protobuf from protocolbuffers/protobuf Github repository and extract it in project directory. After extracting it, Go to bin folder of protobuf copy the path and add it to Environment Variables.
Now use Protobuf to compile all proto files into Python files. To do so, first direct to the research sub-folder in models using the cd command:
cd ‘path of research folder’
Run following command:
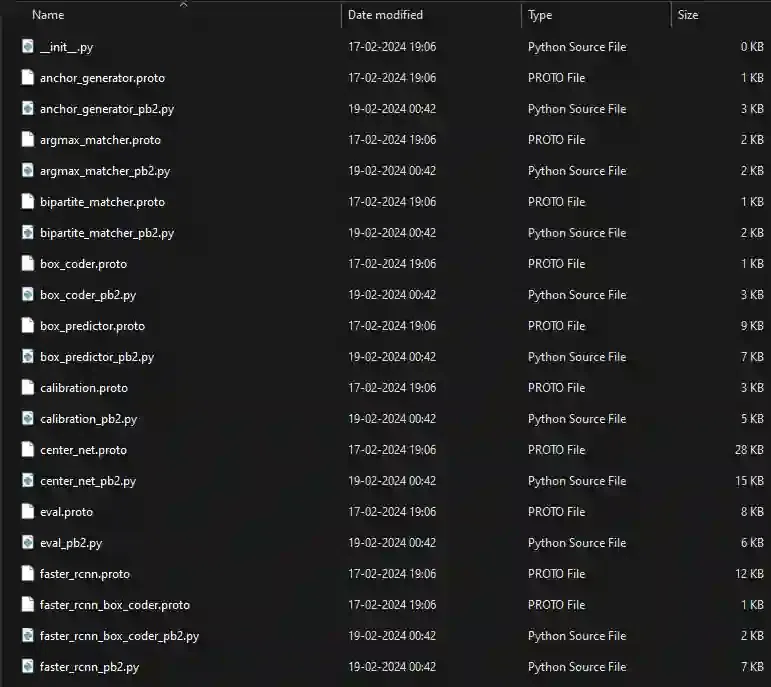
protoc object_detection/protos/*.proto –python_out=.
To check whether this worked or not, you can go to the protos folder inside models/research/object_detection/protos and there you can see that for every proto file there’s one python file created.
Install TensorFlow Object Detection API
To install the TensorFlow Object Detection API, copy the setup.py located in “object_detection/packages/tf2” directory using this command:
cp object_detection/packages/tf2/setup.py .
then
python -m pip install .
The first command copies the file setup.py from the directory “object_detection/packages/tf2” to the current directory. The second command installs the TensorFlow Object Detection API using pip. This will make the API available.
Import necessary libraries and modules
Create a new python script in directory “models/research/object_detection”, import the necessary libraries and modules in it:
Python3
import numpy as np
import os
import six.moves.urllib as urllib
import sys
import tarfile
import tensorflow as tf
import zipfile
import pathlib
from collections import defaultdict
from io import StringIO
from matplotlib import pyplot as plt
from PIL import Image
from IPython.display import display
from object_detection.utils import ops as utils_ops
from object_detection.utils import label_map_util
from object_detection.utils import visualization_utils as vis_util
|
Select Model for Object Detection
Create a method called load_model() that downloads and loads the requested model from the TensorFlow Object Detection Model Zoo. Based on the system specifications, choose the model for object detection from the TensorFlow Object Detection Model Zoo and save it in the model_name variable. Build a variable called PATH_TO_LABELS as well, and assign it the path to the label map file.

Python3
while "models" in pathlib.Path.cwd().parts:
os.chdir('..')
def load_trained_model(trained_model_name):
model_file = trained_model_name + '.tar.gz'
model_dir = tf.keras.utils.get_file(
fname=trained_model_name,
origin=base_url + model_file,
untar=True
)
model_dir = pathlib.Path(model_dir)/"saved_model"
model = tf.saved_model.load(str(model_dir))
return model
PATH_TO_LABELS = 'models/research/object_detection/data/mscoco_label_map.pbtxt'
category_index = label_map_util.create_category_index_from_labelmap(PATH_TO_LABELS, use_display_name=True)
trained_model_name = 'faster_rcnn_resnet101_coco_2018_01_28'
detection_model = load_trained_model(trained_model_name)
|
Now let’s creat two more functions
- display_inference_results(model, image_path): This function reads an image from the given image_path and then runs the object detection on that image using the run_inference_for_single_image function. After that, it visualizes the detected objects on the image by drawing bounding boxes around them and labeling the detected objects with their class names and confidence scores. Finally, it displays the resulting image with the detected objects.
- run_inference_for_single_image(model, image): This function takes a pre-trained TensorFlow model and an input image as parameters and performs object detection on the image. The function converts the input image into a tensor, adds a batch dimension, and then passes the tensor to the loaded TensorFlow model for inference. It retrieves the detection results from the output dictionary of the model, processes the results, and returns them in a dictionary format.
Python3
def run_inference_for_single_image(model, image):
image = np.asarray(image)
input_tensor = tf.convert_to_tensor(image)
input_tensor = input_tensor[tf.newaxis,...]
model_fn = model.signatures['serving_default']
output_dict = model_fn(input_tensor)
num_detections = int(output_dict.pop('num_detections'))
output_dict = {key:value[0, :num_detections].numpy()
for key,value in output_dict.items()}
output_dict['num_detections'] = num_detections
output_dict['detection_classes'] = output_dict['detection_classes'].astype(np.int64)
if 'detection_masks' in output_dict:
detection_masks_reframed = utils_ops.reframe_box_masks_to_image_masks(
output_dict['detection_masks'], output_dict['detection_boxes'],
image.shape[0], image.shape[1])
detection_masks_reframed = tf.cast(detection_masks_reframed > 0.5,
tf.uint8)
output_dict['detection_masks_reframed'] = detection_masks_reframed.numpy()
return output_dict
def display_inference_results(model, image_path):
image_np = np.array(Image.open(image_path))
output_dict = run_inference_for_single_image(model, image_np)
vis_util.visualize_boxes_and_labels_on_image_array(
image_np,
output_dict['detection_boxes'],
output_dict['detection_classes'],
output_dict['detection_scores'],
category_index,
instance_masks=output_dict.get('detection_masks_reframed', None),
use_normalized_coordinates=True,
line_thickness=8)
display(Image.fromarray(image_np))
|
Now we will test it with set of images, initially when we clone the TensorFlow Repository we get bunch of test images which are inside the object_detection/test_images folder. Thse images can be used to test the model. We can put our Images also for which we want to located objects and run the following code to get results.
Python3
PATH_TO_TEST_IMAGES_DIR = pathlib.Path('models/research/object_detection/test_images')
TEST_IMAGE_PATHS = sorted(list(PATH_TO_TEST_IMAGES_DIR.glob("*.jpg")))
|
Output:
.webp)

Conclusion
In conclusion, we covered TensorFlow, its applications. We explained Object Detection, a key aspect of Computer Vision, and its applications in various fields. We discussed two approaches for building Object Detection models and introduced popular pre-trained models. Finally, we provided a step-by-step guide on using the TensorFlow Object Detection API to implement Object Detection models.
Share your thoughts in the comments
Please Login to comment...