JUnit 5 – @Timeout
Last Updated :
03 Jan, 2024
The @Timeout annotation in JUnit restricts the duration of test and lifecycle methods. It aids in ensuring that a test procedure is completed according to the planned timetable. TimeoutExceptions occur when the duration of the test method exceeds the specified limit.
Any JUnit test or lifecycle method can utilize @Timeout. Add the @Timeout annotation to the class declaration to set a global timeout for all tests. To override the global timeout, apply the @Timeout annotation to a specific test method.
There are a few circumstances when using JUnit’s @Timeout annotation might be beneficial:
- Slow network calls: If your test procedure makes a network call to an outside service, you might wish to set up a timeout to ensure that the test method fails in the case that the outside service is down or runs slowly.
- Extended testing: If your test method takes a long time to finish, you might want to include a timeout to make sure it doesn’t affect the way other tests are run.
- Deadlocks: If the test function contains several threads and there’s a potential of a deadlock, you might want to add a timeout to ensure it doesn’t run forever.
- Infinite loops: If the test function has an infinite loop, you may wish to specify a timeout to ensure that it does not continue indefinitely.
Implementation of @Timeout in JUnit 5
We’ll see some methods for implementing the @Timeout annotation in JUnit using Eclipse. If you don’t have Eclipse, ensure you have a platform that supports writing and executing JUnit tests. We’ll demonstrate how to use @Timeout to test methods implemented within your project, providing a reference for crafting tests for your existing methods.
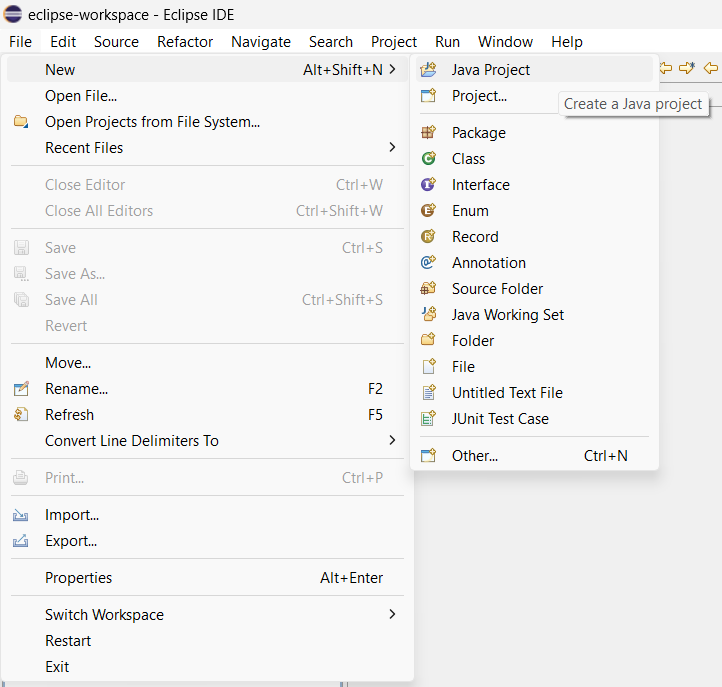
Within Eclipse IDE, these are the initial steps:
Step 1: Create a Java project.
Step 2: Under the src folder, create a package named timeoutTest.
- Within this package, create two classes:
- The first class will contain the methods you want to test.
- The second class will serve as your test class.
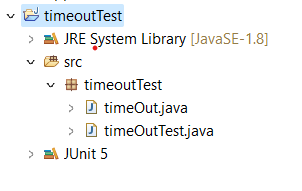
Note: This is a sample structure for implementing JUnit’s @Timeout feature. Your actual project environment may differ.
Now, we’ll shift our focus to the timeOutTest.java class to write tests and observe the behavior of @Timeout in various scenarios.
Section 1: Using Timeout() annotation
Test 1: Demonstrates using Timeout annotation with Thread.sleep
Checks if a method finishes within 6 seconds using Thread.sleep to delay for 5 seconds. It should pass.
Java
@Test
@Timeout(6)
public void test1() throws InterruptedException {
Thread.sleep(5000);
System.out.println("Test1 Passed within the time");
}
|
Test 2: Demonstrates using Timeout annotation with TimeUnit.SECONDS.sleep
Same as Test 1 but employs TimeUnit.SECONDS.sleep to imitate the delay. It should also pass.
Java
@Test
@Timeout(6)
public void test2() throws InterruptedException {
TimeUnit.SECONDS.sleep(5);
System.out.println("Test2 Passed within the time");
}
|
Section 2: Using Assertions
Test 3: Demonstrates using Assertions.assertTimeout
Uses Assertions.assertTimeout to confirm a procedure completes inside 7 seconds. It mimics a 6-second delay using a helper method and should pass.
Java
@Test
public void test3() {
Assertions.assertTimeout(Duration.ofSeconds(7), () -> delaySeconds(6));
System.out.println("Test3 Passed within the time");
}
private void delaySeconds(int seconds) throws InterruptedException {
TimeUnit.SECONDS.sleep(seconds);
}
|
Section 3: Demonstrating timeout failures
Test 4: Using Assertions.assertTimeout to handle timeout failure.
Expects a timeout failure since it asserts a 4-second timeout but delays for 5 seconds using Thread.sleep.
Java
@Test
public void test4() {
Assertions.assertTimeout(Duration.ofSeconds(4), () -> {
try {
Thread.sleep(5000);
} catch (InterruptedException e) {
}
});
}
|
Test 5: Same as Test 4, using TimeUnit.SECONDS.sleep
Similar to Test 4 but utilizes TimeUnit.SECONDS.sleep for the delay. It should also fail.
Java
@Test
public void test5() {
Assertions.assertTimeout(Duration.ofSeconds(4), () -> {
try {
TimeUnit.SECONDS.sleep(5);
} catch (InterruptedException e) {
}
});
}
|
Test 6: Using Assertions.assertTimeout with a shorter timeout than delay
Another expected timeout failure, asserting a 5-second timeout for a 6-second delay using a helper function.
Java
@Test public void test6()
{
Assertions.assertTimeout(Duration.ofSeconds(5),() -> delaySeconds1(6));
}
private void delaySeconds1(int seconds) throws InterruptedException
{
TimeUnit.SECONDS.sleep(seconds);
}
|
Final timeOutText.java will be :
Java
package timeoutTest;
import java.time.Duration;
import java.util.concurrent.TimeUnit;
import org.junit.jupiter.api.Assertions;
import org.junit.jupiter.api.Test;
import org.junit.jupiter.api.Timeout;
class TimeOutTest {
@Test
@Timeout(6)
public void test1() throws InterruptedException {
Thread.sleep(5000);
System.out.println("Test1 Passed within the time");
}
@Test
@Timeout(6)
public void test2() throws InterruptedException {
TimeUnit.SECONDS.sleep(5);
System.out.println("Test2 Passed within the time");
}
@Test
public void test3() {
Assertions.assertTimeout(Duration.ofSeconds(7), () -> delaySeconds(6));
System.out.println("Test3 Passed within the time");
}
private void delaySeconds(int seconds) throws InterruptedException {
TimeUnit.SECONDS.sleep(seconds);
}
@Test
public void test4() {
Assertions.assertTimeout(Duration.ofSeconds(4), () -> {
try {
Thread.sleep(5000);
} catch (InterruptedException e) {
}
});
}
@Test
public void test5() {
Assertions.assertTimeout(Duration.ofSeconds(4), () -> {
try {
TimeUnit.SECONDS.sleep(5);
} catch (InterruptedException e) {
}
});
}
@Test
public void test6() {
Assertions.assertTimeout(Duration.ofSeconds(5), () -> delaySeconds1(6));
}
private void delaySeconds1(int seconds) throws InterruptedException {
TimeUnit.SECONDS.sleep(seconds);
}
}
|
Video Demo Execution
Let’s see how the execution of all six written tests happens in this article:
FAQs pertaining to JUnit’s @Timeout annotation
1. What is the @Timeout annotation’s primary function?
It acts as a safety precaution to keep testing from going too long. It’s similar to giving your tests a time limit and making sure they finish within that window.
2. What is the proper way to use @Timeout in my tests?
It’s really very easy! You have two options:
- Include it in several test techniques: This creates a timeout just for that particular test.
- Use it throughout the entirety of the test class: This includes an additional global timeout for every test in that class.
3. What occurs when an exam goes beyond the allotted time?
TimeoutException will be raised, informing you that the operation took too long to finish.
4. When is the best time to use @Timeout?
It’s especially useful in situations like:
- Slow network calls
- Extended testing
- Possible impasses
- Endless loops
Share your thoughts in the comments
Please Login to comment...