JUnit 5 – @BeforeEach
Last Updated :
13 Dec, 2023
JUnit 5 is a widely used testing framework in the Java ecosystem. It is the successor of JUnit 4 and is designed to address its limitations. JUnit framework allows the developers to write and run the tests for their Java code. These tests help ensure that the code functions correctly and continues to work as expected as changes are made.
JUnit 5 provides a variety of annotations and one such annotation is @BeforeEach. In this article, let us understand about @BeforeEach annotation in JUnit 5.
@BeforeEach in JUnit 5
@BeforeEach annotation in JUnit 5 is used to mark a method that should execute before each test method in the JUnit test case. It is used to provide initialization for set-up tasks.
Example for @BeforeEach
Below is the implementation of @BeforeEach :
Java
import org.junit.jupiter.api.BeforeEach;
public class Testcase1 {
@BeforeEach void test()
{
}
@Test public void testMethod2()
{
}
}
|
Prerequisites:
To understand this, we need to have some prerequisites. They are:
- Java 8
- Maven or Gradle.
- Java IDE such as Eclipse, IntelliJ IDEA, or Visual Studio Code.
IDE Setup
Here, we are using Eclipse IDE for Java and Web Developers 2023-06. You may also use other platforms like IntelliJ, Spring suite tool, Spring Initializer, etc.
Step By Step Implementation
Step 1: Creation of Project
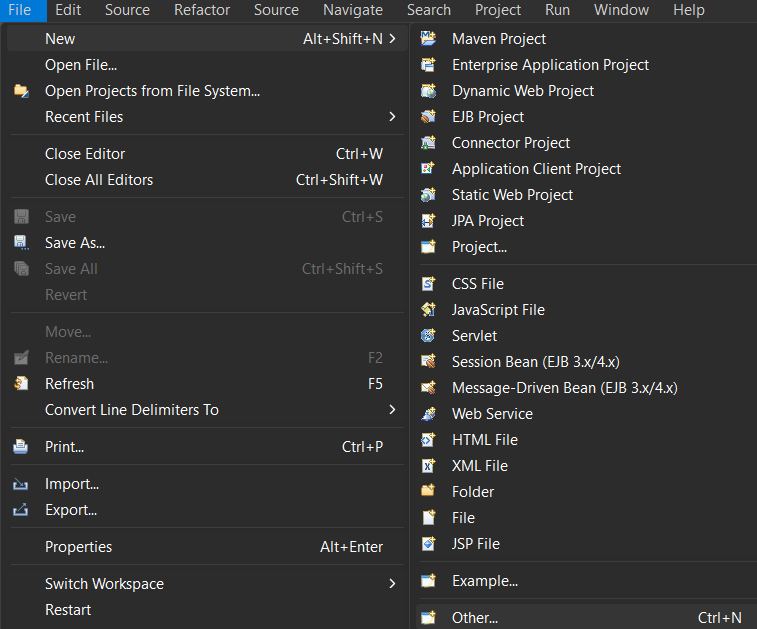
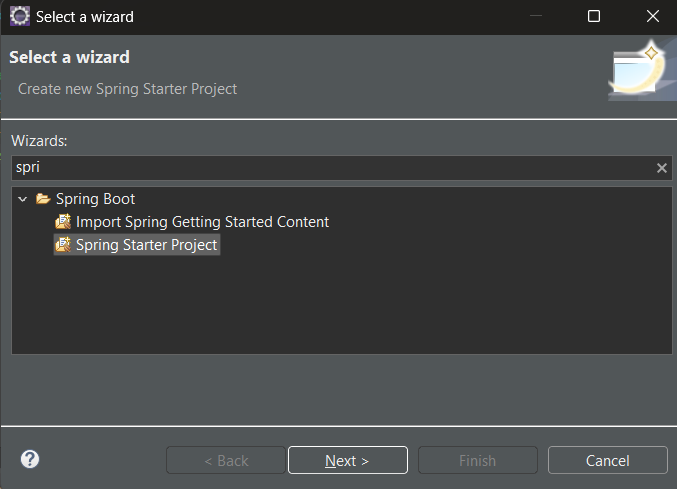
- Go to the file menu click new and navigate to Spring Starters project. If you don’t find the Spring Starters project immediately after the new one, then click other and find the Spring Starters project.
- File > new > Spring Starters project.
- Configuration for the new Spring Starter Project is below
- Name your project and configure the default options given if necessary.
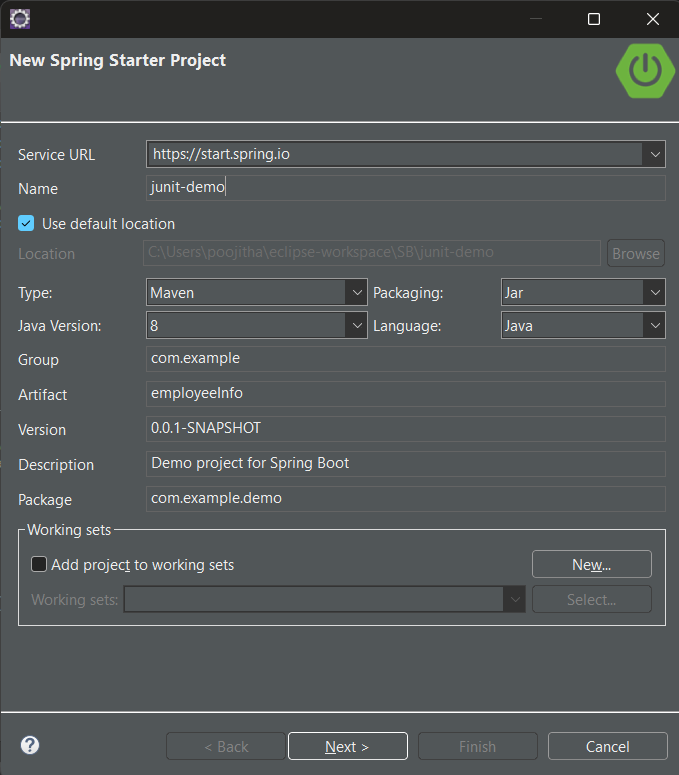
Recommended Configurations:
For testing for JUnit testing are as follows:
- Type: Maven
- Packaging: Jar
- Java Version: 8
- Language: Java
- Make sure that, you have chosen the type as Maven and the version of Java should be at least 8.
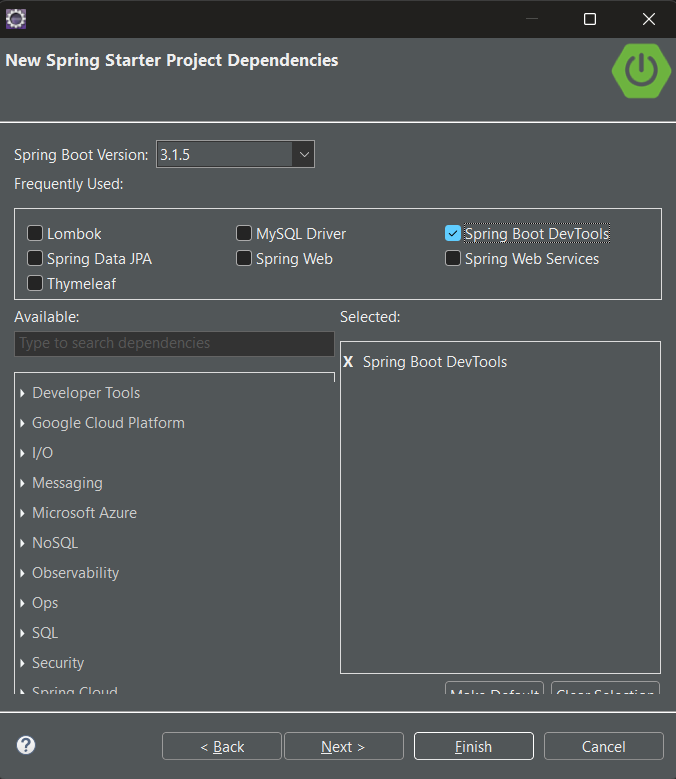
- Add dependencies If you need any, otherwise, click finish.
Step 2: Adding dependencies
Let us configure our pom.xml file with the following dependencies:
JUnit Jupiter API:
The JUnit Jupiter API is the part of JUnit 5 framework which provides annotations, assertions, and other features for defining and running test cases and serves as a programming model for writing tests in Java. To add the JUnit Jupiter API in the pom.xml file, copy and paste the following code.
XML
<dependency>
<groupId>org.junit.jupiter</groupId>
<artifactId>junit-jupiter-api</artifactId>
<version>5.8.0</version>
<scope>test</scope>
</dependency>
|
Project Setup
Now, that the project setup is ready, let us look into an example to understand how to write and run test cases of JUnit using the Maven tool.
- Step 1: Create a new package in the src/test/java, right-click on src/test/java > new > package.
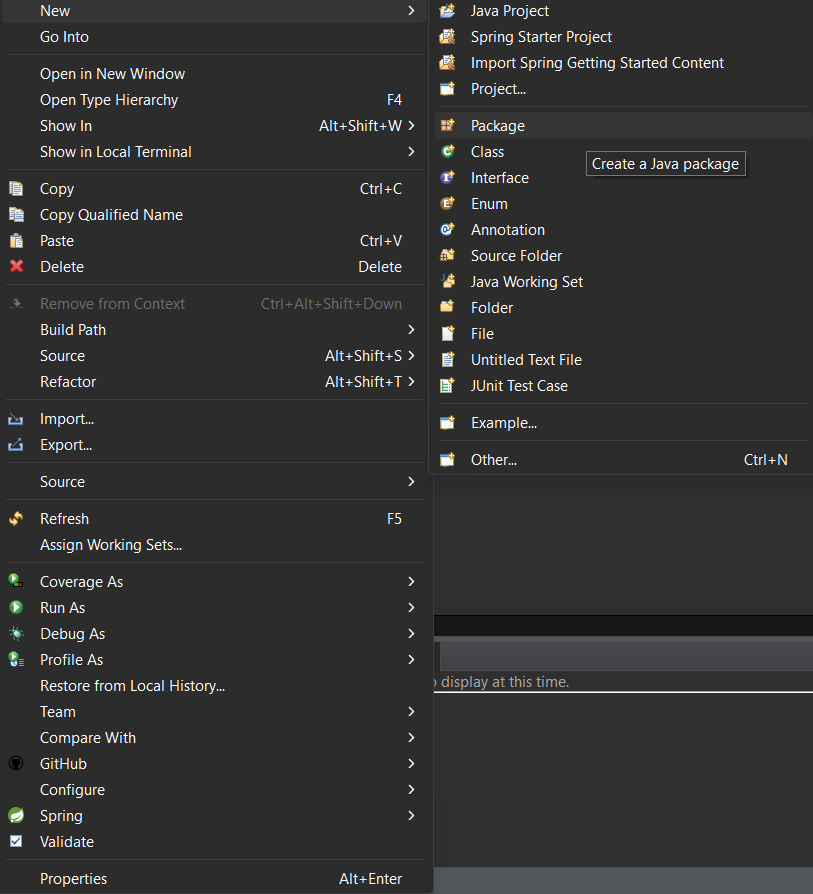
- Configuration for the New Java Package is below.

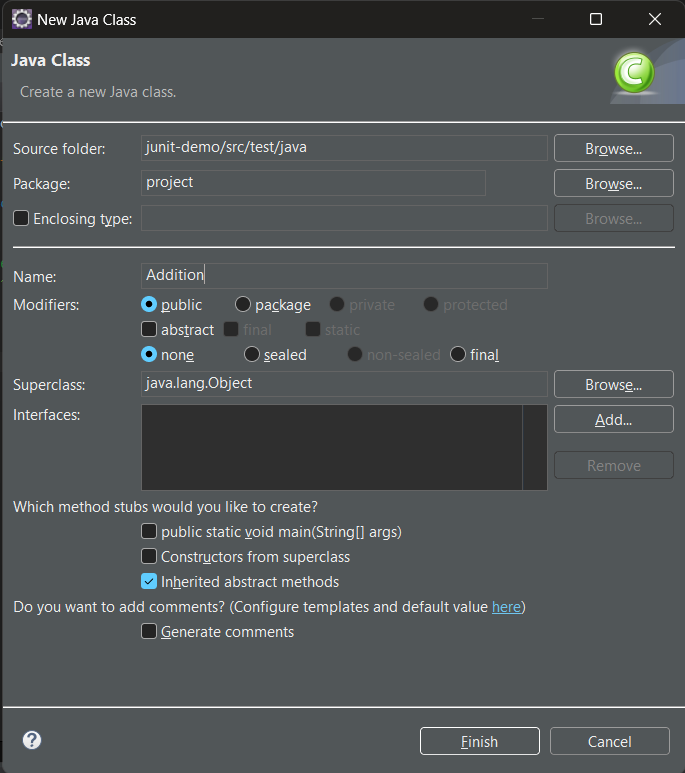
- Step 2: Create a class in the package and name it, for this illustration we will name it Addition.java to create a class, right-click on package > new > class.
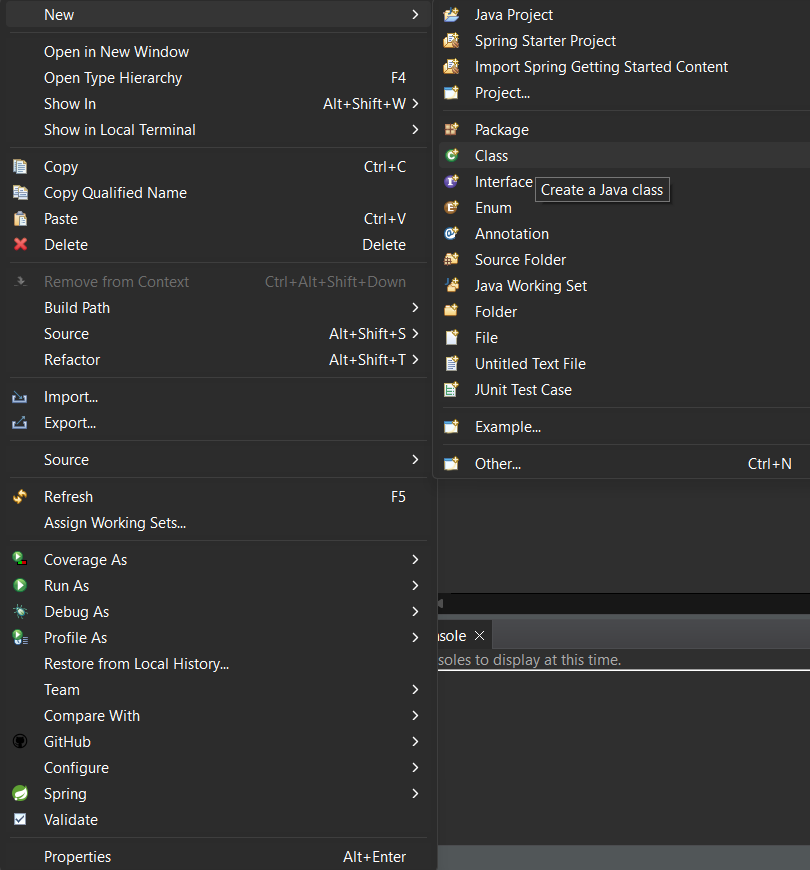
- Configuration for the New Java Class is below.
- Step 3: write the logic which you want to test in Addition.java
Java
package project;
public class Addition {
public int sum(int a, int b) { return a + b; }
}
|
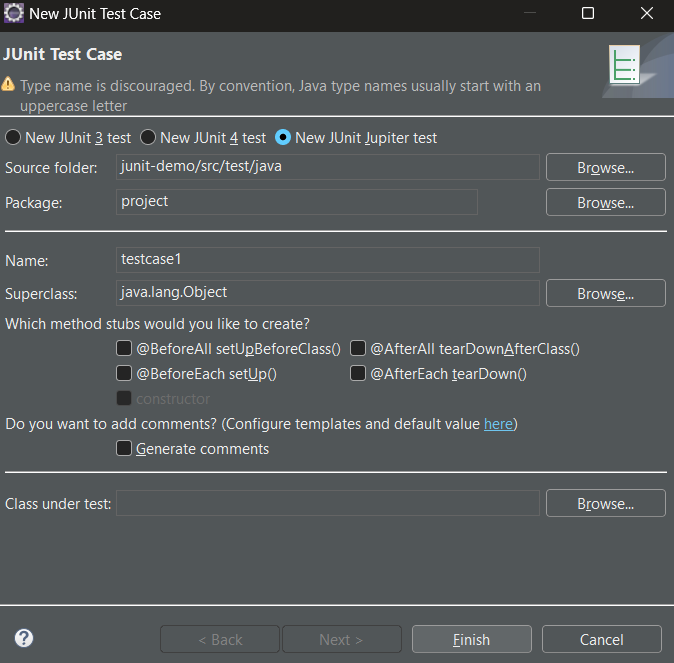
- Step 4: Now, create a test case inside the package by right-clicking on the package > new > others > java > JUnit > JUnit test case.
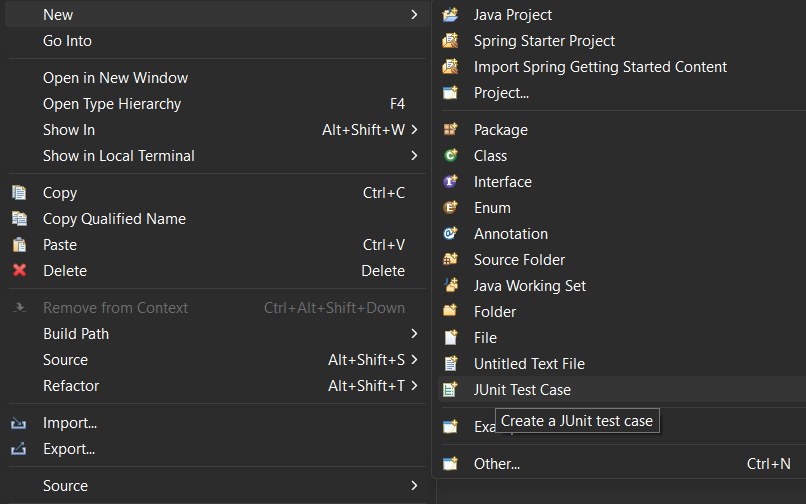
- Configuration for the New JUnit test Class is below.
Example:
Test Script: Let us write the first test case i.e. Testcase1, to test our Addition class using JUnit features.
Java
package project;
import static org.junit.jupiter.api.Assertions.*;
import org.junit.jupiter.api.BeforeEach;
import org.junit.jupiter.api.Test;
class Testcase1 {
public Addition addition;
@BeforeEach void setUp()
{
addition = new Addition();
}
@Test void test1()
{
int actual = addition.sum(2, 3);
int expected = 5;
assertEquals(actual, expected);
System.out.print("Test is executed");
}
@Test void test2()
{
int actual = addition.sum(2, 3);
int expected = 6;
assertEquals(actual, expected);
System.out.print("Test is executed");
}
}
|
Explanation:
- In the above code snippet Testcase1 class, we have defined a method setUp that is annotated with @BeforeEach
- The method annotated with @BeforeEach is marked to be executed before each test method.
- We have defined two test methods which are annotated with @Test i.e. test1, and test2.
- In the setUp method, the logic to initialize the addition object for the Addition.java class.
- In test1 and test2, we are not initializing the object for the Addition class again because that task is handled by the setUp method.
- In the test methods, we are using the assertEquals method to verify whether the calculated sum and expected sum are equal or not.
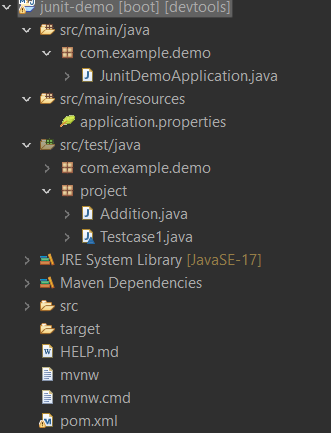
Project Structure (Recommended)
Ensure that you have followed this project structure to reduce the inconsistencies:
Steps to Run the Application:
To run the Spring Boot application, navigate to your project explorer, right-click on your project > run as > JUnit test case.

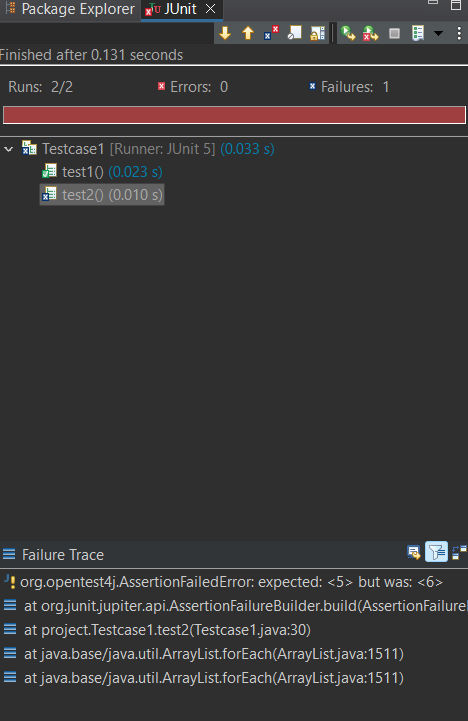
Output:
- JUnit view: test1 – successful execution because 2+3(actual) == 5(expected)

- test2 – it fails because 2+3(actual) != 6(expected)
- Console view: test1 – Successful execution message displayed
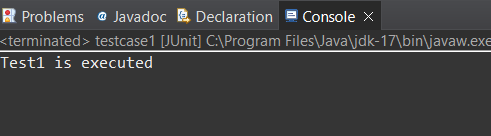
- test2: No console log is displayed, because the test2 fails
Share your thoughts in the comments
Please Login to comment...