How to work with Julia on Jupyter Notebook?
Last Updated :
14 Sep, 2021
Julia is a programming language that uses multiple dispatches as a feature where a method or a function can be dynamically dispatched based on the requirement. It is a high performance and a dynamic language which makes it user-interactive. It has a high-level syntax which makes it easy to learn and use for the beginner to expert level programmers. Julia is open-source, so anyone can use it for free.
Jupyter is an open-source project which provides an interactive environment for data science and scientific computations using many programming languages. It is web-based software and it is free for everyone to use. Jupyter notebooks are documents in which programmers can write live text or code in, and also implement visualizations.
What is the use of Jupyter for Julia?
Julia is a compiled language and is easy to write. Jupyter notebooks are used to implement programs and mathematical equations with Julia effectively with live data visualizations. By using the two of them, impressive tasks can be implemented even if the user has low programming knowledge.
Installation of Jupyter
The easiest way is to install it is through the application of Anaconda. The Anaconda distribution contains python, jupyter notebooks, and other packages for data science implementation. Click here and scroll down to download the latest appropriate version of Anaconda installation file for your operating system.
Detailed steps for installation and implementation of Jupyter notebook are provided in How to install Jupyter Notebook in Windows and Linux?
Steps for the addition of Julia workspace on Jupyter
Step 1: First, Julia has to be installed on your computer, it can be downloaded from its official site julialang.org and can be installed by following steps in How to Install Julia on Windows and Linux?
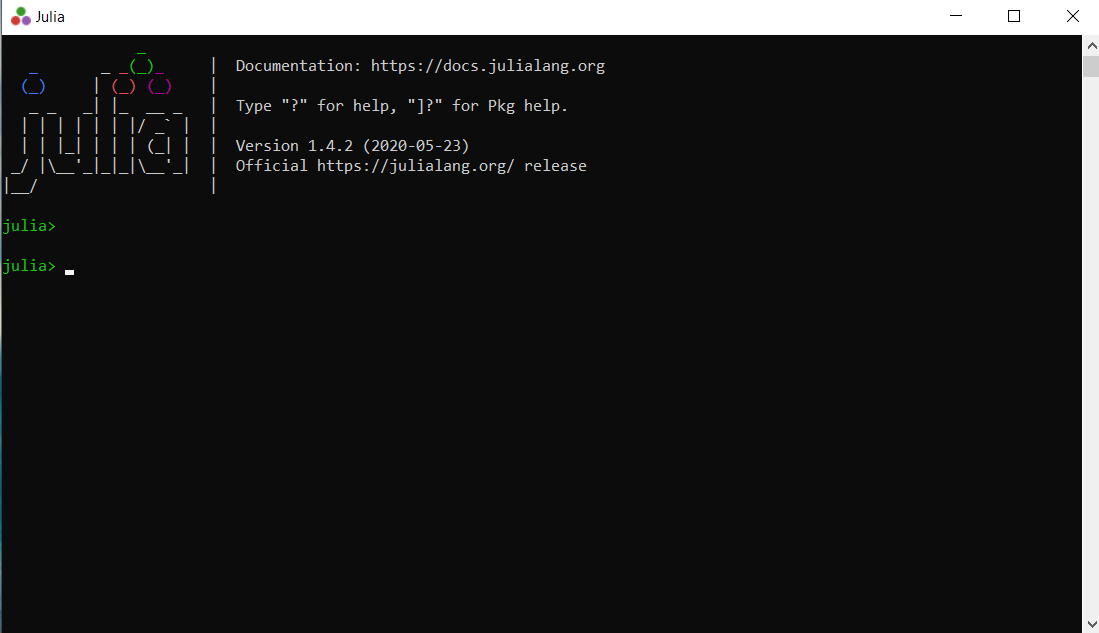
Step 2: After the installation, click on the Julia application and the following command prompt will appear:
Step 3: Now, the communication between Julia and Jupyter has to be established, for this enter the following commands in the prompt and press enter:
using Pkg
Pkg.add("IJulia")
This tells Julia to use the package manager and then to adds the package IJulia which establishes the connection between Jupyter and Julia. Julia takes some time to install the IJulia package and the end of the process should appear like in the image shown below:

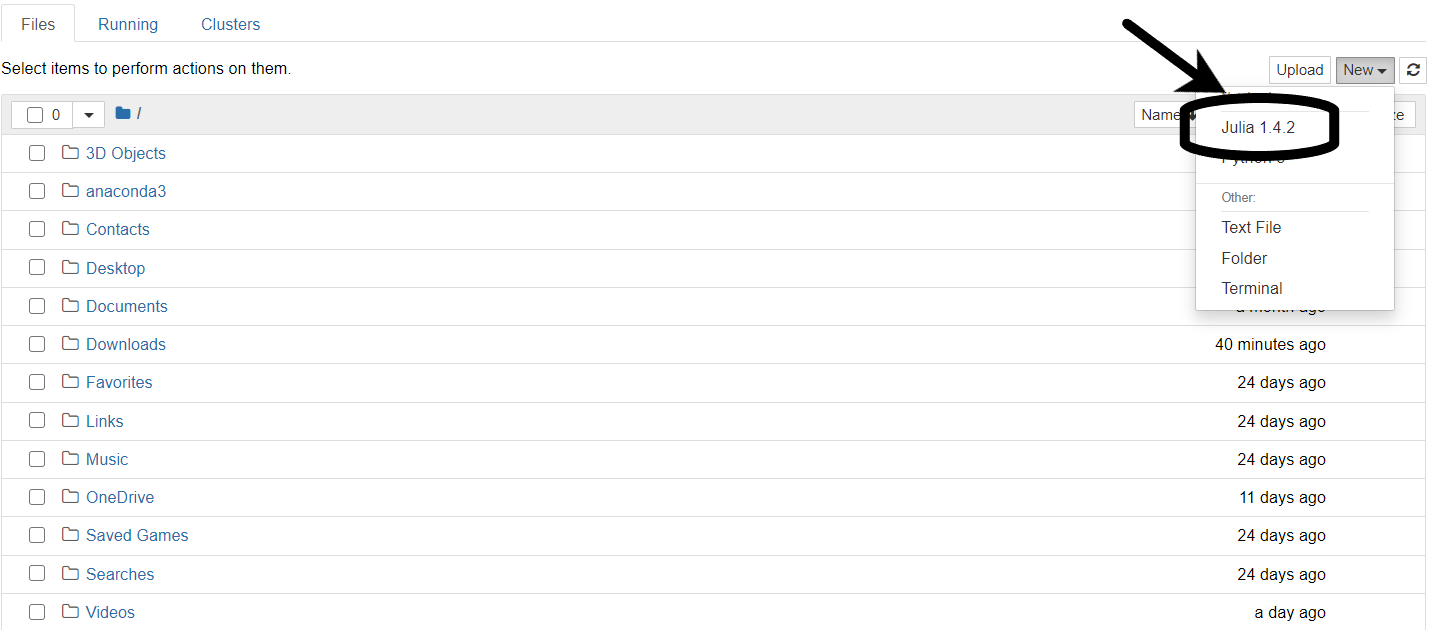
Step 4: We have established a connection between Julia and Jupyter and now a new Jupyter notebook can be created with Julia instead of Python. The option to select Julia will be present when the new notebook option is clicked as shown in the image below:
Step 5: Appropriate packages are also to be added to use Julia for required purposes. Commands to add some of the most commonly used packages are given below:
Pkg.add("DataFrames")
Pkg.add("CSV")
Pkg.add("Plots")
The packages mentioned above are to create and use data frames, read and write CSV files and use plots for visualization respectively.
Sample example code
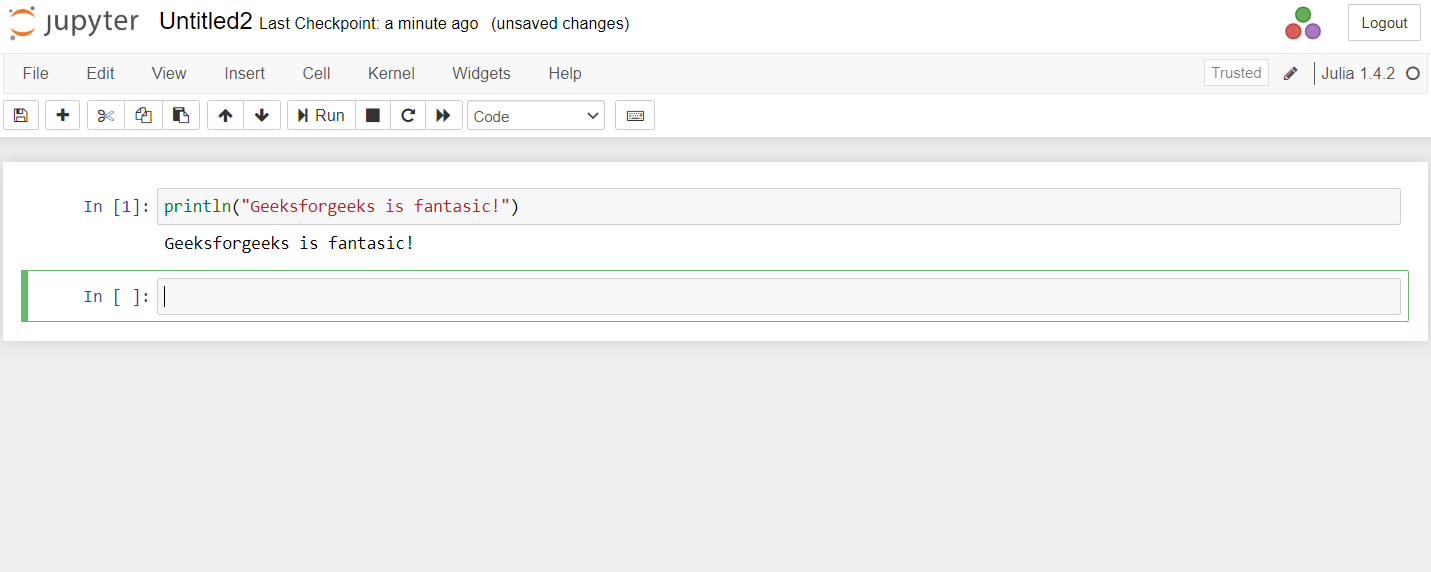
Now that the setup has been completed, we can go ahead and implement our first code in Julia on the Jupyter notebook. Example of a most basic print statement is given below:
Julia
println("Geeksforgeeks is fantastic!")
|
Output:
Geeksforgeeks is fantastic!
Following image shows the execution of the example in Jupyter notebook:
After installing the necessary packages for your purposes, you can experience the high-performance Julia language in Jupyter notebook.
Share your thoughts in the comments
Please Login to comment...