How To Integrate SonarQube With Jenkins?
Last Updated :
20 Mar, 2024
SonarQube is a code analysis tool that is used to find a number of bugs, duplications, security vulnerabilities, and many more. On the other hand, Jenkins is an open-source automation tool used to automate the build, test, and deploy stages of a software development lifecycle. Here in this, I have discussed what is SonarQube. Then I discussed what Jenkins is. After this, I have finally walked you through the different steps to integrate SonarQube with Jenkins and analyzed the code in a GitHub repository.
What is SonarQube?
SonarQube is a code analysis tool used for analyzing the quality of code. SonarQube generates a detailed report of code analysis on the SonarQube server. It analyzes the overall code to find the number of bugs, duplications, security vulnerabilities, security hotspots, and code smells. SonarQube can scan multiple programming languages, like Golang, Python, Java, and many more. This tool is used by various organizations to detect potential bugs and issues. SonarQube can be integrated with the CI/CD pipeline, which will help in the automatic generation of code analysis reports. Based on the report, developers can make changes in the code to fix potential errors and issues. In summary, we can say SonarQube is a powerful tool used for maintaining the quality of code and helping organizations deliver high-quality software.
What is Jenkins?
Jenkins is an automation tool that helps to automate the build, test, and deploy stages of software development. Jenkins has a very friendly user interface, which helps developers build and test their code more easily. Developers initially push any new code or new feature to the version control system (like Github, Gitlab, etc ). Jenkins then fetches the code from the version control system and stores it in the Jenkins workspace. Later on, the code is built and tested. If the new code is perfectly integrating with the old code, then the build status will be a success, but if the new code is not integrating with the old code, then the build status is a failure. Based on build status, developers know when to fix their code. Apart from this, Jenkins also reduces manual error and improves efficiency by automating all its build stages. With each update, Jenkins is becoming more reliable for automating the software development process. In summary, we can say Jenkins has become an essential tool for organizations to create CI/CD pipelines and accelerate their software development lifecycle.
Pre-requisites
Before moving on to the next section, make sure that you have installed Jenkins and SonarQube on your system. If not installed, follow these articles and resources to install Jenkins and SonarQube on your system.
Steps To Integrate SonarQube With Jenkins
Step 1: First go to Jenkins dashboard and download the SonarQube plugin. Then restart the Jenkins.

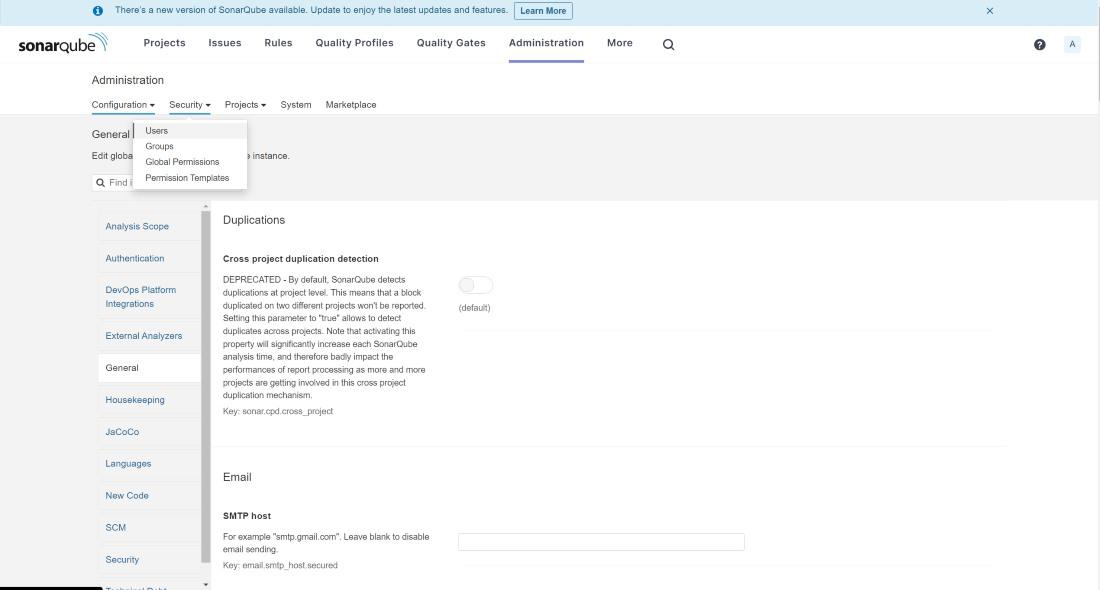
Step 2: Now go to sonarqube server . Here go to administration , then security and then select users.
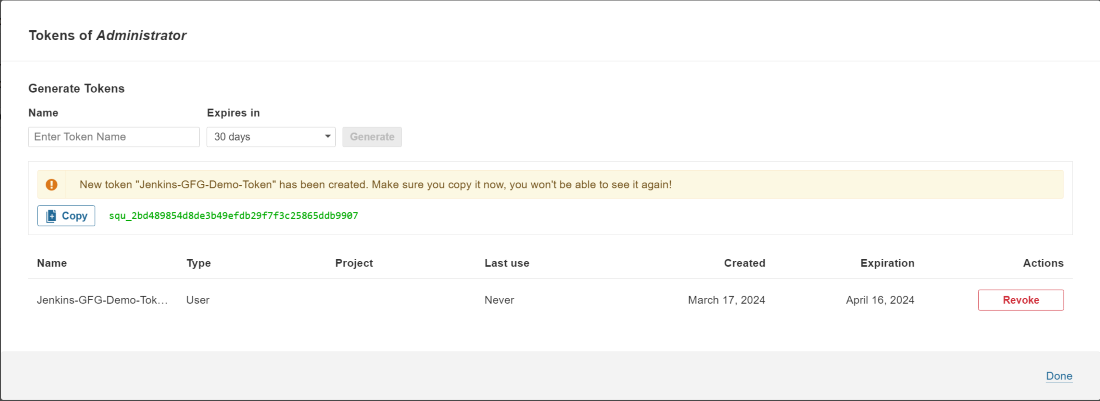
Step 3: Now create a token for Jenkins.
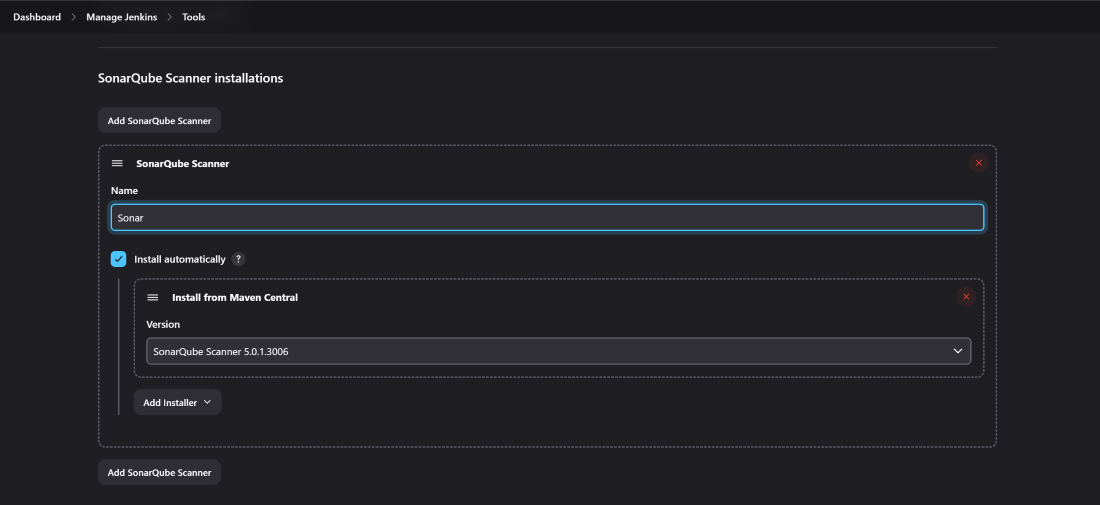
Step 4: Go to Jenkins dashboard and go inside the tools section. Here you setup a sonar scanner which will scan the code.
Step 5: Now go into system section to configure sonarqube server.

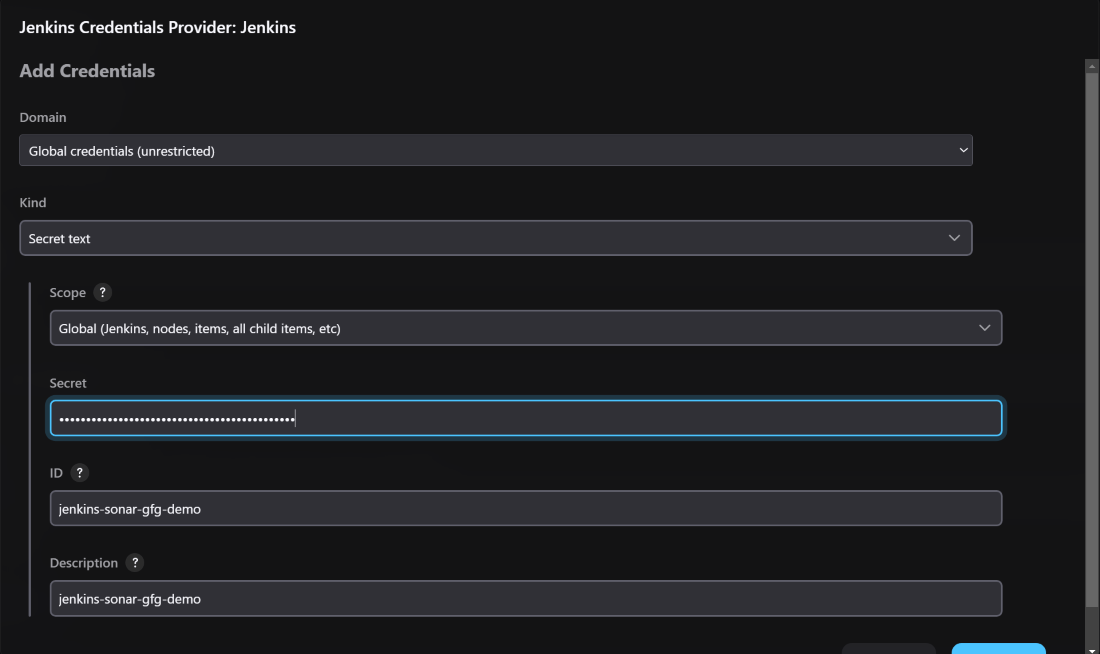
Step 6: Create the secret text credential using token that is generated in step 3.
Step 7: Then attach the credential to the sonarqube configuration.

Step 8: Create a pipeline. Give the pipeline a name and select ok.

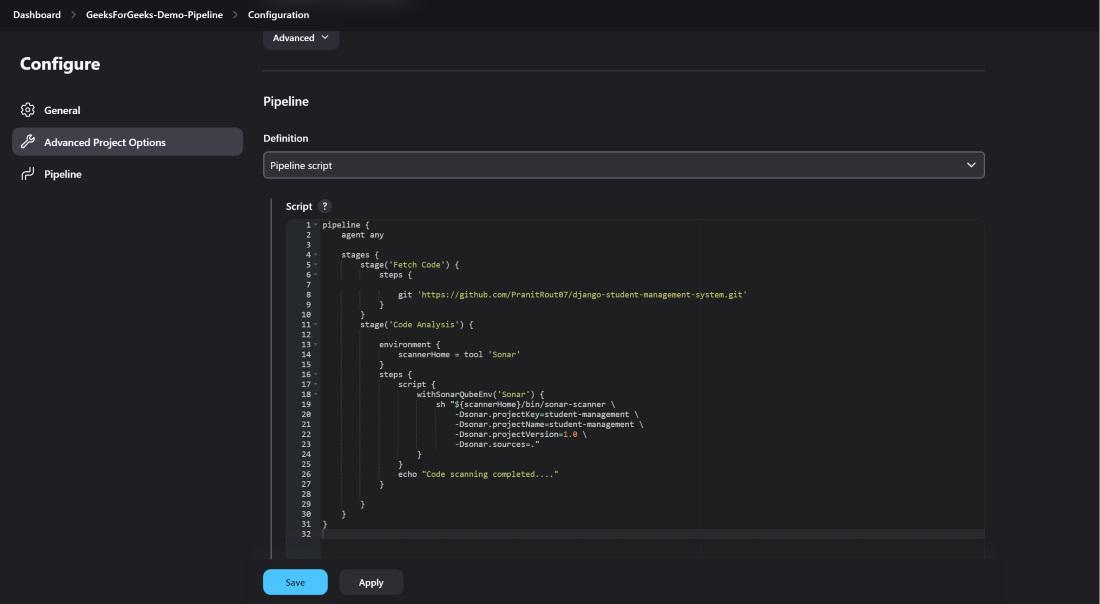
Step 9: Write the pipeline. Here i have used one of my github repository for code scanning.
pipeline {
    agent any

    stages {
        stage('Fetch Code') {
            steps {
                git <your-github-repository>
            }
        }
        stage('Code Analysis') {
            environment {
                scannerHome = tool 'Sonar'
            }
            steps {
                script {
                    withSonarQubeEnv('Sonar') {
                        sh "${scannerHome}/bin/sonar-scanner \
                            -Dsonar.projectKey=<project-key> \
                            -Dsonar.projectName=<project-name> \
                            -Dsonar.projectVersion=<project-version> \
                            -Dsonar.sources=<project-path>"
                    }
                }
            }
        }
    }
}
Step 10: Build the pipeline.
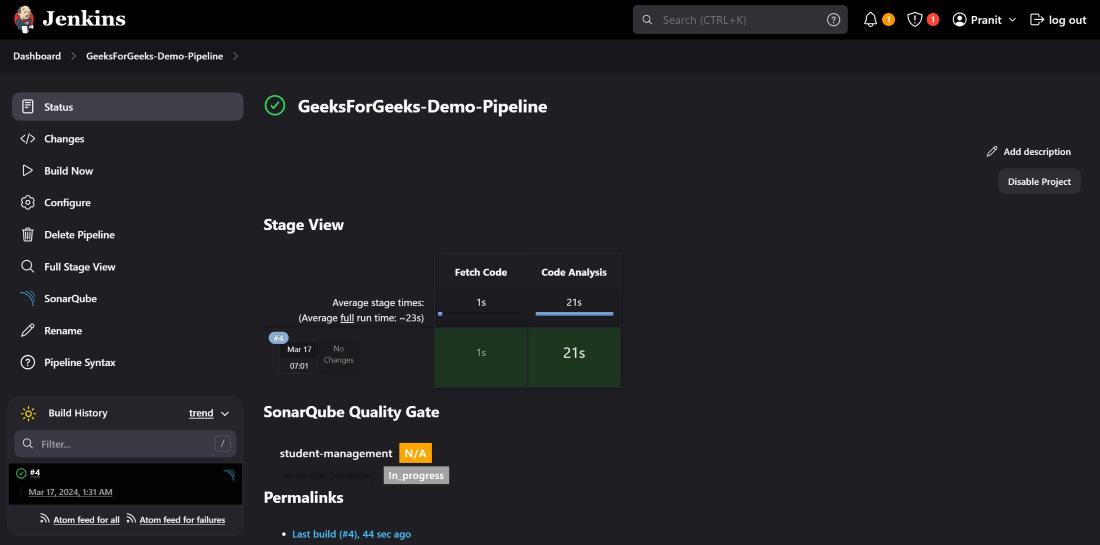
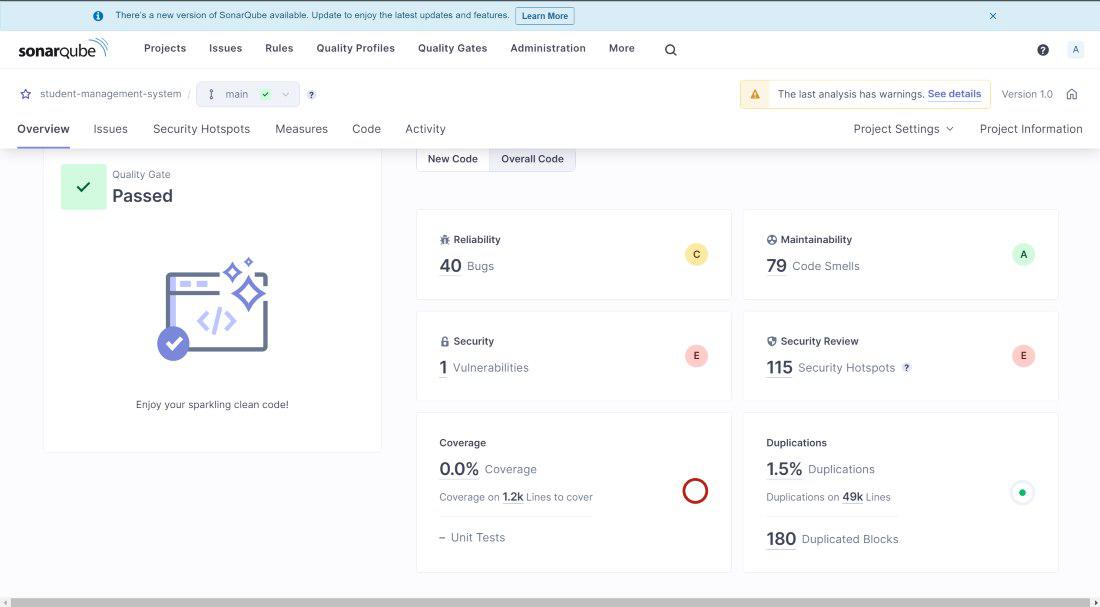
Step 11: After the build is successful you can see the report generated at sonarqube server . Here you can see all the bugs and vulnerabilities report.
Conclusion
Here in this article you have first learned what is SonarQube. Then you have learned what is Jenkins. After this you have created an authentication on SonarQube server and used this token to integrate the SonarQube server with Jenkins. Here you have created a demo pipeline and analyzed the code in a Github repository using SonarQube.
How To Integrate SonarQube With Jenkins – FAQ’s
What is purpose of using SonarQube?
SonarQube analyzes the entire code and generates the a report on the number of bugs , duplications and many more.
What is quality gate?
Quality gate is a condition or a criteria for a particular project to go into next stage.
How quality gate is configured in SonarQube?
Quality gate can be configured by using webhooks in SonarQube.
What kind of security credential is created for SonarQube server configuration on Jenkins?
On Jenkins you have to create a secret text security credential to hold the SonarQube server token.
What is SonarQube authentication token ?
SonarQube authentication token is used to establish connection between a SonarQube server and Jenkins server .
Share your thoughts in the comments
Please Login to comment...