In the Operating System market, a user can find different varieties to purchase. One can opt for Windows, Linux, MacOS, ChromeOS, etc., and many others. However, the Windows OS takes the lead among others even from the Mac Operating System as well. One survey data says most users opt for the Windows Over Mac Operating System
So, if you find there are a lot of times you feel to have a Windows device, no need to buy a new one. Rather, on your Mac device, you can easily Install Windows on Mac without having any issues. To perform such operations, there is a preinstalled Mac Bootcamp Assistant application present.
In this article, we will discuss a handful of methods required to Install Windows over Mac without consuming much time.
Quick Preview to Install Windows on Mac:
- Install the Windows 10 ISO File from the Official Page
- Upload the ISO file to the Bootcamp Mac Application.
- Drag to make the disk space.
- Provide Product Key information while installing Windows
- Select the language & other details of the device.
- Wait until the installation is completed.
Prerequisites for Windows Installation on Mac
Note: The steps discussed here need to be executed irrespective of the method that you choose to install Windows on Mac. You have to get the Windows ISO file to proceed to any installation method.
Downloading ISO Files in Windows
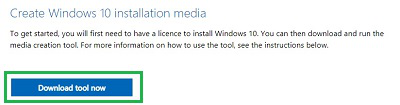
Step 1: Browse to the Official Page of Windows and click on the Download Tool option.
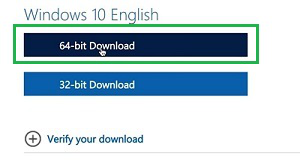
Step 2: It might allow you to choose a 32-bit and 64-bit Downloading Option. Click on the 64-bit option to get the ISO file on your local device.
Hence, you have successfully installed the Windows ISO File on your Mac device.
Methods to Install Windows on Mac
For installing Windows OS on Mac, the following methods can be used. We will start with the Boot Camp application installed on Mac.
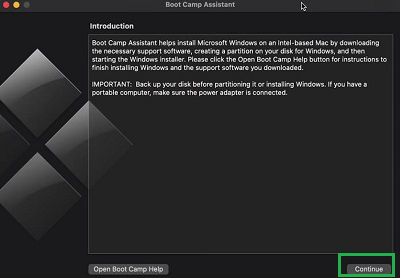
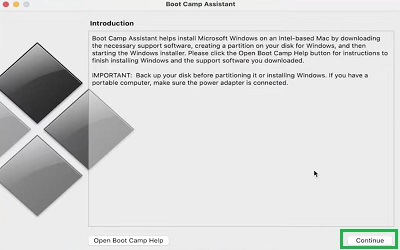
Method 1: Install Windows on Mac Using Boot Camp
Step 1: Open Boot Camp & click on the Continue option.
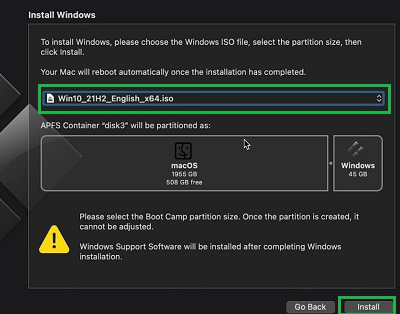
Step 2: Select the ISO File & click on the Install Button. It will take a few minutes to configure & the system will reboot.
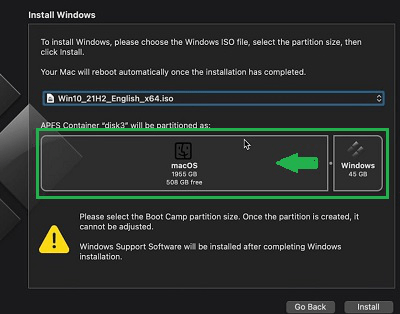
Step 3: Now, slide the Disk Space towards the MacOS to make the Partition for Windows. You can keep the default one as well.
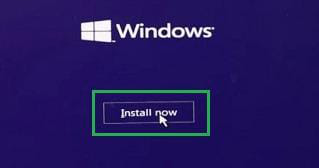
Step 4: After rebooting the Windows Screen will be visible. Click on the Install Now button.
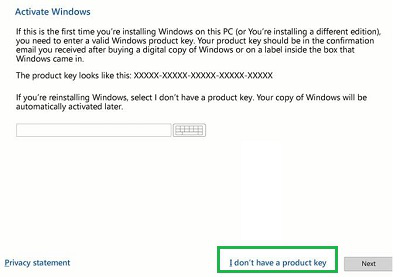
Step 5: It will ask for the Product Key from you. Select the option I Don’t Have A Product Key.
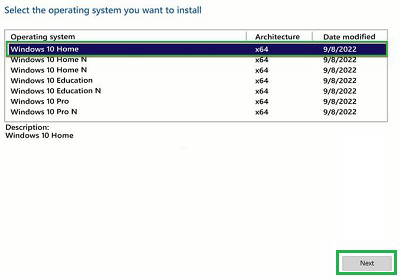
Step 6: Now, select the First Option & click on the Next button.
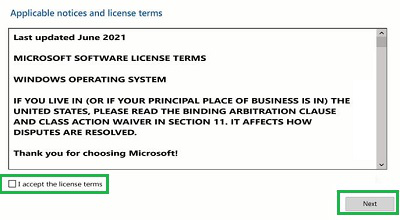
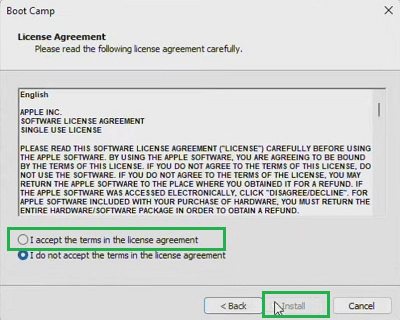
Step 7: Accept the Terms by reading it carefully. Select Next.
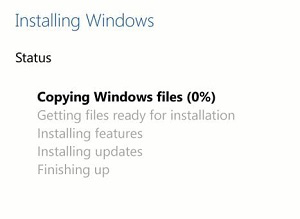
Step 8: The Windows Device will start the Installation process.
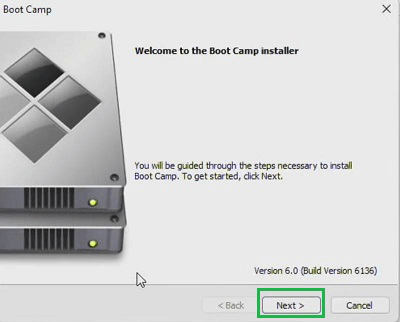
Step 9: Once, the Windows is started, you will find an Installer to install the Boot Camp on the device. Click on the Next to move ahead.
Step 10: Accept the Terms by reading carefully & select the Install button.
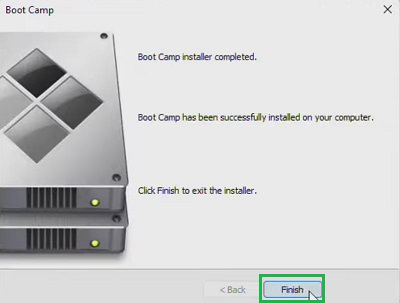
Step 11: Click on the Finish option to complete the installation process.
Hence, we have successfully installed Windows on Mac using the Boot Camp application.
Method 2: Install Windows on Mac Using Virtual Machine
Note: For using this method, you should have the Virtual Box Application installed on your Mac previously.
Step 1: Open the Virtual Box application & select the option New.

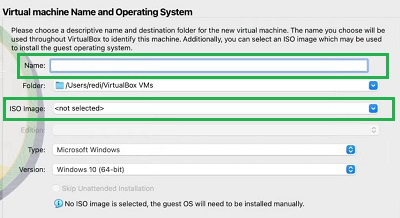
Step 2: Now, provide the Name of the Operating System & select the ISO File to move in the process.
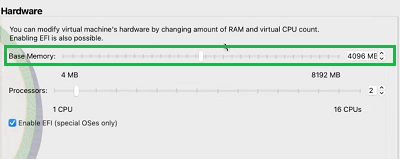
Step 3: Now, increase the Memory to 5000 to proceed to the next step.
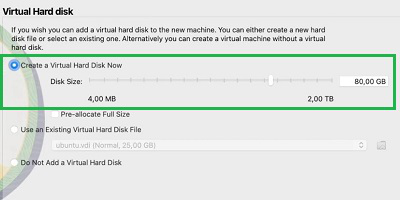
Step 4: On the next page, it will ask for the Disk Space for creating the Partition. Provide at least 400 MB of Memory thereby sliding the scroll.
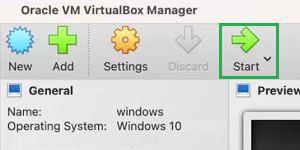
Step 5: It will take some time & the Windows will be installed on the Virtual Box. Click on the Start Button to enter into the Windows.
Hence, we have successfully installed Windows on Mac using the Virtual Machine method.
How to Restart Mac for the First-Time Access to Windows?
To Access Windows for the first time you have to restart your Mac as it allows the system to initialize and configure the newly installed Windows Operating System allowing you to access and use Windows on your Mac after the reboot.
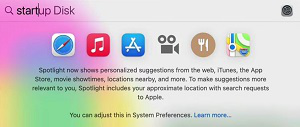
Step 1: Press the Command + Space button to open the Spotlight Search. And Search for the Startup Disk option.
Step 2: Unlock the Lock using the Passcode & click on the Windows Disk. Now, restart the device to boot into the Windows.

Hence, we have successfully restarted the Mac to access the Installed Windows.
How to Switch Between Windows & Mac?
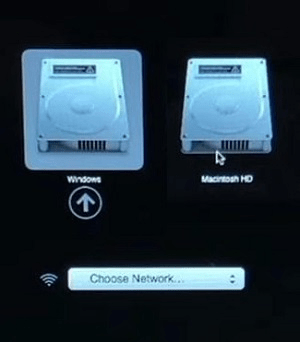
To switch between Windows & Mac, hold down the Power Button for 2 seconds & leave it. Then, promptly press the Option Key till the device gets started. Now, you will get the option to choose the Windows or Mac to start the device.
Hence, we have successfully switched between the Windows & Mac.
How to Remove Windows from Mac?
Now in case, you don’t want to continue with Windows OS and decide to remove it from the system completely. here’s what you can do to remove Windows from Mac, the following methods should be used. We will start with the uninstallation process in Boot Camp.
Method 1: Remove from Boot Camp
Step 1: Open the Boot Camp & select the Continue button.
Step 2: Now, press the Restore Button to remove the Windows from the device.
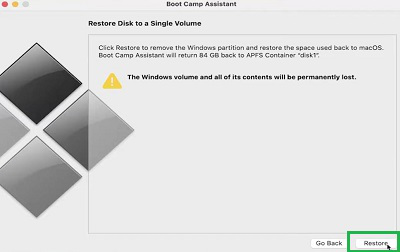
Hence, we have successfully uninstalled Windows from Mac using Boot Camp.
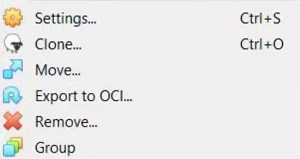
Method 2: Remove from Virtual Box
Step 1: Open the Machine Tap & click on the Remove option.
Step 2: Now, select Delete All Files for complete removal.
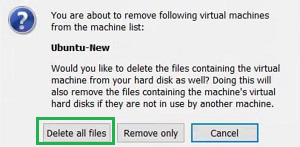
Hence, we have successfully uninstalled Windows from Mac using Virtual Box.
Conclusion
So if you are not comfortable with MacOS then you are open to Install Windows OS anytime to your system. Using the VirtualBox application, you can Install Windows 10 on Mac without Bootcamp. We have tried to explain ain you in the simplest possible way to Get Windows on Mac. So try it out now!
Also Read
Frequently Asked Questions to Install Windows on Mac
How to install Windows on the Mac operating system?
To install Windows on a Mac operating system, the best way to utilize Bootcamp Mac Application over a Virtual Machine. The steps required to follow that path are the following.
- Install the Windows ISO file from the Microsoft Official Page.
- Execute the Mac Bootcamp Service.
- Upload the ISO File & change the disk space.
- Go inside the Windows installer & bypass the product key section.
- Enter Language & other details.
- Wait until the process gets completed.
Is Boot Camp free for Mac?
The Boot Camp is the application that is present in the MacOS beforehand. You can easily use the application to install any other OS on the device. And luckily, Boot Camp doesn’t require any subscription or price to use the service. You can use the complete service free of cost.
Is Windows 11 free on Mac?
No! You can install Windows Operating System on Mac maximum Windows 10 version completely free of cost. The Windows 11 version is not available to get on Mac using Virtual Machine or Boot Camp application. For that, you have to use the Parallel Application downloaded from the App Store.
Share your thoughts in the comments
Please Login to comment...