How To Install PIP Using Ansible ?
Last Updated :
26 Mar, 2024
Nowadays the IT culture is evolving with Agile practices and DevOps Culture, on idea of making the business plans, and features quickly to market and making users available. In this software development workflow configuring software and updating the patches to each system manually or through automation is time-consuming. In resolving this kind of problem ansible comes into play. Ansible works agentless with push-based mechanism that facilitates configuring the worker nodes that are connected to it remotely with the help of playbooks and ad-hoc commands.
Understanding Of Primary Terminologies
- Ansible: An open-source automating configuration management tool that is used for application deployment and task automation.
- Playbook: It is a file with YAML syntax that used in defining a set of tasks and configurations that is executed by Ansible on remote hosts.
- Inventory: It is a file that contains a list of hosts that are the worker nodes details that are used by Ansible manager for ensuring worker nodes that can be static or dynamically generated.
- Module: A discrete unit of code in Ansible responsible for performing specific tasks on managed nodes, such as installing packages or copying files.
- Task: A Task is a single unit of work defined within an Ansible playbook, representing an action to be executed on a remote host.
- Worker Node: A node in a distributed computing environment responsible for executing tasks or workloads, often part of a cluster managed by tools like Kubernetes or Hadoop.
How To Install pip Using Ansible Playbook: A Step-By-Step Guide
In this implementation we taking 3 aws instances with Amazon linux AMI, (you can also choose other AMI also) as One Manager Node and 2 Worker Nodes. Here we define the details and credentials in inventory and install the pip software in worker nodes through running the playbook for it in manager node.
Step 1: Create Instances
Navigate To AWS Management Console and sign with your Credentials.
Navigate To EC2 Dashboard And Click On Launch Instances.
- Firstly lets create Ansible Manager Node. Provide the name of the instance as “Ansible Manger Node” , Number of Instances as “1” and choose the AMI as “Amazon Linux”.

Step 2: Configure SSH Key And Security Groups
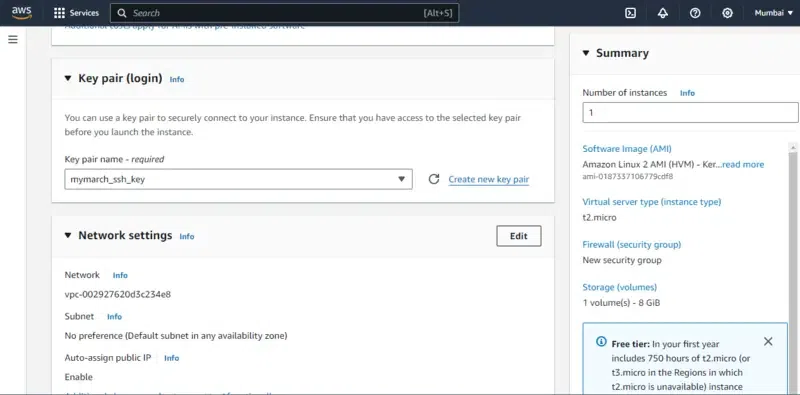
Choose The available key pair in your PC, if you don’t have create one pem file. Make sure the choosen pem file available in your local laptop.
- Configure the Security Groups with providing the all accesses such as Allowing traffic , protocols and ports, so that we don’t face any security restrictions from the AWS Instance. The following screenshot illustrates it clearly.
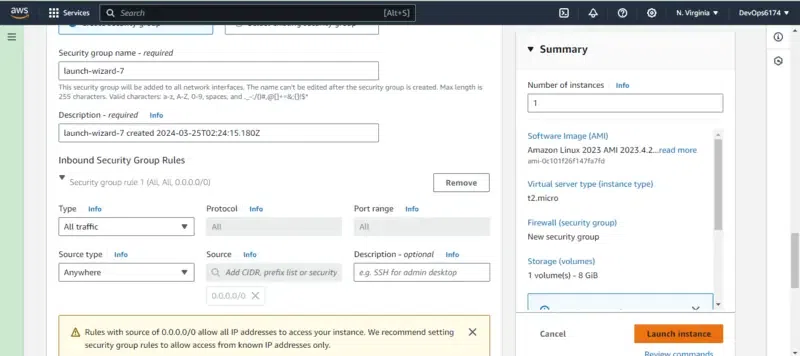
- After Configuring the security groups checking the defined values once and click on launch instance as confirmation.
Step 3: Running Instances
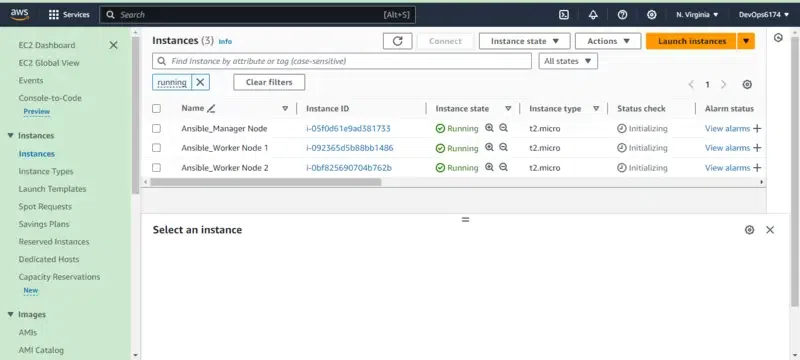
- After launching the instance, it takes some time to come for running state. Here we guided you to create Ansible Manager Node perform step 1 and step 2 again to create 2 worker nodes with name such as “Ansible Worker Node 1” and “Ansible Worker Node 2” with choosing same key pair file that choosen for Manager Node.
- The following screenshot shows successful running of all these 3 Instances.
Step 4: Connect Manager Node
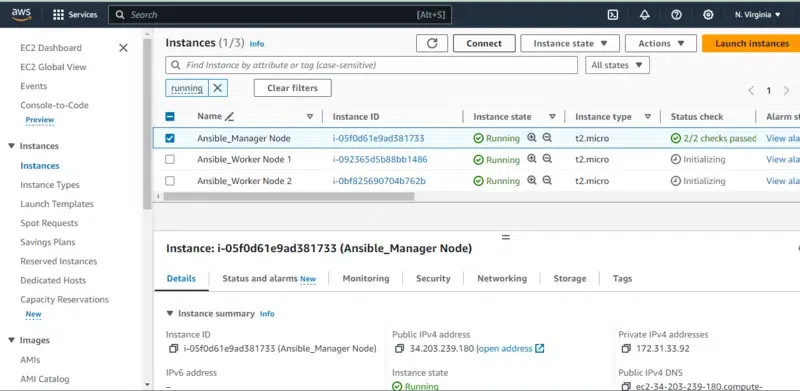
- Now, Connect to Ansible Manager Node by checking the instance and clicking on Connect button as shown in below screenshot.
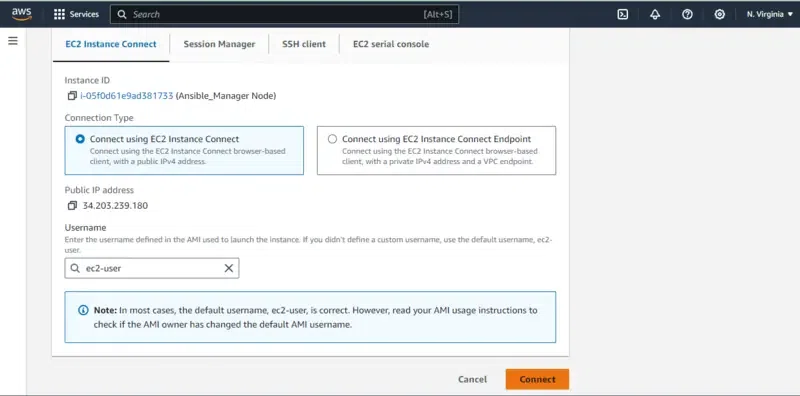
Step 5: Connect EC2 Console
- After coming to the Ansible Manager Node instance go to the EC2 Instance Connect section and then click on Connect Button.
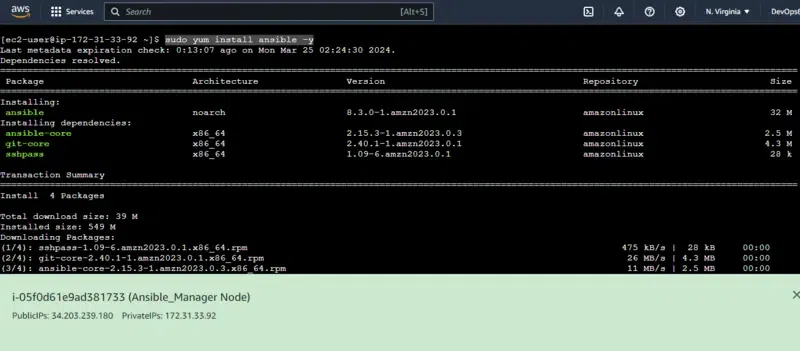
Step 6: Install Ansible
- On accessing the EC2 Console, now install the ansible software with the following command:
yum install ansible -y
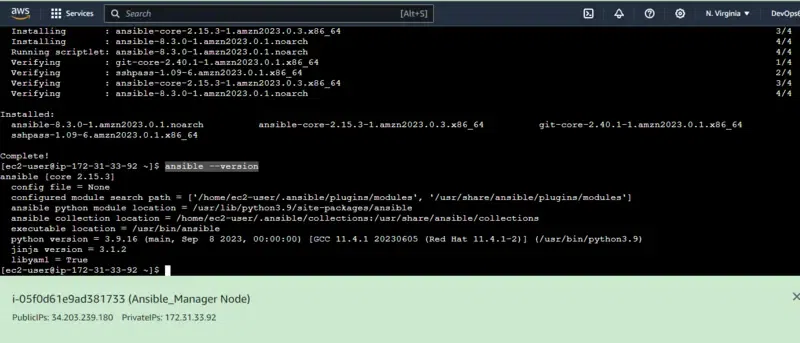
Step 7: Verify Ansible
- After installing the ansible software, verify it successfully installed or not with checking the ansible version by following command:
ansible --version
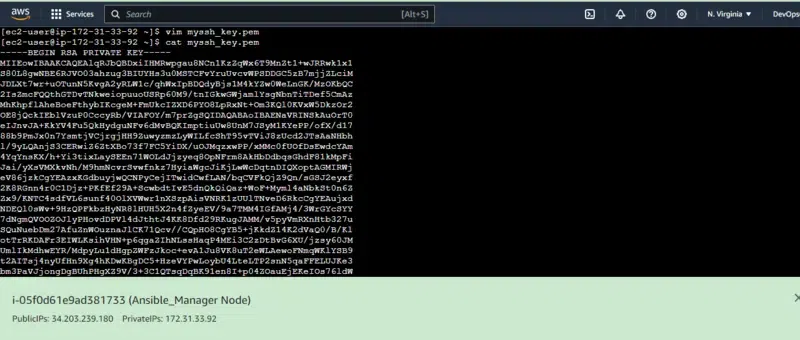
Step 8: Copy Pem file
- Now, Come to your laptop open the choosen/dowloaded pem key file and copy the key as shown in the below screenshot.
.webp)
Step 9: Adding Permission To Pem File
- Save the pem file to your instance as shown in the screenshot below with file name “myssh_key.pem”
- Now, provide the only read permission to the user for making the pem file more secured with the following command:
chmod 400 myssh_key.pem
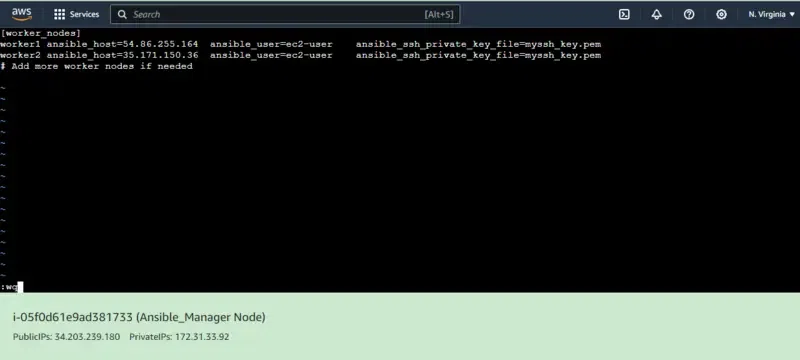
Step 10: Create Inventory
- Create an inventory with hosts file name and specify the worker ip and credentials as shown in the below screenshot.
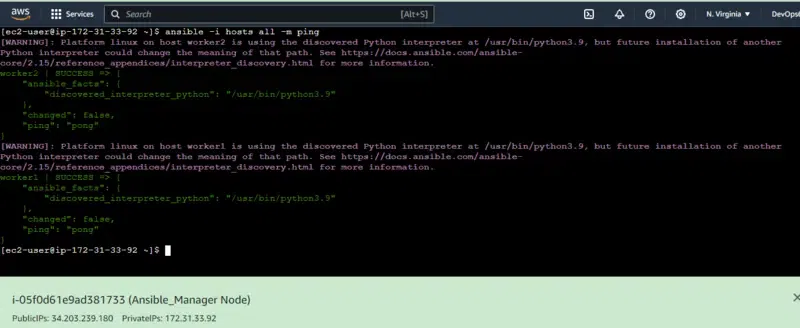
Step 11: Ping The Worker Nodes
- After creating the inventory file with hosts as filename, check the connecting with the worker nodes with the following command:
ansible -i hosts all -m ping
- The following screenshot illustrates clearly that our worker nodes are successfully pinging.
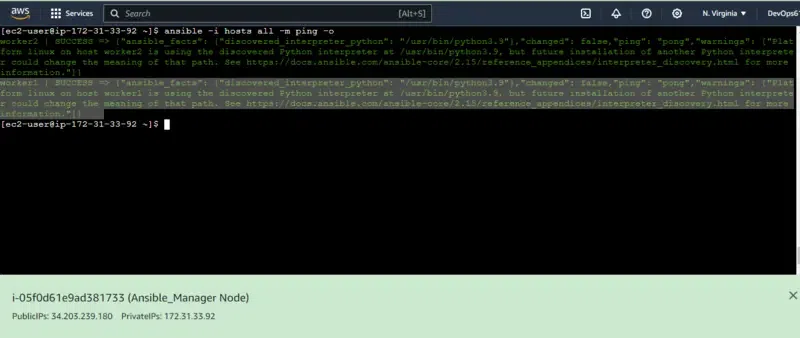
- To check the connectivity with ping on ignoring the warning use the following command with -o option as follows:
ansible -i hosts all -m -o ping
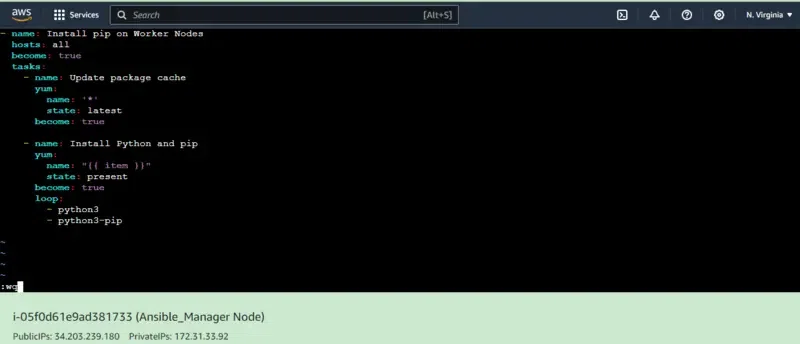
Step 12: Define Playbook
- Now create a create playbook file such as naming with myplaybook.yml and define the following code in it.
---
- name: Install pip on Amazon Linux
  hosts: your-instance-public-ip
  become: true
  tasks:
    - name: Update package cache
      yum:
        name: '*'
        state: latest
      become: true

    - name: Install Python and pip
      yum:
        name: "{{ item }}"
        state: present
      become: true
      loop:
        - python3
        - python3-pip
- The following illustrates the same with practical screenshot.
Step 13: Run The Playbook
- Now, run the defined playbook with the following command:
ansible-playbook -i hosts myplaybook.yml
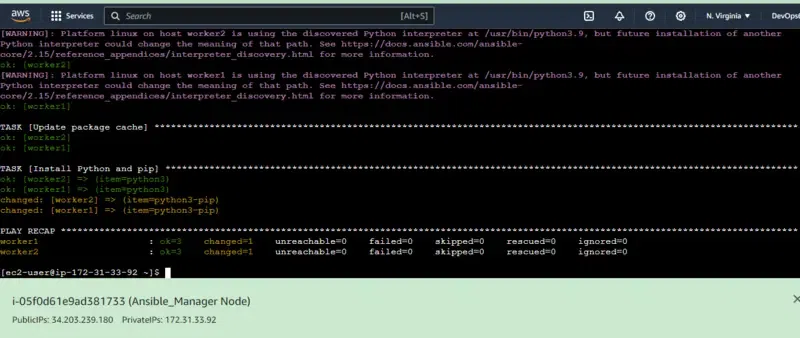
- The following screenshot illustrates running of the playbook.

- On getting the output of the playbook run process as shown in the below screenshot indicates we successfully installed the pip software in the worker nodes.
Step 14: Verify The Software In Worker Nodes
To Cross check the installation of pip software in the worker nodes, navigate to EC2 Dashboard and connect to EC2 Console of worker node and run the following command:
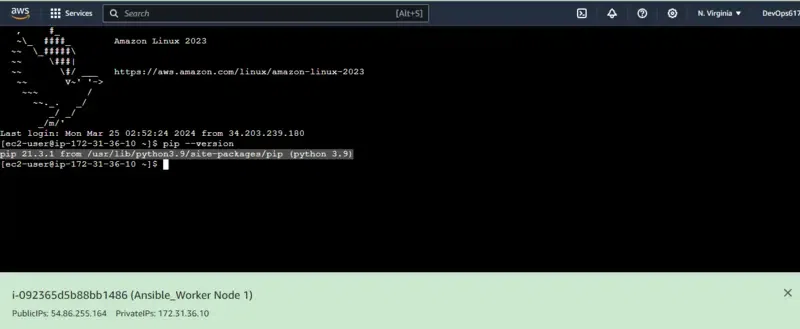
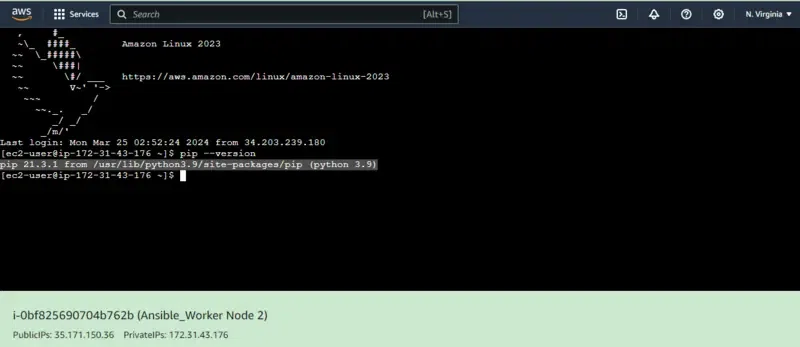
pip --version
- The following screenshot illustrates successful installation of pip software in the Ansible worker Node 1.
- The following screenshot illustrates successful installation of pip software in the Ansible worker Node 2.
Finally, we have successfully implemented the installation of python and Pip softwares on worker nodes from the Ansible manager node using ansible playbook.
Ansible – FAQ’s
What Is Ansible?
Ansible is open-source automating configuration management tool. In this we will define tasks defintion and configure the softwares in the worker nodes from the manager node.
How Does Ansible Differ From Other Automation Tools?
Ansible comes with agentless architecture. It features such as simplicity, and ease of use provides seamless configuration management across different environments.
What Are Ansible Playbooks?
Ansible playbook are files defined with YAML syntax. This files are defined with a set of tasks and definitions for executing the remote hosts providing automation of workflows.
Can Ansible Manage Both On-premises And Cloud-based Infrastructure?
Yes, Ansible capable of managing both on-premises and cloud based infrastructures with providing modules support.
How Does Ansible Ensure Security During Automation Tasks?
Ansible ensure security with providing features such as encrypted data storage, secure channel communication and with privileged escalation mechanisms during automation of tasks.
Share your thoughts in the comments
Please Login to comment...